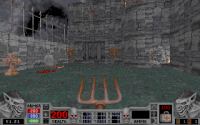
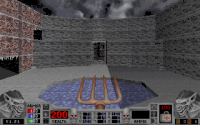
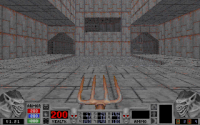
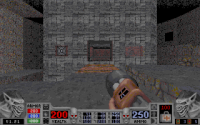
Duke4.net Forums: Duke Map/Mod of the Month Club - August 2023 - Duke4.net Forums

Jump to content

  • 2 Pages +
  • 1
  • 2
  • You cannot start a new topic
  • You cannot reply to this topic

Duke Map/Mod of the Month Club - August 2023  "I LIVE AGAIN...AGAIN!"

User is offline   FistMarine 

#1

What's this thing?
We play through a set of maps/mods during the month, and use this thread to discuss it as we're still all fresh with our comments/opinions/feelings about the maps.

What's the purpose?
Basically, there are 4 purposes:
  • Showcasing some of the older mods/maps to wider public - they definitely deserve the attention!
  • Getting more people to actually enjoy and appreciate the user content - because let's be honest, over the past 27 years this was really what kept Duke alive after all.
  • ...and while we're at it - keeping Duke alive by still enjoying it, as there's no new games in the franchise on the horizon (and let's be honest, they wouldn't be as good as some of this stuff!).
  • Having a more structured discussion on maps than what's going in "Last map you played" thread - which is great, but it's basically a monologue most of the time.

Can I join?

Sure, as long as you find some spare time during the month to play the stuff that's on the table!

Why a month?
Because people have lives, jobs or other stuff to do (like mapping). For smaller maps, this could be shorter time - it's all up to debate in the future!

What port should I use? Are mods allowed? Where to get the maps?
It's entirely up to you how you play the game, so you can use whatever port or mod allowed - it would be cool to state in your posts what you're using too, as there might be some slight differences between the ports! As for the maps, they should be always linked within the first post.

How should I play the maps or post about them?
Again, it's up to you. You can finish them all in one go or play them one by one whenever you feel like. On Doom forums, there's a rule that you should keep the pace by not posting about a map that has a higher number than the day of the month, so e.g. on 6th you shouldn't post about map 7 etc. I think that might be a good practice if there's a large interest in this, but first let's see how active the thread is for a start - so if there's nothing going on, feel free to post about whatever map you want to.

Previous 2023 Editions


Previous 2022 Editions


Previous 2021 Editions


For this month, the second half of ONE UNIT: WHOLE BLOOD has been chosen!

I don't need to go into as many details as previously. This month we are focusing on the remaining THREE episodes of the game: Dead Reckoning, Post Mortem and Cryptic Passage.

Dead Reckoning is the fourth episode of the main game and concludes the main game's story. Post Mortem is the fifth episode of the game that is included with the Plasma Pak expansion and is already integrated into the game in One Unit Whole Blood and the Fresh Supply remaster. Post Mortem continues the main game's story and gives it a proper end. Cryptic Passage is the last official episode of Blood and it was made by Sunstorm, unlike Plasma Pak which was made by Monolith. Canonically, Cryptic Passage is often said to take place after the base game but personally I consider it taking place after the events of the Plasma Pak episode. Cryptic Passage is bundled with both One Unit: Whole Blood and Blood: Fresh Supply and it is selectable separately in the game. It is not selectable from the main menu. In the DOS version at least, you just need to load up CRYPTIC.EXE instead of BLOOD.EXE and you will see Cryptic Passage as the only episode available in the main menu, besides the fact no demos will be playing in background this time around. Then you will be able to play the CP episode. Source ports may handle this differently, for example GDX allows to select the episode directly from the main menu, while NBlood allows to select Cryptic Passage from the startup window.

Additionally, there are some extra DM maps available as the fifth episode in-game called BloodBath. There are no actual E5M1-E5M9 maps in BLOOD (Post Mortem maps are labeled E6M1-E6M9, while the Cryptic Passage maps are labeled CP01-CP09 and CPSL) but instead we have BB1-BB8 (available since the first registered version) and DM1-DM3 (these 3 DM maps were included as bonus with Plasma Pak, they follow directly after the 8 DM maps). Cryptic Passage also includes four extra DM maps (CPBB1-CPBB4) available separately as the second episode in game when CP is loaded. All the DM maps require the "mario" cheat code to access them, for example "mario 5 1" to warp to the first DM map. I wasn't able to find any command line parameters to warp directly to the DM maps, so if anyone knows the parameters (if they exist), please let me know.

Here is an explanation from the Blood Wiki as some interesting trivia:

Quote

Although Cryptic Passage is commonly regarded as the fifth single player episode for Blood, the episode 5 slot of the main game's INI file is already taken up by its BloodBath maps, before being followed where applicable by an episode 6 containing the new episode from the Plasma Pak. Cryptic Passage however is stored within its own independent INI file, with the single-player portion as episode 1 and the pack's new BloodBath maps as an episode 2 under the title "Cryptic BloodBath". These distinctions have led to some trouble when packaging all the official releases of the game together, as well as for players launching them.


As such, the extra DM maps are all optional but if there is enough time, I will cover them for sake of completeness after I'm done reviewing the three remaining episodes. The only thing I don't understand is why they couldn't have just moved the DM episode into the E6 slot and have the Post Mortem episode into the E5 slot, so there won't be any more confusion which is actually the fifth episode of Blood, considering Cryptic Passage was released a few months before Plasma Pak and we have three episodes (BloodBath, Cryptic Passage and Post Mortem) that could be the fifth episode. I don't like things being confusing and disorganized. :P

Have fun!

This post has been edited by FistMarine: 01 August 2023 - 01:20 AM

2

User is online   Quacken 

#2

Are we in Hell now or are we in some weird cross between Hell and Earth? Because these maps don't look human to me.

Butchery Loves Company
James Wilson

EC Pitchfork
Spoiler


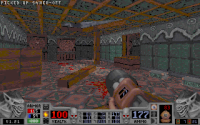
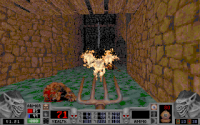
On to Episode 4 now! Episode 4 reminds me a lot of Thy Flesh Consumed. It has more of an aesthetic identity compared to TFC but it's very vague in relation to where and when it takes place. Now that you've stomped out all three of his elder demons, your task is to now hunt down Tchernobog. These first three maps seem to provide a hint of this episode being the Cabal's base of operations, wherever that is. This map has a lot of electrical coils, saws, a Brain Storage room, caged monsters and the curious MIDI from E1M4 and E1M8, which leads me to believe that this map is meant to symbolise some kind of monster laboratory, where monsters are created as part of the Cabal's army. There's some caged Innocents and a caged Gillbeast at the end of the map - the next map is a breeding ground for Gillbeasts, so perhaps Innocents are abducted and turned into horrible creatures, and the Gillbeasts are used as both infantry and also extra bodies for creating extra monsters? Maybe that's why the Zombies and Butchers drop their hearts despite being undead and not having a need to pump blood into their bodies... this map also introduces the final weapon, the Life Leech, but it's in a secret. The Life Leech is an odd weapon that often tends to get overlooked. It's not immediately obvious what it's useful for and so most players will often avoid using it, but it's definitely a useful weapon in the right circumstances. The main use of this weapon is (as FistMarine correctly guessed) that you can throw out the MOUSE2 Life Leech into rooms and use it to kill things without exposing yourself. When you run and deploy the MOUSE2 Life Leech, it will keep some of your forward momentum and slide. You run forward, press MOUSE2 to deploy the Life Leech, and then immediately after press S (or whatever your key is for moving backward), and you can throw out the Life Leech a little into the next room without taking damage. You can get more momentum if you do a running jump. Also, the Life Leech is capable of shooting straight up, which makes it a solid counter to swimming Gillbeasts. It's not very useful in this map though as you get it way too late, so it's mainly a boon for single segment players. Butchery Loves Company isn't my favourite opening map, but it's sufficient enough as an opener, and its existence provides a lot of room to think about the implications of its existence.

6.5/10.
1

User is online   Quacken 

#3

I feel like a Gillbeast's roaming sounds after this map.

Breeding Grounds
Wilson, Hubbard, Hamel

EC Pitchfork
Spoiler


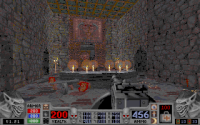
Breeding Grounds is one of the most striking maps in Episode 4. I like the colour pallet in this map particularly - it's a lot of greys for sure, but I also like the blues in this map. The opening room with the filtered blue light pouring in from the aquarium looks great, and I also like the blue banners on the walls in the party room (Skull Key room). I would have liked for there to be more props in this map, or at least some from E4M1. This map is already a breeding colony for Gillbeasts, but having electrical coils, or Gillbeast eggs stuck in tubes, or Innocents stuck in tubes, or anything really would have sold it even more. It's kind of just a lot of grey boxes, which works fine enough, but it can look a little bland and samey. This is the fourth time that CBLOOD10 is being used, and I don't know if I like it. With how long this map is on a Pitchfork start, the dread inducing MIDI helps you settle into it more, but I think E3M4's MIDI would have worked a little better on a conceptual level to me. There's a lot of spots to use the Life Leech in this map, and unlike in E4M1 it's right in front of you and at the start of the map. You don't get a lot of trapped souls, but you get enough to where you can use the Life Leech to help out in two or three sections. Ironically enough, if you brought it over from E4M1 using the Life Leech at the spot where you find the non-secret Life Leech is a good place to use it. There's no new monsters in Episode 4 besides Cerberus, who only appears once in E4M8 (on Well Done and below) as the boss rematch, so I wouldn't really say it counts. There's a lot more Shials, though! On half of these maps there's at least one Shial, and on E4M4 and E4M6 there's multiples. Expect the kill counts on those two maps to rise into the 200s if you're not good at killing Shials. Breeding Grounds is a fairly fun map that's a satisfactory extension of the themes in E4M1.

6.5/10.
1

User is online   Quacken 

#4

Have a double feature to make up for my tardiness. Also, I'd like to make an addendum to one of the things I said about the Life Leech: Even when it has 0 ammo, you can still use the MOUSE2 mode, but doing so will take about 11 health off of you. It can still fire though, so it's still a usable weapon even when it has no ammo.

Charnel House
Hubbard, Wilson

EC Pitchfork
Spoiler


Oh boy, it's Charnel House! This is another map I'm really on the fence about. It's kind of just samey and boring. There's even less creativity here than there is in E4M2. A charnel house is a building where bones and bodies are deposited and incinerated - don't tell that to this map though. Aside from the three furnaces in the start, the hanging bodies by the front door and the pit of flesh, there's not much else that even suggests this is a place related to fire. There's a lot more water here than anything. You start in a water tank, go out of it, wade through an aqueduct, wade through another aqueduct to find the switch that raises the bars everywhere, and towards the end of the map you need to jump in another water tank to eventually get to the exit. This seems like it's a bit of a hack job to me. At least there's more good spots to use the Life Leech? If you wait? You can randomly find Freddy Kreuger's coat and jacket in this map? Except you'll usually destroy it because the room it's in has hitscanners you need to blow up? I'm kind of stretching it now. I know where to go in it unlike in E2M5, but this is another map I just don't really care for. Fitting, because this is another map that has CBLOOD7 playing.

4/10.

Crystal Lake
Kilstrom, Wilson

EC Pitchfork
Spoiler


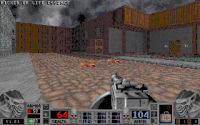
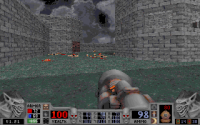
Warning! Warning! Banger alert! Crystal Lake is a fantastic map, and another highlight of the entire game for me. There's a lot to like here. The MIDI reprises itself from E2M7 and is used wonderfully here. I would say it works better for this map than even E2M1. It feels very isolated and cramped here, and it has a good use of both bright areas as well as dark areas to contrast, which makes the map feel pretty fun to get lost in. I also like that there's more of an attempt to parody horror franchises in this map, with this in particular being based off of the Friday the 13th series. You've got Jason Voorhees' hockey mask, a special Zombie head prop used as a severed head, and there's unique sound effects. The only thing we're missing are unique textures for this map besides Jason's clothes. This map also partially ratchets up the difficulty. It's the first map in E4 to have over 100 kills (on Well Done and above), and with the combined three Shials (for Well Done), that kill count can balloon up to past 200 if you're not good at handling big spiders. Don't be duped into wasting your ammo despite getting a lot of it, you still need to play tactically so you can handle the double Shial fight at the end. If you run out of ammo here, then you've got a lot of problems. The Gillbeasts are out in full force in this map too. The Moon door underwater sequence will throw you in the wringer if it's your first time playing the map on Well Done, and the Gillbeasts near the Life Leech are nothing to scoff at either. Crystal Lake is refreshing, spooky and lots of fun. It's one of the defining maps of Blood for me.

9.5/10.
1

User is online   Quacken 

#5

Seems like Miguel's Guns and Ammo has a clearance sale on Napalm Launchers. And Cheoghs.

Mall of the Dead
Craig Hubbard

EC Pitchfork
Spoiler


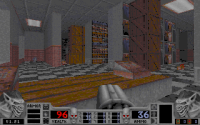
Mall of the Dead is a classic map, and I can see why that is. This is a map with quite a few unique textures, a unique jingle that plays while you're in the mall which sounds like grocery store music, and quite high monster density despite its lower monster count. A lot of this map's combat is based around infighting, but thankfully not one you really need to use NBlood for as a lot of it is luring Zombies and Butchers to their deaths with Hellhounds. There's 10 Hellhounds in this map and a lot of Zombies and Butchers, so it's easy to start a barbecue. If you hate dogs, then this map's three Cheoghs are also great picks to slowly whittle away at the pack. It's better to kill them with Spirit weapons though. This is another map with threatening Cheoghs. The two at the start are great bullies who will either lock you into crawling, force you to run for the Tesla Cannon or force you to jump in the water, where you'll be greeted by two Gillbeasts. Mall of the Dead is short, but its a welcome breather map from the last four maps on Well Done and Extra Crispy, and its bountiful resources and weapons are a boon for single segment players.

8/10.
1

User is online   Quacken 

#6

I don't know why this map is randomly the most difficult one so far.

Fire and Brimstone
James Wilson

EC Pitchfork
Spoiler


I don't remember this map being very interesting, but it sure remembered me. These next four maps are ones that I'd point to to try and make a case that this episode takes place in Hell or some kind of underworld. I don't really know a place on Earth that accurately reflects a pit of lava, a flying castle, some dude's intestines and a temple both in that order and right next to eachother. If I had to guess, I would probably say it's somewhere in Russia with some central Asian influence (E4M5). E4M4 could be an interpretation of Cheremkhovsky Forest, and Tchernobog is named after the Slavic black god, so it kind of makes sense. This map's just okay. It's honestly pretty frustrating. There's a lot of lava here and also a lot of Hellhounds that can run over it without taking damage. I would like this utilisation of the Hellhound's immunity to fire more if it wasn't for the fact that I'm both getting just a little exhausted and also I need to hop around everywhere just to find places to stand on that won't kill me. It would help if I could take more days off inbetween maps. Sections in this map rub me the wrong way. I don't really like the Skull Key fight, the best way to do it on a Pitchfork start is to round up all of the Gargoyles and Hellhounds to pit them against eachother. I shouldn't have taken E4M9 for granted, because it's probably the last break map in the original four episodes. Fire and Brimstone is a very blah map that I'm happy to get over and done with.

5/10.
1

User is online   Quacken 

#7

ANÁL NATHRACH, ORTH’ BHÁIS’S BETHAD, DO CHÉL DÉNMHA

The Ganglion Depths
Wilson, Hamel

EC Pitchfork
Spoiler


Oh good golly gee, if it isn't The Ganglion Depths, also known as the single biggest bully in the entire game. Even for experienced players, E4M6 is the meanest, most uncalled for, violent, twisted and baddest motherducker on the block, and I really like playing it. I used to hate playing this map, but now that I'm more experienced I really enjoy that it has a surprisingly fair level of challenge. This map throws you into the frying pan right away. Four Cultists around the corners, and also a double Cheogh ambush that falls on your head. These are probably the most threatening Cheoghs in the commercial maps. They'll fly over you, harass you and threaten you with lethal damage every time you need to cross up the steps that are just a little too high to crawl over. You have to release crouch briefly to step over them, which is when the Cheoghs can try to hurt you. That first Shial used to be a lot more annoying until I realised that you can lure her over to the bottomless pit and get her to fall into it. I encountered two bugs with the Cheoghs in this map while I was playing it again for this review. The first is that one of the Cheoghs fell asleep near a wall at the start and popped up behind the fence once I hit him with the Voodoo Doll. I guess his hitbox clipped into the wall enough for Cheogh to upwarp up to the nearest surface after waking up, which took him behind the fence. The other bug will make a Cheogh impossible to kill. Cheogh can sometimes get into a position where he can fly under the clouds above the bottomless pit, and then he will go to sleep there. Since Cheogh flies, he can't die from fall damage, and there's no way to really kill him without getting yourself killed. I ended this map with 154 kills out of 169, which I think feels about right.

Despite its apparent meanness, The Ganglion Depths both tests and rewards your mastery of its weapons. On Well Done it really feels like that this map is the final challenge instead of E4M8. You get every kind of weapon here, no Cloak, Invincibility or Reflective Shots to help yourself, and two Life Seeds to patch you up. Good luck! You'll have to consider nearly every option in each fight. This is one of the rare spots where a MOUSE2 Tesla Cannon is actually useful, and you might be able to make the MOUSE2 Napalm Launcher work near the Skull Key. Visually this map feels like an extension of E1M6. It's another castle above the clouds, though this one is conceivably actually floating in the sky. There's no music (rest in piece to PESTIS), but that's okay, because the chantings of an old Irish hymn about creation will keep you company throughout the entire map. Sometimes it feels like this one sound effect is your real enemy instead of all of the monsters. You'll dread The Ganglion Depths the first time you play it, but for an experienced player it is just the right combination of challenge, ingenuity and fairness. It makes for a great antepenultimate level.

9.5/10.
1

User is online   Quacken 

#8

"Pranking" (Using weapons of mass destruction) my "dad" (Evil god of darkness) when he gets "home" (Comes out of his monster closet). Also, it's a double feature today.

In The Flesh
Hubbard, Wilson

EC Pitchfork
Spoiler


This map's sticky, janky and gross. I don't even really mind the switches that fart whenever you press them honestly, it's moreso the (what sounds like) heavy breathing and constant gibbing sound effects. I'm pretty sure the main wall texture in this map is the opening tunnel from E1M8. It's a cool use of a texture, but I think it looks better with the warped effect it has in E1M8. The main reason I remember this map is it's the only map in Extra Crispy where there's an extra Cerberus. It's a pretty bizarre choice though. In the Flesh has all these corners, strange lifts and pillars that make traversal for a big target such as Cerberus hard, and so he'll usually get stuck on something and die. Cerberus would have fit right at home in the circular area in E4M2 or to be a stalker enemy in E4M3. I'm confident that E4M3 would have been a better choice for it because it and E4M1 are the only maps in E4 to not have a miniboss (Cheogh, Shial or Cerberus). With long tunnels that are easy to get lost in, Cerberus would have made a great fit for E4M3, and I would have rated it higher had there been a Cerberus in that map. There's no music again also. This is another map that has PESTIS assigned to it but is commented out, the last map to have this distinction. I'm kind of struggling to figure out what this map even is, also. It's clearly the body of a monster, but aside from there being a skin texture behind the exit switch in E4M6 I don't really know what kind of monster this could be. Especially since it appears to be alive, otherwise its bones wouldn't be trying to kill me. Maybe this is the portal you take to arrive in Hell and E4M8 is the only true Hell map? No idea. In The Flesh is confusing in nature and confusing for why it was chosen to be the seventh map.

5.5/10.

Hall of the Epiphany
Kevin Kilstrom

EC Pitchfork
Spoiler


Look, guys! It's the end of Blood! Just kidding. Hall of the Epiphany is notable as it's the last map of the main 34 maps in Blood, it's one of two levels to feature a cutscene at the start of the map, and it's the only map to feature Tchernobog, the Slavic dark god. Tchernobog is a big Scooby-Doo lookin' ass guy who's actually pretty hard. On a Pitchfork Start, that is. On single segment he is rightfully a joke, as by this point in the game you'll have a maxed out Tesla Cannon and a maxed out Napalm Launcher, and with the non-secret Guns Akimbo you can blend Tchernobog up extremely quickly. Without tesla or enough napalm though, Tchernobog can actually be pretty tricky. He has a pair of slow blue fireballs which can be easily dodged, a stomp attack that does instantly kill you but you will also never get hit by, as well as an infinitely more threatening attack, his psychic attack that sets you on fire. I read somewhere that apparently Tchernobog was meant to have about 25x more health than he has in the final game, but he was kneecapped due to an overflow. I'm pretty happy that occurred, because having to chew through even at a minimum 25,000 health would have been awful even on single segment.

This map has two cutscenes, so let's talk about them. The starting cutscene features Caleb standing at the foot of the hall while Tchernobog talks to him from above. He's not actually shown, so I'm assuming Tchernobog can communicate with Caleb telepathically, and for some reason just... decided to never do that in the game? Or maybe he did once in E1M5? I guess it would ruin the surprise. This cutscene's pretty bad honestly. It's cool it's there and it is necessary for Tchernobog to reveal his ultimate plan (not to mention Stephan Weyte's voice acting), but there's only two different shots, Caleb never moves, and his cape is very obviously set on an animation loop and doesn't have any real physics. The cutscene that plays at the end of the map is genuinely fantastic though. Tchernobog's 3D model looks a little janky and doesn't have much texture (it might even be Cheogh's model with a pair of big horns added), and there's an animation error when the Innocent comes into frame and Caleb holds out his Tommy Gun to the side (look at the inside of his coat), but there's a lot of different shots, the lighting is done pretty well especially around Caleb's face, and him gunning down the Innocent with the Tommy Gun mid spiel is some good shock factor. Then the music turns to a more depressing tune and Caleb struts out of the place with the Life Leech as a walking stick. Great stuff. I think this and the ending cutscene from E2M8 show off Caleb's character the best.

8/10.

No closing thoughts here, I'll save my thoughts for when I finish E6M8. I'm going to briefly go over the other two cutscenes I missed too. The start of E1M1 is probably the most iconic cutscene in the game, and it's very good. It explains the story well enough while also enticing you to play the game to find out what happens to the Chosen at the end of each episode. Here's your player character. Here are their friends. The big boss man is pissed off at you and your friends are all dead. This one friend that got carried off by Cheogh seems to be important because Caleb did more than just look at them. One thing with the human models in these cutscenes is all of the faces are just Caleb's face stuck onto different body types. I like the fact that Monolith tried to do something unique with the cutscenes in this game. It looks terrible by today's standards, but what were you gonna do? It was 1997 on a shoestring budget and they whipped these cutscenes up in like a month. They're better demonstrations of Caleb's character and his world than what Duke, Lo Wang or (God forbid) Leonard ever got. And at least in E1M1, E1M7, E2M8 and both E4M8 cutscenes, they do a pretty good job masking Caleb's face by using large amounts of darkness or panning away from him so his face model doesn't look as ugly. The other cutscene I missed was E1M7. It's another very good cutscene. It has probably the only tolerable close-up in all of the cutscenes with Caleb's hand over Ophelia's face, even if it does highlight that Ophelia's face is a clone of Caleb's. I also like the shot of Caleb facing Ophelia as he burns her body. It feels oddly sincere. The ending shot with Cheogh peering down the barrel of a shotgun is also awesome. If someone animated these cutscenes in a '90s anime style then we could have something really special here.

This post has been edited by Quacken: 09 August 2023 - 04:45 AM

1

User is online   Quacken 

#9

Boats! But mainly caves!

Boat Docks
Michael Beaulieu

EC Pitchfork
Spoiler


We now arrive at Cryptic Passage, the Sunstorm Interactive-produced expansion for Blood. This is a pretty weird expansion. I don't really think most of Sunstorm quite knew how to design Blood maps, because there's a lot of decisions in this map specifically that don't seem in line with Monolith's own design space. For starters, in Cryptic Passage there are no monsters that drop Life Essence. The only Life Essences you can find are placed directly on the map, like in Duke 3D. This is mostly a bad thing in my opinion. There's generally less health in Cryptic Passage than in the other five episodes, and the Life Essences that are in the map is now up to the mapmaker instead of being dropped in various places by monsters. What often tends to happen is that Sunstorm's mapmakers will put Life Essences in places where you are forced to pick them up. If you have 68 health and you come across the two Life Essences sitting in a corridor in CP04 with a low ceiling, then sucks to be you. You could have at least had the option to jump over them. The item distribution in Cryptic Passage is also a little borked. In this map in particular there's way too many shells. Like, it's to the point where even if you had double the capacity for carrying shells you'd probably still be carrying more than you would be able to. You'll also be maxed out on tesla cells by the end of this map, but the earliest map you can get a Tesla Cannon in is CP04. There's putting items in to only help single segment players (I wish anyone who does this a very unpleasant evening by the way), and then there's making you forget you have 250 cells only for you to remember you have them three maps later. The visuals are pretty alright. The best thing about most Sunstorm maps is their unique textures and the way they construct dioramas in the Build Engine. I like the shark hanging on a chain, and the lighthouse is a cool setpiece even if it doesn't actually move and is geographically in a pretty useless spot for a lighthouse. I also like the new textures and props, such as the various skeletons hanging out of the walls. These are very clearly just Halloween decorations that Sunstorm took photos of and scanned in, but I like how cheesy they look and how they clearly don't fit in with the artstyle of the other props made by Monolith. This map also reprises the MIDI from E3M1, and I would say it's a pretty good fit. Cryptic Passage makes a point to utilise as much of Blood's MIDI soundtrack as possible, even using PESTIS for CP02 (except when it doesn't do this and just repeats CBLOOD07 for CP08 and CP09). Boat Docks can be unforgiving for a first time player, but it is quickly made into work if you know where to find the secrets.

6/10.

This post has been edited by Quacken: 10 August 2023 - 10:23 PM

1

User is offline   Aleks 

#10

View PostQuacken, on 10 August 2023 - 07:36 PM, said:

Boat Docks
Michael Beaulieu

Oh, didn't know Mike Beaulieu went "pro" with his level design, he made some of the best early user maps for DN3D, namely two parts of Legends and Boba Fett.
3

User is online   Quacken 

#11

View PostAleks, on 11 August 2023 - 01:29 AM, said:

Oh, didn't know Mike Beaulieu went "pro" with his level design, he made some of the best early user maps for DN3D, namely two parts of Legends and Boba Fett.


Michael Beaulieu has two mapping credits for Cryptic Passage - one is Boat Docks, and the other one is CP05 (Steamboat). Steamboat is a vehicle map and from what I remember it's actually a pretty good one. It uses a lot of room over room in pretty advanced ways for the time, and in a lot of ways is basically a better version of Gamblin' Boat (RRRA). I haven't actually replayed Steamboat in a while though, for all of these reviews I'm playing the maps on Extra Crispy as it comes time to do them each day.
1

User is online   Quacken 

#12

"In the room with the Dagger Key, play the piano. The bookshelves behind you will spin around. Reward: Nothing."

Old Opera House
Bill Buchalter, Robert Travis

EC Pitchfork
Spoiler


We've got another cool map here. This is a very Sunstorm-esque map. It's not really something that someone from Monolith could really make, because it's very committed to its own location. Map author Bill Buchalter is one of the unsung but still fairly important characters at Sunstorm. Besides this, he made Caribbean MAP08 and Route 66's MAP03, and while I think Route 66 MAP03 is pretty average, Caribbean MAP08 is very good. Old Opera House is his first time working with Sunstorm and also probably Buchalter's first Blood map, and honestly he did a way better job than these other guys. (I also credited Robert Travis because Buchalter said in an interview that Travis helped him with tuning some parts of the map.) This map's fantastic for what it is. Its visuals are much better than CP01, with pianos, dressing rooms, custom textures and good use of the banner textures from Episode 4. Plus, Buchalter was smart enough to make it so his monsters drop Life Essence instead of you finding it on the floor. I don't really know why this map transitions into a sewer past the Dagger door though. It feels pretty odd. Everything past the theatre also feels pretty railroaded and rushed. The Spider Key and the Spider door are literally facing eachother, and to get the Dagger Key you need to take it from a Fanatic's hands.... but the Fanatic is in the room to the left and you go straight ahead for the Dagger door. Another oddity is that you can fall from the catwalk into the random hole in the stage and then come crashing down into the basement, which kills you instantly. Shawn Swift said in another interview that CP03 was rushed and Robert Travis had to hack together an ending, so I don't know what Sunstorm were crunching for. Shadow Warrior wasn't out yet and Sunstorm weren't contacted to do an expansion for it until after that game came out. Maybe Monolith got impatient and wanted the expansion out as soon as possible? This expansion came out less than a month after Blood did in the US, so maybe they literally had like 25 days to do an expansion.

Cryptic Passage has a story, by the way! Caleb's in the Carpathian Mountains for some reason and he's going to get a McGuffin. Where's the Carpathian Mountains, you may ask? I looked it up tonight and found that they're located between Romania, Ukraine, Slovakia and the Czech Republic. I guess Caleb was sailing on the Black Sea, found himself on the shore of Romania (where CP01 takes place) and is hiking towards the Carpathian Mountains (CP07)? Works for me. I like to think that Caleb was trying to sail to wherever Post Mortem is located, but got stranded in CP01 due to his boat malfunctioning. Maybe he needs the scroll at the end of CP09 to power his ship again. Old Opera House is probably the best map in Cryptic Passage due to its visuals, hearty monster count, generous powerups and the fact that health isn't on the floor.

9/10.
1

User is online   Quacken 

#13

I died more times in this map than I should have.

Gothic Library
Shawn Swift, Robert Travis

EC Pitchfork
Spoiler


This is a map that seems like filler. Here's a map that you can visually recreate with Doom II textures, here's 51 monsters, and you've got a map you can blink at and you'll miss. The fights and keyed doors are so short in this map that you can carry over your invulnerability from your Cloak and Invincibility between fights if your movement is good enough. There's really not much to say here. It doesn't even feature unique textures. There already aren't too many unique textures in Cryptic Passage to begin with, but I would have at least liked a sign on the front of the library. Even every map in Route 66 has a custom sign! According to an interview with Shawn Swift, this map was originally meant to be a lot longer and complicated, with more traps and puzzles. However, due to time constraints, Robert Travis had to stitch the latter half of the map together. Maybe if Shawn didn't spend so much time working on that room over room in the second floor with the circular room, we would have had an actual map, yes? There's no reason to even visit the balcony. There aren't any items or monsters there and that's probably due to technical limitations. Gothic Library is capable of sending a guard dog to sleep.

4/10.
1

User is online   Quacken 

#14

Uhhh...

Lost Monastery
Robert Travis

EC Pitchfork
Spoiler


Lost Monastery is definitely a map. I just played it as I'm writing this and aside from the huge campfire that will tear your insides out, I don't really remember a whole lot about this map. It has 107 monsters on Well Done, but this map is more unnecessarily long than it is actually dense. Half of the map isn't even the monastery. The other half is a river rapids ride of missed opportunities. I'm a sucker for natural rock formations, but even this feels like a letdown. Some of the choices in this map are baffling to me, and they speak of Robert Travis' inexperience. Six Gillbeasts that start on land instead of being in the water is one thing, but the final fight in the same open area with lots of space to run around in is three Hellhounds. Yes, three, and they're running right next to a huge body of water that you can easily lure them too. It's not even partially hidden like in E4M1, that lake is just there. You and the Hellhounds can see how you're going to win the fight. The only real thing I like about this map is the return of the custom textures, including a Jesus hanging on a cross, some large statues, a bell and the Holy Order of Carpathia sign. That and the MIDI. I think CP03 and CP04's MIDIs could have been swapped and they would have each fit better. I'm torn on Lost Monastery - sometimes I don't mind it, and sometimes it's boring. In this case, it was boring.

5/10.
1

User is offline   FistMarine 

#15

Thanks guys for the comments so far. I may reply to a few posts later on, provided I'm not so busy these days. Although I expected the Cryptic Passage episode to get covered later but it's fine if it gets covered now in between E4 and E6. I will personally cover E4, E5, E6 and CP in this order. Yes, the DM maps/episodes will be covered too! But for now, let's see Episode 4, which is the last episode of the main game!

DEAD RECKONING

Butchery Loves Company
by James Wilson

Kills: 33/33
Secrets: 5/5

The first level of the fourth episode is a bit on the short side and it's quite challenging at times, though thankfully the enemy count is rather low. And there aren't many nuisance enemies.

The only advice I can give is to use the invisibility secret wisely and to make the two Hellhounds fall into the pit, then they will die. Oh yeah, in case I haven't mentioned before, fall damage EXISTS in Blood for enemies too! In Duke3D it also worked for enemies in earlier versions but in 1.3D and above the enemies are only affected if they are low on health. I think SW enemies also die when falling into deep pits, though it's been a while since I played Shadow Warrior last time.

Back to Blood (heh), inside one of the secrets, you can claim your first LIFE LEECH! But I advice you to save it for when you really need it, at least when playing continuously. As I've said before, I wish it kept the Life Stealing effect, at least in Single Player mode. Though Quacken pointed out something that I should have also mentioned: the Life Leech can also be used when out of souls but it will use your health instead, making it a bit like the Voodoo Doll where using it with no enemy in your sight (or the enemy can't be hit), it will actually hurt you. Not the best example but I wanted to point out that some of the weapons can hurt you (besides explosives), so be careful.

Overall, this is an interesting first level. Looking forward to what E4 offers next.
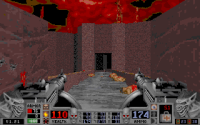
Attached Image: BLOOD_E4M1_1.pngAttached Image: BLOOD_E4M1_2.pngAttached Image: BLOOD_E4M1_3.png

Breeding Grounds
by James Wilson, Craig Hubbard and Terry Hamel

Kills: 104/104
Secrets: 3/3

The second level is okay, I guess. Just keep in mind the following things:
-The Skull Key is dropped by a civilian, so you need to kill them to get the key and other goodies.
-Unlocking the LIFE SEED secret will spawn the Stone Gargoyle later in the level, at least according to what I've read online in the past. In my past playthrough, that gargoyle statue didn't come to life but on this playthrough on Well Done, he did. Mostly because I unlocked that secret earlier, so he must have activated later on. I know there's a lot of weird shit like that in the whole game and I wish things like these would get documented somewhere, for levels where you can get 100% if you do everything properly.
-There are two Diving Suits in the level. You can save one for the next level if you are playing continuously, especially helped by the glitch which causes most inventory items (minus the medkit) to reset to full to the next level.
-When fighting Spider Bosses in general, it is recommended to spam the Tesla Cannon at them. Not only you will kill them quickly but also they will often get stunned and prevent spawning too many tiny spiders, so you don't have to worry about having an enemy missed somewhere if going for 100% kills.

Not much else to say. It's okay.
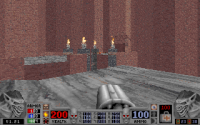
Attached Image: BLOOD_E4M2_1.pngAttached Image: BLOOD_E4M2_4.pngAttached Image: BLOOD_E4M2_6.png

Charnel House
by Craig Hubbard and James Wilson

Kills: 86/86
Secrets: 2/2

Ugh. Despite a good start, this is yet another annoying ass map that isn't very memorable and isn't much fun to play either. Didn't like it on my previous playthrough and didn't like it now. Just like E3M5, it's pretty damn annoying and quite hard, as it's not very generous with health and it features some absolutely dickish encounters. Besides dying a lot and savescumming like crazy, I think I exhausted every single health pickup in the level (including the Doctor's Bag from the inventory) but thankfully I ended up with 184 health at the end of the level. Not 200 health, no medkit and half-used armor but still way better than finishing without any of the extra health/armor. ;)

There is plenty of underwater sections that may seem confusing at times but my issue with this map is how miserable is in terms of gameplay, while it's also quite average looking (the beginning parts are nice but the later parts aren't anything special), so it doesn't have the cool visuals other maps have to make up for the frustrating gameplay. Hopefully the next map is better.
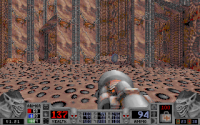
Attached Image: BLOOD_E4M3_1.pngAttached Image: BLOOD_E4M3_2.pngAttached Image: BLOOD_E4M3_5.png

Crystal Lake
by Kevin Kilstorm and James Wilson

Kills: 169/169
Secrets: 6/6

Good news! This is one of the highlights of the entire game. The map is packed with atmosphere, great little Easter Eggs and some challenging enemy placement. Sure, you will be getting your ass kicked at times but at least the level design makes up for that and offers you some nice sights.

Important note is that the secret exit is found by blowing up a cracked wall just near the normal exit.

Aside from some annoying parts (surprise traps, underwater fights towards the end, etc) and having to fight THREE Spider Bosses in total (two at the very end), this was a pretty good map.
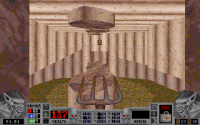
Attached Image: BLOOD_E4M4_3.pngAttached Image: BLOOD_E4M4_5.pngAttached Image: BLOOD_E4M4_7.png

Mall of the Dead
by Craig Hubbard

Kills: 103/103
Secrets: 5/5

And now time for the secret level with the funny mall music! Though destroying those speakers is the key to access one of the secrets, so be sure to find and destroy them all!

This is another highlight of the game and this level remained memorable since the past playthrough. Design wise, it's pretty good and again the encounters are challenging that may kick you in the nuts at times, though I only died a few times from what I remember. You even get to fight TWO Cheoghs at the start but one of them drops a LIFE SEED, so you get some really good reward out of this.

Don't miss the chance to get to this level. It's worth it and it's one of the best levels in the game!
Attached Image: BLOOD_E4M9_1.pngAttached Image: BLOOD_E4M9_3.pngAttached Image: BLOOD_E4M9_5.png

Fire and Brimstone
by James Wilson

Kills: 73/76
Secrets: 5/5

While the level may be forgettable at times, I think this was a fairly okay level overall. It's not as difficult as I thought but it may bite you in the ass at times, especially since there's some evil enemy placement awaiting in some places.

Fun fact: This was the level that lacked the SKULL KEY in the initial 1.00 registered release and probably a few later versions as well, according to some websites I've read this!

Yes, this level lacked an item required for progression in the early versions of the game! How the hell this wasn't noticed when the game was being developed? I'm not sure which version fixed this bug but all I know is the latest 1.21 version (and Fresh Supply and source ports) DON'T have the missing key, so the level is completable normally without using any cheats.

Interestingly, I read a comment on an YouTube video (from pagb666's playthrough) of this map about someone not being able to find the key in the whole map. The person didn't specify the version number and if they used a source port or not but I assume it was the original release. Not sure if source ports support the early versions of the game but please don't bother trying to use the old version data when playing in source ports, as it's not worth it and will cause various issues. Just use the OUWB 1.21 data files in the source ports to get the proper experience. The same applies to every game out there, including Duke3D, in this case you want to use the ATOMIC GRP file when playing in source ports, so you can play every map/mod out there.

Oh and unfortunately, there exist THREE gargoyle statues that won't come to life. I pushed them into lava with my pitchfork and nothing happened to them. I could have sworn I read in the past that pushing them into lava/pit/water should kill them and credit you with the kill but none of this turned out to be true. I am waiting for Quacken to clarify here but I guess the gargoyle statues only activate if the level designer set them the "wake up" flag or whatever.

Interesting level overall, although a bit sad that 100% kills aren't possible and it persists for the next map as well.
Attached Image: BLOOD_E4M5_3.pngAttached Image: BLOOD_E4M5_6.pngAttached Image: BLOOD_E4M5_8.png

The Ganglion Depths
by James Wilson and Terry Hamel

Kills: 145/157
Secrets: 1/1

Another long and hard level that's also packed with bosses (Cheoghs and Shials). This was a frustrating level at times and I can't say I had too much fun with it, though not because of the high number of bosses. Rather because there's tons of traps and quite dickish enemy placement at times but there's also some fun parts and the design is quite impressive, I have to admit. And good thing is you can backtrack from the end to the beginning if I remember correctly, so it is possible to grab the stuff left behind if you want.

On another note, where the hell are those 12 enemies missed? Looking in the comment section on the YT video of this map (from pagb666's playthrough), someone also reports 12 enemies missed. I know 3 of them are gargoyle statues that never come back to life but what about the remaining 9 enemies left? I guess we will never find out. And I don't think there were gargoyles that fell into the void and survived. I am pretty sure I did a quick death check by either just falling into pits or activating the Jump Boots when falling to survive the fall and in both cases, nothing alive was found at the bottom. It makes me think I missed a room with those 9 enemies somewhere or maybe there is a trap that fails to activate somewhere in the level that contains those enemies.

I may have mixed feelings about this level but I appreciate the design at least. Wish that you could get all the kills, then I would have a better experience.
Attached Image: BLOOD_E4M6_1.pngAttached Image: BLOOD_E4M6_7.pngAttached Image: BLOOD_E4M6_9.png

In The Flesh
by Craig Hubbard and James Wilson

Kills: 47/47
Secrets: 3/3

And now time for the map that takes place inside someone or something like that. My guess is that this map takes place inside the human body or some weird creature, as far as I can tell. It sounds disgusting but the map's visuals are interesting and it is not that bad in terms of gameplay. There's a few annoying parts but I think this is an interesting map overall. I also appreciate that the acid isn't damaging, so you are safe to swim in it. Wish I had more to say about the map but I just don't remember a lot of things happening, other than being careful at various crushers and the infamous hands showing up every now and then.

Will the final level turn out good or will it be disappointing?
Attached Image: BLOOD_E4M7_1.pngAttached Image: BLOOD_E4M7_2.pngAttached Image: BLOOD_E4M7_4.png

The Hall of the Epiphany
by Kevin Kilstrom

Short boss level. Kill the Cheogh, kill the Shial, kill the Cerberus and then face off the Tchernobog! There's a couple more interesting things to talk about, including the cutscenes at level start and end, Tchernobog's planned health, the infighting between bosses and so on but they were all mentioned by Quacken, so I won't repeat myself.

I died once or twice from the Cerberus but then decided to humiliate him by pitchforking him to death when staying crouched. He never hurt me and I stayed with 200 hp/armor intact. It took me about 5-10 boring minutes to do it but the strategy worked, which surprised me that his flame attacks simply go over your head and he never uses the deadly napalm shot when nearby. I suppose you can do the same to Cheogh but I have no patience for doing that and the Shial has to die quickly to not get overwhelmed by annoying tiny spiders. I forgot to mention that sometimes getting bitten by a tiny spider won't make you lose health/armor and you just get the dizzy effect or whatever.

The final boss himself, Tchernobog, seems like a joke. He dies far quicker than you would expect. I read that in an earlier version of Blood he was EVEN WEAKER than that! How the hell did they mess up the balance that bad? I mean his health is already lower than expected in last version of Blood but can't imagine fighting an even weaker version of the final boss. Probably explains why you fight the previous bosses again, otherwise it would be too short of a final level. But then why do you fight them in previous levels yet again and sometimes multiple ones at once? Couldn't have been made mini variants of existing bosses to be used as regular enemies in past levels? Mini Cheogh, Mini Shial, Mini Cerberus...

Oh wait, they sort of already exist as common weaker enemies: Flesh Gargoyles, Tiny Spiders, Hellhounds. Could have probably invented a few new variants of the existing enemies or expanded the Plasma Pak roster or whatever. Or just slightly shrunk the existing bosses and lower their health in the 1000-2000 range, similar to how Duke Nukem 3D and Shadow Warrior actually have mini versions of the existing bosses. Reusing the full sized bosses is a lazy way to increase the difficulty and it also doesn't make sense story wise, even if I don't care much about the story in the 90s games, it's something that I've thought in last couple years when thinking about the lore/story of each game I've played. I mean to be honest, I generally prefer as of lately to analyze the details and such in the games, so I may sound pedantic at times. :P

There is one unmarked secret: in the final room, shoot a button above the throne. It will reveal Guns Akimbo in the right side and allow you to finish off Tchernobog quickly, especially with dual Napalm cannons, which is almost Devastator-Style! Then just watch the credits scrolling, which show up upon completing an episode. No, I didn't have the cutscenes installed but I will be sure to have them on my next replay or to have the CD image mounted and not only have the cutscenes showing but also hear the CD music instead of MIDI music. ;)

Although the level shows no stats when you finish it, which is true for the last level of each episode in Blood, something that appears to be inherited from DOOM (DOS version and most source ports), which further proves that Blood has a lot of things in common with DOOM rather than DUKE NUKEM 3D. Which is quite an interesting trivia if you ask me and will be further explained later for people who get confused here.

Also I forgot to mention a weird ass glitch that happened at end of episode 2 and I wish I had mentioned earlier but I just reminded now. If you get bitten by a spider and get dizzy while the level finishes, the screen remains tilted during the demo loop. I had a good laugh when this happened. Though loading the saved game fixed that weird glitch. I should have experimented more with that glitch and see if it remains like that throughout all demos or it fixes itself on the next demo playing.

Overall, the final level is okay and puts an end to the original story of Blood! To be continued in the Post Mortem and Cryptic Passage episodes but not before reviewing the bonus Deathmatch episode! Yep, that's right. Will do the DM episode next time because it's technically the fifth episode of Blood and it has 11 maps, making it the LONGEST episode of Blood in terms of the number of levels in an episode. The sixth episode is Post Mortem and Cryptic Passage appears to be a separate story with two episodes actually (yes, CP has its own set of DM maps in a separate episode).
Attached Image: BLOOD_E4M8_2.pngAttached Image: BLOOD_E4M8_4.pngAttached Image: BLOOD_E4M8_6.png

E4 OVERALL: Pretty good with some noticeable decline in quality in some parts. There are a few weaker levels in E4 and whole Blood (heh) but I'm surprised by the overall quality package of Blood (main game) so far. And the good news is that the expansions are also MOSTLY consistent with the level design, although they have a couple more forgettable maps and while their quality isn't as high as the most important maps in BLOOD, there's still some interesting maps worth checking out. More on that later.

The only level I did without dying in this episode was probably E4M2. I don't recall surviving any other level but there were a few levels that I didn't die many times (E4M1, E4M5, E4M7, E4M9) compared to some (E4M3 and E4M6) that kicked my ass repeatedly.

Have a nice day!

This post has been edited by FistMarine: 16 August 2023 - 03:24 AM

1

User is online   Quacken 

#16

Every time I go to load up NBlood to play Cryptic Passage, I accidentally load up the main game instead since it defaults to that. I always do it at least once. It's still faster than the unskippable Atari splash on Fresh Supply. I'm pretty sure that's the only splash screen that you can't skip, by the way. You can skip the Kex Engine, Nightdive, the Nightdive copyright screen as well as the standard Monolith, Blood and Sunstorm splash screens, but not Atari, oh no! If that leaked Fresh Supply update gets released some time next decade, I'd like to see an addon list like the Doom Unity port has.

Steamboat
Michael Beaulieu

EC Pitchfork
Spoiler


We've got a good map now. Steamboat is the second map by Michael Beaulieu, and I would say it's one of the highlights of Cryptic Passage. This map looks very good, firstly. It has great uses of room over room, some unique custom textures which look very nice, and it has clever uses of props and sound effects. The dead Innocent that's normally covered in blood is instead drinking himself silly in the upstairs bar, and Grilled Butcher is on the menu tonight. The automap looks pretty funky though. The scrolling effect used to sell the illusion of the steamboat swimming through the water looks like it's bugged. One side of the shore is scrolling diagonally while the other side is following the water current, like it should be. You can also spot a floating tree in one of the corners. This map's MIDI fits better than it should. It's very cramped and features a lot of greys and browns on top of exposed electrical equipment, so it kind of fits the "dangerous machinery" vibe. Not to mention, the water is very dangerous for some reason. This is a map that heavily utilises teleporter traps. Monsters come from all angles in this map, but unlike in Doom, monsters don't come out of teleporters already woken up. They're deaf, and you have to go find them yourself. If a horde of Zombies or even a Shial got loose on this map and they were the ones coming for you, then it would have been a pretty cool ending fight, as it wouldn't play out the same way twice in a row. Unfortunately, that is not the case. To my knowledge, this is the last map that Michael Beaulieu did with Sunstorm, and I wish we could have had his talent and professionalism for Wanton Destruction, Route 66 or Caribbean. He would have fit right into any of those expansions in my opinion. Steamboat is a fun map that is both tense and also a relaxing shootout, with shells and bullets aplenty.

8/10.

This post has been edited by Quacken: 16 August 2023 - 07:03 PM

1

User is online   Quacken 

#17

This map's the Bone Zone. Figuratively and literally. Also, have another addendum to one of my tips: Proximity Detonators will detonate if there is a monster near where they arm. They still detonate if that monster is asleep, however, so blowing up hitscanners from above with Proximity Detonators is a pretty decent way to save ammo.

Graveyard
Tyler Larsen

Spoiler


Oh boy, it's Graveyard! Not any other name, it's just Graveyard. They couldn't even put a "The" at the front to make "The Graveyard", this is just a random graveyard that the Cabal happens to be stalking in. Sunstorm did this with CP05 and CP09, too. And also all of Wanton Destruction, but that doesn't count. This map is mostly underground and so as a result it doesn't particularly stand out. The only thing that does stand out about this map are all the skellingtons. I think these goofy boneheads really help to spruce up the map a lot. As I've said before these are just Halloween decorations and they don't really mesh well with Blood's artstyle, but they're used just often enough to where I still like it. Plus, it implies that the cemetery is larger than it is. So large, perhaps, that whoever's running this place, whether this was built by the Cabal as a mass grave site or was run by a different party and is under Cabal occupation, is just stuffing bones in the walls and calling it a day. I would have liked some more wood and brickwork to be used on the walls or flooring instead of mostly just being stone. The skeletons are already white, we don't need more gray on the walls. This map's fights annoy me, but I still respect them. Map author Tyler Larsen places some mean Hellhounds, and a lot of his hitscanners come at awkward angles that make banking dynamite or lining up napalm shots hard. I would have liked some more tesla though, just to kill the second Shial. Graveyard is an annoying map to play that I still respect for its custom textures and monster placement.

7/10.
1

User is offline   Aleks 

#18

It's still a bit until the end of the month, but I'd like to submit the proposal of playing ck3d's maps (besides the newest Blast Radius and Zero Zone for obvious reasons) next month :)
6

User is offline   Radar 

  • King of SOVL

#19

View PostAleks, on 18 August 2023 - 11:12 AM, said:

It's still a bit until the end of the month, but I'd like to submit the proposal of playing ck3d's maps (besides the newest Blast Radius and Zero Zone for obvious reasons) next month :)


I don't have a dog in this fight but I started going through MRCK's old catalog myself lately. It would coincide with some videos I'm working on, even though they're not scheduled to go up until October.
2

User is online   ck3D 

#20

I appreciate the motivation and enthusiasm; if y'all somehow ever do that, I promise I won't intervene in the thread until the month is over and even then that will be just to answer the potentially suspended interrogations and questions. I'd want people to act like I'm not even present on here, and feel reassured to talk just as much smack as they want, it's not like I can't take it.

This post has been edited by ck3D: 18 August 2023 - 02:35 PM

2

User is online   Quacken 

#21

Double feature today. You wanna make CP07 less boring as hell to play? At the end of the map, you can do a Dynamite Jump at the corner where the highest part of the black rocks are. I found more success if you hug the corner while you're doing it. If you get enough height, you can go over the huge wall and you can walk on the bottomless pit. You can do it on CP08 too, since that map still has the end of CP07 you can walk around in!

Boggy Creek
Robert Travis

EC Pitchfork
Spoiler


It's time for Boggy Creek! And it's the first of three times that you get to hear CBLOOD7! This map sucks. It manages to somehow be less than nothing. The only thing I really like about it is the greyscale paintings in the ruined house as well as the greyscale Spider door sign. Everything else about this is a waste of time. Lots of health, lots of ammo, plenty of cover, five total hitscanners on Extra Crispy no less, and no swimmable sectors despite the fact that this is a swamp and all of the floor is water. It's more of a challenge to remember where the secret exit is in Graveyard than actually trying to play this map.

1/10.

Mountain Pass
Robert Travis

EC Pitchfork
Spoiler


Mountain Pass is long, stretched out and sluggish. I can appreciate this map's sense of scale as well as its ambition, but Robert Travis dropped the ball hard on this map. You've got a big grey gulch that has no texture variety and no height variety to actually sell the illusion of this being in a mountain range. It's also highly padded, and as a result loses most of its momentum around the Moon switch. This section of you going through teleporters to be dropped off at non-fights is stupid and I don't like it. I also don't like that two of these sections are on cycles, and the monsters that teleport in may have to make you wait for an extra cycle. This first area with the moving platform is the worst offender. It takes damn near an eternity for this thing to go to one side and then come back to you if you happen to miss the cycle, and if you miss the jump towards the platform you fall into a pit. The third area has the cutest horde of Hellhounds ever as well as these nonsensical raising and lowering platforms, on top of just being a really ugly area. And none of the teleporters are colour coded, so you'll often go through the other two teleporters trying to find the one that takes you to the Hellhounds. Then there's the music. UNHOLY is a certified banger, but not for this map. E1M6's MIDI would have worked much better here in my opinion. Mountain Pass had a lot of potential, but it's a frustrating mix of awkward platforming, boredom and asinine design decisions.

3/10.
1

User is offline   Aleks 

#22

View PostRadar, on 18 August 2023 - 12:46 PM, said:

I don't have a dog in this fight but I started going through MRCK's old catalog myself lately. It would coincide with some videos I'm working on, even though they're not scheduled to go up until October.

I have played most of MRCK's older maps during the last 2-3 years, but there's still some I've either never played (mostly the oldest ones, but also a few from like 10 or so years ago) or that I've played 20 years ago and wouldn't mind revisiting now from the perspective of having played Blast Radius. And it's about time for one of the most prolific mappers out there, we've been doing this thing for over 2 years!
3

User is online   Quacken 

#23

I went back to the end of CP07 in CP08 (the map featured in this review) using a Dynamite Jump. When I got up there, I found a spooky switch that didn't do anything when I tried to interact with it, and I also found that two of the wall textures up here were a different colour. The switch texture was rotating to face me on all sides, which told me that it was a prop. In Fresh Supply, switch textures are turned into voxels. So I loaded up Fresh Supply and went back up to this area. When I did, I found a huge graphical glitch while I was standing on the ledge, and that switch was turned into a voxel model that I was still unable to interact with. Very interesting. I got to see the back of the switch model though, which was pretty cool. If I had to guess, I would say this switch is either a mistake or part of some map logic for later in the map.

Abysmal Mine
Shawn Swift

EC Pitchfork
Spoiler


We're out of the mountains and in the mines, and on the tail end of Cryptic Passage. I said back in my E2M7 review that this map looked better than that one, but that doesn't mean I like this map more. Abysmal Mine demonstrates some great visuals and lighting, but Shawn Swift can't balance a map to save his life. You get four Life Seeds and two Doctor's Bags in this map, and this map is so underpopulated I didn't even need to use my first Doctor's Bag to beat it. Swift gets you with one decent trap and that's all he's capable of mustering. The rest of the fights post Napalm Launcher are either telegraphed or don't contain any hitscanners, which makes them easy pickings. There's also quite a few annoying sound effects in this map. That sound of the crushers all the way near the Skull Key can be heard even if you're in the out of bounds area at the back of the map (and said crusher area leads to a dead end and will just kill you), and there's a lot of radio static which makes it hard to concentrate. Getting the Skull Key isn't really shown to you at all, and I always get it by jumping and then holding crouch so I can slink between the gap. The Eye Key room is proceeded by a tunnel straight out of a 1995 Doom WAD, and it also contains an extremely easy softlock. Dropping down to the Super Armor and Life Seed secret without pressing the pillar that raises the secret will trap you on the edge of a cliff with no way to bring yourself back up. This is such an obvious softlock that unless Sunstorm were on some really heavy crunching, I'm baffled at how this even got into the final product. Abysmal Mine is a very blah map with not much to praise besides its visuals.

4/10.
1

User is online   Quacken 

#24

"To your right, you'll see a door with an ornate Gargoyle on it. Guess what you'll have to fight to get the key behind that door. Well, double your guess, and go in and grab the key."

Castle
Jeff Cleveland

EC Pitchfork
Spoiler


We're at the final map of Cryptic Passage now. I don't know who Jeff Cleveland is and he hasn't done any other work for Sunstorm besides this one map, but he made a pretty good way to end off an episode. Castle is a long gauntlet that tests exactly your endurance and no other skills. On Well Done there's 191 monsters in this map, and Extra Crispy adds 10 more to make this one of two maps in commercial Blood that natively exceeds 200 monsters. There's also a lot of variety here. Damn near everything shows up to try and take a bite out of you at some point, including Cryptic Passage's total of five Cheoghs (on Extra Crispy anyhow). I don't know why none of the other maps have a Cheogh in them, but honestly I'm not complaining. The aesthetics are so and so. There's really only so much you can do with a castle, and a lot of this map feels like it's a diet E1M6. I will say that the portal effect near the end of the map looks really cool. It's surprisingly seamless considering you're dropping through a silent teleporter and ending up at a completely different area. If this map was built around that gimmick the entire way through, then it would have been a really memorable map. A lot of the fights also tend to blend together in this map, which can occasionally make it get monotonous. What'll also make it monotonous is the inclusion of CBLOOD7 for a MIDI. CP08 ends and then you immediately load up CBLOOD7 again. There's two other Blood MIDIs you forgot to put in Cryptic Passage, Sunstorm.

The final fight against the double Cerberi is a good parting gift though. I appreciate that Sunstorm respected Blood's narrative and didn't drop off Tchernobog again for him to take another beating. Instead, you've got the so-called "Lord of All Nightmares". Except there's two of them, so it's pluralised wrong. This fight is easy to choke, but as long as you're confident in jumping around a whole lot on the upper ring, you should hopefully be okay. This ending cutscene sucks ass, and it's not because Sunstorm made it. There's only two panels and nothing is really explained at all. What's the scroll for? Why is it in this temple? Why does Caleb need it? What is his "dark journey"? Does the scroll have anything to do with the story in Post Mortem? I don't really know. And we'll never know, because the canonicity of this expansion is highly dubious and it's unlikely it will even be acknowledged. Castle may prove to drag on for far too long, but unlike the previous three maps Jeff Cleveland managed to give this one some fire.

7.5/10.
1

User is offline   FistMarine 

#25

Thanks everyone for the comments. It's great to see the topic alive.

Quote

It's still a bit until the end of the month, but I'd like to submit the proposal of playing ck3d's maps (besides the newest Blast Radius and Zero Zone for obvious reasons) next month :)

Great suggestion, Aleks. I had in mind to nominate CK3D/MRCK's maps for one of the following months, as I also want to revisit some of them and play the ones I haven't played yet. Last time I played most of ck3D's older maps was back in mid/late 2020 and it was certainly an experience.

Hope you (and ck3D) don't mind this but would be okay if this gets chosen for October? You may have noticed my lack of activity as of lately but I'm very busy these days and would rather prefer to have a less busy month to play ck3D's maps. Considering he has released at least 25 standalone maps if I'm not mistaken and some of them are quite large, thus I wouldn't want to miss a few of them. And besides, Radar said he will upload the videos in October, so maybe we should save ck3D's maps for October, especially since some of them have spooky atmosphere and will work well for Halloween.

On that note, Aleks and ck3D have also nominated back in June, the maps by Reginukem, Stephano Lessa and various other mappers, so I will put them as nomination soon when voting comes.

Anyway, as promised, here is the short review for the Deathmatch episode in Blood. Description taken from Blood Wiki about the Deathmatch episode:

Quote

These are listed as episode 5 within the game's INI file. Despite this, Cryptic Passage is commonly regarded as a fifth episode as well, despite being listed as episode 1 within its own INI file and having its own second episode of BloodBath maps. The new single player episode from the Plasma Pak follows on from either as episode 6 within the main Blood INI.


As an interesting trivia, the main eight DM maps are labeled as BB1-BB8. The other three DM maps added in Plasma Pak are labeled as DM1-DM3 and follow immediately after. None of these maps have any exit, so after you are done exploring a map, then warp to the next one.

To access them in Single Player mode, you must use the MARIO cheat code, followed by two numbers, first being the episode number and second being the level number. Cheats are entered after pressing the T button, just like you would do in Shadow Warrior. I don't think there are command line parameters to access these DM maps but some source ports should allow accessing them from the User Map menu or something similar.

To warp to a specific level, here are a few examples: MARIO 5 1 will warp to the first DM map, MARIO 5 5 will warp to the fifth DM map and MARIO 5 11 will warp to the last DM map, the latter if Plasma Pak is installed, otherwise use MARIO 5 8 to get to the last one in regular registered Blood.

Note that there isn't much to talk about these maps, so I will be rather short on their description. I'm curious if Quacken will get to review these maps or not? It would be interesting to see what ratings they get. :P

BLOODBATH

The Stronghold
by James Wilson

The first of the Bloodbath maps, taking place at a castle.

There isn't much to tell other than I've been crushed by a door...twice.
Attached Image: BLOOD_BB1.png

Winter Wonderland
by James Wilson

A nice snowy themed map. The Blood Wiki mentions that this map was recreated in the Q3 BloodBath mappack for Quake 3 Arena and I remember actually playing those maps back in 2009-2010 but I don't know if the Q3 BloodBath mappack is still available to download after all these years. If not, then it was sadly lost in time.

As for the actual map, I think it's pretty cool.
Attached Image: BLOOD_BB2.png

Bodies
by Craig Hubbard

Somewhat bland and boring map that according to the Blood Wiki, it was not only recreated in Blood II but also in Half Life 2 Deathmatch.
Attached Image: BLOOD_BB3.png

The Tower
by James Wilson

As the title says, it's a map taking place around a tower. Pressing on the buttons will activate traps like blowing up the barrels in the entire level. Be careful to not fall into the deep pits!
Attached Image: BLOOD_BB4.png

Click!
by Kevin Kilstorm and Craig Hubbard

This map takes place in some sort of catacombs. According to the Blood Wiki, the map is named like that because of the proximity mines littered around.

An interesting feature of the level is that the three shotgun shells will RESPAWN in Single Player mode! Yep, that's right. The only time in the entire game where items respawn in SP mode but it doesn't matter much here because there are no enemies and in DM mode all items respawn anyway, as far as I know.

I think this item respawning feature is something that custom levels can really benefit from, though it should be handled with care to not break the balance (e.g. respawning a few shells and a life essence in a secret area should be fine).
Attached Image: BLOOD_BB5.png

Twin Fortress
by James Wilson

As the title says, it's a map taking place in between two fortresses and it sounds like it would be a great team map for Team Deathmatch and Capture the Flag, though I don't know if the original game supports these modes. Please correct me if I'm wrong but doesn't the original game only support two modes: BloodBath (Deathmatch) and Cooperative? I read that Fresh Supply supports Capture the Flag mode but it wasn't in the original game and was added to the remaster (and maybe source ports as well), right?

Unfortunately, even just exploring this map was miserable in Single Player due to high amount of traps, mostly the random invisible landmines littered around the battlefield that were impossible to see and even if you got plenty of fire armor, you would still die quickly. Just one explosion can remove about 30-50 health with armor, usually leading to an instant death if you have no armor or if your health isn't high enough to survive the explosion. Even worse is if you get blown up, survive and land on another damn mine, then you are guaranteed to die. At least the map is generous with the Doctor Bags and Armor Pickups but the problem is if you can make it alive to the next fortress or back to the closest one to stock up on health and armor. I actually recommend using saves here when exploring this map. If not, then maybe use the invincibility cheat code to explore or move on to the next map.
Attached Image: BLOOD_BB6.png

Midgard
by Nick Newhard and Terry Hamel

According to the Blood Wiki:

Quote

Midgard is the Old Norse (Viking) word for our world (Earth). It translates to "middle enclosure".


As for the map, it was recreated in Blood II. The only notable things are the barrels, some difficult to reach goodies and a Tommy Gun that you can't pick up for some reason. You can pick up the other weapon pickups (including another Tommy Gun) but this one pickup you can't get, even if you have less than 500 bullets, which should allow you to pick up the weapon/ammo for it. Another weird Blood glitch? Was it fixed in source ports? Can anyone confirm?
Attached Image: BLOOD_BB7.png

Fun With Heads
by James Wilson

The only DM map to contain enemies (at least until Plasma Pak): a single zombie! Kill him and then play football with his head! That's pretty much it. Map takes place on a Football field.

Would have liked a SP conversion of this map. Reminds me a bit of E3L9: Stadium from the original Duke Nukem 3D.
Attached Image: BLOOD_BB8.png

The following three maps (DM1-DM3) are ONLY available if Plasma Pak is installed (One Unit: Whole Blood 1.21 and Blood: Fresh Supply already come with Plasma Pak content integrated in). All three DM maps use the exact same song (CBLOOD8) and are designed by Monolith Productions, according to the Blood Wiki. No exact map author specified.

Monolith Building 11

The first of the Plasma Pak BloodBath maps, this takes place inside the Monolith Offices.

The map has a dirty trick: it contains a BLOOD BEAST! For those who don't know, the Blood Beast is the final boss of the Plasma Pak episode (or rather final bosses, since you fight THREE ones in that map) and it has a melee stomp attack that does heavy damage and ignores all types of armor!

Due to how cramped this map is, the Blood Beast can be quite deadly and difficult to kill. Luckily, there is plenty of ammo and if you find the Invisibility powerup, you are set up for the battle, since he won't even fight back.

According to the Blood Wiki, there is also a Bloated Butcher somewhere in the map (located in the Manager's office) but either I couldn't find him and/or the Manager's office or he doesn't spawn on the higher skills and is replaced by the Blood Beast. It's weird because I spent like 15-20 minutes exploring the map to fully make sure I got everything but I really couldn't find that stupid zombie and some doors were locked with no way to unlock them. There was no helpful YouTube video either that showed everything about this map.
Attached Image: BLOOD_DM1.png

Power!

As far as I can tell, the second map takes place at a factory.
Attached Image: BLOOD_DM2.png

Area 15

This isn't a typo. The third map takes place at Area 15 and NOT Area 51! It is visually similar to the third regular BloodBath map (BB3), which is very bland and boring.
Attached Image: BLOOD_DM3.png

E5 OVERALL: An interesting set of Bloodbath/Deathmatch maps. Fun to take a look in Single Player mode, after you have finished all the episodes in Blood and want more before checking out custom levels or you are just bored or whatever. I don't think Blood supports bots in any capacity (original DOS version, source ports, Fresh Supply), so your only options is exploring the maps yourself or playing against real people.

The only reason I chose to do this now because chronologically it is the next episode after the base game and before the expansion episodes. Someone had to cover the DM episode for sake of completeness.

Hopefully I will get the E6 review done until Friday, then I will start the voting for the next month, before concluding the month with the long awaited Cryptic Passage review. Have a nice day!

This post has been edited by FistMarine: 21 August 2023 - 10:03 AM

3

User is online   Quacken 

#26

We're on to Post Mortem now, which will hopefully be much more interesting. By the way: Cryptic Passage came out first in terms of release order so that's why I did it first.

Welcome To Your Life
James Wilson

EC Pitchfork
Spoiler


We're now on to Post Mortem. This is considered to be the hardest commercial Blood episode from what I've heard, but I've always seen it as being pretty easy even on Extra Crispy. This first map might give you a licking if you underestimate it though. Though it has a small kill count, Welcome To Your Life has a lot of hitscanners and tight corridors for which they thrive in, which can cause you to get killed quick. However, patient players will be rewarded with a litter of hearts on the ground to consume, as well as a bevy of ammo. The secrets come just a little too late to be particularly useful, with the only exception potentially being the Life Seed. Post Mortem introduces five regular monsters and one new boss, and E6M1 shows off the Ackolytes and the Zealots. Ackolytes are green Cultists that main Dynamite. They'll throw it at you till the cows come home. This makes the Ackolytes a very good way to start infights. The dynamite tosses are easy to bait, the Ackolyte doesn't have a hitscan or even a melee attack, and the dynamite has a large range which allows one to three Ackolytes to chip down big hordes. The Zealots have a Tesla Cannon and they also shrug off your own Spirit damage. Zealots are very powerful. They attack really fast, their tesla shots move at the speed of light, and each projectile stings. Thankfully, they also make great infighting starters. Zealots have a bad trigger finger, which often lets them infight with Hellhounds, Butchers, Zombies and even Cheoghs. Fortunately, Zealots aren't often placed in the most advantageous spots unlike Cultists and Fanatics. Welcome To Your Life is a good starting map, and its nice to see the Monolith team be back in the saddle.

7/10.
1

User is offline   Aleks 

#27

View PostFistMarine, on 21 August 2023 - 10:00 AM, said:

Great suggestion, Aleks. I had in mind to nominate CK3D/MRCK's maps for one of the following months, as I also want to revisit some of them and play the ones I haven't played yet. Last time I played most of ck3D's older maps was back in mid/late 2020 and it was certainly an experience.

Hope you (and ck3D) don't mind this but would be okay if this gets chosen for October? You may have noticed my lack of activity as of lately but I'm very busy these days and would rather prefer to have a less busy month to play ck3D's maps. Considering he has released at least 25 standalone maps if I'm not mistaken and some of them are quite large, thus I wouldn't want to miss a few of them. And besides, Radar said he will upload the videos in October, so maybe we should save ck3D's maps for October, especially since some of them have spooky atmosphere and will work well for Halloween.

On that note, Aleks and ck3D have also nominated back in June, the maps by Reginukem, Stephano Lessa and various other mappers, so I will put them as nomination soon when voting comes.

Sure, good idea. I think Reginukem + Steph Lessa would be a good pick for September and then MRCK for October. Probably won't be able to vote from Friday onwards as I'm going to travel, so if they're nominated, please assign my vote to them ;)
2

User is online   Quacken 

#28

Clear the red carpet! This Zealot has a hot date with Cheogh!

They Are Here
Craig Hubbard

EC Pitchfork
Spoiler


Jeez, it's only the second map and it's already heating up immensely. They Are Here takes place in a plaza that gets very busy very quickly. If you run into here without a plan, you'll be mowed down quickly. And even if you do have a plan, you might be struggling with the many Hellhounds and five Acid Pods, who like to deny a lot of space. And the less said about the Cheogh here, the better. Not even single segment runners will be safe from having to either Shotgun down Cheogh or using a Zealot to infight with it. Wouldn't it be great if there's a non-zero chance you have to do one of these same two methods again in the next map too? I appreciate the new textures in this episode so far. E6M1 has these shelves with clothes and other items on it on top of coat hangers and mannequins, and E6M2 has the Innsmouth Corporate Plaza sign. Though, that sign looks just a little like it came out of Microsoft Word. E6M2 introduces the last three regular monsters, and they're pretty interesting. Mini Calebs only show up in one fight and are basically only threatening if you get up close and crouch to them. They're mini hitscanners. They're small and would be hard to hit in any game that wasn't Blood. Proxmimity Detonators, MOUSE2 Aerosols, Dynamite and Remote Detonators all handle them very easily. Acid Pods are deceptively annoying. They take a long time to whittle down with the MOUSE1 Aerosol, they always survive a MOUSE2 Aerosol and they're very accurate with their projectile. Their best answer is a direct hit Dynamite. Fire Pods lob really slow napalm balls at you. Their splash damage on top of the fact that the napalm being easy to bait means that they're great ways to distract monsters. They Are Here is a pretty basic map that I only really remember due to the Cheogh at the end.

6/10.
1

User is online   Quacken 

#29

Had a fun and very useful AI bug in E6M3 that made the map quite a bit easier. At the start of the map, I got a Zealot and a Gargoyle to infight. But the Gargoyle ended up flying above the Zealot while it was crouched down and firing. Unable to navigate the crates next to it well enough, both monsters ended up getting locked in place, with the Zealot continuously firing at the crates. This was very noisy, but what it ended up doing was essentially creating a wall of death. I could lure Hellhounds, Zombies and Butchers over to the wall of death and watch them do laps around the crates and get incinerated by the Zealot's continuous fire. It took a little work, but the amount of ammo I saved was well worth it. I easily had enough spirit ammo at the end for Cheogh because I didn't need to use it for the Hellhounds. If there's a consistent setup for this, then this could make E6M3's run revolve entirely around what I called the "Death Ray Strat".

Public Storage
James Wilson

EC Pitchfork
Spoiler


When James Wilson III was hired to work at Monolith, he was chosen because the other team members were impressed by his various Doom maps. I like to think that Public Storage is a return to his roots by trying to emulate Containment Area. This opening area is an infighting party to end all infighting parties. Zealots, Ackolytes and chaff are everywhere and are prime pickings to fight each other. This is a good spot to practice being more confident with Zealot infighting. If you learn to do it here, it will make the required infighting in E6M2 much less stressful. Once you get into the vent, the map becomes a power fantasy, but a good one. The central storage area with all of the crates stacked high is fun to run around in, and it's equally as fun to drop explosives into mosh pits and cause huge eruptions. It almost feels like a sandbox here because of the amount of freedom you have to tackle the fights. This map also has some pretty good sound design and visuals. The moving chains, buzzing noises and other industrial delights really make the place feel alive, and the thatched straw on the concrete floor adds an odd amount of roominess to the place. The end of the map feels like it's kind of just there though. It stops pretty abruptly with the Cheogh at the end who's sitting on a crate stack. The opening area gets repopulated with monsters later on for some reason, which is confusing as you can move around the map pretty easily without even returning to the start. I would have liked there to be more teleport traps or monster closets as you got the keys or other items. Public Storage surprised me. It's a jungle gym of explosion training and it has some pretty fast-paced and satisfying fights. The best map in Post Mortem so far.

8.5/10.
1

User is offline   FistMarine 

#30

Quote

We're on to Post Mortem now, which will hopefully be much more interesting. By the way: Cryptic Passage came out first in terms of release order so that's why I did it first.

Right. Cryptic Passage released about a month after Blood was released in stores. It required Blood v1.02 (the patch was included on the CD), according to what I've read on the internet. On top of that, Plasma Pak was released a few months later and it upgraded the game's version to 1.11 (apparently a version in-between 1.10 and the regular 1.11 patch). Plus the fact that Cryptic Passage doesn't include any of the Plasma Pak enemies. But I still consider CP separate from the main game with Plasma Pak installed.

Quote

Sure, good idea. I think Reginukem + Steph Lessa would be a good pick for September and then MRCK for October. Probably won't be able to vote from Friday onwards as I'm going to travel, so if they're nominated, please assign my vote to them ;)

Thanks Aleks! I will add your vote in the nomination.

Anyway, before I begin my review, I have to mention that today is the 26th anniversary of Shadow Warrior! Happy birthday to Lo Wang! With this occasion, I also hope that Shadow Warrior (1997) will get a proper remaster in the future with a brand new expansion pack. Maybe when Nightdive will be less busy with remastering other games. :P

In the meantime, here is the long awaited Episode 6 review. Grab the popcorn and enjoy!

POST MORTEM

Welcome To Your Life
by James Wilson

Kills: 59/59
Secrets: 4/4 + Super Secret

Pretty decent opening level. There aren't too many enemies but due to having no weapons, it can be a bit difficult early on, especially thanks to Cultists.

Speaking of which, this map introduces a couple new enemies, mostly new variants for the cultists. The first one is the Ackolyte (probably should have been called Acolyte), which is a green cultist that only throws TNT at you. The second one is the Zealot, which is a blue cultist that fires TESLA at you! In addition, the Zealot is very resistant to the Tesla Cannon, so they don't get to taste their own medicine. Oh and the Acolyte is also resistant to fire/explosives from what I noticed.

Tip: If you are playing continuously and want to save the individual armor pickups that give 100 per pickup (all three types are present), you will have to wait some time until you get to the secret Basic Armor that gives 50 armor each type (up to 100 maximum), which means you will spend most of the level without any armor. Luckily, the level is generous with health pickups, as most enemies should drop a life essence. Just be careful with the cultists around the corner that can take you down quickly! Of course this tip doesn't apply to players who pitchfork start every level, in which case you should make use of every pickup, as it doesn't matter how you end up the level as long as you make it to the end, while the continuous players should try to have as much health/armor/ammo at end of each level.

Super Secret (description taken from Blood Wiki):

Quote

To the left of the Eye Key is a case. Use the shirt rack (or an innocent) to jump on top of it. Push the middle of the wall. Reward: Life Leech


Overall, this level was fine and sets up the episode quite nicely.
Attached Image: BLOOD_E6M1_1.pngAttached Image: BLOOD_E6M1_2.png

They Are Here
by Craig Hubbard

Kills: 88/88
Secrets: 2/2

The second level is thankfully still fine in terms of design. It is much harder than the first level and it even has a Stone Gargoyle boss fight at the end! Luckily, there seems to be decent amount of supplies in this level. There are especially some very useful supplies early on.

The new enemies introduced are the Acid Pod and the Fire Pod which are just immobile plants that spit out a projectile. They are an interesting enemy when set up correctly and they can sometimes blend in the background, to surprise the player when they don't expect.

The other new enemy introduced is the funny Mini Caleb or rather Mini Calebs because they come in packs upon breaking a mirror. As the name suggests, they are mini versions of Caleb and do little damage to you with their toy sized guns but they shouldn't be underestimated because they can distract you from the real threat. The only thing I wish is that they still remained tiny sized when they are burning after catching on fire. Oh and also I wish that Caleb himself could become smaller like Duke Nukem himself, in order to solve puzzles or simply access new secret areas. This was actually a planned feature in the original game with the Shrink Shroom and even a Grow Shroom but in the final game these are unused and do nothing if placed in a level and then collected. Source ports (and also Fresh Supply?) implement the powerups from what I've read before, so they can be used in mods.

Anyway, back to the level, the fight with the Stone Gargoyle can drain you of ammo supplies, so I hope you have plenty of ammo to kill him. Other than that, this level was interesting.
Attached Image: BLOOD_E6M2_2.pngAttached Image: BLOOD_E6M2_6.png

Public Storage
by James Wilson

Kills: 115/115
Secrets: 7/7

Ugh. I don't remember this level being that annoying before. I died plenty of times this time around and felt a bit frustrated that I had to save-scum in some parts. It's not as bad as what awaits in the next level but still a painful experience.

This level takes place at a warehouse which is filled with many enemies. The beginning is hard but if you started the level with 200 health and armor, you should be fine tanking some damage early on.

The only advices I can give is when finding the secret powerups, they should be used wisely. The Death Mask and the Reflective Shots will greatly help you with clearing some of the rooms that are filled with cultists and hellhounds.

In the end, you fight the Stone Gargoyle once again, as there has to be a boss at the end of each level because why not.

Overall, this level was quite frustrating but design wise, it was fine. What about the next level?
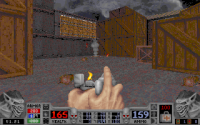
Attached Image: BLOOD_E6M3_2.pngAttached Image: BLOOD_E6M3_6.png

Aqueducts
by James Wilson and Nick Newhard

Kills: 128/128
Secrets: 5/5

Oh boy. We are at the lowest point of Blood. This map sucks. Plain and simple. There isn't any other map that has made me so angry while playing Blood. I hated it on my first playthrough and hate it even more now. I recently learned it was recycled from Alpha version of Blood and it shows.

Half of this map takes place underwater and is filled with many dickish ambushes, mostly involving cultists. Even worse when the cultists decide to drop into water, which is nearly impossible to avoid, no matter how good you are. You try to get smart with a Flare Gun and snipe from far away but the burning cultist falls into water and gets extinguished, as if nothing happened. Yeah, it's complete bullshit. Burning monsters should NEVER EVER get extinguished and gain their health back upon falling into water. Now if they were simply burning but still alive, then it's fine to get extinguished. But not when they are in their burning death animation. This right here is complete fucking bullshit and you can't convince me otherwise.

The health also seemed a bit scarce, despite the mappers placing a couple Doctor Bags. I haven't seen a single enemy dropping a heart. On a map like this, dropping hearts would have been much needed. But it doesn't happen for reasons. I would like to think the health situation was caused because I keep getting hit from unavoidable damage taken from cultists and other crap. I had to save scum like crazy in this map, with whatever little health I had because I just couldn't advance far with very low hp.

Design wise, it's also not a pretty map. To give the map a little credit, the last part with the sinking ship was pretty cool. Though the trap firing napalm was bullshit, as are those guns at the start upon trying to pick up few items. At least there is a generous amount of Diving Suits and ammo, as well as one Life Seed and Super Armor in secret places. Could have used a couple regular body armor pickups, I guess. And those dropped life essences, then this map would have been tolerable. As it stands, it's a poorly balanced mess.

Overall, I HATE this map just by thinking about it. The underwater cultists can absolutely go fuck themselves and it's easily one of the most annoying things to happen about Blood, besides the many bugs/glitches that drag down the experience. Fuck this map! Hopefully the next one is better.
Attached Image: BLOOD_E6M4_2.pngAttached Image: BLOOD_E6M4_6.png

The Ruined Temple
by Kevin Kilstrorm and James Wilson

Kills: 117/117
Secrets: 5/5 + Super Secret

Although there are a couple annoying parts (especially a trap later on), this felt like a much better Blood level.

In case I haven't mentioned earlier, there is a trick that is very useful in water themed levels: if you barely surface from water, you can see the enemies but they can't see you! You are free to take your time and easily kill them.

Super Secret is located near the Guns Akimbo secret. Fall down the hole (be careful to not fall into pit or you die), then turn left and push the wall to collect an Invulnerability powerup! This powerup will be very useful to clear one of the nearby rooms. This is also the last Super Secret to be found in the entire game!

The only weird thing about this map is that one of the doors requires a key that's not found in this map but the map is still fully completable without cheating.

Also the only annoying parts are the hellhounds in cramped corridors and the secret area containing a Super Armor. Pick it up and get surrounded by a bunch of monsters but also some trap activates that shoots napalm at you. It is incredibly hard to do it without taking damage, if you want to conserve the precious 200 armor. I'm also not a fan of secrets that punish you like this.

In the end, aside from some annoyances, this was a decent level.
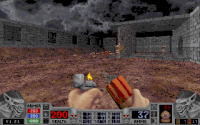
Attached Image: BLOOD_E6M5_2.pngAttached Image: BLOOD_E6M5_4.png

Forbidden Rituals
by Kevin Kilstrom and James Wilson

Kills: 120/120
Secrets: 10/10

This seems to be another level recycled from Alpha version of Blood, in fact it is the second of the three playable levels in the alpha. Unlike most other recycled maps, this one is okay and I really don't have much to say about it.

A reminder that both expansion episodes (E6 and CP) have the secret exit found on the SIXTH LEVEL instead of the FOURTH! So that's where you find the secret level.

Secret Level (description taken from Blood Wiki): "Shoot the eye above the Moon Key door. The entrance to the secret level will open up to the right."
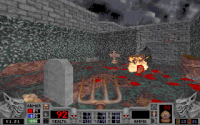
Attached Image: BLOOD_E6M6_2.pngAttached Image: BLOOD_E6M6_5.png

Forgotten Catacombs
by Nick Newhard and James Wilson

Kills: 86/86
Secrets: 5/5

Secret level time! It turns out this is yet another recycled map from Blood Alpha. And it shows, as this map is quite bland, to be honest.

Fun Fact: The achievement for finding this secret level in Fresh Supply is called So Forgotten That They're Still Full of Cultists. This is a reference to Civvie's video "PRO BLOOD: POST MORTEM" where he says this line when talking about the secret level of the episode. And yet even with the achievement, Civvie still trashed Fresh Supply at launch. :lol: Though rightfully so, since it was buggy as hell and my hope is that one day Nightdive will come back to fix it with the addition of community made addons becoming official over time. I mean seriously, I think everyone wants Death Wish to become official at one point.

Unfortunately, I had to replay the last part of a level due to a missing enemy, though I'm not sure why that enemy was missing in first place, considering on second attempt, I got all kills. Interestingly, this was also the only E6 map I beat without dying, so I think it's an interesting coincidence.

In the end, the map was kinda meh but difficulty wise, it was okay, mostly on the easier side.
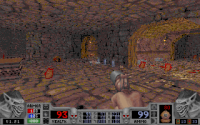
Attached Image: BLOOD_E6M9_1.pngAttached Image: BLOOD_E6M9_4.png

The Dungeon
by James Wilson and Nick Newhard

Kills: 204/204
Secrets: 3/3

Yet another map recycled from Blood Alpha. I will now tell what to do at the beginning and how to quickly solve the puzzle:

1) Set the symbols to "Spider, Dagger, Moon" to open the left door.
2) Set the symbols to "Dagger, Spider, Spider" to open the front door.
3) Set the symbols to "Moon, Fire, Dagger" to open the right door.

Note that only one door can be open at a time but you are free to do them in any order you want. It is still possible to backtrack in the whole level, so no worries about getting stuck or whatever, you just need to insert the combination again. Also there is one secret in each section, if you are interested in secret hunting. Good luck with the map, since it is heavily populated and contains multiple bosses (Stone Gargoyles and Giant Spiders).

A small hint for the secret place containing the Life Seed: After grabbing the goodies in the secret area, you may have noticed that you are forced to drop down and lose at least about 30-40 hp if I remember correctly. The only way around is to use the Jump Boots acquired in one of the previous maps, which will negate the falling damage when they are active. This will allow you to finish the level with 200 health and prepare you for the final battle.

Interesting map overall, though a bit bland at times and quite exhausting. I'm still surprised that the penultimate map in the first episode had the highest amount of enemies in any Blood map, though I could be wrong about that.
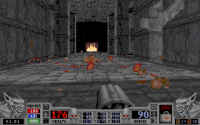
Attached Image: BLOOD_E6M7_1.pngAttached Image: BLOOD_E6M7_9.png

Beauty and the Beast
by Nick Newhard and James Wilson

The very last level of the game is another recycled level from Blood Alpha. It's tiny and there isn't much to say about it. There are also no secrets to find.

There are no level stats in DOS Blood but according to a YouTube video of the map being played in BloodGDX, this map contains 13 enemies, at least on Well Done difficulty. You've got THREE Priests and TWO Pods I believe (the latter contains tentacles, which count as separate enemies).

The Priest is an Orange Cultist that uses a shotgun but after taking enough damage, he turns into the BLOOD BEAST!

The Beast is the final boss of the Plasma Pak episode and the entire first Blood game (yes, I consider him the real final boss, not Tchernobog himself). He has a ton of health but dies quickly from Akimbo Tesla Cannons. He attacks by stomping the ground upon approaching you and unfortunately, not only is the attack unavoidable (jumping doesn't help much but probably reduces the damage taken) but also ignores armor completely. So I hope you have enough health to deal with him. And be sure to keep your distance from him!

Fun Fact: Caleb was once meant to transform into the Beast upon taking too much damage or dealing too much damage to the enemies. The idea was eventually scrapped during development and the Beast Claws sprites can still be found in the game files. Apparently the other Chosen (Ophelia, Ishmael, Gabriel) were also playable and each would transform into a different monster that eventually became the bosses of the first three episodes. But again, this idea was scrapped during development.

After taking out the monsters, go to the center of the map and press the switch to end the game and see the credits scrolling. I don't believe there is a cutscene anyway.

Interestingly, I don't think I've seen a Life Seed in this map but there should be enough health to make it through. A bit shame that the Beast's stomp attack ignores armor entirely, which makes the almighty armor almost useless in this level, besides protecting from the few enemies seen at the start (pods and priests). Also not sure if it's just me but I noticed the Voodoo Doll doesn't use ammo when pointing at the Beast. Or maybe he isn't affected by this weapon at all? Please let me know if it's true.

Overall, this was a short map that wraps up the game nicely.
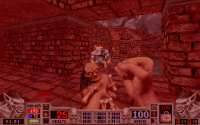
Attached Image: BLOOD_E6M8_1.pngAttached Image: BLOOD_E6M8_3.png

E6 OVERALL: It's okay for the most part. While there are some stinkers in here (Aqueducts is probably one of the shittiest levels ever in Blood), there are also some really fun and nice levels in this package. It's still a mixed bag at the end of the day, especially with half of its levels being recycled Blood Alpha levels but I really don't think the quality was too far from the fourth episode, to be honest.

I even appreciate the fact you can in fact 100% every single level in this episode! It's strange that no other episode in Blood can be 100%'ed completely due to some glitchy levels (the Cryptic Passage levels are even worse in this regard) but apparently the expansion episode received more polish/testing before release compared to the base game episodes? Which to me is still weird that the original Blood episodes wouldn't be fixed in later patches (at least in OUWB 1.21 or at the very least in the Fresh Supply remaster) to be able to get 100% everything in each level but I guess that wasn't a concern back then in the 90s when most people just wanted to finish the game normally.

I don't have Fresh Supply to confirm but from videos I've watched on YouTube, apparently the maps remained unchanged and the glitchy kills/secrets were never fixed. It's a shame that there are hardcore purists that will complain about the new changes and prevent this from happening and as surprising as this sounds, I am speaking as a purist myself!

To further elaborate, I usually love the original releases of old games (mostly due to nostalgia, such as Duke3D 1.3D but in Blood's case, a game I only played for first time in 2020-2021, I only care about the latest OUWB 1.21 release), which is why they should be preserved but when a remaster comes out, I absolutely hope to have all the bugs fixed, so we can have a polished experience and if I want the original experience, I can always go back to the original release(s) and compare the differences. I always found it interesting to compare the differences between the versions released for each game. The remasters for Quake 1 and 2 are perfect examples of excellent remasters that not only fix certain bugs in the original game but they are also packed with tons of new content and features. It's too bad that Fresh Supply didn't attempt to do the same.

I will give my Overall Thoughts of Blood next week when I get to review Cryptic Passage. To not make it longer, here are the nominations and votes for September:

Despite being Shadow Warrior's 26th birthday, Lo Wang must take a break (poor Wang, he never gets a time to shine) and in his place, the maps by CK3D/MRCK are added.

Maps by Aymeric Nocus (aka CK3D/MRCK)
Maps by Reginukem and Maps by Stephano Lessa ++

I have voted for the second choice. Aleks also voted for this.

Have a nice weekend!

This post has been edited by FistMarine: 25 August 2023 - 06:52 AM

1
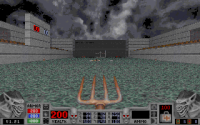
Share this topic:


  • 2 Pages +
  • 1
  • 2
  • You cannot start a new topic
  • You cannot reply to this topic


All copyrights and trademarks not owned by Voidpoint, LLC are the sole property of their respective owners. Play Ion Fury! ;) © Voidpoint, LLC

Enter your sign in name and password


Sign in options