It's fine, Aleks. It happens, even if it came as a small shock to me. Still, I appreciate that you found a different way to fix the mistake. I wish the forum had a better way to handle the reputation, like undoing the mistake and having "Like" and "Dislike" buttons near the "Reply" and "MultiQuote" buttons, instead of the tiny +/- symbols in a corner, so mistakes like these won't happen. That's just my two cents about that.

And thanks for your comments Quacken and Merlijn!
Anyway, wrapping up the MM review for this month (boss maps E5L11-E5L14) and casting my vote for next month, seeing as RR is winning anyway. Extra notes/trivia about the boss levels before their review:
-E5L11 is actually "The Bitch", while E5L12 is "High-Altitude Face-Off". Makes me wonder if the order was switched around during development or something.
-Two of the boss maps start you with arsenal intact, while the others will start you without weapons. This will be mentioned below for each map.
-Two of the boss maps contain only one secret in them, while the rest have no secrets in them. This will also be mentioned below for each map.
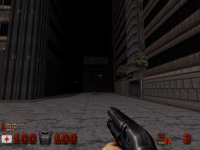
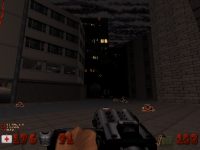
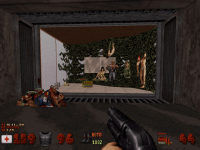
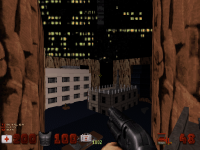
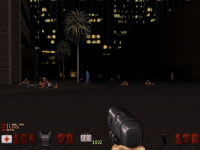
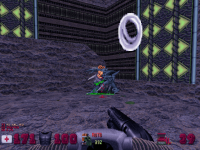
High-Altitude Face-Off
by Mikko Sandt (based off CK3D's idea)
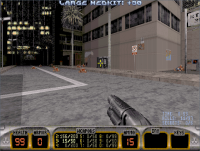
Probably the most interesting way to end the episode. You start without weapons and have to make your way jumping from building to building until you build up (heh) enough ammo to defeat the Cycloid Emperor sitting in the middle of the platform! In fact, he can be quite challenging to take at times because his rockets may sometimes clip through the walls. My advice is to stay away from those windows and don't stand near the walls.
I don't want to spoil too much about the map. Just go around the buildings and carefully jump in between them. You will take a bit of fall damage in each section. Eventually you will get access to heavier weapons and more supplies before unlocking the Devastator and after that, the Cycloid is pretty much done. Oh and this map contains the first (I think?) Holoduke in the entire episode! Also no secrets to find in this map.
Overall, this is a challenging and fantastic boss level.
png]
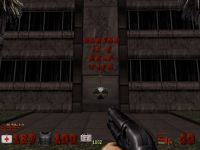
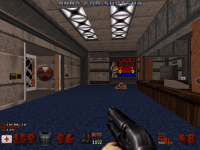
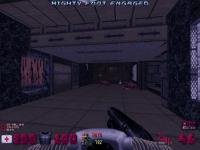
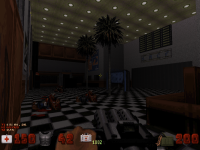
The Bitch
by Mikko Sandt
Inspired by E4L10, this is pretty much a remake of The Queen. It's much shorter and easier, plus you get to keep your weapons/inventory. Getting all the kills is still quite a challenge, due to The Queen spawning the Protector Drones.
There is only one secret to find and it's located in the very last room, find the small water sector to resurface and find a couple goodies (atomic health and ammo supplies). Just like you would do in the original game.
Overall, I think this is a fine way to end the episode. A bit shorter than I expected, though.
png]
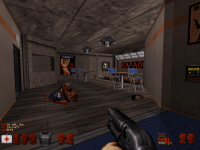
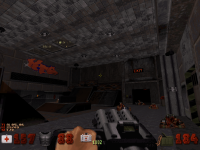
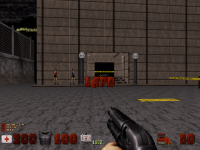
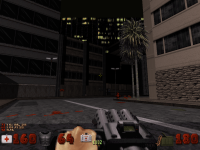
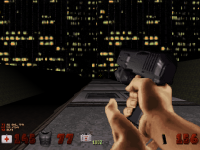
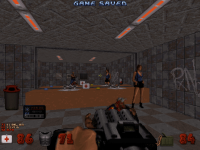
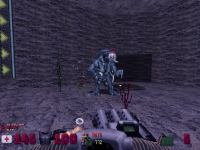
Stadium Despair
by Aymeric Nocus (CK3D/MRCK)
Another interesting map. It's basically a remake of E3L9 if it was a longer map. Or if not, then only the last part of the level is a remake of E3L9.
Oh and I like how it has continuity with the previous level "Trains in Veins", meaning this is the canonical boss level if we are judging by the continuity that was present in the previous levels. And you get to keep your inventory/weapons here as well!
Make no mistake as this map can be quite challenging at times, especially if you try to engage the enemies directly. Running around the stadium and mashing the M button to use your medkit when your health gets lower will greatly help. There is also a blimp you can blow up to spawn the goodies, though if you are lucky, the autoaim will help you blow it up if an enemy happened to be standing near it. These goodies will give you the edge to easily win the fight.
At the end, you have to push those buttons to spawn monsters, whom are colored to BROWN and GREEN. Somewhat inspired by the lesser known Duke-Tag gamemode from Duke Nukem 3D: Atomic Edition, which had Brown and Green teams. Unfortunately, as a side effect, due to the limitations of the engine, the monsters spawned in the level will not be affected by palette, so ck3D went around the limitation by putting them in a separate area and they get summoned in the arena when pushed by the explosions happening in those parts.
Which means you can't get all the kills, as some of those enemies get stuck in that separate area. This isn't a problem if playing the episode on Damn I'm Good but when playing on Come Get Some and lower and wanting to get all the kills, you will be left without a couple kills (19 kills in my case).
Anyway, once you press those two buttons, you get the choice to spawn the boss himself: CYCLOID EMPEROR! If you are crazy enough, you can press all three buttons at once to spawn everyone into the arena but you will probably not last too long. I recommend doing this with care, as otherwise it may lead to random deaths or the Cycloid getting killed earlier before everyone else is dead. Not that it matters since you can't get all the kills but you get my point. What I did was activate both teams and once they were dead, restock on supplies, save and summon the Cycloid Emperor and take him out.
If the episode were to be remastered with fixing issues in this level, I'd have either of the following suggestions/ideas to get implemented:
-New con code to have brown and green variants of existing enemies, only used in this level.
-Get rid of the Brown/Green ideas and just have regular enemies spawning upon pressing those switches.
-Place those Brown/Green paletted enemies behind some gates that you open by pressing those switches.
Overall, this was a fantastic level. Shame that you can't get all the kills but don't worry about that, it's nothing compared to the insane next level, which is surely going to cause you pain!
png]
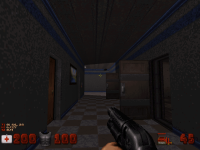
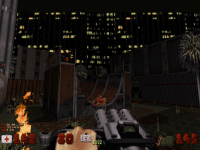
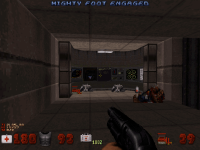
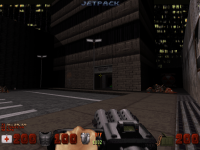
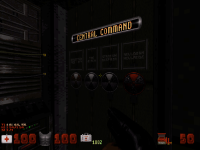
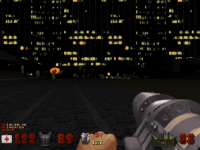
Yelldown Hellride
by Aymeric Nocus (CK3D/MRCK)
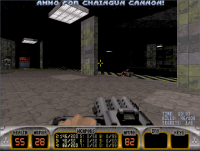
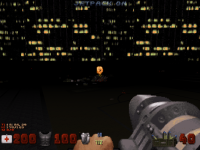
This feels like an extra boss level that is meant to be a challenge for hardcore players. The starting area is insane with all those turrets. You are given a pistol with lots of ammo, as well as a lot of health supplies but you will probably get hit all the time that you may unintentionally waste those precious medkits because you happened to be standing on them. My advice is to grab the Armor pickup ASAP because it will be a lifesaver and just rapidly move left to right while jumping to minimize damage taken by turrets! When your health gets to 70 or lower, quickly grab a medkit and continue shooting them. The pistol's autoaim will help you a LOT! Not going to reveal/spoil too much about the map but I will only give a couple hints to get past this madness:
1) After you make it alive past the First Room, grab the health pickups (including the two atomic healths), do a bit of platforming to reach a switch that temporary opens the door (I recommend saving here), then you have to fight a few Sentry Drones. Then after that section at beginning, there's some parts with sections that are taken from ck3D's past maps.
2) Second room contains a sentry drone and some eggs/slimers. Kill them and throw a pipebomb inside the elevator, then back off and send the elevator back up and blow up the crack. Call down the elevator, get inside and when you go up, you will notice you can now access the next room. Kill the protector drone and a few slimers/eggs. Save now.
3) Third room is a short one containing a few colorful protector drones getting out of the wall. Try to take them down with your shotgun/chaingun without getting shrunk by them. It's easier said than done. Then once done, get up and press on that door to open it. You will get a Sentry Drone in your face.
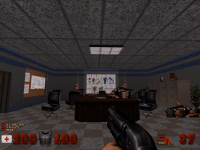
4) Fourth room is very dark and has a few troopers inside. Kill them, kill the commander from far away (he won't come over you) and make a save, as you need to cross the highly damaging toxic acid without boots, so I hope you have enough health to survive, though there's a few small health items inside acid! Once done, kill the eggs and go to the next room.
5) Fifth room has a Protector Drone waiting you. Kill him, grab the weapons and press the switch. It temporary opens a door nearby, so if you miss the time, go back here to press the switch and unlock that door containing the teleporter. Kill the protector and open the Fridge to collect the Expander ammo! This is the ONLY secret in the map and you need to enter inside the fridge to register the secret! After you got everything, press the switch to open teleporter and make a save here.
6) Sixth room is inside the haunted house with those upside down Octabrains, which evokes a creepy feeling. This part was very atmospheric. Just visit each room. If you get stuck, press on everything that looks suspicious to unlock each room. Collect the armor, boots and access card, insert the card but save before that! In newer eduke32 versions (thankfully not the latest 2015 build I'm using), if the door hits you, it goes back and gets locked instead of pushing you away, which will softlock you. So make sure to save in advance! I remember this from my 2020 playthrough when I played in a random 2020 eduke32 build!
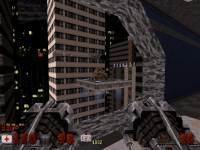
After you teleport, you get the choice between two teleporters. I recommend making a backup save here. The left teleporter (ALONE) sends you to a rather challenging Overlord boss on the streets filled with many aliens and Atomic Health/Devastators everywhere, with a very familiar section from Roch Island. The right teleporter (TOGETHER) sends you to a short boss battle against a Battlelord, the area is probably taken from Anarchy City series. I'm guessing the words were switched around or I may be misremembering which teleporter sent you to the boss battle? Either way you will be able to get all "kills" by choosing the Overlord path, as the other path with the Battlelord, you will not get all the kills for obvious reasons.
There isn't much I can do to offer advice other than staying on your feet when you choose the Left teleporter, as those streets are filled with spooky aliens (they are now green and transparent) and the Overlord roaming around. If your health gets low from getting shot from all the sides, use the medkit or continue running towards Atomic Healths, as the whole area is filled with them! Your armor will most likely get consumed quickly and there isn't another one (unless you get lucky with a pig cop drop) but in this case it's not as much needed when you are given tons of health in exchange.
I died twice in this map, because of that room with the protector drones where I got shrunk and stepped on (FUCK). I was so close to beat Metropolitan Mayhem without dying this time!

Overall, this map was a bit frustrating at times but it was also interesting and an unique experience, especially the haunted house and the two possible Boss fights you can have! Don't get discouraged by the awful beginning and some confusing parts, the last parts of the map are worth suffering through!


png]
Closing Thoughts: Metropolitan Mayhem is still a great and interesting episode to revisit after all these years. Some parts of it may not have aged well and the last few levels indeed don't seem to match the original Duke3D style of maps but to me, this is episode is still a blast and it felt like an unofficial fifth episode for the game (as evidenced by taking the 5th episode position in the menu and the maps themselves being labeled as E5L1-E5L15), almost five years before World Tour's official fifth episode (Alien World Order) came out! With a bit more polish, Metropolitan Mayhem would have easily been one of the best episodes out there! Too bad it missed its 10th anniversary last year, so a remaster of the episode is unlikely any time soon.
Thanks to everyone involved in the making of the episode and also thanks everyone for participating this month, it was fun to read ck3D's developer commentary over the various maps and Aleks' excellent review!
Anyway, looks like Redneck Rampage is easily winning this time (April is the month for Build Engine Games after all), so I'm casting my vote for it, which means the new topic will be up in the evening of 31st, so that people have extra time during weekend (and to not make it look like an April Fools joke). After all, from now on, I want to avoid choosing/nominating too many maps in a month, as we've had a couple busier months where things were slower or running out of time that reviewing whatever maps/mods took forever (which reminds me I need to get around playing the WGSpace Episode and finally review it in the February 2023 topic, hopefully people won't mind that). Even if playing/finishing things in time, reviewing them is another story.
Rankings:
Redneck Rampage ++++
The Gate
Unlike Merlijn, I don't have nostalgia for Redneck Rampage, having played it for the first time in summer 2017, during my College/University years, as I didn't own any other major Build Games when I was a kid (back then I only had Duke Nukem 3D, Witchaven 2, Powerslave Beta Demo with two levels and some rare alpha version of Blood), so when I review it, it will be a bit of a bias, though I will do my best to review RR fairly, even if it hasn't aged that well.
With the discussion focused on classic episodes, I might as well give my two cents for future Duke related projects. One day, I'd like to see a vanilla (DOS compatible) Duke Nukem 3D community project inspired by Doom The Way Id Did, it can be called Duke3D The Way 3DR Did. The closest thing existing to that is Fernando Marquez' FMX series (which are fantastic by the way and highly recommend them out, will probably nominate them next time for the Map/Mod Club) but I don't know how many people are interested in the idea. I would love to help with beta testing the maps/project at least if the idea takes off in the future.
Maybe the proposed project will be made for Duke3D's 30th anniversary. A bit inspired by how last year there was a 30th anniversary mod for Wolfenstein 3D and I'm sure there will be something similar coming later this year for DOOM as well. Though I should save that for another topic, as I'm getting off-topic here.

Have a nice day and see you soon on the April 2023 edition of the Map/Mod club!

 Help
Help
 Duke4.net
 DNF #1
 Duke 3D #1