Hey everyone! Thank you for your comments so far. I started playing Zero Hour earlier this month and last Friday I reached Level 9. I never played this TC before and I find it funny how this was perfect timing for its anniversary on 1st November, which makes it much more fitting. I'm also halfway through Route 66, so I should be able to meet the deadline with the reviews for this month, hopefully.
The only disappointing thing is that I wasn't able to finish the review in time for the weekend but I will compensate by reviewing the whole episode this week, split into three days, which means about 3-4 maps reviewed each time.
Before reviewing the maps, here are some notes about the Zero Hour TC:
1) All of the enemies are replaced with completely new ones, who are much stronger and can kill Duke pretty quickly. To combat them, Duke is usually given enough supplies and some weapons have been modified/reskinned to fit the theme.
2) Collect everything before finishing a level, so you have enough supplies to deal with whatever awaits you next time. Of course unless you are pistol starting, in which case good luck doing that!
3) Explore to find goodies and secrets that will make your life easier. Just note that there are many optional areas you can access, some of them being well hidden and not counting as official secrets.
4) Kill count seems bugged, as you may have expected. I don't know which monsters count/add to kills normally or not but from my testing, destroying the spiders' corpse will add to kills, which can help if you've got missing enemies at the end of the level.
5) Save often and use multiple save slots. Have a backup save at the end of each level, just in case something goes wrong in the next level.
6) The levels have difficulty settings implemented for all four skill settings. If you are a masochist, feel free to play on Damn I'm Good for the maximum amount of enemies. I don't know if the new enemies respawn on Damn I'm Good skill. Even if they don't, caution is advised.
7) The new soundtrack is really nice.
8) The screen shakes when Duke gets hit at less than 25% health, as is the tradition with most older TCs, making it difficult to recover while getting shot at.
9) The TC is pretty difficult overall, at least some of the levels. If it's your first time playing the TC, I recommend lowering the skill level to deal with less enemies. For experienced players, Come Get Some will prove to be quite difficult at some spots but still doable in the end with some patience, as long as you save your game often, so you don't lose much progress upon dying or getting stuck.
There is a 100% playthrough done by DoomGuysBrutal92 on YouTube:
https://www.youtube....R0ReAdlCyo6eUDl
He played in Duke3D v1.5 in DOSBox and to be honest, he is actually more of a purist than I am, judging from the playthroughs he has uploaded on his channel. He only cheated at end of the third level but other than that, he completes the levels 100%, so this playthrough may be very helpful in case you get stuck and/or want to get the secrets.
If you want to play Zero Hour in Duke3D v1.3D, then keep in mind the mod replaces the episode
L.A. Meltdown at the episode selection screen (the original version of Duke3D has the episode names hardcoded into the executable). If you are playing in Atomic Edition or source ports, then you don't need to worry, as you only see "AND SO IT BEGINS" in the main menu, so you already know what episode to select.
Just so I don't repeat myself who made each level, here are all the map listings and the map authors taken from the readme file (re-arranged the text):
Quote
The Granite Fortress (Bill Tatton)
The Rec Center (Bill Tatton)
Ancient Realms...Part 1 (Shane Campa)
Ancient Realms...Part 2 (Bill Tatton)
The Laboratory (Pierre-Olivier Clement)
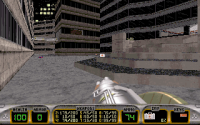
Night Streets (Bill Tatton)
Into the City (Bill Tatton)
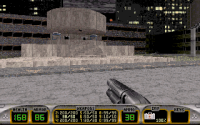
Oasis City...Part 1 (Shane Campa)
Oasis City...Part 2 (Shane Campa)
Oasis City...Part 3 (Shane Campa)
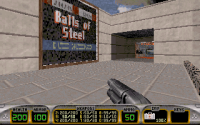
Balls of Steel (Shane Campa)
I played
Duke It's Zero Hour in Duke Nukem 3D v1.3D on CGS skill in DOSBox 0.74-3. I played with keyboard only controls and saved often, while getting all kills and secrets along the way.
AND SO IT BEGINS
The Granite Fortress
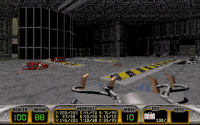
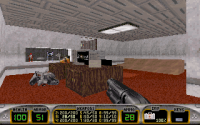
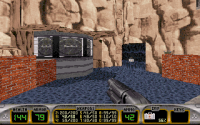
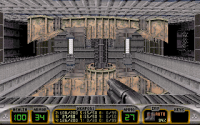
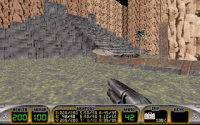
The very first level of the TC is pretty difficult and quite long. It will easily take you about an hour to finish on the first playthrough, especially if you take your time to fully explore. Maybe 30-40 minutes or so if you don't want to backtrack for everything before exiting. I also recommend saving often, since the new enemies are deadly and there are a few deadly traps too, such as the nasty explosion trap in the vent, which is guaranteed to get you the first time. Most levels begin at the EDF base with the mission briefing screen. Afterwards, you take the teleporter to the new area.
The first thing you want here is to go behind the waterfall to grab a few weapons and medkits. The Chaingun Cannon has been reskinned into the Spike Cannon with nice new graphics and sounds. The Pipebombs are changed into Handbombs, again with nice new graphics and a small change with 8 bombs contained per pickup. This will greatly help you prepare for what is coming ahead. Unfortunately, you don't get the Armor until later in the level, so you have to suffer early on from the enemies' attacks. Luckily, Bill is very generous with the resources in this level, as the health packs are provided in good amounts and even the Armor pickups will be plentiful at the later times, especially with some enemies dropping some extra stuff.
The first new enemy you encounter is the Screamer, which is sort of a mini plane that's really hard to hit, has a small hitbox and fires a couple lasers at you. Without armor, you are guaranteed to lose about half of your health in just one shot if you get unlucky. Thankfully, they go down quickly with the shotgun/spikegun, provided you can hit them, though the autoaim helps a lot (pistol doesn't seem to be effective against them).
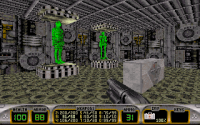
And then afterwards, prepare to meet the GIANT SPIDERS! They are very fast, attack quickly for 20 damage per hit and can climb the walls. If you have arachnophobia, then you may want to turn the game off right now, because this TC is infested with them. The new enemies encountered later in this level are the Servants and Warriors, which are some kind of red dinosaur-like creatures that shoot lasers at you and have a nasty melee attack, though they can also usually drop plenty of goodies, ranging from health packs to ammo pickups and even used armor (and in one later levels in the middle of the episode, I saw one dropping a Portable Medkit). The only difference between them is the health they have and the damage they do with their melee attack.
Other new enemies encountered in this level include the Heat Sensing Mine and a reskinned turret, which is bigger and easier to hit. Later in the level, you will also find the reskinned RPG which is called Railgun. And I suppose you can also collect some ammo for the new Flamethrower but the weapon itself is not available in Single Player until the next level, while the seventh weapon is not available until the fifth level. And don't forget the Devastator in a corner before the entrance to the last area, as you may miss it.
Speaking of which, you may notice that it is possible to backtrack throughout the entire level, as long as you don't get locked in the last area. Normally after you pass through the door, it will slowly close behind you. It is not possible to open the door from the inside but if you retreat outside right when you get ambushed by the spiders and the door is closing, then you can open the door from the outside and it will stay open! So that means you can backtrack throughout the whole map and restock on everything before stepping on the exit portal. I found this trick after I had finished the map first time but since I had a bunch of backup saves, I only had to replay the last two areas.
Secrets:
1) In the control room, blow up the crack and then jump to reach the vent. Inside the vent, you can find 3x Large Medkit, Armor, 2x Spike Ammo and 2x Atomic Health.
2) After resurfacing from water, look for a misaligned wall. Inside you can find Shotgun ammo, Scuba Gear and Portable Medkit.
3) Inside the second secret, press on the nearby wall to find a teleporter. You will get teleported in a room with three enemies, as well as Large Medkit, Shotgun ammo and Spike ammo.
4) Shortly afterwards, there is a dark room. Use the NVGs and press on the hidden message to open the nearby wall. Inside, you can find Shotgun ammo, Railgun + ammo and 2x Atomic Health.
5) Shortly afterwards, go downstairs and check the two rooms filled with goodies and some fire in them. Jump on the ledge to reach the vent. Inside the vent, you can find 2x Tripmine (weapon), Spikegun, 2x Railgun, 3x Atomic Health, a box of Bombs.
6) Before crossing the bridge leading to the last few areas, check the left corner. Press on the wall to access a Portable Medkit.
There are also a bunch of unofficial secrets, as Aleks has noticed. Unfortunately, I can't make a full list of unofficial secrets, as there's lots of them and even describing the official secrets was a bit hard due to the locations. I'd see keep your eyes open for anything that looks suspicious. The waterfall at the beginning containing some much needed goodies and a Portable Medkit in the vent are two examples of unofficial secrets.
As for the kills, initially I may have missed a few kills but upon getting to those optional underwater areas packed with goodies, I found a couple more enemies and was able to get all the kills. I found the trick with gibbing spiders corpse to gain extra kills in the next two levels (I don't know if the spiders count/add to kills initially) and I never had issues with any missing enemies in any level. I guess the Addon Compilation version and/or Rednukem may be a bit different in this regard compared to the original version of the mod played in DOS Duke3D v1.3D?
Overall, this was a pretty interesting starting level. I wasn't a huge fan of having a long and difficult level early on but it does leave a good impression and makes you want to keep playing.

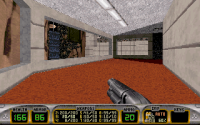
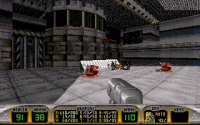
 The Rec Center
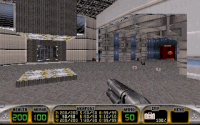
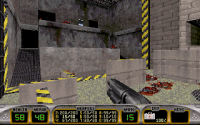
The second level is easier to navigate but it still has some mean tricks, such as the introduction of the Sentinels! They are basically a floating Mini Battlelord that will shred Duke to bits with their hitscan, especially the closer they are. They seem to take between 2-4 rockets to die, possibly even more if you are unlucky and the shots go through or the sentinel keeps surviving. Not sure why and if it's me but I noticed with some monsters that they can sometimes take more hits to die but that may be due to the paletted monsters having double health, which happens only in Duke3D v1.3D. And since the old monsters are replaced, it was impossible to distinguish the new paletted monsters from the non-paletted ones.
As for the level, you will find your new weapon: X-32 Flame Accelerator. Replacing the Freezethrower, it is basically a Flamethrower and it's a quite powerful one, though each weapon/ammo pickup only gives 18 rounds, so you may want to be careful with the ammo usage. I recommend using it against the stronger enemies, it cuts through them quickly. Oh and something that has been pointed out earlier, the flames that get dropped by some monsters don't hurt more because of their big size, they hurt more because the modders made the fire to hurt for 5 dmg instead of only 1 dmg and also extended their radius, so be careful to not step into the fire, as it's easy to lose the health now.
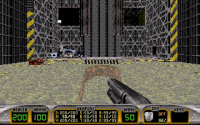
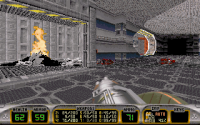
There are also some interesting locations to visit, ranging from a Toy Store to a club and eventually to a factory with a tiny functional crane! I always liked seeing the cranes in Duke3D, though in this case the crane's size seems smaller than intended. This has no side effects during the game, it's just a fun thing to point out when you compare the crane's size to the size from the ones seen in the original game.
The final battle with a few screamers and sentinels in front of the nuke button is also pretty interesting. I recommend taking each side carefully or else you get ripped to shreds by the Sentinels waiting behind the Screamers.
Secrets:
1) At the very beginning, when you arrive in the room with the spaceship, go to the left side and open the compartment to collect Flamethrower ammo.
2) Go upstairs and before getting to the club, press on the cash register to open the nearby door in your right. Enter the room but watch out for two enemies waiting for you and the explosions occurring. Inside the blown up wall, look for a hidden Atomic Health.
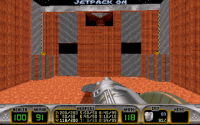
3) At the very end of the level, drop down the left corner to collect a Jetpack.
4) At the very end of the level, drop down the right corner to collect an Atomic Health.
Overall, this was another interesting level. Looking forward to the next one!
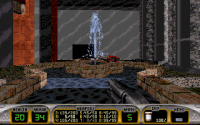
 Ancient Realms...Part 1
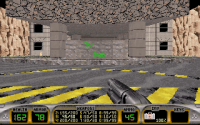
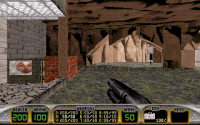
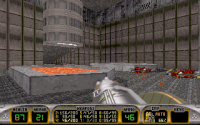
Jesus Christ! This is quite a difficulty spike here and feels like a level that was meant to be placed later in the episode, which is ironic seeing as Shane Campa made the last couple of levels as well. Even if you started this level with full everything, it will still be a painful experience. I was really surprised at Quacken's high rating of this level but I will have to say that Aleks' review is pretty much spot on.
First, the level is populated by over 150 enemies, many of which will gladly ambush you and force you to lose large amounts of health/armor if you are not careful or the autoaim doesn't do its job properly. Second, the level is a confusing mess that had me using the Jetpack at times and not even sure if I broke the experience with the level because I found a blue card and a door requiring a yellow card, so I had to use the Jetpack to progress through the level. And I don't think there is a jetpack given at the very beginning but if you found the secret one from the previous level, you should be fine, as there's two extra jetpacks in the later portions of this map.
As mentioned, the level is pretty damn hard, despite the generous amounts of Portable Medkits, as there is only one armor pickup in the entire level but due to the huge number of servants/warriors you face, you can have an occasional used armor drop. Otherwise, if you are getting your ass kicked, you may want to retreat to one of the two water fountains present in the level and slowly refill your health before you have a fair chance at fighting. There is no shame in doing that after clearing a room filled with spiders and other shits while you are being left with low health and no more Medkit in inventory.
Furthermore, there is the elephant in the room, which is the final battle. As epic as it sounds, this fight is a frustrating mess. You have to fight about 20 (!!!) or more screamers & sentinels and you already know that even a single fucking Sentinel is enough to take Duke from full health to zero almost immediately. But how about facing about FIVE or more at the same time? Needless to say, I died shitloads of times, despite the generous resources given in the same room. It was frustrating as hell and I had to save/load a lot, even retreating to the previous rooms to find more health pickups because I just couldn't fucking do it with all the health given and all the health pickups were picked up carefully too. I must blame the lack of armor here. Eventually I managed to do it.
Interestingly, the guy who made the walkthrough I linked in the post, cheated with God Mode during the final battle but thankfully I didn't have to do that. But even though I succeeded in the end, I still think that final battle was way too hard for being the THIRD level of the entire episode. I wouldn't have complained if this was the final level or even the penultimate level, to build up for the final boss but unfortunately we are into Last Reaction's or The Gate's or The Ultimate Doom's Thy Flesh Consumed bullshit territory here of putting frustrating levels early on, making the difficulty feeling non-enjoyable and schizophrenic. At least in my opinion.
And as a final insult, there are NO official secrets! Though again like the previous levels, there are a couple unofficial ones, so you are encouraged to explore the places, maybe you can find something that can help you even the odds during the final battle.
Overall, despite the interesting level design, this was a miserable experience. I simply did not enjoy this level and at least the 30 or so deaths I have suffered here. It's just not fun to constantly die and I am glad I am completing the levels without any cheats because at least this proves the levels are possible to complete without any cheats. But you still need insane luck and lots of saving to get through some of the encounters here, especially at the end. Makes me wonder how the hell people could even beat this level back in the day.
I feel like Duke3d or mods like these desperately needed an invisibility/invulnerability powerup to deal with some of these nasty encounters. Or even a simple change like making Steroids give Duke about 25-50% damage reduction. Or slightly increasing Duke's maximum health to 125 like in LR&WB TC. Any of these changes would have helped a lot in situations like these. Hopefully the next level is going to be better.

 Ancient Realms...Part 2
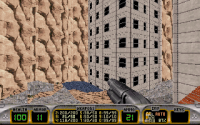
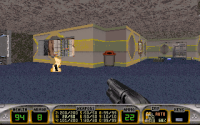
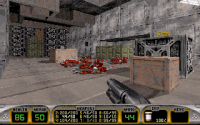
Well, this level was much less painful than the previous one, seeing as Bill returned to the mapping. Don't get me wrong, the map still has its mean tricks but the design is mostly decent and the battles won't make you pull your hair out. For whatever reason, this map doesn't start you at the HQ base. Probably because it's the second part of the Ancient Realms, so it should continue where the first part ended.
As for the map, it's quite difficult but nowhere near as hard as the previous one. There are no new enemies encountered until the next level, so you still have to deal with the swarms of spiders and other "familiar" enemies. Luckily, the balance is a bit better thought out, as the generous health and armor supplies are back. I still died a bunch of times but the enemies weren't getting on my nerves as the previous level, so the experience was mostly enjoyable.
I noticed a small missing sound error: when I arrived in a control room with the switch that temporary opens a gate to a teleporter, I got the message on top of screen:
SOUND PORTE2.VOC[#293] NOT FOUND. This might have been fixed in the addon compilation version. I don't have much else to say about the level, so I will just give the secret guide.
Secrets 1-5
1) At the beginning, there is a Portable Medkit and two teleporters. The secret is still reachable even after the wall will collapse.
2) Inside the cavern, blow up the crack to access a small room with spiders. Look for an Atomic Health and grab it quickly before the ceiling collapses.
3) After using the Blue Card to enter the warehouse, press on the green crate to open it and access Atomic Health and a box of Bombs.
4) Near the Red Card, push on a nearby wall to access a hidden elevator that sends you to an Atomic Health.
5) In the room with the Yellow Card and Jetpack, jump on the crates, all the way until you see a compartment that contains a Portable Medkit and 2x Railgun ammo.
Secrets 6-9 are located around the same place. In the central room, where you resurface from water the first time, fly with the Jetpack in the middle until you see a compartment with some goodies.
6) One side contains Jetpack and Spikegun.
7) One side contains Jetpack, Atomic Health and Armor.
8) One side contains Flamethrower.
9) One side contains Railgun.
Overall, this level was okay.
Without spoiling too much for the next levels, I will say the TC becomes much better from now on. It truly feels like a classic Duke TC at times. I don't know how levels 9-11 are as I haven't played them yet but judging from Quacken's comment, it looks like level 9 might be miserable with its lack of health. I will look forward to that later today.
Have a nice day.
 Help
Help
 Duke4.net
 DNF #1
 Duke 3D #1