Duke4.net Forums: Duke Map/Mod of the Month Club - September 2023 - Duke4.net Forums

Jump to content

Page 1 of 1
  • You cannot start a new topic
  • You cannot reply to this topic

Duke Map/Mod of the Month Club - September 2023  "Duke is back"

User is offline   FistMarine 

#1

What's this thing?
We play through a set of maps/mods during the month, and use this thread to discuss it as we're still all fresh with our comments/opinions/feelings about the maps.

What's the purpose?
Basically, there are 4 purposes:
  • Showcasing some of the older mods/maps to wider public - they definitely deserve the attention!
  • Getting more people to actually enjoy and appreciate the user content - because let's be honest, over the past 27 years this was really what kept Duke alive after all.
  • ...and while we're at it - keeping Duke alive by still enjoying it, as there's no new games in the franchise on the horizon (and let's be honest, they wouldn't be as good as some of this stuff!).
  • Having a more structured discussion on maps than what's going in "Last map you played" thread - which is great, but it's basically a monologue most of the time.

Can I join?

Sure, as long as you find some spare time during the month to play the stuff that's on the table!

Why a month?
Because people have lives, jobs or other stuff to do (like mapping). For smaller maps, this could be shorter time - it's all up to debate in the future!

What port should I use? Are mods allowed? Where to get the maps?
It's entirely up to you how you play the game, so you can use whatever port or mod allowed - it would be cool to state in your posts what you're using too, as there might be some slight differences between the ports! As for the maps, they should be always linked within the first post.

How should I play the maps or post about them?
Again, it's up to you. You can finish them all in one go or play them one by one whenever you feel like. On Doom forums, there's a rule that you should keep the pace by not posting about a map that has a higher number than the day of the month, so e.g. on 6th you shouldn't post about map 7 etc. I think that might be a good practice if there's a large interest in this, but first let's see how active the thread is for a start - so if there's nothing going on, feel free to post about whatever map you want to.

Previous 2023 Editions


Previous 2022 Editions


Previous 2021 Editions


For this month, the maps and mods by Reginukem and Stephano Lessa have been chosen!

For those who haven't heard of these authors before, they have been active Duke3d mappers/modders in the 2000s and have created plenty of stuff, as well as participating in a number of community projects. This month focuses only on their creations and besides the maps themselves, we've also got a TC and an episode to complete the month.

The maps/mods are listed below in chronological order per author (though the episode/TC are listed at the end) and can be downloaded from Dukeworld at the following links:

Maps and Mods by Reginukem

Emergency Room
Fight For Life
Computer Mega Core
Urban Reclamation
Shuttle Service
Crane Chase
Center For Disease Management
Fight For Life 1.1 (Requires DukePlus)
Dukerminator 3D (Total Conversion)

Maps and Mods by Stephano Lessa

Go Back Home
Jungle Tour
Zombie Mall
Jungle Tour 2
Jungle Tour 3
Gotham's Industrial District
Twilight City
Industrial Complex (Episode)

Mirror:
Industrial Complex (Episode)
The mirror link contains both versions of the Industrial Complex episode.

Important Notes

1) All maps/mods are made for the Atomic Edition. Most maps are compatible with the DOS version of Duke3D Atomic v1.5 but some of them require a source port. Maps that contain new art/sounds/etc should be installed in a separate folder to avoid conflicts. More information provided below on which are the maps to contain such files.
2) All maps/mods by Stephano Lessa have NO DIFFICULTY SETTINGS implemented! This means the gameplay is identical across all skill settings. The only option you have is either playing on Come Get Some for normal gameplay or Damn I'm Good for respawning monsters.
3) Computer Mega Core and Shuttle Service may not require the Atomic Edition to play but I strongly recommend to play the maps in Atomic Edition anyway, to not run into potential issues arising from a missing texture or something similar.
4) Dukerminator 3D is a TC that contains two original levels (they use the E2L10 and E2L11 slots), as well as the CMC map as bonus. There isn't much reason to revisit CMC with this mod as the map itself is unchanged and included as bonus because it fits the TC but the two new levels are still worth checking out with the TC.
5) Fight For Life 1.1 is an updated version of Fight For Life which is an updated version of Emergency Room. It also includes the original F4Life zip file as bonus. However, this latest version, F4Life_UP, is a map made with DukePlus in mind! I think it works in regular Atomic Edition (with or without source ports) but DukePlus is absolutely needed to get the most experience of the map. DukePlus can be downloaded at ModDB: https://www.moddb.co...-plus/downloads
6) Industrial Complex contains 6 levels (five regular levels, as well as one secret level) and is available in two forms: i.c.e.zip and Ice.zip. The former is the original release that is playable in Duke3d Atomic v1.5 in DOSBox, while the latter is the repacked version for source ports (JFDuke3D as the minimum required port). However, the episode can also be found with various changes/fixes in the EDuke32 Addon Compilation. So, if you are playing in a modern source port such as EDuke32, then please get the Addon Compilation version for the best experience.
7) Speaking of which, the Jungle Tour Trilogy is available as a single package in the Addon Compilation. It also allows to play the maps as an episode.
8) Two of the maps (Gotham's Industrial District and Shuttle Service) are also included in the Addon Compilation with further bug-fixes and changes.
9) The following maps contain new art: Fight For Life 1.1, Zombie Mall, Jungle Tour 2, Jungle Tour 3
10) The following maps contain new music: Computer Mega Core, Go Back Home, Jungle Tour, Jungle Tour 2, Jungle Tour 3, Gotham's Industrial District, Twilight City
11) The following maps contain new sounds: Jungle Tour 2, Jungle Tour 3
12) You can start with any author you want but the maps should be played in chronological order, with the TC played at the end (either at the end of each author has been covered or both TCs at the end of the month).

Have fun!

This post has been edited by FistMarine: 01 September 2023 - 09:42 AM

6

User is offline   Quacken 

#2

I had to take a hiatus because I just didn't really feel like doing anything this week. Now I am supposedly back. Starting with Reginukem.

Emergency Room

Imagine my surprise when I walked through this map's second set of double doors and found a pleasant little jaunt. Despite how much it could have been the case otherwise, Reginukem keeps this map simple, which I appreciate. They have a surprising amount of mastery over the stock Duke 3D textures. The walls from Duke Burger also happen to be convenient walls for a hospital, and there's plenty of wheelchairs and beds running around that are made with bridge textures. As a side effect, due to the fact that these textures are destructible, you can crumble them to bits with one explosion. There's even a "functional" treadmill at the physiology clinic and two platforms for disabled patients. That's one thing this map has over The Sick Ward. The excellent use of textures and gizmos does come at a price though, this map is pretty boxy and the height variation isn't all that good, and there's some not-so sneaky use of copy-pasting with all of the rooms with the hospital beds. This map could pretty conceivably be made in Doom with very minimal alterations, but then again that's far from a bad thing. I would rather play a simple map than a complicated one. This map's monsters hardly put up a fight also. The only one you really need to worry about is the Battlelord in the second floor, but unless you forget you have an RPG like I did, he's really not too bad. Walking through the Yellow door spawns an Overlord Sentry that gets killed in one shot, as it's the one that is still left in the game files that has 1 HP. Not sure why Reginukem didn't add in a config file that contained a more reasonable version, considering LRWB had proper health Overlords and that was from 1999. Emergency Room is simple, fun and not too much of a challenge. It's a great appetizer.

7.5/10.

This post has been edited by Quacken: 06 September 2023 - 02:48 AM

4

User is offline   Quacken 

#3

Let's do a double feature.

Fight For Life

Fight For Life starts by dropping you in a city street, and as you fight through the street you enter double doors to a... a hospital. Oh, would you look at that, that fork up ahead looks awfully familiar... Fight For Life is just Emergency Room but way worse. This map really feels like a copy and paste job. I guess I like the opening lobby being more compact, but this map has about as much depth as a pothole in the road. Once you take the elevator, you have to play a really generic techbase map that doesn't have near the same amount of charm that Emergency Room does. Some sequences like the radiology machine are literally just taken from Emergency Room. Same Terminator skeleton popping up and all. Towards the end of the map a really obnoxious Battlelord shows up which managed to kill me the first time I fought it. I got it on the second try though. There's no Overlord Sentry in this map, so the Battlelord is really the only thing that's interesting. Fight For Life is a bland, cramped key hunt which doesn't put a smile on my face.

3/10.

Computer Mega Core

Geez, I haven't seen a mapper undo all of their good faith from their first map by the time they release their third one in a long while. Computer Mega Core is a miserable, padded slog that sacrifices pretty much everything good about Emergency Room, amplifies its long gray hallways and adds in Sentry Drones behind doors that will instantly take 50 health off of you. If I see another guy who puts a Sentry Drone behind a fast moving door and it takes a bunch of health off of me, I'm going to blow a gasket. First thing to take down a peg is the MIDI. It's the Terminator theme (I'm pretty sure), and not only is it the most unpolished, boring MIDI I've heard in a while, it also doesn't loop properly. I don't use one of my MIDIs in my collection for a map that already has a custom one, but I made an exception because I wanted something that was good about this map. A lot of rooms in this map are really dumb. There's this silly area where you have to run around and flip switches that open doors which have more switches, that finally culminate in opening the route for you to proceed. Isn't that nice? The big room with the huge lightning rod in the middle looks very awkward and spawns two Battlelords here eventually who are a total chore to kill, after which you press a button which opens a door to the exit. The only reason the exit isn't at the lightning rod is so that Reginukem can clothesline you with a quadruple Sentry Drone attack. This map is terrible, and I'm quite baffled by its existence.

1/10.
3

User is offline   Aleks 

#4

I have (re)played the Jungle Tour series, Gotham Industrial District and Shuttle Service in the recent years, so will skip these ones. I was quite looking forward to revisiting ICE and older Steph's maps and Emergency Room, the rest I haven't played yet, but will skip the "remakes". Started with ICE last night and finished it pretty much in one go, took me just about an hour for the whole episode - and considering the theme is pretty much the same, I won't go into details about each map but rather just comment on everything at once. Note to Quacken: one spot at the beginning of level 4 requires the player to have a jetpack from the previous level, so pistol starting won't work.

Industrial Complex Episode
It's six levels, but the first one is basically just a short briefing map without any enemies, the last one won't take more than 5-7 minutes as it's just a boss with short build-up, there's a short, 10 minutes tops secret level which obviously isn't mandatory and the 3 other maps are about 15 minutes each. The episode relies mostly on DN3D assets, with no new enemies. However, there is a new shotgun model together with a different sound and new chaingun sound. While the model isn't anything special (doesn't look out of place too and might be even considered a nice change from the OG shotgun), the sounds for both weapons are very good, more "pounding" and "meaty", which makes the use of both weapons feel a lot more powerful. The music was also carefully used for each level (and the theme/main menu music which uses the Bond theme), some re-using different DN3D midis and other having their own. There's also some new art, used from map 3 onwards (map 3 seems to be the one using it the most) - it's notably higher resolution than original Duke art, but blends in very well and works with the game's palette, so I'd say it's a good use of new textures. Now about the levels themselves - they're very direct and straight to the point, but they usually have a very simple, Doom kind of layout of room-corridor-room, with occasional courtyards here and there and pretty much without any actual verticality. The monster placement is typical what you'd have expected of an early 2000s user maps, the combat is quite fast-paced, but not really too challenging and you're also given plenty of guns to deal with the enemies. The secret places are usually hidden between some random walls, but often strongly hinted where to find them (particularly in the case of secret level exit). Design is mostly simple, I think only the boss map uses doors different from up/down opening or split ones - but besides that, there's plenty of movement around - rotating vents, pistons and floating devices are virtually everywhere, which is a nice idea to introduce additional interactivity to the map. There's a lot of trimming, but despite being the theme "industrial complex", it's difficult to see any actual purpose in the devices we see, which makes it all a bit abstract. This sensation is emphasised by a particular way of doing shadows - they are there, but quite unnatural and creepy. At this point, I'm not sure if it's a design flaw or a conscious styling choice. The atmosphere of the whole episode is gloomy and dark, I think the default visibility has been even toned down - one open area with a clear blue sky still doesn't really brighten up the silhouettes of the monsters there. There are a few places with a bit dickish enemy placement (like a new beast in cramped spot right above an elevator), but in general, the combat is fine. My favourite maps were Dangerous Tour 2 and Alternative Route, the secret level which is heavily inspired by a lot of 2003-2004 AMC maps. The boss fight isn't too bad either - it's a cycloid, but the fact he's located in quite a narrow area, you have to fight him similarly to the bosses in old platformer games - wait until he stops shooting for a moment then attack.

Overall, I'd say it's the best work of Steph, was short, fast and action-packed!
4

User is offline   Quacken 

#5

I'm here and I'm only half dead. The second half of my Water Bases review will come when I'm fully alive.

Urban Reclamation

If you ever wanted to know just how "city" a map could get, then Reginukem has you covered. This extension of the first two minutes of Capitol Punishment is just as short and only mildly more competent than that map, and once again the best part about it was the MIDI that I put on to sub out Taking the Death Toll. The exploding buildings in this map are about as flaccid as they can be. They just fall down into the sidewalk, and most of them happen right next to you so it's easy to take damage when you don't need to. Besides the map trying to kill you, nothing else in the map can kill you. There's way too many bullets, so everything gets effortlessly stunlocked by the Chaingun. There's also only about 52 monsters in this map, and you can be over and done with it in 5 minutes. Urban Reclamation is a forgettable map that you can blink and will miss.

3/10.

Shuttle Service

This map isn't really anything to speak about either, but at least it's got some blood in its body. Reginukem actually tries something that's not a city map for once, he puts you on a space shuttle. The effect of the shuttle raising into space is done pretty decently honestly, especially with the window you can open that shows you scrolling through space. That's as far as Reginukem gets in terms of good things though. This space shuttle is not nearly big enough in my opinion, and I think it suffers due to the fact there's only 51 monsters in it. Despite this, it can take up to 8 minutes to complete as there's lots of switches that open with no indication, and a lot of them have janky collision that makes them hard to activate. A lot of the monsters in this map feel like afterthoughts. There's random fodder and hitscanners tucked around corners, almost like they don't want to be found, and there's two Commanders which show up in crowded rooms who will eat up all of your Devastator missiles. Shuttle Service is a better offering than the previous two maps, but it's still very average.

5/10.
3

User is offline   Aleks 

#6

Spent a fruitful night with Reginukem...

Emergency Room
Replayed this one after 10+ years and I'm positively surprised. There's certainly a style here - mostly blocky architecture, but with enough verticality to keep it interesting and we also get a first glimpse at Reginukem's forte, which is vehicles. The ambulance at the beginning of the map looks great, especially if we consider it's a pre-Mapster construction. The combat is engaging and dynamic, but nothing out of the ordinary really (besides the overlord flop maybe). There are some interesting pairings of monster types. The hospital is definitely sellable and there are some nice little details/effects like the blowable wheelchairs and stretchers or the Rentgen room with terminator sprite showing, which works great. The progression is pretty straightforward, but there are also some optional areas worth visiting. Very solid and classic map which kinda feels like it could have been a part of official addon like Duke DC.

Rating: 89/100

Computer Mega Core
Haven't played this one before, but it's a lot of fun! Seems to be based around some platformer and that's a really good way of impementing its physics in Build environment - there are some creative platforming puzzles starting as soon as the first room. The aesthetics are strong as well, reminding of Duke 1 or Duke 2 a bit. The corridors are quite narrow, but this doesn't make combat annoying at all. There's a bunch of battlelords spawning, which will aggressively chase you around these corridors, so you have to deal with them quickly - but there's plenty of ammo. A lot of stuff in the map moves in quite an effective way for a map from 20 years ago. Despite being mostly a convoluted switch hunt, the progression is clear, also thanks to lots of viewscreens. Short, fast-paced and original map, I think it's better than e.g. Circuit from one of the conversions we've played here last year (The Lost Duke Episodes?) which also takes place inside a computer.

Rating: 85/100

Urban Reclamation
OK, this map is pretty much a highlight of Reginukem's forte I've mentioned earlier, i.e. vehicles. There's plenty of different, nicely designed and varying cars around, some construction machines... Especially the huge mobile crane at the center of the street is impressive, I really dig how much detail was put there, too bad it isn't operable, but this one alone makes the map very distinctive. There are some blowable building and a general atmosphere of ongoing construction/destruction going around. The monsters are quite few though and they never get that much in the way, which is OK given how fun just traversing this map feels with its pretty visuals and nice layout choices.

Rating: 87/100

Crane Chase
This would be a good boss level for some episode - we're basically pitted against a Cycloid with 4 minions in an open street, where basically the only obstacles are cars and giant, collapsed crane structure. The whole trick is to grab the RPG and devastator (and preferably also a jetpack) and avoid getting blown up. Boss works in this setup pretty well, as you have to watch for both his rockets and potential splash damage near the walls. However, the map pretty much ends before it really starts.

Rating: 79/100
4

User is offline   Aleks 

#7

Feels a bit lonely here, but it's probably a wrap of this month's selection for me, unless I decide to try out Dukerminator TC.

Center for Disease Management
According to the author, it's a "cover" or remake of a Blood map, but I wouldn't know since I still haven't played Blood. It was supposedly taking place in a mortuary, but in this case we get a neat space station kind of hi-tech environment, with the mortuary only being hinted at by the piston compressors on a conveyor belt and blue key room which could be the morgue indeed. Other than that, it's a generally competent, but somehow empty and plain level, which feels like mazes in parts. There are some nice effects like the crane puzzle towards the end, but nothing out of the ordinary. The gameplay is pretty good though. Probably the weakest map from Reginukem though, yet still solid.

Rating: 77/100

Now back to Steph!

Go Back Home
This is Steph's first released map and well, it shows - it has a strong 1996 user map vibe. Design being blocky, with oversized scale and quite weak choice of textures. On the other hand, there are no jarring glitches - every effect works as intended (although the author never ventured far past some of the basic ones), there are no HOM stuff or missing textures and there's a nice, although a bit too loud, midi of Nirvana's In Bloom playing as the soundtrack. The combat is basic, but pretty solid - we will mostly fight tons of weaker monsters, but the ammo/monster balance is pretty good and there are no dickish placements, so the whole map turns out to be pretty entertaining to play. The progression is clear as well - actually, once in the city, we don't really have to follow through the 3 keycard doors and can just head straight for the nukebutton - but where's the fun in it?

Rating: 58/100

Zombie Mall
I remember beta-testing this one. Well it's a mall for sure, but didn't notice any zombies here. We will be traversing three floors of various shops full of new art that translates fairly okayish to Duke's palette. Most locations are completely optional, so this map could be speedran in a matter of minutes by just going straight for the keycards on each floor - but again, where's the fun in that? The combat is mostly on the easy side, as you'll be only fighting troopers, pig cops and enforcers - the only way for it to get interesting is when you get too many enemies attacking you from all sides, which may happen especially when entering a new floor due to the darkness/low visibility. The design is OK, but nothing particularly original or outstanding. The map feels a bit adventurous with all the optional locations and gave me that neat 1996 thrill of just running around and shooting things. Once again, it all feels quite blocky and without much shadows/trim, but also the texture choices are much better than in Go Back Home.

Rating: 75/100

Twilight City
Well, this one isn't much of a city at all - it's mostly another industrial site that opens up in the 2nd half for a grey and flat city, where you can't really enter any buildings. It's another bleak map after Jungle Tour 3, not nearly as annoying as that one, but also feeling like a chore to mow through. The main issue is the darkness/low visibility, which is often paired with lots of rotated turrets over great distances, ending in a frustrating combat. The map is a bit more challenging, but it's mostly due to this kind of artificial difficulty, which I don't like at all. It also makes the navigation through the map a nightmare. The single secret place awards the player NVG, which are still quite useful as they don't allow you to see better in low visibility environments. The industrial part is nicely designed, but you still don't see most of it and just wander aimlessly most of the time, wondering if you've already visited this area. The city is... original, but I don't really dig that style. It might be the only city map not to utilise any of the regular "wall with windows" textures, instead just going for grey, worn out concrete. It also lacks any verticality whatsoever. The ammo is a bit on the stingy side, but there's enough not to worry about it. Overall, this is one of the maps where I fear reading Quacken's review in the future...

Rating: 60/100
4

#8

Computer Mega Core

Overall this map is a a string of narrow halls connecting small cubes together. While you play the switches make little sense between what they do and where they are located. Your path forward is more often than not indicated by what a security monitor's camera is pointed at. Every other corner has a sentry drone explode before you hear the wail.
That said, the route is interesting and there is a rationale to what the buttons are doing-- and it is not something that can be appreciated until after you know what is does given the misery of pressing something and then hunting for what it did. Because you are not going to enjoy it prior to the trial/error it can't be a good map.

Other than door opening, what most of the buttons are doing is creative.
Spoiler


The combat, despite being in crawlspace-width passages, is not bad. My complaint instead lyes in a poor choice of where the enemies pop up aesthetically.


4 / 10 would not play again
5

User is offline   DNSKILL5 

  • Honored Donor

#9

REGINUKEM'S USER MAPS:

Here is a playlist that puts them in what I consider an "episodic" order, but for the reviews I'll put them in order of release.


Eroom is a pretty decent map and likely one of the toughest from Reginukem. It has a really nice outside area with a cool ambulance truck. It is apparently inspired by Tekwar. The X-Ray machine gag was pretty funny too.

F4Life is a "remake" of Eroom, but I found it to only be so much similar. There's some rooms that are clearly copied over, but the majority of the level is new and the combat is entirely different. In fact, I think I liked this map a bit more than Eroom, but found it to be slightly less challenging.

CMC is inspired by Terminator Future Shock, though I don't recall a level of this design in that game. Then again, I haven't played that game in 20+ years. I'm not sure if it's just me or what but the MIDI only plays once. It is a decent map, though there's 2 traps. One is avoidable by simply not falling down the pit, the other is inescapable and will eventually electrocute you to death. The latter is just there, didn't really seem at all necessary.

Reclam is an OK map, it has some cool building destruction going on, but it seems it could've been a tad more fleshed out.

Service has a lot of cool stuff going on such as the shuttle launch. The ending switch seems to require you to kick it in order for it to activate the door that leads to the exit.

Crane is inspired by a scene from Terminator 3 where a crane truck crashes. It is a fairly short boss map that would've probably played better if the Cycloid Emperor could move around a bit more. I'm not sure why but this map seemed to lag a bit for me but not enough to matter.

Disease is a cool map inspired by Blood 2, though I assume only loosely so. This one has some of the best combat of all of Reginukem's maps, but I found the crane part to take me a moment to figure out exactly what to do. I didn't notice the red marker right away.

Overall, not bad for early-mid 00s. I wonder what Reginukem is up to these days.
5

#10

Service


Initially this seemed like a standard space map.
The invisible forcefields were annoying because of a lack of trim denoting their locations but they do fit their placement. Thanks to them the theme of the map comes together, just not until after entering the main area.

As with Computer Mega Core you never really know what any given switch is going to do before you press it and sometimes you are just as clueless afterward too.
But the switch in the first large area is not such a case.
On pressing the switch there is the impression of this new opening door having depressurized the area by cleverly placing an echo effect on one side of the room. The two halves of the room being different settings is betrayed by there being pickups in the echoing sector beforehand though.

You then open and enter an elevator which marks the beginning of what makes this map special.
This map is cool such that I want to copy it. The first window showing the station lowering away really sealed the feeling of the ship rising from the ground- even though it was only at this point that everything up until then clicked as having been a spaceport. Admittedly the opposite window with the reeling floor was not so convincing but the effect is understood.

Later there are rows of seating with an aisle down the center akin to a shuttle's and that floor lowers/opens which is the coolest looking shit. It reminded me very much of Air Force One from Perfect Dark, even more so on walking into the next area, which was a sort of cargo hold.
The spots on the floor with door textures had me anticipating more of that cool shit but to my great disappointment they don't actually open. In the immediate next room however there is another cool gimmick that I can't really describe more than being a lift. Just know it is very cool.


This map has a lot of cool factor after you board the shuttle. But it's not very good for any desire to play it again.
5 / 10
5

User is offline   FistMarine 

#11

Hey everyone. Thank you for your comments so far. It's great to see the topic active as of lately. I have started to play the maps since last week and finished about 10 maps so far.

Anyway, here is my review for the first four maps (one 2001 map and three 2002 maps). I decided to do them in chronological order for both authors, so I can better combine my reviews and save the maps requiring source ports and the TCs for the end, with a few exceptions along the way (you will see what I mean next time).

As usual, I played in Duke3D v1.5 in DOSBox 0.74-3 on CGS skill, while getting all kills and secrets. In case of most Reginukem's maps, I put them in a REGNUKEM folder alongside the midi included with CMC map, so that meant I got to hear that map's midi instead of the original dethtoll when playing Reginukem's maps.
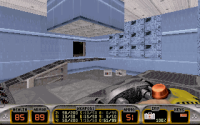
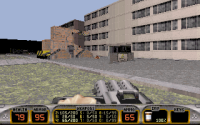
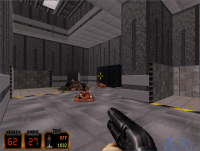
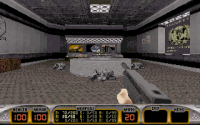
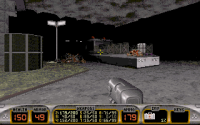
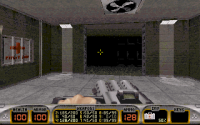
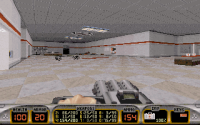
Emergency Room

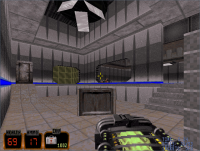
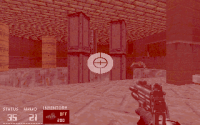
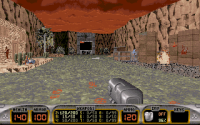
The first map by Reginukem, released near the end of 2001, is pretty nice and is a humble effort. I really like the idea of a hospital-themed map for Duke Nukem 3D using the stock atomic assets. It ended up being fairly enjoyable and got just the right amount of balance and length. Of course I took my time to explore and find the secrets because most of them are pretty well hidden that I had to consult Mapster after I was done with the map in order to find them.

Gameplay isn't very challenging early on but it ramps up in difficulty later on that you will get some good fights. Health, Armor and Ammo are all provided in large quantities. After all, this is a hospital themed map, so health pickups should be very common (on top of the occasional water fountains and toilets showing up) and even armor pickups are plentiful in the map, so you should never have problems running low on either of them. Ammo is provided in adequate quantities for the later weapons, especially the Devastator being the first weapon you pick up and you are expected to use it against Commanders that will appear as soon as the map starts.

Interestingly, I didn't get many ammo drops (pistol, shotgun, chaingun) from the enemies early on but I was still able to maintain the ammo nicely when alternating between the weapons 2-4, so I wasn't left only with explosives or the Freezer ammo, all of these I tend to save for the stronger monsters. I didn't acquire the Shrinker/Expander until I found it in a secret place after finishing the map and I also didn't find the RPG until later in the map but the Devastator and Freezer were great help when I came across the stronger monsters.

There is a Mini Battlelord encountered halfway through but he won't be much of a problem to take out. There is also a Mini Overlord as Quacken pointed out but he has only 1 HP, so he dies instantly upon taking damage. Funny that when I came back to the main hallway, the trip mines were set off and the Mini Overlord was already dead. :P

Oh yeah, speaking of which, you should be careful with a couple traps happening at some points, mostly the trip mines and the explosive traps. There is also a pipebomb lying down near the end after taking an elevator but there are also two sentry drones waiting for you, so what you want to do is to grab the pipebomb immediately and take out the sentry drones with the Chaingun. I imagine the pipebomb was put there so that if the sentry exploded, you would have also died from the bomb exploding. Thankfully this didn't happen to me but it was quite clever how it was set up that it can catch players off-guard.

I didn't have problems coming close to dying (though my health fell in to 40-50 range about twice) but I had one funny thing happen to me near beginning that I got shrunk once by the protector at start when he somehow shrunk me in the water and I was able to escape by jumping out of the water, as shrunken Duke can still jump when he is at the water surface. ;)

But then I loaded save and I didn't deal with the Inactive Protector until I got some weapons first. And speaking of which, progression isn't too difficult to figure out and the access cards aren't really hidden when compared to many other user maps. The Blue Card at start is placed in the dumpster where you can also find a very handy armor pickup, so be sure to explore.

There are FOUR secrets to find:
1) In the bathroom with the red card, jump through the fake mirror to find a box of Pipebombs.
2) In the first saloon (near the door where you insert the red card), press on the monitor to temporary reveal a secret containing an RPG. Note that this will also spawn a few monsters outside.
3) In the corridor with the saloons, press on the switch near the handicapped sign (which also controls the elevator) to unlock a nearby door. Take the elevator down to reach the secret area guarded by a few monsters (trooper, enforcer and two sentry drones). After taking them out, collect the various health/armor goodies.
4) This secret is quite cleverly done and requires multiple steps to get to it:
-First, you need to use the Yellow Card on the main door, which will also unlock the broken door you may have seen earlier (near a broken yellow access switch).
-Second, once you did that, go back to the broken door, as it can now be opened. It is guarded by a few commanders and protectors.
-Third, after taking them out, grabbing the goodies (including a jetpack) and unlocking the door leading to an area you may have visited earlier, you will need to use the Jetpack to fly to the vent, as you can't reach it by jumping. Then continue flying until reaching a room.
-Fourth, after reaching the room, kill the troopers/enforcers and collect various goodies, including the map's only Shrinker!
-Fifth, the actual secret is located behind the shelf in the room mentioned above. After opening the shelf by pressing on it, you can find inside 3x Eggs and 2x Expander Ammo.

Overall, this was a really nice map and the secrets were quite creative. Looking forward to the other maps!
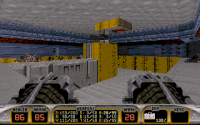
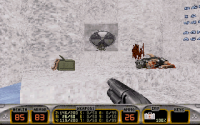
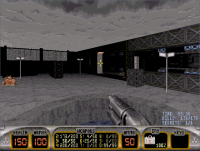
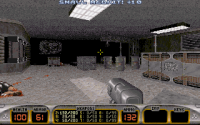
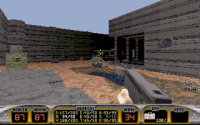
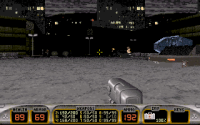
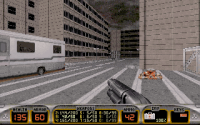
Attached Image: Eroom_1.pngAttached Image: Eroom_8.png

Go Back Home

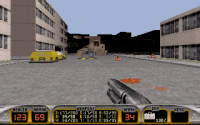
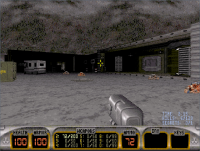
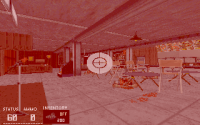
Stephano's first map is a bit rough around the edges. Besides the lack of difficulty settings that persists for all rest of the author's maps (though not a big problem for people who often play on CGS but it can hurt newbies who only play on easier skill settings), this map lacks polish in some areas. It has some oversized rooms and there are some bland corridors but I think for a first map this wasn't too bad. The music included is also pretty nice.

Gameplay wise, the map is not too difficult and gives you plenty of resources to make it through after getting through the initial challenging rooms, so I think the balance is pretty spot on. All weapons (except Trip Mines) are available, as well as plenty of health and armor pickups to make it through (and even a few water fountains as well).

An interesting thing to note is that many enemies have various palettes applied to them. This isn't a problem this time due to the map being made for the Atomic Edition, so this means the enemies have normal health as intended. If this map was made for original v1.3D release and played in that executable, then it would have been a problem due to the paletted monsters having double health, which is a feature that only exists in the original v1.3D release (and also certain EDuke32 builds from around 2013-2014).

Another interesting thing is that you will occasionally find a "D" box meal in some of the author's maps (and even the original Duke-Burger map and many other custom maps). Break the box to obtain an Atomic Health.

The only thing I don't understand is why is the exit available before using any cards. It makes the keycard aspect completely optional but if you want to get all kills and secrets, ignore the exit for now and just explore the buildings first.

There are SIX secrets to find:
1) At the start, after breaking the vent and killing the Pig Cop, press on the wall to reveal a Shotgun and ammo for it.
2) In the room containing Red Card, press on the book shelf to reveal Shrinker + both ammo types (crystal and expander) and a small medkit.
3) In the building that requires Red Card to enter, after taking out the Mini Battlelord and other aliens, jump behind the counter (look for nearby THANKS FOR SHOPPING WITH US sign) and press the wall. Inside, you should find two ladies in the bed and a trash can nearby. Break the trash can to obtain a Freezethrower.
4) When entering the Hotel that requires the Blue Card to enter, after taking out the elevator and various aliens, look for a darkened wall to open. Inside you will find a Freezethrower.
5) In the corridor that leads to a room containing the Yellow Card, press the wall on the right side. Inside you will find a flashing room with a trooper and pig cop, as well as RPG, Armor and Portable Medkit.
6) Inside secret #5, open the wall in the middle to obtain a Pistol, Shotgun and a Small Medkit.

Overall, the map may have been a bit meh but gameplay was quite good and the effort for being the author's first map is still appreciated.
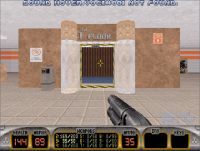
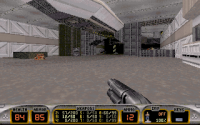
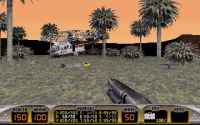
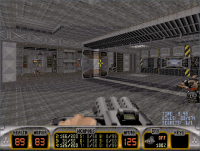
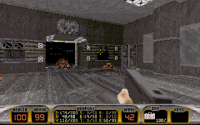
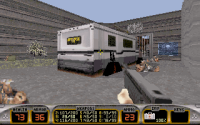
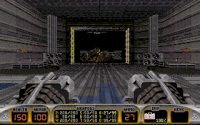
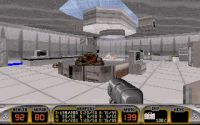
Attached Image: Backhome_4.pngAttached Image: Backhome_7.png

Fight For Life

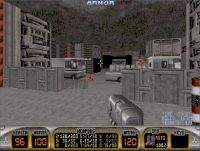
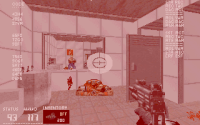
A remake of Reginukem's previous release, Emergency Room. It's okay, I didn't mind playing it and it was fun to spot the similarities between the two maps.

I only died once from the blue barrel because I kicked it and the whole room exploded, taking me down instantly from 85 hp to 0. Oh well, that's what I get for kicking the barrel, although I didn't expect the whole room to explode (also a bit of trivia, the barrels in Duke3D aren't as deadly as the ones in Doom, considering in the former they do like 20 damage but in the latter they do like 128 damage). Oh yeah, unlike Emergency Room, this map doesn't give you the armor right away but you get a water fountain near the hospital entrance (funny, the hospital is named after the legendary Levelord) and there are plenty of health packs to keep you alive, so the lack of an early armor isn't too bad here but you should eventually find one armor pickup at a later time and then the health/armor situation is mostly resolved for the rest of the map, although you need to pay attention for the occasional enemy spawns at various points.

I'm not going to talk about the entire map and the differences compared to Emergency Room but instead, here is the secrets guide, including a few unofficial ones:
1) Near the radiology and next to a bathroom, there is a red trooper sitting and an armor pickup. Press on the wall to collect a Devastator.
2) Before entering the saloon that leads to the bathroom containing the Blue Card, there is a door you can open and lead to a metal corridor. Look for a darkened wall to open. Inside, you can find a monitor, 2x Tripmines (weapon), Armor and Holoduke.
3) Blow up the crack in the bathroom containing the Blue Card. Inside, you can find TWO Commanders and various goodies: Devastator + ammo, NVGs, Armor and 2x ammo for RPG. I recommend blowing up the crack after first dealing with the enforcers that ambush you upon collecting the Blue card, otherwise you will get ambushed while fighting the Commanders.

Unofficial secrets:
-Inside the saloon leading to the bathroom with blue card, there is a door you can open, which has a Commander and Freezer inside. Open the panel to collect 2x Atomic Health, Armor and Shrinker ammo.
-Collect the jetpack from third secret and go back to the start, where exit is also located after using the red card. Use the jetpack to fly and collect Devastator + ammo.

Overall, while I preferred the older version of this map (aka Emergency Room), I don't think this was a bad map at all. It was pretty decent and there is a lot of fun to be had.
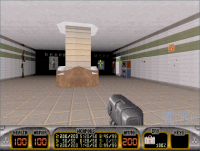
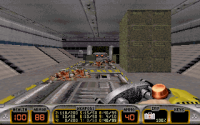
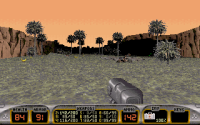
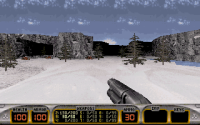
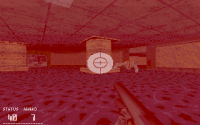
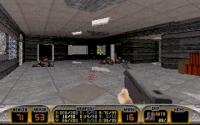
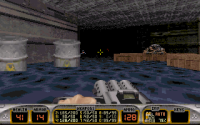
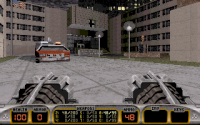
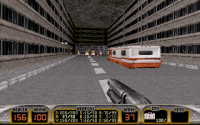
Attached Image: F4Life_5.pngAttached Image: F4Life_7.png

Jungle Tour

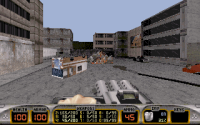
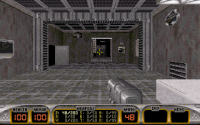
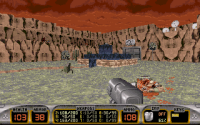
Stephano brings us the first of the Jungle Tour series. And it's...eh, it could be better. It was more annoying compared to the author's previous map and you have to navigate the jungle in order to reach some military base. While there are a few points of no return, you are given THREE Jetpacks in total in the map, so you can backtrack at any time as long as you maintain the jetpack fuel. In fact, the Jetpack is also required for progression and having it is very handy for some backtracking if you missed a certain early room that contained the map's only RPG, like I did.

Gameplay wise, it's decent and there is some challenge early on but once you pick up the shotgun and reach the water fountain, you will also find the first armor pickup and the chaingun, then afterwards you will have more than enough supplies for the rest of the map.

Progression can be a bit confusing, like the Yellow card is at the bottom of the well which also contains a jetpack that allows you to escape in case you didn't collect a jetpack earlier. I had to be careful here to collect the card without the second jetpack because I'm not throwing away a jetpack at 90% fuel or so for nothing. The yellow card will be used to unlock the base, which must be reached by flying and finding a cave nearby. Afterwards, the map will be mostly straightforward, so you will not get lost, hopefully.

Unfortunately, I died once near the end because...I got squished by a door. Yeah, I know it was kinda lame and unexpected but that's Build Engine for you. So close to beat this map without dying! :D

Anyway, to unlock the door that leads to the Blue Card that leads to the last part of the map, you must find a few hidden switches in order to unlock the door. The switches are located in some of the earlier rooms in the main corridor, just check every corner inside each office and you should spot them. I think there's about three switches to be found.

After you got the Blue Card and unlocked the way to the exit, you can choose to backtrack for more goodies/secrets if you want and still have plenty of Jetpack fuel if used wisely. I certainly had to backtrack because it turns out I didn't check a room in the early parts of the map, which contained the map's RPG and the last few enemies. But don't worry, there aren't points where you need to use explosives to progress (besides throwing a pipebomb to blow up a hidden crack that leads to a secret place). The map is completable by just using the weapons 2-4 against the monsters, since you are given sufficient amount of ammo to deal with them.

There are SEVEN secrets to find (first four are found around the canyon areas):

1) In the large canyon room, fly with the jetpack to find a Trooper, a Shotgun and a box of Pipebombs.
2) After dropping down the first waterfall (where the water fountain is located and the door leading to the only RPG), look for RPG ammo hidden around the wall.
3) Before dropping down the second waterfall that leads to secret #4, after taking out the turrets, look for an armor hidden around the wall.
4) Drop down the waterfall, collect the stray pipebomb and blow up a hard-to-see crack (just aim at the tree and the crack will be blown). Inside you can find a cave with a Jetpack near the dead Octabrain, as well as two Octabrains guarding an Atomic Health.
5) In the bathroom, jump to the vents and you should find a small room containing a pistol and a small medkit.
6) In the alien room, near the machine where you find a hidden Freezethrower, jump through the barely visible fake wall to find a Shrinker + 2x ammo.
7) In the next room that leads to the kitchen and manager's office, press on the wall near the trash can to reveal a small room containing 2x Freezer ammo.

Overall, the map may be a bit amateurish but the gameplay isn't too bad and I like the exploration based aspect of the map, especially the generosity with the jetpacks (if you spend the fuel wisely, you will not need two other jetpacks). Hopefully the next two maps in the series will be better.
Attached Image: Junglet_3.pngAttached Image: Junglet_4.png

Have a nice weekend!
5

User is offline   Quacken 

#12

I am back. I will try to pick up my own pace after this, but thankfully I have two really short and unremarkable maps to speed through.

Crane Chase

Crane Chase is sort of a proof of concept. Fight the Cycloid Emperor in a narrow street with a variety of different cover options. Well... there's a nice crane here for sure, and I also like the turned over cars, but this is more of a Mini Battlelord arena than a Cycloid arena. And for that matter, I would have liekd to have real guns. Even with the Steroids in this map, trying to navigate around the Cycloid to grab all of the weapons you need to actually kill him can be frustrating, and there's a lot of geometry you can get stuck on and die instantly. And then actually fighting Cyclie is just dumb. It's either a lot of peekaboo shooting or a lot of long range rocket spam with the RPG. Neither of those are particularly fun to me. As an ending fight it could be okay, but as an entire map Crane Chase is like a pillow to the face.

2/10.

Center for Disease Management

According to the text file and screenshot, this map is based off of Blood II's map with the same title as this one (its map slot is C1L6 by the way). I've never played Blood II before, I don't really care to, and this recreation isn't going to want to make me get the game. Center for Disease Management is an even worse downgrade compared to Fight for Life. This dummy of the Reginukem medical science trilogy is even more flat grey boxes, and his adherence to the original source material makes it so he can't even put any funny medical equipment to make the map more visually appealing. After the Blue door, I hit a brick wall for like 7 minutes because I couldn't figure out there was a claw in the Blue room. It's obvious where you have to stand to call the claw, but what's not obvious is whether the claw even exists at all or how long the claw will take to get to you. God bless you if you miss the second claw like how I did and need to wait for it to come back up. Could there not have just been a staircase or a teleporter? Why claws? Center for Disease Management is sourced from a questionable game, and its construction is probably worse than its source material.

1.5/10.
3

#13

Emergency Room
Visually, I thought it did a good job at being a Duke 3D-style hospital. There are clearly identifiable elements of one, but it’s done in a way where gameplay takes precedence. This isn’t a mid-2000s map situation where detailing and trimwork were far more important than fun gameplay.

Most of the map uses the same white texture. This may sound like a bad thing, but the map maker uses details and diverse room sizes in a way that rooms don’t feel samey. Besides, it fits a hospital setting.

I liked the various bits of hospital equipment built out of stock Duke 3D assets, like the wheelchairs and the x-ray machine. Clever usage of default assets to make new things is always a positive in my book.

Gameplay is fairly easy. The only genuine challenge is a mini-Battlelord that you usually face in the middle of a long hallway with no cover, but I had enough Devastator ammo to carve him up.

There were some clever encounters, like having to use a Devastator at the very start of the map to take out a Commander, and avoiding hitting sleeping Newbeasts that were in front of or close to enemies. It never felt like the typical custom map where you mindlessly use the Shotgun and Ripper.

Navigation was simple, which is just how I like it. No dumb keycard hunts nor semi-hidden switches to find. The map felt very interconnected with plenty of room to move around. I thought it was neat how there was a door that had a broken yellow keycard reader that would open up when you used a functioning yellow reader to open another door.

I usually suck at finding secrets, but I got most of them. The secret involving the Jetpack was very cool and made good use out of an item mappers usually ignore.

I found myself running critically low on hitscan weapon ammo near the end the first time I played the map. I’m not sure what caused that.

There’s nothing really groundbreaking about the map, but it does cleverly utilize a few mechanics, has some fairly unorthodox combat situations, and gives you time with the Devastator and more exotic weapons. It’s well worth a playthrough.


Fight For Life
I found the texture work made the map look gaudy compared to Emergency Room. The clinical whites of the original maps were replaced with stretched darker assets that made the map look a bit tacky. The areas taken from Eroom were the best-looking parts of the map.

I really liked the expanded street area before the hospital itself. There’s a neat bridge the player can fly over to later to get a Devastator and some ammo, light flash sprites used in a way to make them look like flowers, a little subway station you start in, and how you have to go back to it in order to open a door in order to finish the map.

The gameplay is a few steps down from Eroom. Encounters are a lot more generic than Eroom and weapon flow leans more towards the typical Pistol, Shotgun, and Ripper you see in many other maps.

The rooms in Fight for Life are much tighter than the ones in Eroom, meaning that combat in them usually devolves into stunlocking with the Ripper or Freezethrower if you don’t have the Shrinker or Devastator to mix things up.

Combat in map is very easy, even on Come Get Some. There are few heavy hitters and the weaker enemies in the map are spaced far enough that you’re in little danger. I will say that, like Eroom, the map gives you plenty of opportunities to have fun with the Devastator if you find the secret one.

Thankfully, map flow is simple and easy to understand. Keys are placed in obvious spots and there’s little chance of getting lost due to how small the map is and good signposting.

The secrets in this map are simple to find. I usually suck at finding secrets, but even I got all of them on my first run.

I found that a vent opening wasn’t accessible by jumping into it from below in EDuke r10168. It’s just a small shortcut, so it’s not game breaking.

Fight for Life isn’t a bad map, but it’s a few steps down from Emergency Room. Eroom has a spark that Fight for Life just doesn’t have. It’s still worth going through.
4

User is offline   Quacken 

#14

I'm probably skipping Fight for Life 1.1 as I don't really feel like installing DukePlus. Trying to comprehend how regular Duke 3D's files work frequently gives me headaches as is. So in that case, it's on to Dukerminator and Reginukem's final act:

Water Sistem

Oh no, it's.. a siwer! Now that you're playing the Dukerminator TC, you get to see the "world" through a "fresh" pair of eyes. I get what Reginukem was going for, and it's admirable for sure, but also this new HUD sucks ass. It displays a variety of useless information on your screen like pop-up spam, flashes a bright light on you every 20 seconds whenever you're low on health, the kill and secret counts that can be toggled on with eDuke32 are now illegible, the crosshair is comically large and isn't transparent enough, and you have to play these maps in an extremely eye-straining red filter. I played both of these maps at 10:30 PM and I regretted every second of it. This map's not any better either. Water Sistem is baby's first sewer map that would be forgettable and bland under normal conditions, but is rendered excruciating with all of the bullshit you have to deal with from the HUD. The new weapons included with the TC are at least a little interesting, I guess. The Pistol has been replaced with a much faster Shadow Warrior Uzi that... regrettably works way better here than it does in Shadow Warrior. Less overall DPS, but you don't have to stand still like a dumbass waiting for a Ninja to die. The other weapons aren't anything to talk about though, because they're all just reskins of the regular weapons. They do however have smaller clip sizes, not that that really matters because there's no ammo in this map. Or health, too. There's only one new monster in this map and it's this big walker mech that I'm pretty sure is from Strife. It uses the Cycloid's roaming sounds, the Overlord's death sound and it fires pellets at you. There's two of these guys and they will swallow all of your ammo if you try to take them on. I recommend just avoiding them. Visually speaking, you're already pretty creatively bankrupt if you do decide to make a sewer map, but Reginukem didn't even really try. I think this was a Doom map first and then it got converted into a Duke map second, considering it's mostly flat and doesn't really use any of Build's features. If you give me two hours, I'll have a version of this map playable on Crispy Doom. Water Sistem needs to be avoided at all costs.

1/10.

The Corral

Why oh why did Reginukem decide to put these two maps in E2L10 and E2L11 of all places? Why not just put them in E1L1 and E1L2? No idea. After a tedious start where you're forced out of an Uzi and spawn on an electric surface, once you go through the staff doors you have a map that is not even really a club like it tries to make you think. The club area where the actual patrons visit gets one fight, and then the rest of the map is... something? I don't even know. The last two thirds genuinely feel like a SLIGE map. It is about as generic as a "Duke 3D building" you could get. The same white drywall texture populates every wall, and every room is the same shelf everywhere that hides random items. I'm convinced the area with the car and the Commander is designed to softlock you. Once you jump down, there's nothing in this area you can use to get back up. I had to DNCLIP up to the place where the red key was. This map and the last one also just end. This map ends when you walk up to a bike past the blue key, and the other map ends when you find yourself in a street. I accidentally found myself finishing Water Sistem and I didn't want to play the map again so I could 100% it. The Corral is a forgettable map made worse by your awful HUD.

2/10.
3

User is offline   FistMarine 

#15

Glad to see more people joining in. Anyway, it's time to review the 2003 maps: three maps by Reginukem and one map by Stephano.

Computer Mega Core

A somewhat simplistic map inspired by the game Terminator: Future Shock. I never played those Terminator games, so I don't know how accurate this map is. Also be sure to grab the box of Pipebombs that are right behind you at the start.

Anyway, I think I remember playing this map a decade ago and having a bad time with it but this time with my improved skills, I didn't have much trouble with exception of the Mini Battlelords spawned in the cramped corridors at later points of the map. Because of that, I actually managed to die THREE times, two from those Mini Battlelords spawned in cramped corridors (one death was actually caused by falling into inescapable electrified floor but the Mini Boss followed me and jumped into the pit to finish me off) and once by falling into pit in the secret area, though this one was done as a curiosity because I wanted to see how deep was the pit.

Which reminds me, there is ONE secret to find, which actually got mentioned earlier but here is the guide anyway: In the corridor leading to the place with electrified floors and Yellow Card, press on the bright wall to open the secret area. But wait, don't go yet! Save in advance and then make a LONG jump because there is a pit and if you fall, you die! After making the long jump, you are rewarded with various goodies: Armor, Shotgun ammo, Chaingun ammo, Shrinker, Holoduke, Portable Medkit. Once grabbing everything, save and make the long jump back.

Overall, this map was kinda meh and easily one of the weakest maps by Reginukem. I didn't have a problem navigating my way through this map and in general ambushes weren't as bad as I expected but it's still nowhere near as good as the author's famous city maps. But at least the midi included was pretty nice and since it was the only Reginukem map with midi included, I decided to keep it in the folder and have it play for the rest Reginukem maps as well.
Attached Image: CMC_4.pngAttached Image: CMC_8.png

Zombie Mall

Unlike the rest maps so far (including most of the upcoming ones to be reviewed) that were played in Dosbox, I played Zombie Mall using JFDuke3D (2005). The reason being the map exceeds the 8 characters allowed to be loaded in DOS and I don't know if DOS Duke3D allows loading maps that exceed 8 characters in their filename (no, I'm not renaming the files to get around the limitation), so I just went to JFDuke3D to make sure the map runs and plays properly. I think I may have played this map a decade ago in EDuke32 but I don't remember much of it, so the map still felt fresh this time around.

Anyway, despite the map's title, there aren't any zombies present. It's just the usual Duke3d enemy roster and the map design is okay, if not somewhat repetitive due to only encountering troopers, pig cops and enforcers. There is also new art included, which adds a bit to the atmosphere. I only wonder why couldn't Steph just give the enemies unique green palettes to make them look like zombies, much like certain Megaton Edition user maps from Steam Workshop that I've played back in 2015 or so. If I remember correctly, the map in question was called Zombie Outbreak.

The only weird thing I noticed in Zombie Mall is that one sound is not playing when using the Blue Card and activating the first lift. It said "SOUND HOVER.VOC[#80] NOT FOUND", which seems to be a missing sound error because the other elevators that require the other cards function normally and don't display an error message upon using them.

I don't have much else to say about the map and there aren't any secrets either to warrant a guide, there's just 146 enemies present initially (and one shark and two pig cops spawned upon killing two babes) and that's it, though I got 152 kills since three corpses got squished below some doors, so you can exceed the kill count as long as you killed everyone else. I didn't do this glitch on purpose, it just happened and after I finished the map, I had to track down the last few enemies, since it is easy to miss some of the rooms that contain them, as they are optional to explore but I still recommend exploring every room because there's lots of stuff to be found.

Let's move on to the next map.
Attached Image: ZombieMall_3.pngAttached Image: ZombieMall_6.png

Urban Reclamation

This map looks familiar, doesn't it? If yes, then chances are you may have watched a video called "Duke Nukem Arena" on YouTube back in 2006-2007 or so. I certainly did and this was the map that was played in that video. Even if I haven't played the map for first time until recently, the map is still nostalgic just by watching that video. The said video can be found here for those interested:


Reclam.map shown in the video is a bit different compared to the public version and it runs in a Team Deathmatch mode with a couple Duke bots and some alternate fire modes for the weapons. I never got to play this mod myself and I don't think it's even available to download anymore, so it might be lost in time.

Anyway, about the map, it is rather short and might be one of the shortest maps of this month from Reginukem. It took me about 17 minutes to complete it with the exploration and slower gameplay I did but it was lots of fun. I don't agree with Quacken's rather harsh review, as I thought this map was pretty good but it sure could have been a bit longer and maybe have a few more enemies appearing at the start. There are only 35 enemies in it, some of them being spawned in the map, so be careful of some stronger monsters appearing in the outdoor area after visiting the buildings.

There are THREE secrets to find:
1) In the south part of the map, where you fight two pig cops and then get ambushed by two enforcers upon collecting an Atomic Health on the box, continue walking to the other building and check the windows near the Large Medkit. You should reach a basement containing NVGs and RPG ammo.
2) Before you jump from one building to another, press on the wall in the left side to reveal a Pig Cop, as well as 2x RPG ammo and Portable Medkit.
3) Before you drop down to collect the Blue Card, look for the crack in the wall, then blow it up to access a room containing Freezethrower + 3x ammo and Atomic Health.

A small advice: when you drop down to the sewer that leads to the nuke button, there is no way back, although you are given a Jetpack earlier in the level, so you should be able to backtrack if you wanted to find the remaining secrets. I recommend saving before dropping down just in case.

Overall, this was a nice little map that was lots of fun and brings me some good memories of watching Duke3D videos on YouTube back in 2006-2007.
Attached Image: Reclam_2.pngAttached Image: Reclam_4.png

Shuttle Service

And now Reginukem brings us a space map. It's pretty alright and there are some clever designs, especially later in the map.

What was unfortunate to me is that the enemies didn't drop ANY ammo at all until the second part of the map (after inserting the Blue Card) and even then the drops were at either extremes, ranging from most/all of monsters in a room dropping stuff to not dropping anything at all. This made the ammo situation a bit problematic early on, I mean I did not run out of ammo entirely or something due to being given some explosives but it did create a bit of a pressure when I had about 50 pistol bullets, a few shotgun shells and no chaingun ammo left, so I had to make all my shots count.

Another important thing to mention is that once inserting the Blue Card and taking the elevator, the previous part of the map becomes inaccessible. So I highly suggest to fully explore the map, though the secrets will show up afterwards, so if you killed everyone and collected everything, you are all set.

Afterwards, you will even find a toilet, so if you struggled with health (though you should be given armor and portable medkit earlier), now it's your chance to heal up! Don't worry as you will get another Medkit and Armor soon enough that there shouldn't be much trouble with the health/armor supplies in this map at all, then the ammo situation is pretty much resolved when you find the other weapons (Shrinker is the only weapon not present at all).

Progression is pretty straightforward and there will be some enemy spawns after completing a few tasks, so always stay on your toes to not get surprise attacked from the spawned enemies.

Oh and at end with the last commander, be careful if you decide to freeze him in the room and want to smash him. Entering the sector ends the level, which is what happened to me first time but since I had saved a few seconds earlier, this wasn't a problem to redo the fight by luring him out of that sector and then freeze/smash him.

Once ready, enter the small room to finish the level and get sent to Hollywood Holocaust, this assuming you play the map in DOS version of Duke3D. Because when an user map ends in a sector tagged 65535, the whole episode restarts from beginning. This was fixed in most source ports, so user maps end normally.

There are TWO secrets to find (they are found in the last few rooms of the map):
1) In the corner of the room with green crates, press the wall to reveal a small compartment containing a Freezethrower.
2) In the room with four space suits, go to where the switch is located and press on the nearby wall. You will access the engine room containing RPG + 2x ammo, 4x Tripmines (weapon) and an Atomic Health.

Overall, this was a decent space themed map. It's way better than CMC but I think I preferred more the city maps made by Reginukem. Though this space map looks promising and I would have liked to see Reginukem make more space maps.
Attached Image: Service_2.pngAttached Image: Service_7.png

This post has been edited by FistMarine: 21 September 2023 - 02:10 AM

6

#16

Computer Mega Core
Visually, the map is mixed. The large area with the moving platform at the start of the map and the hallways with an angled roof is really cool, but the rest of the map is samey corridors, or worse, blocky rooms with weird architecture that feels like it came from a poor man’s Dark Forces map. I like the mappers usage of walkways you can go under, even if they have little effect on the gameplay.

The map has problems making switches distinct. I spent a few minutes wandering around like an idiot because a vital switch nearly blended into a wall due to the blue lighting in it. I figured out that I should look for switches when I’m in a boxy room with blue lighting afterwards, but it was not fun figuring out what the hell I was supposed to do on the first one.

Difficulty depends on if you find the easy to discover secret Shrinker. If you do, the map is a cakewalk since the map gives you plenty of Shrinker ammo and rarely has more than two enemies attacking you at once. if you don’t, it’s still going to be generally easy, but you’re going to be spending some time hopping in and out of cover to kill mini-Battelords with the RPG and Devastator.

I liked how much time the map gave you with the Freezethrower in the first half. Not a lot of maps really feature it, but this one did. I wish there were some ammo pickups for it in the second half just so I could use it more. It’s not like there’s a serious ammo drought in general that requires it, but I just like using the Freezethrower.

I’d say the map is overall ok. You’re not missing out on anything by not playing it, but there’s enough fun stuff and cool visuals that going through it is worth trying.

Urban Reclamation
The standout elements are the brush-based cars and construction equipment in this map. Reginukem took great care in making them look good, and it shows. The large bulldozer in the map is awesome and the cars are quite snazzy too.

There’s also some neat detailing here and there, like lots of fake RoR behind the main two buildings, a garbage bin with detailed rubble in it, and small chunks of a building on the ground.

Unfortunately, this eye for details doesn’t extend to the building interiors. They’re underdetailed, and despite being condemned buildings, they look pretty clean. Kind of a shame, really.

The overall theme and visuals reminded me a lot of the streets chase section in SiN since it features derelict buildings with (de)construction equipment laying around and a large street section. I wonder if it was an inspiration?

Gameplay is very simple. The Pistol’s very high accuracy makes short work of most of the outdoors enemies, while the Ripper and Pipebombs make the indoors areas a breeze to go through. The map loads you with more than enough Devastator ammo to clear out the final encounter with ease. The onhly gameplay-related problem I can see is that there’s a Ripper at the start that blends in with some trash cans at a distance. If you’re not the type that likes to explore or you don’t destroy trashcans in Duke 3D maps, you’ll probably miss it.

This map has some problems with random explosions out of the blue. A scripted sequence has a building explode…but for some reason, has two explosions that happen on the left side of the building a few seconds after you think the sequence was done. I wasn’t happy about suddenly taking damage when I thought the coast was clear and that I could get near the building. A more egregious issue is the Devastator room, where explosions suddenly occur once you pick up the Devastator. There are no indications that explosions will happen nor is there any way to keep yourself safe from them. It is not fun eating over 70 HP worth of damage out of the blue with no way to mitigate it.

There are three secrets, but I was unable to find any of them. I suck at finding secrets though.

Urban Reclamation is one of those maps where you play it for the neat visuals, not the gameplay. However, the gameplay is simple enough that it doesn’t make the experience a chore, unlike other visuals-focused maps. Recommended just to see the neat details.
5

User is offline   FistMarine 

#17

Alright, time to review the 2004 maps just in time for the weekend. This time, three maps by Steph and one map by Reginukem.

Jungle Tour 2

Before I review the map, here is a small nitpick: unlike the first and third map in the series that use the Junglet/JungleT3 filename, this one is instead named Jtour2. I know, it's a bit inconsistent and had to point this out for people interested in little details like these.

Anyway, this is a long action packed jungle themed map that may take you at least 30 minutes on the first playthrough, despite being mostly linear. It contains plenty of enemies, mostly in the form of troopers, pig cops and enforcers. There are also plenty of resources to deal with them.

I strongly recommend to grab the items carefully and make full use of each of them (e.g. grabbing health packs when at around 70 or less health and armor pickups at around 20 or less). That's because you will be getting shot a LOT in this map, though that's not a bad thing because that's why there's lots of supplies available. RPG, Expander (ammo) and Trip Bombs are the only weapons that are absent.

Don't forget that the pistol is very accurate and will greatly help sniping against enemies from far away. This is to compensate the fact they can also snipe you, although you should make sure there is no object blocking your aim (such as trees), so you don't waste ammo for nothing.

It is important to note that that the map has a couple notable bugs. One serious issue, which is mentioned in text file, is that if you don't align yourself in the middle of the sector before submerging in water, you can get squished. This didn't happen to me thankfully but I still recommend saving in advance to not have a nasty shock if you get suddenly killed.

The map includes a couple files (new sounds, new midi, new art) and I got the bananas from Duke Caribbean appearing in the map, which can't be picked up, they are just used as a decoration and adds to the map's atmosphere. But at same time there are a few brick textures placed in some corners of the map, which lower the map's quality for me. I have no idea if this was a mistake from the author or a glitch caused by playing the map in DOSBox, as it's not mentioned in the text file at all. I assume DUKE3D.EXE was running "out of memory" due to how lengthy the map was, which meant that some objects may have been replaced by the default brick texture.

Besides the two issues mentioned eariler (misaligned water sectors and some brick textures appearing), I haven't encountered any other problems. Okay, I had one Shrinker projectile clip through me, though this one worked to my advantage because I didn't see the Protector firing at me from far away and it made me jump a bit from my chair when the projectile approached me.

When reaching the last part of the level, approach the helicopter to finish the level and get sent to Hollywood Holocaust! That's if you are playing the map in the original executable, as I mentioned in the previous post.

There are THREE secrets to find (secrets two and three are located at short distances from one another):
1) Inside the cave with Octabrains and Shrinker crystals, dive down the water and follow the tunnel until you resurface into a secret room guarded by two troopers. Inside you can collect Atomic Health, Pistol, Scuba Gear.
2) When you enter the church, jump on top of the pillar to collect an Atomic Health. It will also slowly reveal a nearby secret in the corner. Jump inside to collect Shotgun ammo, Steroids, Armor.
3) In the room with the Holy Water and two Octabrains, go behind the waterfall to find a Chaingun and 2x ammo.

Overall, Jungle Tour 2 was much more interesting than the first Jungle Tour but on the other hand, it was quite long and repetitive, dragged down a bit by some glitches. Now let's see how the sequel compares.
Attached Image: Jtour2_5.pngAttached Image: Jtour2_7.png

Jungle Tour 3: Ice Age

A cool map taking place in a snowy forest. It has custom art, music and such. Just like the previous map in the series, it is quite long and packed with enemies! However, it is also very generous with the health/armor/ammo supplies that you will be able to find scattered almost everywhere.

The only problems with this map is that unlike the previous one which had a few unique parts of the map and much more varied gameplay, this one is much more repetitive, since you only get access to the three main weapons (Pistol, Shotgun, Chaingun) fighting against three types of enemies (Troopers, Pig Cops and Enforcers). Though the troopers can come in both varities but my point still stands because it is quite a downgrade in gameplay from Jungle Tour 2 which had included almost all weapons and a couple more enemy varieties. Not to mention after a few minutes, you will want to see more varied designs of the map instead of only snowy terrains and caves.

Also the Portable Medkit is the only inventory item available in the map (there's about five of them), as well as a couple Atomic Healths present too, so you will have more than enough health available, as long as you maintain it at 50 or higher to avoid surprise deaths from the enemies, especially when you are continuously getting shot from multiple sides.

Since there are NO secrets to find, here are my advices instead:
-Grab the armor as soon as the map starts.
-The trees will block both the shots fired by player and enemies. Try to use it to your advantage by hiding behind a tree when fighting pig cops and enforcers.
-Try to use the Pistol to snipe enemies from far away, especially troopers.
-Try to collect the health/armor/ammo supplies when you actually need them to get their full effect: grabbing health packs at around 70 or less health, grabbing armor when it's about 15-20 or less remaining, etc.
-Try to memorize some items that you come across and don't need at the moment, so if your health drops to about 70 or less or your armor is about to run out, you will know where to go and then immediately return to the action.
-Watch your health because there is a rare case where you can get shot while grabbing an item, which will cause the red flash to get hidden behind the green flash.

Unfortunately, one enemy from the map disappeared at some point. I killed 239 enemies and one is missing somewhere, possibly a red trooper disappeared or got stuck into the wall or something similar. Might also be the cause of a few times I had to backtrack for health during a few fights or some trooper decided to simply play dead and then disappear when I got further in the map. Too bad about that, as I was hopeful I would get all the kills, considering in every map so far I got all kills.

Also due to the nuke button being assigned a different palette, exiting the map will just cause it to restart, so you have the option to replay the map with maximum health, armor, ammo and medkit. This can be considered a New Game+ mode and might be worth speedrunning through the map just to try to get all kills in the map if you weren't able to do that the first time. I think finishing the map the second time will reach a definitive end. I might consider doing this later if I feel like replaying the map or loading my save and wandering around the map to see if the enemy shows up, though I already tried that and still couldn't find that enemy even after 10-15 minutes of searching.

On a more positive note, this map had no more glitches occurring. There were no bricks placed anywhere and the water glitch doesn't exist here because you can't submerge in any of the waters in first place.

Overall, the map was pretty cool (pun intended) but it suffers from being very repetitive much more than Jungle Tour 2 was, especially due to restricted enemy and weapon usage. And the single missing enemy did leave me a bit disappointed in the end, though this is more the game's fault rather than the mapper's fault because I am very sure there are 240 enemies in total, unless Steph accidentally placed an enemy out of bounds. I know I've played maps before that had enemies accidentally placed out of bounds, so it's either that or some smart trooper who decided to disappear during the game.
Attached Image: JungleT3_1.pngAttached Image: JungleT3_5.png

Crane Chase

A very short boss map by Reginukem. It seems better suited for Dukematch but it is playable in Single Player as well and tasks Duke to kill the Cycloid Emperor. Depending on the difficulty settings, you get:

Piece of Cake: Cycloid Emperor
Let's Rock: Two troopers added (one red and one green)
Come Get Some: Two sentry drones added
Damn I'm Good: Two pig cop tanks added

Therefore, the difficulty settings are implemented a bit similarly to the original E3L9: Stadium that only resulted in adding a few more enemies on higher skills.

Anyway, once you killed the monsters and defeated the Cycloid Emperor, you will get the Battlelord cutscene, as is the case with all user maps due to using the E1L8 slot.

There are no secrets to find. Not much else to say, as it was a very short map.
Attached Image: crane_1.pngAttached Image: crane_2.png

Gotham's Industrial District

Due to map exceeding 8 characters, I played using JFDuke3D (2005). The only annoying thing is that the game crashed about two times but since I saved often, this isn't that much of a problem. JFDuke3D is just glitchy at times.

The map seems a bit familiar, as I clearly remember playing it before, although there is a chance it might have been with the Attrition mod. Now that I played it without any mods, it is fine for the most part, although gets a bit exhausting towards the end.

The map is relatively challenging and the health packs will all come in handy when you get hurt, although there are even water fountains to be found, as early as the first few seconds, so health shouldn't be a problem in this map at all. Armor is also very common and there is one right at the start in the container, so don't miss it. Ammo is also abundant for most weapons.

There is only ONE official secret to find: in the room containing the Shrinker with Expander ammo, press on the middle wall to access a compartment containing a Pistol.

Unofficial secret: in the room with THREE switches, press on the panel to access a compartment containing a Turret, Large Medkit and Armor.

Both the official and unofficial secret are found relatively early in the map in the first couple minutes or so.

RPG location: the first RPG is somewhat easy to miss (I found it AFTER I got the Yellow card). When getting to the large outdoor area, before you get any of the cards, look in the right side and you should simply see a RPG sitting there. You get another RPG before you fight the Mini Battlelord but having the first one may be useful against Pig Tanks and Commanders, although the latter are better killed with the Shrinker.

Overall, this map was fine.
Attached Image: GDistrict_1.pngAttached Image: GDistrict_6.png

Have a nice weekend everyone! :)
5

User is offline   Quacken 

#18

You get yet another two maps from me. So far I've been thoroughly disappointed by Reginukem, so let's see if Stephano Lessa can pick up the slack.

Go Back Home

This is the first map in Stephano Lessa's line-up, and "humble beginnings" puts it lightly. A good handful of Steph's maps include custom MIDIs, which is always appreciated. In fact, the MIDIs are probably the best part of both of the two maps featured in this post. This heavy metal guitar riff won't win any awards, but it's just good enough to not sound draining or repetitive. The map being only about eight minutes helps with that too. The progression in this map is a bit weird. You can exit right away once you end up in the street, completely bypassing all of the key doors. But if you do exit, you're kind of missing out. Half of the monsters are stuffed in three office complexes in repetitive fights. Multiple doorfights in a row is a pretty bad habit that Steph develops both in this map and in Jungle Tour 1, and it's a lazy way to pad out the runtime. Just as well it's optional, I guess. The combat, much like the doorfighting, is repetitive and won't leave a lasting impact on you. Just Shotgun away everything, because nothing in this game besides a Battlelord or a Pig Cop Tank effectively answers the Shotgun. Go Back Home is an auspicious albeit uninspired start to Stephano Lessa's run.

6/10.

Jungle Tour

Pictured: Not even a jungle. This is more of a canyon than anything. Jungle Tour's theming complexes me because the stock Atomic Edition textures can't do nature scenes very well, despite how much they yearn to. Steph tries their best here, but ultimately their attempts come off as being a bit slapdash. I do like the added emphasis on verticality and the Jetpack, however. Some spots you need to fly to aren't really textured very well though, and in particular I got stuck past the Yellow Key for quite a while until FistMarine's review gave me the clue I needed. That's partly why these reviews took so long. After the "jungle", Steph tosses you into yet another office complex, yet another ring around of doorfighting, but to spice it up this time, you've got to find four partially hidden switches to open the way forward. The back half of this map is bad, and it feels pretty anticlimactic to enter a muted gray box with bland texturing and no height variation. The best thing about this map is probably the MIDI. It's quite relaxing I would say, and it helps to make the agitating parts of this map a little better. I'd be able to squint if Jungle Tour was named after a canyon, but it feels held back by relying on the Atomic Edition assets.

6/10.
3

#19

Shuttle Service
As you’d expect from a typical Reginukem map, the visuals are quite good. The spaceport you can see through the windows at the start of the map looks great with its size and the nice looking space shuttle you can see. The shuttle interior is nice, with the standout section being a detailed passenger area with good-looking seats, screens you can bring down via a button, and a cool pseudo-RoR effect with sprites that lets you walk under the floor in order to reach the engine room. The cargo hold is a little lacking compared to the other areas because it’s large, but doesn’t have the kind of detailing you’d expect for such a big area. I’m guessing this was to give the player plenty of room to move around while fighting enemies, but there aren’t enough enemies in the area to justify so much empty space and the map has no problem throwing enemies at you with no room to maneuver around.

The map’s gameplay is generally focused on dealing with enemies in very close quarters, with areas having little space to move around in. Most rooms contain only a handful of enemies, if that, so the lack of space isn’t a problem. Most of the opposition in the map are Liztroops of various colors and Enforcers that are placed in way that you’re not overwhlemed. There is a bit of Enforcer spam at the end where you’ll probably have to eat a bit of damage to take them out, but it’s the end of the map; it can be dickish. It’s not like you have anything else to use your supplies on at this point. ;)

I had no problems with map flow. There’s one weird part where a critical switch appears in an awkward spot after pressing another switch, but there’s a nearby camera that helps you spot it. Still wish the button appeared in a more obvious spot, but it’s not a big deal due to the hint.

Shuttle Service seems to love switches that can only be used by shooting them for some reason. One of them should easily be openable by using it, but nope, you gotta shoot it. Why? There’s also a switch near the end that requires you to, of all things, kick it. I thought the map was bugged and used noclip to use the button when I first went through the map, but went back and checked after another user here mentioned it can be kicked, and indeed it can be. Once again, why?

One thing I wasn’t happy about was how often you’d enter a small room and be face to face with an Assault Commander. It’s fine as a jumpscare, but it gets annoying when it keeps happening.

The map has two secrets, one of which I was able to find.

I liked this map, even though the the tone of this review might suggest. Gameplay is good and the detailing is nice for a map made in the early 2000s. It’s one that I’d happily recommend that newbies or vets play.

Crane Chase
Crane Chase is a typical boss level against a Cycloid Emperor and four irreverent Liztroops.

The real strength of the map is, once again for a Reginukem map, the cool brush-based vehicles and details. There’s a really neat crane on its side found in the map that looks awesome and several cars that look nice too.

The map’s blue sky looks out of place with the carnage on display. It’d look better with a darker sky, like the one used in Critical Mass, and more foreboding lighting.

As far as gameplay goes, the game is extremely simple. There’s an absurd amount of cover for dealing with the boss to the point where I was able to easily find a spot that made it very hard for the Cycloid Emperor to hit me. The weapons given are adequate, but I had to finish the Cycloid Emperor off with the Shotgun due to a lack of heavy weapon ammo. I did like how supplies were behind the boss and there wasn’t too much room between the boss and the supplies, encouraging the player to pop Steroids in order to quickly grab them before eating one of the Cycloid Emperor’s rockets.

Crane Chase is a very simple boss map carried by its really cool details. It’s worth a playthrough if you want to look at some cool vehicles made entirely in the editor, but it can be otherwise skipped.

Center for Disease Management
This is a re/demake of a map from Blood 2’s campaign to Duke Nukem 3D.

The map’s layout plays into Reginukem’s skill of making fake RoR via sprites. There are several walkways that make full use of this feature, which is really cool.

Unfortunately, the rest of the map is visually lacking. Most of the map consists of blocky corridors using the same gray textures over and over, making the map feel repetitive when it shouldn’t. Oddly, the roofs of these hallways have some good details. Using more visually interesting textures and adding details to otherwise-plain hallways would go a long way to make this map more visually memorable and easier to go through.

CDM brings Reginukem’s worst gameplay habits into the forefront. You will be ambushed by Assault Commanders and Sentry Drones at very, very close ranges and there is little you can do about it. Some of the Sentry Drones are almost required damage due to how little time you have between seeing them and them exploding in your face. The Assault Commanders are less of a problem since the map gives you a Shrinker early on and there’s enough of a delay between when a Commander sees you and when he shoots a rocket. It’s still annoying. The rest of the enemy placement is fine and works good with the cramped and blocky architecture.

There are two other problems that don’t really fit anywhere else. One, the game drip feeds you Freezethrower ammo, but only gives you one near the end of the map, where there’s little to use it against at that point. Wha? Second, there’s a random bit of the map early on that will explode for no reason, which can kill you because you’ll usually be very close to it when it goes off. What’s the point of this? All it does is piss the player off.

Map navigation is fine for the most part. However, near the end, there’s what I’m guessing is a freezer. Inside it is a crane the player has to be picked up by in order to proceed. There are some problems.
1. The only way to tell that there is a crane is by looking up and guessing, based on what looks like E1L4’s crane tracks on the ceiling, that there’s a crane above you.
2. Find the spot the crane picks you up from, which is a red block next to a ladder, and figure out that a crane will grab you there.
3. Wait long enough for the crane to make a long trip to pick you up. I thought it was bugged the first time I tried it so, I moved away and didn’t see the crane in time.
4. Once you’re picked up by the crane, you’ll travel forwards while a Liztroop takes potshots at you. If you don’t have the Pistol out when the crane picks you up, you’re guaranteed to take damage from the monster as the crane travels to its destination.

It’s really dumb and very un-Reginukem like. I wonder if this was an issue taken from the original map.

Like Shutter Service, I found one of two secrets. I’m sure one of them is the RPG in a small room with Octabrains you can see, but I was unable to find a way to open the door to the room.

This map was disappointing. The detailing and gameplay are a step back from Reginukem’s previous works. I wonder if part of the problem was following the original map’s architecture and design TOO closely. It probably would’ve been better if he made a map made in the original’s spirit, but designed in a way to take advantage of Duke Nukem 3D’s enemies, weapons, and art instead doing what seems to be a fairly straight port. I don’t recommend it.

This post has been edited by MYHOUSE.MAP: 23 September 2023 - 08:03 PM

3

User is offline   FistMarine 

#20

Time for the two remaining 2006 maps and one short TC from 2004.

Center For Disease Management

This map does NOT work in either Duke3D v1.5 or JFDuke3D 2005! In Duke3D, trying to select the map from SETUP.EXE or using the parameters "DUKE3D.EXE -MAP DISEASE.MAP /S3" will refuse to load the map and then exit the game with the error "Map DISEASE.MAP not found!". In JFDuke's case, selecting the map from the User Map menu will start for a second but then crash the program as soon as the map begins!

Therefore, I had to play this map in a very old EDuke32 version (EDuke32 1.4.0 Beta 2), which is from 19th July 2006. The main reason is that I wanted to make sure things work and used an executable appropriate when the map was released and this was also the last EDuke32 version before it began the SVN builds/branches where you just choose a random EDuke32 build.

I did this because there is a chance the map would have glitched in newer EDuke32 versions and I didn't want that happening, so I wanted to just make sure it fully works. And it did, no crashes or anything, the map is able to be completed 100% and this EDuke32 version even comes with WASD + Mouse controls enabled by default, which is pretty nice, so I don't have to play keyboard only like I did in DUKE3D.EXE and JFDuke3D. I also used the mini HUD this time. The only annoying thing is that pistol accuracy sucks (seems to be a bug in this eduke32 version) and when the map is finished, you are still sent to Hollywood Holocaust, just like in DUKE3D.EXE and JFDuke3D. It wasn't until later EDuke32 versions these issues were fixed. Although the eduke screenshots still appear to be dark, despite having the gamma raised in game.

The map appears to be a recreation of a Blood 2 map. I never played Blood 2 but judging from most people's opinions, it was a crappy game, so I kept my expectations low for this map. And despite that, I still got frustrated by a few things, namely some cheap traps with explosions in your face (some of these being sentry drones and/or commanders spawned behind you or whatever) and the lack of armor until near the end of the map. No, there are no pig cops in this map to help you with some used armor.

While there is a decent amount of health and ammo available in the map, I still died about five times, mostly from the explosions, the crushers (I realized later you can turn them off) and the Mini Battlelord towards the end where we both killed each other at the same time. I wasn't annoyed by the Freezer being given late in the map because like I said, I had just about enough ammo for most weapons, even though I didn't find the RPG until I was done with the map but at least every weapon is available to use and the early Shrinker is appreciated.

The lack of armor can bite hard because there will be times you will take loads of damage and be low on health but at least you are given a Portable Medkit relatively early and there are even two hidden Atomic Healths in unofficial secrets that are listed below, alongside the official ones, so health is actually plentiful if you know where to look for it. The armor itself is given far too late in the map, where you are most likely only having five more enemies to kill, therefore its existence is pointless and should have been placed much earlier in the map.

There are TWO official secrets to find:
1) Near the beginning, there is a room with a few aliens and a switch to unlock a nearby room containing a box of Pipebombs and a few tripmines (weapon). After getting the explosives, go back in the other room and look for a crack in between those computers. Blow up the crack to collect an Atomic Health.
2) In the middle of the map, there is the room where you press the switch to stop crushers. The same room has SIX computers. One of them looks like it has some lights turned on. Crouch and press on this PC to temporary open a nearby door. Enter inside that green room to collect an RPG. Blow up the crack to escape the room.

Unofficial secrets:
-In the room containing the Shrinker and ammo, press on the shelf in middle to move it and collect an Atomic Health.
-In the area with the Devastator and red water, swim and surface in the tube to collect an Atomic Health.

Notes:
-I recommend saving often in this map, due to frequent cheap traps and the possibility that some monsters may disappear off the map (see below).
-Halfway in the map, there is a Red Trooper standing on the edge of water. You can't reach him at this point and if you let him see you, he will eventually disappear. There is a high chance he will fall in the water while invisible and if this happens, he may not appear again and prevent you from getting 100% kills. What you must do is try moving alongside the wall to NOT be seen (keep your distance from the windows) and when you finally reach that water room, you should kill him quickly.
-After using the Blue Card, kill a few enemies and stand in the red spot to wait for a crane to pick you up. Kill the trooper waiting for you at the stop and wait for another crane to pick you up.
-It is possible to backtrack from the end all the way to the beginning, as long as you don't mind taking quite a bit of falling damage.

Overall, this map was meh and some issues dragged down the map considerably, such as not testing it in the right port. This is why you should test your maps properly before you release them. Nowhere in the text file it mentions that EDuke32 is required, while at the same time claiming that JonoF (JFDuke3D) is NOT required, therefore adding to the confusion.

The zip file comes with two screenshots inside, which are comparisons between the original Blood 2 map and the Duke3D recreation. The Duke screenshot shows the map was being played in EDuke32 with HRP mode on, which finally explains the author only tested the map in EDuke32 with HRP on. No wonder it didn't work in the DOS executable.
Attached Image: disease_3.pngAttached Image: disease_6.png

Twilight City

Due to the map exceeding 8 characters, I played using JFDuke3D (2005). The map may actually require a source port anyway.

This map is similar to Gotham's Industrial District and I think it's pretty okay overall, though slightly more challenging at times, as you don't get an armor immediately and you will have to make sure you don't take too much damage early on because the health can be a bit scarce until later parts of the map. Don't forget to smash the trash cans you come across, as they may contain helpful supplies inside.

There is only one secret to find: Early in the level, near the very first armor pickup, press on the nearby window in the left side of the room, to open a room containing a Pistol, Small Medkit and NVGs.

I don't have much else to say other than it's okay.
Attached Image: twilightcity_2.pngAttached Image: twilightcity_5.png

Fight For Life 1.1

I skipped this 2009 map because I'm not going to bother playing the "same" map for the third time and I still haven't finished my current DukePlus playthroughs I started months ago. Instead, I will review the Dukerminator 3D TC by Reginukem, released in 2004.

DUKERMINATOR 3D

When you will start the TC, you will see there are no new demos in the background, just the ones from the Atomic Edition which will desync over time. I'm amazed that the demo player makes it at least halfway through each demo before dying, even if the demos start desyncing a bit early. What more impressed me is that near the end of the second demo (Area 51), the dead player somehow manages to PRESS the button behind the Pig Cop Tanks. No joke, the player was already dead and the beep sound started playing before the tank exploded.

As a bit of a trivia, when the player dies during the demo recording, then the demo playback automatically stops at that point. However, if the demo starts desyncing halfway and the player dies, then the player will stay dead until the demo actually ends. You will see Duke randomly gibbing because most likely the player is pressing the "USE" button at that time, which also has the side effect to close the main menu if it's already opened. In this rare case, we learn the player can still "use" things even when dead, whereas in a normal Single Player game, pressing use causes the level to restart or ask you if you want to load the last saved game.

OK, enough with the pointless demo trivia. I haven't tried to start any of the episodes because they weren't replaced at all and I remembered the readme file mentioning that the new levels are placed in the E2L10 and E2L11 slots for some stupid reason, which means you need to warp to the new maps either by using the DNSCOTTY cheat code or you can reach them with the following parameters, assuming you are playing in the original executable:
DUKE3D.EXE /xGame.con /gDuket2.grp /V2 /L10 /S3
Where the V is the episode number, L is the level number and S is the skill level. Use 10 to play E2L10 and use 11 to play E2L11. Or if using the warp cheat, just type DNSCOTTY210 and DNSCOTTY211 respectively. If you are playing in a source port, just select the two maps from the User Map menu.

Here are a couple very useful notes about the TC:
-Duke is now Terminator, although he still uses the original unmodified Duke sprites.
-The interface is changed and the new HUD/font is quite ugly. I recommend playing with the mini HUD, though you will still deal with the ugly inventory box that is just a black square.
-Crosshair is very big and will block your view.
-There is a red tint that is present the whole time.
-The screen shakes when your health gets reduced to 25 or less, as is the tradition to many old Duke TCs, making it more difficult to recover from the enemies' attacks.
-You can use the electric panels to restore 30 HP. This can actually be done as many times as you want but you need to wait a little while before you can use them again.
-Some enemies and weapons are modified.
-Some weapons deal more damage but this also makes certain enemies deal more damage as well.
-Some weapons seem to borrow/edit/use sprites from other Build games like Tekwar, Witchaven, Shadow Warrior and NAM.
-The big ass robots from Strife, which are called Inquisitors, replace the Mini Cycloid Emperor and spam lasers and octa blasts at you, killing you very quickly if you are exposed to their fire.
-Enforcers no longer drop anything upon death.
-Grenade Launcher replaces the Shrinker and launches Battlelord mines at the enemies, which sometimes explode on contact. Use this weapon against the stronger enemies.

Water Sistem

A sewer map? Ugh, this map was painful and really ugly. I also got the Machinegun and RPG late in the map and had problems with ammo and health at times. It is still possible to kill all the enemies, including the THREE robots (yes, there's 3 of them) but you need to have a bit of luck with troopers dropping some pistol clips because the enforcers don't drop anything and even if they dropped ammo, the Chaingun (Machinegun) is given quite late in the map, although much better than not being given at all.

If you don't find the hidden RPG, you will suffer and run low on ammo a couple times. The health pickups are also somewhat scarce, with the Large Medkits using new sprites that make them harder to see and blending more in the background. Armor, Atomic Health and Portable Medkit are unchanged and appear in the map (three armors, two atomic healths, one medkit).

With that said, it is still possible to get all the kills in the level but I highly suggest to save your game often because this map will kick you in the stomach multiple times.

There are no secrets to find but here is how do you access the much needed RPG: In the room containing an armor, there is a switch on the wall. Press it to temporary open the nearby hatch.

Unfortunately, due to the sector tag 65535 type of exit, instead of advancing to E2L11, the whole episode restarts from the beginning and you get sent to Spaceport.

Overall, this map was awful and gets minus points for awful balance and for misspelling.
Attached Image: Duket2_e2l10_1.pngAttached Image: Duket2_e2l10_2.png

The Corral

Duke starts this map without weapons. Not that much loss if played from scratch because even if it was possible to continue from the previous map, the player would have lost everything except the extra health, assuming Duke had more than 100 health at the end.

On the bright side, this map is much easier and contains a decent amount of supplies. Sure, you have to kick the troopers inside the restaurant but once you do that, you will find the Shotgun, then later the Uzi and things will be much better.

I am not going to talk about the whole map but I will say that jumping on top of that car to reach the Red Card room is extremely difficult and can take you a few minutes to make the jump. You don't need to cheat even if it looks like cheating may be required to progress, you just need to time the jump correctly and Duke will eventually reach the window.

I recommend saving before killing the Commander, so you can attempt jumping on the Commander's head to reach the window, although it's unreliable and can get you killed. That's if you haven't already killed the Commander, in which case just keep trying to make the jump.

There is only one secret to find in this map and the entire TC: Enter the kitchen and press on the wall to access the secret containing a Grenade Launcher and ammo for it.

And as this level ends in a 65535 type of sector like the previous one, you get sent to Spaceport. No proper ending or cutscene or anything like that. Disappointing ending.

Overall, this map was pretty decent and showed some promise. Just a shame it is paired with this crappy TC.
Attached Image: Duket2_e2l11_1.pngAttached Image: Duket2_e2l11_2.png

In the end, Dukerminator 3D is an experimental TC that really hasn't aged well and it is very frustrating to play nowadays. Although the second map shows some promise, the first map is so fucking awful that it will discourage the players to play further. Which is a shame because the second map is okay and is worth playing through once.

Quacken also made some really good points about the TC. Why does it start with E2L10 and E2L11 instead of E1L1 and E1L2? And even then, you can't carry your stuff to the next level because once you finish any of the maps, you are sent to Spaceport. I realize this reset episode behavior may be a bug in original DOS version of Duke3D (it only seems to work properly in the addons DukeDC and NWinter) and might not be present in newer source ports but my point still stands.

And the various issues that persist make me think this TC was released as unfinished. It is nice that it was released instead of not being released at all but it just wasn't that much fun to play and reminds me of the many old crappy/mediocre TCs that exist for Duke Nukem 3D.

I only recommend checking this TC as a curiosity. But if you want to only check good maps/mods, then skip this one.

And thus all the Reginukem maps have been reviewed, besides Fight For Life v1.1. It's a shame that the author's works ended on a somewhat disappointing note, as his best works are some of the earlier ones. Would have liked to see Reginukem active these days and make newer maps that hopefully turn out very epic.

I will leave the Industrial Complex Episode review for the next time, most likely later this week.

In the meantime, here is the only nomination for the next month and my vote for it:

Maps by Aymeric Nocus (aka CK3D/MRCK) +

To vote, highlight the text in bold and add a + next to the choice. In this case, there is only one nomination, so you have only one choice to vote. :P

This post has been edited by FistMarine: 25 September 2023 - 07:55 AM

3

User is offline   Aleks 

#21

View PostFistMarine, on 25 September 2023 - 07:45 AM, said:

In the meantime, here is the only nomination for the next month and my vote for it:

Maps by Aymeric Nocus (aka CK3D/MRCK) +

To vote, highlight the text in bold and add a + next to the choice. In this case, there is only one nomination, so you have only one choice to vote. :P

I'd suggest adding something else to the poll just for the sake of having some choice, otherwise the voting doesn't really make much sense... Maybe e.g. DukePlus maps, HighTreason maps, Puritan maps?
2

User is offline   ck3D 

#22

Maps by Aymeric Nocus (aka CK3D/MRCK) +
Maps & episodes by Aleks Pistol/Ledsbourne +

Going to throw that one in there especially because Aleks has been working on some really cool looking maps lately so would be timely, both as a teaser and for him to get general feedback re: approach to gameplay which may be inspiring.
2

User is offline   Radar 

  • King of SOVL

#23

My vote is for just MRCK maps next month.
2

User is offline   Quacken 

#24

So I just lost all of my work on the reviews for Zombie Mall and Jungle Tour 2 in a freak accident, and my motivation has jumped off of a cliff. However, I still need to push these reviews out, so you get the cliffnotes versions for these three maps. Maybe later tonight I'll do another post for the other two before Industrial Complex.

Zombie Mall, Jungle Tour 2 and Jungle Tour 3

All of these maps are very strong visually but suck in terms of gameplay. Zombie Mall has new textures, but is the world's worst doorfighting map with a bunch of stalls that hide nothing but Troopers, Pigs and Lizards. Jungle Tour 2 actually looks like a jungle and has a MIDI from Caribbean, but there's no escalation or pacing at all. You just walk through locations, Shotgun everything and shrink the Commanders. Story of my life. Jungle Tour 3 looks really great for the time period, but its combat is arguably even worse than JT2. Now there's only four basic monster types again! And the hitscanners are in big open areas and are hiding behind trees that block your hitscan. Also you only have three weapons. Is this map randomly generated? I like Zombie Mall and JT2 but I thought JT3 really dragged near the halfway point. I was expecting the monster variety to ramp up, and it just never does.

Zombie Mall: 6.5/10.
Jungle Tour 2: 6.5/10.
Jungle Tour 3: 5/10.

This post has been edited by Quacken: 26 September 2023 - 05:22 PM

1

User is online   Mark 

#25

I say go for the Dukepus maps. Although that would leave CK out of because of Polymer rendering. So something else I guess.

This post has been edited by Mark: 27 September 2023 - 07:30 AM

1

#26

I'm not done yet!

Fight For Life 1.1
Fight for Life 1.1 is a slightly modified version of the original Fight for Life for DukePlus. And by “slightly”, I mean exactly that. The only significant changes are that the red key is dropped by a mini-Overlord that appears in front of the hospital after clearing it out and that the exit button has been moved behind a garage door with an Assault Commander in front of it.

The custom art for this map didn’t properly load and I didn’t care enough to fix it, so I can’t properly grade it on visuals. I will say that its architecture is the same as the original Fight for Life.

Gameplay wise, it’s slightly worse because of the key-carrying mini-Overlord. In the original version of the map, you were able to easily get the red keycard and then go back to the street to finish up the map. In 1.1, you have no idea where the red keycard is, so you wander around like an idiot until you stumble upon the mini-Overlord. It felt like Reginukem wanted to have his cake and eat it too by bringing back the mini-Overlord from Emergency Room and utilizing a DukePlus feature, but didn’t realize how it would affect map flow.

I found myself having trouble getting into a vent at one point. Had to use DukePlus’ mantling system to get in there. Not sure if this is a problem with the Eduke32 build used with DukePlus, but it’s worth mentioning.

FfL 1.1 is a slight downgrade due to the red keycard issue mentioned, despite billing itself as a small improvement. You’re better off sticking with the original Fight for Life unless you really want to fight a mini-Overlord in FfL.

Go Back Home
To be frank, this map looks awful. It’s like something you’d see a young teenager create back in 1996. Doors that don’t look like doors, bizarre buildings mean to look like things like electronics stores or hotels, and a street area with proportions that make you and the enemies look huge are all in wait for you in this map.

Despite the awful texturing and architecture, the actual gameplay is surprisingly solid. Enemy encounters are balanced quite well and there are no bullshit fights. There’s also a decent amount of Newbeasts in the map, which is a big plus in my book because I feel they’re underutilized by mappers. Go Back Home leans more towards being a shooting gallery than your typical map does, but that works well with the simplistic architecture.

There’s one really weird bit with it’s gameplay; all of the keycards are optional. The badly proportioned street I mentioned earlier contains three buildings with keycard-opened doors, but the nuke button is found at the end of the street without any need to open the keycard doors. The optional areas contain a good bit of the map’s enemies and let you go loose with Duke’s more exotic weapons, so they’re worth going through. Your ultimate reward for going through all areas is a group of enemies behind the yellow door that you can wreck with the Devastator. I like destroying large groups with the Devastator, but that’s a really unusual “reward”. Gating a significant chunk of the map’s gameplay behind optional areas is very strange, but not something I’d dock against the map.

Map flow is very simple because of how straightforward it is. There’s no way you could get lost in this map, even if you go through the optional keycard doors.

The only issue I had with the map flow is that a door to a room containing a Devastator and some other goodies uses the same texture that nearby walls use. If you skip it, use the RPG you find on enemies, and don’t pick up the Shrinker found in a nearby secret room, you’re not going to have enough firepower to take down a mini-Battlelord that’s in the red keycard building.

I found three out of six secrets in this map. One of them was a weird room with rotating Duke heads in it and the other was a Freezethrower without any ammo for it. Would’ve been nice to have some rounds to go with the Freezethrower, but whatever.

Go Back Home is a good example of how looks can be deceiving. Its awful visuals hide a fun map. It’s worth a playthrough for some casual fun.

Jungle Tour
Despite this name, this is actually a canyon map that turns into a base when you’re a little more than halfway into the map. The canyon theme works well with Stephano’s mapping style, as he prefers tight areas with minimal texture variation, perfect for a canyon map. The base section looks better than Go Back Home, but it’s still very 1997ish.

Gameplay is pretty good. It starts out easy, as you’ll be Pistol sniping weak enemies at a distance. Around halfway through the canyon section, Stephano starts getting sneaky with Turrets, with the last fight in the canyon section almost requiring some Pistol sniping due to deviously placed Turrets that’ll make things very hard if they see you. The base is generally easier than the canyon since you’ll be swimming in Shotgun ammo when you start it and you’ll get a Shrinker in the middle of the section that trivializes the small amount of enemies you’ll be facing.

The most unique thing about this map’s gameplay is how the first half requires you to use the Jetpack. You use it in short bursts, but it’s cool to see a map integrate it. There are enough spare Jetpacks laying around and the parts you use them on are straightforward enough that you’ll never reasonably run out of fuel and get hardlocked.

Navigation is pretty simple for the most part, but there are some parts that can be unclear. I got hung up for a few minutes trying to find a way to proceed near the end of the canyon section. Turns out that the way forward was in a cave above the player, but there’s no indication that a cave is there unless you look at the automap near it. Would’ve been nice to have an indication that I should look up and the cave should’ve been more obvious to see. There’s also a hidden button hunt near the end, but it’s easy and signposted well because the first button is very easy to find but still “hidden”.

I found four out of seven secrets. Jungle Tour pulls an E1L2 and has a secret area that’s required for progression for some reason. It’s not hard to find, but why would you do this? The essential switch in it easily could’ve been put in the room before it. I found three other secrets, one of which, for some reason, contained a single Pistol well after you’re loaded with Shotgun ammo. Weird.

I really liked this map despite its primitive architecture. I admit that I love canyon maps, which clouds my judgement, but even if you’re not a canyon map fan like I am, there’s some fun combat and Jetpack usage in it that makes it worth a playthrough.
4

User is offline   FistMarine 

#27

Quote

I'd suggest adding something else to the poll just for the sake of having some choice, otherwise the voting doesn't really make much sense... Maybe e.g. DukePlus maps, HighTreason maps, Puritan maps?

Quote

Going to throw that one in there especially because Aleks has been working on some really cool looking maps lately so would be timely, both as a teaser and for him to get general feedback re: approach to gameplay which may be inspiring.


Aleks vs ck3D? Okay, that's a twist I never saw coming. :D Though even if it's an excellent nomination to go alongside ck3D's, I was thinking maybe Aleks would release more maps/episodes later this year or next year. There aren't enough separate map releases (AlexCity and Submachine are the only user maps), though there's two episodes (Back in Business and The Conundrum) that barely make up for the number of maps, I don't know if they are even 15 maps in total.

Because of the low number of maps, I would have liked to see a few more maps or one episodic release to make up for the number of maps, unless we can nominate Aleks' stuff for next January/February or later if people don't mind waiting a bit more for the possibility to have more maps. I don't know if Aleks is going to release stuff any time soon, I haven't visited the forum too much as of lately, besides playing and reviewing the maps for this topic.

The other suggestions with DukePlus maps, High Treason's maps and Puritan's maps are all interesting and should be saved for sometime next year, as I already have some surprises saved for the following two months, as I remembered some nominations made in past months. Also glad to see MYHOUSE.MAP reviewing Fight For Life 1.1, so this map didn't remain without any reviews this month.

Quote

So I just lost all of my work on the reviews for Zombie Mall and Jungle Tour 2 in a freak accident, and my motivation has jumped off of a cliff. However, I still need to push these reviews out, so you get the cliffnotes versions for these three maps. Maybe later tonight I'll do another post for the other two before Industrial Complex.

Sorry to hear that you've lost the full reviews. I am glad you managed to write something for these maps. Looking forward to your next reviews, especially the ICE episode.

Anyway, speaking of which, it's time to wrap up this month with the long awaited Industrial Complex Episode review. I played the original release (i.c.e.zip) in DOSBox.

INDUSTRIAL COMPLEX

I.C.E. replaces the FIRST episode in the game. In fact, it still uses the classic E1L1-E1L6 structure, with the secret exit and the secret level being exactly where you'd expect them to be found.

There are no new demos but instead there is new art, music and sound included, which is all appreciated.

The Shotgun has been reskinned and uses new sounds but I think it does the same amount of damage as before. All weapons (except Trip Mines) are included and the only inventory item that never appears in the episode is actually the NVGs.

I am very sure the maps are designed for continuous play because one level requires you to use a jetpack you have acquired in the previous level. For people playing continuously, I also highly recommend stocking up on everything before finishing each level (200 health, 100 armor, full ammo on most weapons, inventory items, etc). Now to the actual episode review.

Welcome Duke

A nice short intro map. There are no enemies and secrets, so all you do is prepare yourself for the next level. Explore the base to find Armor (in the starting room), Shotgun and a few more ammo pickups. Eventually, you will find the Nuke Button.
Attached Image: ICE_E1L1_1.pngAttached Image: ICE_E1L1_3.png

Hostile Arrival

This level starts you under attack from various aliens. I recommend using the pistol against the troopers, since Steph is usually generous with pistol ammo. Outside of that, you've got plenty of resources available and the action remains challenging without being unfair.

The only thing I am not fond of is the Protector waiting for you when the elevator is raising. This is something that commonly happens throughout the episode (though usually with weaker enemies) and while respawns are kept to a minimum, there are a few moments where an enemy may be spawned directly behind you, which you may not notice during a tense fight. Again this happens a few times in later levels.

Another important thing to mention is when you pick up the box of Pipebombs, don't forget to blow up the door to proceed. Not many user maps require you to blow up a door directly without a crack nearby, so this is a rather rare case, which is quite creative and while I figured this out easily myself, I wanted to point out in case people may get stuck in this level.

There are THREE secrets to find:
1) In the room where you find the box of Pipebombs required to blow up the door, jump in the vent, destroy the two turrets and open the wall behind to find Shotgun ammo and Armor.
2) After entering the Maintenance Area 01 (near the Red card slot) and clearing the place of monsters, press on the slightly brighter wall to open a secret room containing a Shotgun.
3) After entering the Computer Center and clearing the place of monsters, take the elevator down and press on the panel ahead to open a compartment containing Atomic Health and Devastator ammo.
Attached Image: ICE_E1L2_2.pngAttached Image: ICE_E1L2_5.png

Dangerous Tour 1

The third level is significantly more challenging with plenty of tense battles. Although there can be cheap moments like opening a door and ending up with a commander's rocket to the face which can deal about 50 dmg or having surprise spawns around you while you are busy fighting other enemies. This is why I recommend stocking on health and armor from the previous level, to compensate for moments like these. Not saying that the levels are too difficult but I can imagine the episode not being too pistol start friendly, as you will see what I mean soon.

There are THREE secrets to find:
1) Before going through the electrified train tracks, check the EDF window nearby to find a Shotgun inside.
2) In the barracks, where you find Shrinker, after clearing the place of monsters, open the nearby windows to enter a vent that contains 2x Turrets, 2x Shrinker ammo and 2x Expander ammo.
3) In the hallway leading to the Blue Card, check the room near the bathroom that contains a Commander inside. Press on the picture to reveal an RPG inside.
Note that secrets #1 and #3 will only register if you jump inside the sector.

Unofficial secret: Right where you killed the Mini Battlelord, look for a giant tube filled with water. Fly with the Jetpack to reach it and dive down until you collect a Scuba Gear and Portable Medkit.
Attached Image: ICE_E1L3_2.pngAttached Image: ICE_E1L3_4.png

Dangerous Tour 2

NOTE: To complete this level, you need to have the Jetpack acquired from the previous level. While you get a Jetpack much later in the level, you need the one from the previous level in order to progress through the sewer part. If you insist on pistol starting, then you need to cheat a Jetpack to progress. Simply typing DNKROZ (or GOD in console on source ports) will give you a free Jetpack, as well as resetting the health to 100. Or if using source ports, just type SPAWN JETPACK into the console.

Anyway, I will not talk about the whole level but I must mention that you CAN backtrack from the last part of level with the Normal Exit by using the Jetpack to fly into the vent and then backtracking for supplies and Secret Exit. It is also possible to backtrack even to the beginning, which was appreciated because I apparently missed an optional room with enemies near beginning.

There are THREE secrets to find:
1) After using the Jetpack to escape the sewers, you will arrive in a bathroom. Press on the nearby wall marked by sign EMPLOYEES only to reveal a compartment containing a Turret, Portable Medkit and Holoduke.
2) After using the Blue Card to enter the building, clear the rooms of monsters and notice an UP sign nearby. There is a nearly invisible switch that you press/shoot and it will open a nearby compartment containing the SECRET EXIT!
3) After the corridor mentioned earlier, check the vent in the corner of the room. Inside you will find 2x Shotgun ammo.

Secret Exit: See Secret #2.
Note: Secrets #2 and #3 are found at short distance from each other.
Attached Image: ICE_E1L4_4.pngAttached Image: ICE_E1L4_6.png

Alternative Route

The secret level of the episode is quite short. Make no mistake as it's pretty challenging and will actually leave you worse than you started because there is only one Atomic Health, so unless you rarely get hit, you can finish this level with 150 health maximum. The health pickups are also a bit scarce and I certainly found myself with about 40-50 health left at times, despite starting the level with 200, though I used half of the Medkit to save myself from dying, then I realized I was pretty much done with the level.

One interesting thing to note about the level is there are various fake nuke buttons that do nothing when pressed. Another interesting thing is in the flooded room, there is an invisible reactor that hurts you. You can blow it up with a Pipebomb but the reactor's explosion will hurt quite a bit, so keep your distance. Afterwards, you don't have to worry about getting hurt from radiation.

There are TWO secrets to find:
1) At the beginning, exit the room and go towards the door in front of you (look out for a commander waiting in your left), then enter the room ahead. Press the nearby panel to open the nearby secret and collect a Chaingun.
2) After going through the big EDF room, just before going towards TRANSPORT room which contains water, carefully look at the walls and look for two arrows pointing at the different shaded wall. Press on it to access a room containing a Scuba Gear, which is guarded by two Octabrains and three Eggs.
Attached Image: ICE_E1L6_3.pngAttached Image: ICE_E1L6_5.png

Metal Pit

The final level time! Starts you under attack from a couple aliens, so be prepared. Kill the alien bastards, clear the buildings, grab the Blue Card to open the gate leading to the boss, kill a couple more aliens, then open the gate to the CYCLOID EMPEROR!

I recommend saving before fighting the boss, just in case, as you only get 150 health maximum, which I am not sure if you can survive a direct hit from the boss (armor doesn't save you from attacks that would kill you if you had no armor at all), though you get more supplies in the boss room but this is pointless because the boss never moves from his place and all you have to do is spam Devastator from the outside while taking cover from his rockets.

And due to replacing the first episode, once you kill the Cycloid, you get the Battlelord cutscene as expected. There are no new ending screens or anything, which is a little disappointing.

There is only ONE secret to find: In the corridor leading to the three doors (one leads to the Blue Card), press on the picture in front of the Devastator with ammo and you will find an Atomic Health and Holoduke. Note that you must jump inside to register the secret.
Attached Image: ICE_E1L5_1.pngAttached Image: ICE_E1L5_4.png

ICE Overall: Pretty good episode, although a bit repetitive at times. I don't have a favorite map in the episode, which is why this time the review was different without specifying if the maps were okay or not but I enjoyed what I played, with every level worth checking out.

In the end, this month has been pretty interesting exploring two different authors. What is interesting is that Reginukem started out strong but then his subsequent releases were all over the place in terms of quality (including a shitty demo TC), although I didn't mind playing most of the releases, their quality is just uneven.

Stephano's maps on the other hand started out a bit meh and got slightly better over time, with his ICE episode being the strongest release IMO. His maps mostly suffer from lack of difficulty settings but since I played on CGS, this wasn't a problem for me, it's only a problem for the people who want to play on LR or even POC and then they will not realize the maps don't have difficulty settings implemented. I always felt that DN3D could have used a slight damage reduction for POC skill at least. Although I found out recently that DN64 actually makes Duke take half damage on POC skill. Makes me wonder why the later Duke3D re-releases didn't adopt this useful change.

Anyway, it's been a really fun month and other than the missing enemy in Jungle Tour 3 and not playing Fight For Life 1.1, I have completed every single map with all kills and secrets.

Here is the score tally for the October nominations:
Maps by Aymeric Nocus (aka CK3D/MRCK) ++
Maps & Episodes by Aleks Pistol (aka Ledsbourne) +


Looks like ck3D's maps are winning for next month, so assuming the victory, we will play through all his map releases, excluding the Blast Radius and Zero Zone episodes that are saved for another time because there would be simply no time to play through all this stuff in an already very busy month, even if you don't go for 100% completion and speedrun the maps.

Thanks everyone for participating and see you on the October 2023 edition of Duke Map/Mod of the month club! Have a nice weekend!

This post has been edited by FistMarine: 29 September 2023 - 02:05 AM

2

#28

Almost there...

Zombie Mall
This map’s visuals look pretty good. It’s no Fallout Freeze as far as mall map visuals go, but Stephano does a good job making a functional and believable mall with his cramped map style. I felt some of the stores were too blocky and primitive at points, like the electronic and toy stores on the first floor, but it’s still better than the weird electronics store in Go Back Home. The new art packed with the map fits Duke 3D’s stock assets well. Some people might complain about the lack of ceiling height variation, but there’s not a lot you can do with a four-story building and still have it make sense.

Gameplay is fairly unlinear in this map. The basic gist is that the player travels through a four-floor mall, exploring stores and bathrooms on each floor to find a keycard to get to the next floor, with the final floor containing a random nuke button on the far side of the floor. It’s a bit like Luna One if you’re ever played that map, but with much more primitive architecture. Keys are easily found as well, though you might get hung up on the yellow one if you’re not used to doing the classic Duke 3D move of diving into sinks. I like a map that encourages exploration and lets you do what you want, so the gameplay really clicked with me.

The problem with the map is that the enemy roster is very small. You’ll spend the entire map taking down Liztroops, Pigcops, and Enforcers. There isn’t even a token Slimer in a trash can. It makes combat feel pretty samey despite how big the map is. The map has plenty of opportunities for setups like Assault Commanders launching rockets from the other side of a hub or Newbeasts supported by Enforcers, but the mapper seems hellbent on using the same three (well, four, if you count red Liztroops) enemies over and over. It makes things a little awkward on the final floor, where the game showers you with Devastator, Shrinker, and Expander ammo, but you’re still facing the same cannon fodder you’ve been cutting through. It feels like you’re wasting “valuable” ammo on such weak enemies or that you should stick with the weapons you’ve been using before because there’s no justifiable reason to use such powerful weapons on them.

This map doesn’t have any secrets, but there is a semi-secret Shrinker hidden in a bathroom vent.

Zombie Mall is a fun mall map that’s worth a playthrough, despite being handclapped by a poor enemy roster. Fans on non-linear gameplay in particular will get a kick out of this.

Jungle Tour 2
Like Jungle Tour before it, Jungle Tour 2 is actually a canyon map, but Stephano has tried to make it more jungle-like with textures from Life’s a Beach and has added a few swamp sections. I did see tile 0 appear a few times when it shouldn’t have, though.

JT2 shows a remarkable improvement of Stephano’s detailing skills. There are a lot of ledges, small caves, and uneven floors that help sell the canyon feel the map is going for. He’s also very liberal with palm trees, fruit underneath them, and bits of details for underwater areas meant to look like plants. The large amount of trees and the like might sound like they it hard to find in target enemies, but in practice, I found that it prevents the map from turning into a turkey shoot with the Pistol. Stephano is still having issues with parts of the map having a consistently high “ceiling”, this time affecting the canyon areas. Having some walls jut out higher than others would’ve been a big help in making the canyons feel more natural.

Stephano avoids repetition by adding several different areas to the map, such as a cult’s hideout, a small village with several optional rooms to enter, a few pools, and a cave filled with “gold” (yellow soap sprites on the walls and treasure chests from Babe Land) that the player visits inbetween the canyons. These are a good change of pace both visually and gameplay wise, as his canyons start looking pretty samey after a while. I wish the cult temple and village were more detailed.

The maps gameplay is good. Stephano has learned from Zombie Mall and has added a strong enemy roster to the map. There’s still a bit of an overreliance on Liztroops, Pigcops, and Enforcers, but there are enough Octabrains, Pigcop Tanks, and Newbeasts to make things interesting. I found there was way too much ammo, though. Near the end, you’re overflowing with ammo for everything but don’t have nearly enough enemies to justify having so much ammo.

Map flow is very simple since the level doesn’t have any keycards you need to look for. The cult compound has a button hunt, but it’s easy and signposted well, like the one in Jungle Tour. Otherwise, the map is a straight shot from start to finish. That’s good, because a more exploration-focused map with all the detailing Jungle Tour 2 has would not be fun.
The map is much longer than Stephano’s previous maps. My first run was around 24ish minutes. It’s a good ride, but I think the map could’ve benefitted from having one or two canyon sections cut or heavily trimmed since they start feeling repetitive around 3/4ths into the map.

I found one out of three secrets in the map. I also discovered a hidden Devastator and some ammo for it that I think should’ve counted as a secret, but didn’t.

Jungle Tour 2 is generally an improvement on the original, though I miss the Jetpack shenanigans from the first. It’s a good map for canyon level lovers and is an interesting look at how Stephano’s maps are evolving while still clinging to tropes from earlier maps, like even ceilings.

Jungle Tour 3
Jungle Tour 3 takes place in a snowy mountain but keeps the “Jungle Tour” name for some reason. This is accomplished with a set of custom mountain and snow textures. The textures are good, but weapons, health, and armor tend to blend in with the gray wall textures used in this map, making it hard to find supplies for a distance. The actual level feels like a retextured version of one of Stephano’s canyon maps most of the time, down to having the consistently even “ceiling” issue that Jungle Tour 2 had.

The biggest issue with the visuals is a lack of variety in environments. You’ll either be in a frozen field or a generic cave throughout the map. This leads to the level feeling repetitive pretty quick. It’s a shame, as Jungle Tour 2 shows that Stephano has a grasp on mixing up environments to prevent repetition. A few different areas would’ve really helped make the map stand out.

Gameplay…let’s just say that Stephano isn’t fucking around with this one. The map consists of large areas filled with trees that block enemy fire and lots of enemies scattered throughout, though they tend to be focused near the edges of the arenas. Encounters are set up in a way that you’re going to take a lot of fire and that said fire won’t be 100% blocked by trees, so you need to be careful and effectively manage how to deal with enemies, or else you’re going to take a lot of damage. Stephano “regresses” back to using only Liztroops, Pigcops, and Enforcers again and reduces your armory to the Pistol, Shotgun, and Ripper. While I usually don’t like maps that have such limited enemies and weapons, it works here. They’re utilized in a way that makes them deadly. It feels like you have to get into a certain rhythm with what gun to use when to effectively tackle this map, which isn’t something I’ve seen often in a Duke 3D map.

Map flow is fine. The map has several optional areas, but it can be difficult to discern what area leads to a goodie-filled room or leads to another area until you go through them.

The map has three secrets, but I didn’t find any of them.

This is a very combat-focused map that shows little mercy to the player. If you like getting into the intricacies of Duke 3D’s combat, you’ll have a blast. If not, you’ll find this map becomes a repetitive chore around the halfway point. I personally love Duke 3D’s combat and how this map uses basic weapons and enemies to create a fun challenge, so this map was right up my alley.
4

User is offline   Quacken 

#29

Hey so remember when I said I would do Industrial Complex? Yeah, uh... I'm not doing that anymore, sorry. Nor will I be doing Twilight City because I'm completely clocked out.

Gotham's Industrial District

Thankfully, Gotham's Industrial District is a good way to end. GDistrict has some cool city sights, a nice black fog out on the streets that is for once not melting my eyes whenever I take a shot and some cool texture work with various different metals. I like that there's teleporting monsters again, which was absent from most of the other maps by Steph (bit of a low bar but bear with me), and there's more enemy variety than in Jungle Tour 3. Accompanying your trip through definitely not Gotham City is a snazzy custom MIDI, which as far as I can tell isn't just a theme song from a movie series or something. Something about this map just feels satisfying to run through. It's not particularly challenging save for some close encounters with big foes, which will test your ability to identify sounds. There's way too much ammo in here though, so even if you get jumped by something you can basically always just shrink or Shotgun it. My only real complaint with the map is that there's way too many Turrets. There's a few I like the placements of, but I've just never been a big fan of Turrets in general. Gotham's Industrial District is a surprisingly fun map with a lot to offer.

8/10.

As for my vote, I'm not going to vote because I'll be sitting out next month. I need a break from playing Duke 3D. I already kind of had to throw myself at most of these maps just to get them done and I want to feel like I'm not forcing myself to play things just to write reviews on them.
4

#30

It's late and I don't want to burn myself out with making long map reviews, so have some bite-sized ones to round out the month.

Gotham Industrial District
Fun map. Lots of opportunities to use the Shrinker and Expander, which is awesome. Cramped. Lots of details. Annoying Turrets in the second half because autoaim fucks up with them. Worth a playthrough.

Twilight City
First half requires some ammo conservation so you have enough shotgun shells for the big battle at the end. Second half is large city area, but darkness makes it hard to find things. More annoying Turrets due to autoaim not locking onto them. Had to be on nearly even ground with them to reliably hit. There's a required button that i thought was hidden behind impenetrable glass. I eventually figured it out. Second hardest Stephano Lasso map. Would recommend with caveats.
4

Share this topic:


Page 1 of 1
  • You cannot start a new topic
  • You cannot reply to this topic


All copyrights and trademarks not owned by Voidpoint, LLC are the sole property of their respective owners. Play Ion Fury! ;) © Voidpoint, LLC

Enter your sign in name and password


Sign in options