Today is time to review MSSP Episode v3.0, as well as the nominations for the next month. It's understandable there was a lot of stuff to play and I don't feel like doing the collaboration maps for now, while the review for The Brave New World will be posted in the next few days, to not make this post too long.
To talk a bit about myself, I have played
MSSP Episode before, in fact I played v3.0 a decade ago in EDuke32, while I played the older versions in past 1-2 years in DOSBox. The older versions can be downloaded from gamers.org and dukeworld, although strangely, versions 2.0 and 3.0 are put into a separate MSSP folder (at gamers.org mirror) for whatever reason. I'd strongly advice you to just play the latest v3.0 release or the addon compilation version. You can read the changelog to see what has changed between the versions, basically the first version included MSSP1-MSSP5 and MSSPEND, second version added MSSP6 and third version added MSSP7. Each version also had various other changes made, such as v3.0 including new/modified enemies and updating older maps. Unfortunately, no further updates were released to include the newer MSSP releases, such as MSSP8 and MSSP9.
The episode is called
MSSP: END GAME (it used to be called
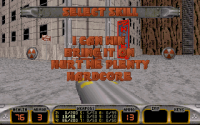
MSSP: ALIEN RACE in older versions of the mod) and replaces the third one in game. In the latest version, there is a demo included that showcases the fourth level, this time ending with the player's death. Much like Duke Tournament, the demo is recorded by starting MSSP4 as an user map, which is why you will see the USER MAP shown in the main menu in DOS Duke3D v1.5.

On top of the new art, cons and maps, there are a few new sounds included, such as activating switches (I always liked this sound effect, may be taken from Half Life or Unreal, I'm just recently getting into these two games I missed back in the day) and a teleport sound taken from Quake. New enemies include a Freezer Trooper variant (has higher health and can teleport, inspired by the one from LR&WB, he drops pistol clips instead of freezer ammo upon dying for some reason), an overpowered variant of Octabrain that spams projectiles at you (also taken from LR&WB) and mini boss versions of Overlord and Cycloid. There's some other palletted enemies as well but they don't seem to have any changed behavior compared to vanilla enemies. Everything else seems to be stock Duke3D gameplay.
MSSP: END GAME
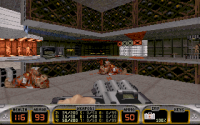
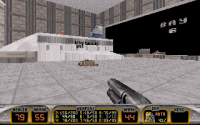
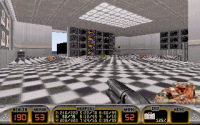
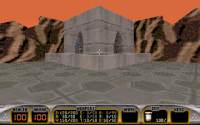
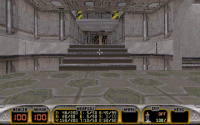
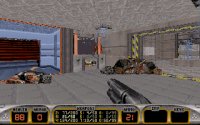
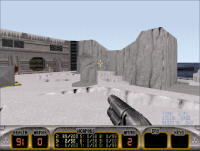
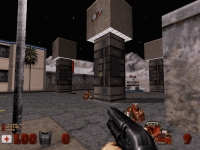
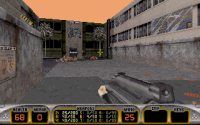
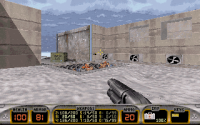
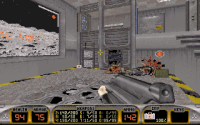
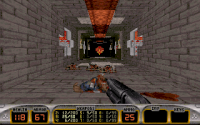
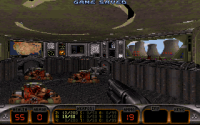
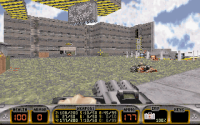
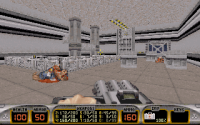
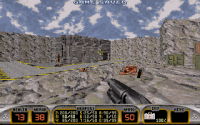
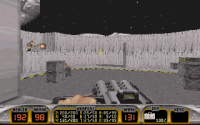
Mistake (MSSP1)
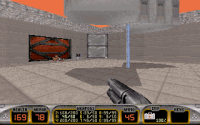
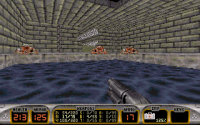
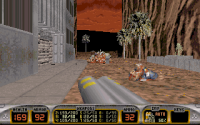
An intro level that can be slightly challenging at times, as there doesn't seem to be any armor available (unless you get lucky with a pig cop drop) but thankfully health should be plentiful, with two Portable Medkits (one given away and one found inside a secret place). Just don't get hit too much and you will be fine. And pay attention to the annoying Freezer trooper that can get a few cheap shots on you, even if you dodge the projectiles, one will bounce back at you, although the projectile will be weakened per every bounce until it disappears.
There isn't much else to say about the map, it suffers from oversizing and seems a bit bland in some parts. Blowing up the reactor is pretty cool and you get to fight various spawned enemies but other than that, most enemies shouldn't pose too much of a treat. I got very good use of one of the portable medkits that I consumed it entirely just before grabbing the new one. So the lack of armor is somewhat justified if only for being given another Portable Medkit in exchange, so one can be saved for the next level. And there is one secret containing an atomic health that will be a great help for the next level as well.
Speaking of which, here are the secrets:
1) In the room where you insert the blue card, go behind the boxes and find a crack to blow it up. Inside you can collect a Shrinker.
2) In the room with many computers, go to one of the corners, press on the wall to access an Atomic Health.
3) Near the end of the level, right where you collect the Devastator, jump inside the nearby vent to collect a Portable Medkit.
It's okay, though somewhat bland and forgettable. Looking forward to the next map!
 Alien Race (MSSP2)
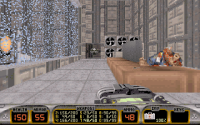
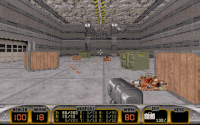
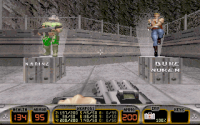
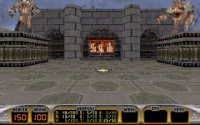
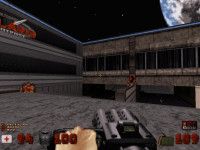
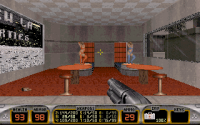
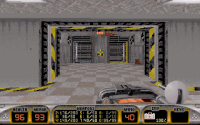
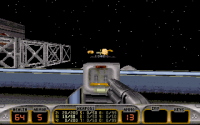
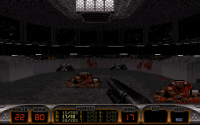
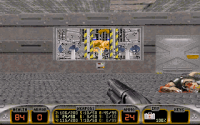
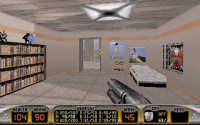
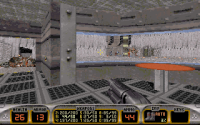
This map begins with some explosions in your face while you get ambushed by two blue Octabrains. Don't worry, they aren't the upgraded variant, for better or for worse. The upgraded ones are indistinguishable from the regular ones. And the best part? This level doesn't give you armor pickups either! Though at least the health seems plentiful, even more atomic healths available too.
Anyway, kill the aliens until you find out you need to get cards to unlock the doors. Once you get the blue card and backtrack, just watch out for that Octabrain behind the blue door, it's the rare variant. I was lucky I dodged in time. Eventually, you will get to some kind of control room located in the middle, this area reminded me a lot of Fusion Station (E2L4), complete with deadly lava (the variant from Atomic Edition) surrounding the place. However, this time you need to do a switch puzzle which temporary unlocks the door right ahead. Hint: Two switches are the solution and they are located close each other. Kill the enforcers, enter the Central Command to press a switch that raises the bridge and move on. Kill the aliens, look out for some protectors (there is one hanging inside the tube, you can kill him with a RPG shot) and solve another switch puzzle. The solution is once again two switches must be pressed/shot (the first and third one).
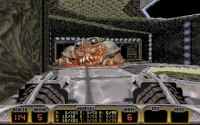
Afterwards, you spend a bit of time underwater, kill Octabrains and slimer eggs until you get to your first boss, a Mini Overlord! This (and every other mini overlords/cycloids) used to be a Mini Battlelord in past versions but now it was changed into a Mini Overlord, who is easy to take down without taking any damage and he has a habit of falling into water. You are given plenty of ammo for taking him down but if you are smart, you can even shrink him and get rid of him easily!
Collect the goodies, including the red card, use the teleporter to return to the base, kill the spawned aliens, insert the red card and prepare for yet another Mini Overlord guarding the exit! Once again the Shrinker is the easiest and fastest way to get rid of him.
Secrets:
1) In the room before getting the blue card, there is a blue sentry drone and various electrical sparks. Press on one of the green walls to access a small room containing a pack of Pipebombs.
2) In the lava filled area, after raising the bridge, look for a crack in the left side of the door and blow it up to reveal a Portable Medkit.
3) In the room with the Mini Overlord, shortly before getting the red card, press on the red walls in left side of the room to access an Atomic Health and Chaingun ammo.
It feels like an improvement compared to the previous level but it's still not quite the Mikko we know nowadays. Maybe the next map will be even better?
 Answers (MSSP3)
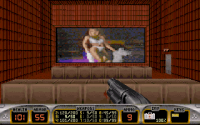
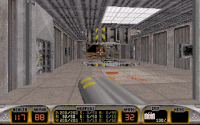
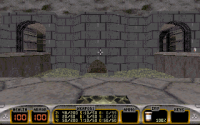
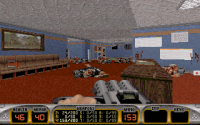
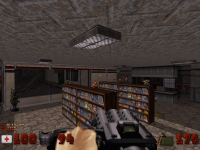
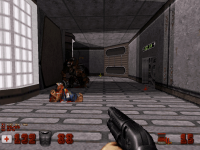
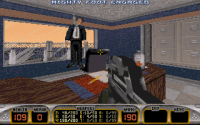
Good news! The map appears to be much more competently designed and feeling more like a mission-based one. The bad news? It's filled with various annoyances, especially towards the end. At least you get an armor this time around, which is located at the very beginning where the Space Suit can be seen. Don't miss it!
Afterwards, step into the teleporter and prepare to fight some alien bastards while avoiding lightning strikes and various ambushes that can happen at some points. Also as Quacken noticed, it seems that in every episode/TC that Mikko made, The City Streets is the song that will play in the third level (yes, this carries into BNW as well!). Whether it's a coincidence or not (and whether it's a reference to the original game), I will leave the readers to decide that.
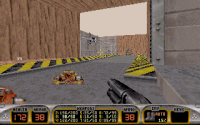
Anyways, I don't think there is any need to give any advice for the earlier parts of the map, as the progression should be pretty straightforward. What I want instead is to give advices for the last couple parts because there are tons of mean tricks involved, some intentional and others unintentional. It starts in the room with the crane, which reminds me a bit of the first level of Duke Tournament, interestingly.
First, after using the yellow card, taking down the sentry drones in the corridor and advancing, there is no way back, as the building explodes behind you! And the following two areas/rooms also have another point of no return! So before advancing, make a backup save and make sure you kill all the aliens and find ALL FOUR SECRETS before you get there and make sure you have as much health and armor as possible because you will NEED them! Finding the secrets will help a lot and there is even an extra atomic health found easily in one of the bathrooms you can find earlier.
Second, if you want to check what's inside those two toxic barrels, just don't, unless you don't mind dying shit-ton of times. The problem is that the barrel is too narrow which causes Duke to die instantly upon entering it. It takes a lot of attempts to enter and grab the item that may not be worth. One of the barrels contains chaingun ammo, the other contains an atomic health. It's very difficult to explain how to successfully make it inside (you need to actually enter it twice, as entering the first time causes Duke to not grab the item as it hasn't seen you, a weird Duke3D behavior where an object/enemy must see you to become active), as you will need to see for yourself and no, this has nothing to do with EDuke32 clipping changes when I have played this in plain Duke3D v1.5 in DOSBox. It may have been fixed in the Addon Compilation version but we can't tell for sure. I don't know how was in the first version of MSSP, as I didn't check if these barrels contained anything but in V2 and V3, I died countless of times trying to get these items.
It's bullshit that this part was never tested, as Duke can die even just staying at the surface of the barrel and not moving at all. You will notice the game tries to squish Duke and after a while or just pressing one of the buttons, Duke will die instantly! So if you don't want to torture yourself, please, DON'T bother with those stationary barrels! The rewards are NOT worth it!
Third, after you grabbed everything and made a backup save, you got outside the crashing building, killed a few enemies and prepare for jumping in the water but NOT BEFORE KILLING THE TWO MINI BOSSES AWAITING YOU! You can kill them easily with your RPG, the autoaim will help a lot. You get the fight one Mini Battlelord and one Mini Cycloid. In the older versions, you fought two Mini Battlelords. Once taking them out, make a jump to land in water safely. Collect the Atomic health and kill the two spawned troopers.
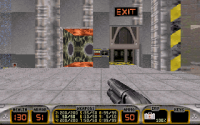
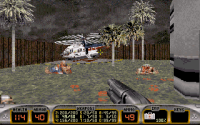
Fourth, open the door and prepare because that's not a real nuke button, this is the first fake exit which causes the elevator to lower and be surrounded by two aliens! Kill them and go along the corridor where you will stumble upon more aliens and also THREE nuke buttons! This is another trap, where choosing the wrong button will cause explosions to get spawned in your face. So choose wisely! OK fine, the correct answer is the one in the right, it will temporary open a nearby door. Nothing stops you from activating the other two and surviving their explosions but it's not worth it. In best case, as soon as you press one of the fake buttons, you can run back and suffer minimal damage. Do the same to the other fake button, so they won't spawn explosions anymore if pressed again. Afterwards, kill the remaining aliens, smash some trash cans and approach the helicopter to finish the level.
This time, there are four secrets to find:
1) Near the briefing room, blow up the crack to access an Armor.
2) Inside the briefing room, look for a hidden switch behind the desk to access an atomic health.
3) Inside the room where you find the red card, jump through the map to collect a Large Medkit and Steroids.
4) Inside one of the bathrooms, check the middle stall and break the toilet to access a vent that contains RPG ammo.
It was an interesting map overall but I won't be lying if the last part of the level was quite frustrating. It helps that I played the episode before and other than those numerous glitchy deaths I've had (which I'm not counting), I don't think I died at all in the episode. Had some moments I was low on health but I survived until the end, as you will see below. Hopefully the next map is better and more polished.
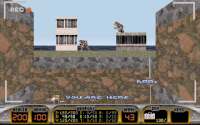
 Riot (MSSP4)
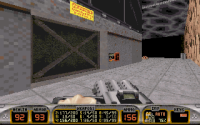
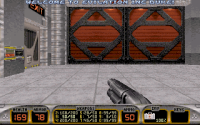
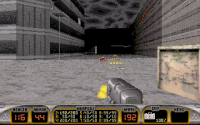
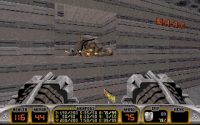
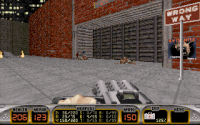
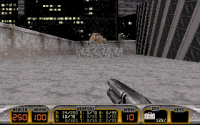
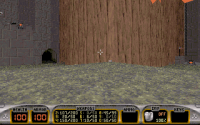
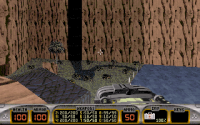
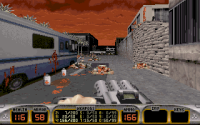
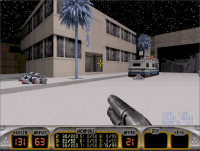
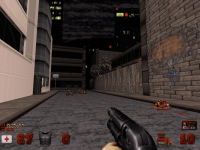
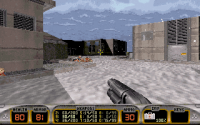
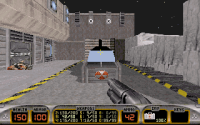
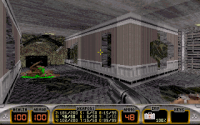
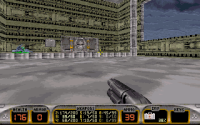
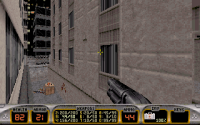
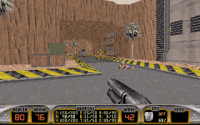
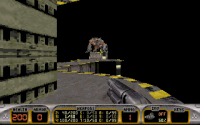
Another interesting, mostly linear map, that can be a bit tricky at times. The beginning should be pretty straightforward. Then you have to blow up a building and access the sewers, use the jetpack to go back and grab a card on top of a building. Afterwards, you need to kill the Mini Cycloid, then press a button which will cause the previous part of the map to be blocked.
I don't think there is a need for a walkthrough but I must stress that the fake exit is once again featured at the end of the level. This time there are two possible exits, with the right choice being the correct one. The left one will still spawn explosions in your face, so if you want to trigger the explosions, just press the button and step back, you will still lose about 20 health.
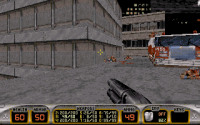
The map itself was better than the previous ones but was still somewhat annoying at times, with explosions spawned in your face and resources being rather scarce at times. Continuous players appreciate the armor being given near the end for the next level but pistol starters will have to suffer until that time unless they get lucky with a pig cop drop. I also appreciate the water fountain existing near end of the level, I got to around 40-50 health when nearly finished, so this was appreciated after exhausting most health items in the second part of the level.
Once again note that the two secrets can only be accessed at some point in the map, so before getting to the point of no return, be sure to find them! Here are the two secrets:
1) In the sewers, you will notice there is a door that can't be opened. Go near the red card slot (where you get the jetpack, which is needed to escape from sewers), press on that panel to temporary open that locked door, then quickly rush to that place. Kill the trooper and collect the Devastator.
2) Use the jetpack to fly out of sewers and go to the top of the building, where you can find an open window. Collect the goodies inside, including the blue card required for progression and then look for a crack in the corner of the room, blow it up to collect the Steroids.
It was better and more epic than the previous maps but the annoyances dragged the map down a bit. What about the next map?
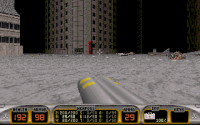
 Project Blue (MSSP5)
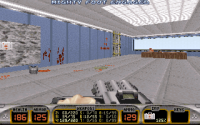
I recall getting frustrated the first time playing this map on first version of MSSP (I think the second version of MSSP didn't make any changes?) but now that the map was updated once again in V3, fixing some things but breaking other things, I feel like there needs to be an in-depth review.
First, this map is very LINEAR, so if you think at getting all the kills and secrets, you might want to get them in advance. As I was familiar with the map, I knew where the secrets were found but this didn't stop from having an extra annoyance added in this updated version of the map.
Second, in older versions of the map, there was a teleporter at the end of the level that was probably meant for COOP only, which sent you to various points in the map, allowing to backtrack and refill your health if needed with the toilets at the beginning. Unfortunately, if you didn't sent the elevators back after using them, you would get softlocked if you chose the first teleporter, so you were either forced to finish the map as how you ended it or restart the map upon getting softlocked if you didn't save (or cheat). In latest version (V3), that multiplayer teleporter is removed, preventing you from backtracking completely, not helped by at least three points in the map where you aren't allowed to backtrack.
Third, the rooftop finale where you were forced to lose health by jumping to the window, did NOT contain any medkits in previous versions! In V3 you are given two large medkits for 60 additional health, as you need to make a long jump to a window and at same time hope you don't fall into pit! Having the jetpack from previous level helps a LOT! I remember on first version reaching this part with 25 health and was nearly screwed (Portable medkit was fully consumed earlier because of the difficult battles) if I didn't have the jetpack because I died as soon as I landed on that window. This wasn't an issue in latest version because I was better prepared and had more health but I still had to replay most of the map when I realized the teleporters were gone, as I didn't collect some items/secrets and most likely a stupid trooper decided to play dead (found him upon loading an older save).
These issues indicate poor level design, unfortunately, which sucks because this map has some cool things going for it and I really don't want to sound negative, as it seemed like the design has been improved in certain parts compared to the previous maps. It's just some things I really don't like and Mikko seems to frequently make maps that you can't backtrack later on.
As for the actual map, I don't know what else to say, there's many epic battles to be had but also some frustrating ones near the end where you are forced to lose a bunch of health. I think V3 rebalanced this map because there was more health available and having foreknowledge of the map helped me avoid taking lots of damage, so I start the next level with about 100 health and not 25 like it happened in first version.
The only tips I can give is to make sure to explore and grab everything before the point of no return, which is when you get teleported (the only exception being the Monolith halfway in the map, which allows backtracking in previous area). And at the exact same location (after using the monolith, where you fight various enemies, including a Mini Battlelord), some monsters may fall into pit, so you need to use the jetpack to go down and kill them, as they don't die upon hitting the ground. And make sure troopers don't play dead, as it happened once, to my surprise.
As for the secrets, there's five of them, of which they can even be seen on the monitor at the end of the level:
1) In the room after the door marked by an access card slot (though it doesn't require an access card due to the pal used), press on those panels to temporary reveal a compartment containing an Atomic Health and Pistol ammo.
2) After taking up an elevator, right where you get the Chaingun and ammo, look for a vent. Inside, you can find a box of Pipebombs.
3) In the room just before blowing up the reactor, crouch behind those containers to collect a Devastator.
4) In the large area you fight the Mini Battlelord and various monsters (after jumping into the monolith to teleport), look for a crack nearby the SECURED AREA door. Blow up the crack to collect Armor, Pistol ammo and Small Medkit.
5) In the room with the fans (where you press the switch labeled as LAVA PRESSURE CONTROL), you will notice you can break one of them. Jump inside to collect Shrinker.
Extras: In the same room as secret #5, jump inside one of those acid containers. Inside the left one you can find a Portable Medkit, inside the right one you can find ammo (pistol and expander).
Overall, I didn't like this map too much because of the various flaws and having a miserable first time when playing the map (I refer to the 2021 playthrough of MSSP Episode, not the EDuke32 playthrough from a decade ago I don't remember much about). The lack of backtracking is annoying for completionists, not necessary a poor design choice but I still think the removal of that teleporter at end was a mistake. I hope the next map will make up for this map being a bit miserable.
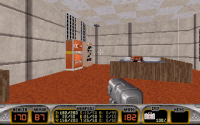
 Extinction (MSSP6)
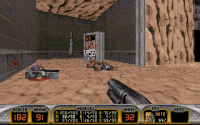
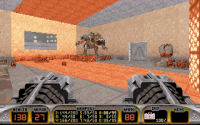
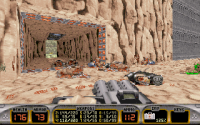
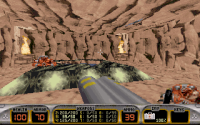
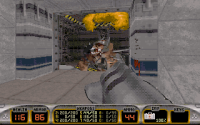
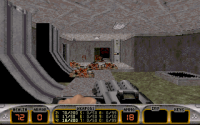
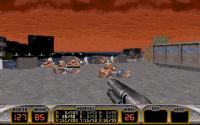
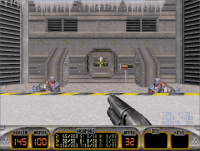
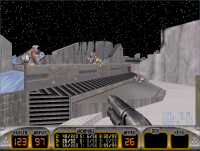
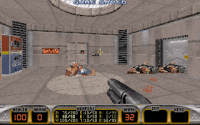
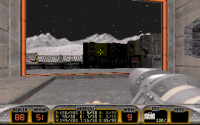
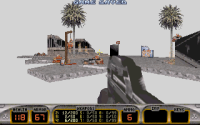
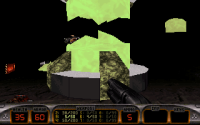
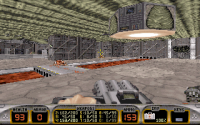
Probably the first really good level of the pack, here the environments will amaze you, especially the design of those tanks (one of them being used to blow up the crack in the wall), those were very well done. And the enemy placement is spot on. You still have to be careful with those upgraded Octabrains and the occasional encounter with the Mini Cycloid but in general, the experience will be pretty smooth when dealing with the alien bastards.
Progression should also be pretty smooth, I can't think of any confusing parts. One time you get to swim inside a pipe filled with toxic purple acid (you are given two Atomic Healths for that, though the boots you collected two levels ago should also be a great help) to collect the yellow card required for progression. Be quick to avoid losing too much health/boots!
Just note that it is impossible to get all the kills and I think I know why, as it occurred in both V2 and V3 of the MSSP Episode on the same map. MSSP6 contains one NEWBEASTHANG actor, which is located towards the end of the map. You can destroy its corpse with one RPG shot but it will not add to kills, unfortunately. So you will get just 84/85 kills. Alternatively, I remember the map crashing DOSBox on me at one point in V2 but in V3, it worked fine, no crashes. I don't know why this happened, it was a very random granular crash.
Secrets:
1) After using the blue card, you should arrive in some blue colored corridors. Look for a hidden vent that contains Pistol ammo, Chaingun ammo and a small medkit.
2) In the room with the pipe filled with purple lava (where you need to get the yellow card), look for a darkened panel in the middle (it's located between two other panels), press on it to access a hidden compartment containing a Portable Medkit.
3) Near the warehouse located towards the end, where you are fighting enforcers and pig cops in some corridors, look for a small hidden switch you can press/shoot to reveal a nearby Atomic Health.
Overall, this map was a massive improvement over the previous maps and probably the highlight of the pack. I especially liked the design of the tanks. Definitely worth checking out!
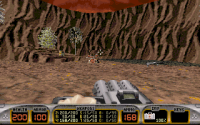
 End Game (MSSP7)
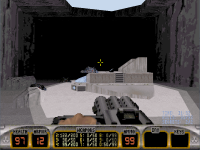
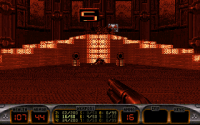
Another highlight of the pack, this one is inspired by various E2 maps and remains challenging throughout (I even got low on health at one point later on). I don't want to spoil too much about this map because there's a lot of surprises and lots of interesting battles to be had. Just play this map right now. You won't be disappointed! Other than the fact you don't get to keep your weapons and inventory for the next map, as you will see shortly.
Secrets:
1) Near the beginning, look for a different looking wall inside one of the corridors (where you fight two green pig cops and one enforcer), open the wall to reveal an Atomic Health and Pistol ammo.
2) In the room with the gray and green crates in the middle, look up for a hidden switch. Shoot it to temporary open a compartment containing a Portable Medkit.
3) In the room near the door with the sign SECURED AREA, press on the panel in the middle to access a small compartment containing Armor, Chaingun ammo and also a turret!
4) After using the teleporter, in the Airlock room, press on one of the monitors to reveal a small hidden room containing a box of Pipebombs and a Large Medkit.
5) Near the end of the level, just before approaching the bridge leading to the blue card, blow up the crack on the left side to reveal an Atomic Health.
Another great and challenging map! The ending ties perfectly to the final map, which is another nice detail. Worth checking out!
 The Source (MSSPEND)
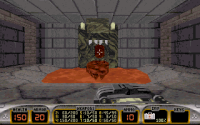
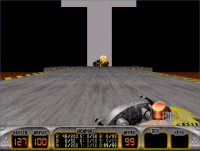
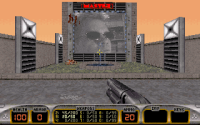
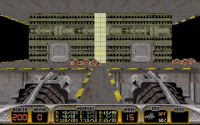
Final level time! Since this level starts you without weapons, the only thing that carries from previous level is the health, so I hope you started with 200 health to get the best outcome! And make sure to move as soon as the level starts to avoid getting electrocuted.
If you have played Fight the Future episode, you will quickly realize where this level is inspired from. Except this time, you are given different weapons (no RPG, only 15 Devastator ammo). To get more into technical details, you are given a Pistol (48 ammo), Shotgun (40 ammo), Chaingun (100 ammo), Shrinker (10 ammo), Expander (40 ammo), Devastator (15 ammo), Freezethrower (25 ammo). You are also given a pair on NVGs to spot those six troopers in the darkness! I suggest to lure them to you and kill them with your kicks/pistol and pray you get some extra pistol clips, as you need to make every shot count when dealing with the Cycloid Emperor, though luckily, if you make every shot count (yes, including the Expander ammo), you should be able to finish off the Emperor before you need to use the Pistol and Chaingun! You may also use the Shrinker against the troopers, as otherwise it's useless against the bosses!
That's all the tips I can offer, besides avoiding his rockets by staying hidden and grabbing the extra atomic health if you need some extra health. It may take a few attempts to get all those six troopers, as some of them refuse to come towards you or get stuck flying or falling. And no, the enemies don't take fall damage upon landing into pit (unless their health is very low, then they die on impact) but in early Duke3D shareware versions (1.0 and/or 1.1) the enemies took fall damage and died upon making contact with the floor. Why this was broken in v1.3D and later, I have no idea!
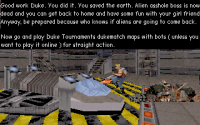
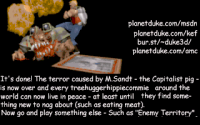
Concentrate on the Cycloid, take cover when he is firing (if you take splash damage, it's not fatal, only if taking a direct shot which is possible to survive with 200 health), make every shot count and then congratulations, you have completed MSSP: End Game! Or in other words, you have completed MSSP Episode v3.0! Disappointingly, there is no new ending screen, just the same E3 cutscene. And the final level is okay.
Overall, this episode was pretty decent, leaning towards pretty good later on. The first couple of levels didn't make much of a strong impression (first two levels were a bit amateurish, with the next three being good but somewhat flawed) and there were some really annoying flaws at them, especially at the fifth level with its lack of backtracking at various points but the last two normal maps (MSSP6 and MSSP7), which were introduced in MSSP v2 and MSSP v3 respectively, were very solid and worth checking out! Of course all these MSSP maps also be downloaded separately as user maps (even MSDM maps I didn't even mention, some of which had unavailable download links) but I chose to only link to latest version of the episode, to not clutter the topic and there isn't much of a reason to check them individually as user maps. O'Boy was an exception because the version included in BNW is quite different from the standalone version, as you will see in the upcoming review.
To me, MSSP6 and MSSP7 were the highlights of the episode and I'd say the episode is worth checking out if for these two levels alone. MSSP4 and MSSP5 would have also been up there if they weren't as flawed as they were, though MSSP4 seemed better and less flawed than MSSP5. The final level is also interesting to check out, just for the challenge alone.
Oh and I still hope/want to see a MSSP Episode v4.0 one day, with not only MSSP8 and MSSP9 included but also the first couple of levels overhauled/rebalanced, so that the older levels are up to modern standards. Then it would be another excuse to revisit the episode!

EDIT: I forgot the nominations for next month! I nominate and vote for the following choice (highlighted in bold with a + added next to it)
WGRealms + WGSpace Episode +
This was nominated since last year (probably was me who suggested it? also it's the only choice remaining for now, new nominations are welcomed for March and later) and I think for a shorter month like February, two episodes should be enough, especially since some of the levels in both episodes (based on my memory from playing these episodes long time ago) are pretty large, so they may take a while to complete.
Yes, I know that William Gee has released a lot of cool stuff as of lately, including other maps/episodes in WG Mega Pack and the legendary WGR2, plus a very recent demo of WGR3 but I think these all deserve their own month/topic at a later time. WGRealms was released in 2004 and WGSpace Episode was released in 2008, so they should be played first separately. This is subject to change and I could fit other WG releases from WG Mega Pack but I'm not sure if a month like February will cover them all.
Therefore, I think we should stick with these two for now and then choose WG Mega Pack for another month like June or July or even August for the author's birthday. Maybe I can include some of older released maps by William Gee for February, as bonus/optional. What are people's opinions here? I wasn't sure what else to choose for a short month like February. Have a nice day!

 Help
Help
 Duke4.net
 DNF #1
 Duke 3D #1