Duke4.net Forums: Duke Map/Mod of the Month Club - September 2022 - Duke4.net Forums

Jump to content

  • 2 Pages +
  • 1
  • 2
  • You cannot start a new topic
  • You cannot reply to this topic

Duke Map/Mod of the Month Club - September 2022  "Level Infinity Presents"

User is offline   FistMarine 

#1

What's this thing?
We play through a set of maps/mods during the month, and use this thread to discuss it as we're still all fresh with our comments/opinions/feelings about the maps.

What's the purpose?
Basically, there are 4 purposes:
  • Showcasing some of the older mods/maps to wider public - they definitely deserve the attention!
  • Getting more people to actually enjoy and appreciate the user content - because let's be honest, over the past 26 years this was really what kept Duke alive after all.
  • ...and while we're at it - keeping Duke alive by still enjoying it, as there's no new games in the franchise on the horizon (and let's be honest, they wouldn't be as good as some of this stuff!).
  • Having a more structured discussion on maps than what's going in "Last map you played" thread - which is great, but it's basically a monologue most of the time.

Can I join?

Sure, as long as you find some spare time during the month to play the stuff that's on the table!

Why a month?
Because people have lives, jobs or other stuff to do (like mapping). For smaller maps, this could be shorter time - it's all up to debate in the future!

What port should I use? Are mods allowed? Where to get the maps?
It's entirely up to you how you play the game, so you can use whatever port or mod allowed - it would be cool to state in your posts what you're using too, as there might be some slight differences between the ports! As for the maps, they should be always linked within the first post.

How should I play the maps or post about them?
Again, it's up to you. You can finish them all in one go or play them one by one whenever you feel like. On Doom forums, there's a rule that you should keep the pace by not posting about a map that has a higher number than the day of the month, so e.g. on 6th you shouldn't post about map 7 etc. I think that might be a good practice if there's a large interest in this, but first let's see how active the thread is for a start - so if there's nothing going on, feel free to post about whatever map you want to.

Previous editions:


For this month, Secrets of the Acropolis and Twin Dragon have been chosen! Both are made by Level Infinity (Twin Dragon was also contributed by Wylde Productions).

The first is Secrets of the Acropolis (SOTA), an old Duke Nukem 3D episode/TC that takes place in Ancient Greece. It was released in August/September 1997 and it is famous for having solid level design and nice new textures, with criticism directed towards the confusing nature of the levels with hidden switches, etc. The TC is available for all versions of Duke3D.

The second is Twin Dragon (TDRAGON), an addon for Shadow Warrior, which also marks the first time SW is being played for the club! The addon was supposed to be released commercially back in 1998 but due to the poor sales of Shadow Warrior (unfortunately), the addons were never released commercially! They were eventually released for free as years passed by, with Twin Dragon being released for free in July 1998 and Wanton Destruction being released for free in September 2005 (and since 2013, both are included as part of Shadow Warrior Classic Redux). There is also a third addon (Deadly Kiss) that is still unreleased to this day.
Because of this, whether the SW addons are considered canon/official, it is up to you. :)

Additional info from the Twin Dragon page at MobyGames:

Quote

Twin Dragon was originally supposed to be released as a commercial add-on for Shadow Warrior. After the add-on had been finished, the publisher decided to cancel the project because the sales of the original game were not as good as expected. Some months pass and the rights for the add-on are finally given back to the original developers after a lot of complaining. This eventually led to the freeware release of the originally planned to be commercial add-on.


Here is the story for both SOTA and TDRAGON (directly copied from their readme files):

Quote

After having rid Los Angeles and the rest of the world and solar system of
aliens (or so he thought) Duke decides to take a well-deserved vacation. So
he packs his bags and heads to the Mediterranean to relax and enjoy the
sites. Among the sites he visits is a museum. But after exploring the museum
for a short while he begins to notice a subtle similarity between the Greek
artifacts and some of the things he'd seen in the aliens' domain. He gets
suspicious and starts exploring further. He begins to discover clues that
lead him to a secret passage hidden beneath the museum. There he finds an
alien artifact which provides him with evidence that the alien invasion was
not a recent development. The aliens had originally infiltrated Earth's
civilization nearly 3000 years ago, during the Classical Greek era. Duke
also discover that the "artifact" is actually a machine of sorts, a link to
the ancient world. He realizes now that there may be other such links and
the aliens could return once again. He decides the only real way to defeat
them once and for all is to travel back to their original source and destroy
them there. After some experimentation he gets the link to work and finds
himself traveling back to ancient Athens. He first finds himself in a village
and must find the trail of evidence that will lead him to the alien source. He
discovers that the aliens have presented themselves to the Greek people as
gods, having them build great temples to worship and honor them. The aliens
have infested the Acropolis and Duke must destroy them! After clearing the
Acropolis he thinks his work is finally done. He is just about to celebrate
his victory when he discovers there is yet another temple, a hidden temple,
unknown to modern day archeologists and ancient Greeks alike. He follows the
trail to the temple and there he makes yet another startling discovery.


Quote

At the time Lo Wang was delivered into the world, he was not alone. Lo Wang's
mother was blessed with twin baby boys. Unfortunately, due to the fact that
his mother was unwed, she gave them both up for adoption. Lo Wang's new family
was only able to afford to raise one child, therefore, his brother was adopted
by another family. His brother, Hung Lo, was adopted and raised by the evil
overlord Pu Tang.

Pu Tang was an evil man, and raised Hung Lo as a deciple of evil, and taught
him about the dark side of Ninja fighting. Once Hung Lo reached maturity, Pu
Tang died, but before his last breath, Pu Tang passed his evil soul into Hung
Lo.

Hung Lo took control of the oriental underground, the undead, the spirits and
demons who would perform the deeds for his evil ways. He had the power to
someday control the world, and decided to infiltrate the key cities of the
world to empower himself as the ultimate crime lord for his evil empire.

The only problem with Hung Lo's plan is the fact that Lo Wang shares a sense
of extra sensory perception with Hung Lo, and they can sometimes read each
others thoughts. Lo Wang knows of Hung Lo's evil plan, and Hung Lo knows that
Lo Wang will stop at nothing to keep him from destroying the world.

Hung Lo must trick Lo Wang into a death trap to stop him before it's too late.
Lo Wang must battle through the levels of the evil fortress to stop the Twin
Dragon, or die in the process.


Download

Secrets of the Acropolis
Gamers.org (installer)
Gamers.org (extracted)

Twin Dragon
Gamers.org (original)
ProAsm (repacked version for source ports)

Notes

1) Secrets of the Acropolis is also included as part of the EDuke32 Addon Compilation. If playing on modern source ports, it is recommended to use that version instead. Same applies to Twin Dragon, use the repacked version for your favorite source port. If playing on the DOS versions of Duke3D and SW, then you should use the original archives (sota.zip and tdragon.zip) instead.

2) The original version of Twin Dragon has a game breaking bug in the level Secret Garden or The Garden (don't remember the exact name of the level, I've seen both names mentioned before). The level ending sector is wrongly coded and you get stuck unable to progress to the next map. You then have to either cheat with SWTREK to warp to the next map (I think you retain your arsenal) or start the next level with sword only (using command line parameters or Twin Dragon's map launcher). If playing in source ports, I HIGHLY recommend using the fixed repacked version by ProAsm, as that one doesn't have the bug, so you should normally advance to the next map!

3) Shadow Warrior Classic Redux also has its own repacked Twin Dragon grp file (TD.grp). This version has also fixed the game breaking bug. It is up to you to decide if using this version of the other repacked version in your favorite source port. I don't know if there is any difference between this version and the other repacked version or if the version included in Classic Redux is based off the repacked one by ProAsm or the original archive with fixes applied manually. If anyone knows more technical details about this, please let me know! :)

Have fun!

EDIT: To answer a question that was asked in the previous topic, if we will play other Build Engine Games and their mods, then yes, I plan to at least cover a couple more Blood and SW maps/mods, including the original levels. That assumes they will get chosen to be played and if there is enough demand for playing stuff for other Build engine games. Blood has a healthy selection of maps/mods that will be considered to be nominated/played in the future at the very least (not sure of other Build games, there isn't too much custom content for Build games besides Duke3D and Blood). Perhaps in 2023, we might have other Build games nominated/played as well. :)

This post has been edited by FistMarine: 01 September 2022 - 02:48 AM

4

User is offline   Quacken 

#2

Never knew about Pu Tang. That's a name I never wanted to hear until now.

There is one pretty major caution between the Redux remaster and all other versions, which is how I got the game and played TD twice beforehand: Land mines on the former are offset enough units into the ground so they're buried into the ground, and only when they are about to detonate do they hop out of the ground and kill you instantly. It doesn't really matter for the stock 20 levels in Base SW or Wanton Destruction, but it makes City of Despair by far my least favourite level out of the three Redux map sets. Even while playing on DOS though I still hate this map... From my own memory, on City of Despair there's one mine behind the medikits at the start of the map beside the flipped over vehicle, one mine standing near the entrance to the first tunnel, another after the tunnel, and the final one you should worry about is past the red truck to the right. Not sure if this information is relevant to anybody but myself. I'd play on VoidSW, but I am one achievement away from getting everything on Redux (beating Twin Dragon specifically on the Redux port), so I think I'll just suck it up and play Twin Dragon on Redux.
2

User is offline   juvenite 

#3

Let's go!! I was looking forward to this. These days are gonna be somewhat more chill so I can take my time playing both addons. I'm excited, specially for Twin Dragon - been playing a bit too much SW recently I suppose Posted Image
Will write my thoughts as soon as I finish each.

This post has been edited by juvenite: 01 September 2022 - 08:39 AM

1

User is offline   Quacken 

#4

Let's actually do some Duke tonight. I'll first do Secrets of the Acropolis and then move on to Twin Dragon. Seeing as I am positive the authors of this map set aren't directly stated in FistMarine's introductory post, I'm also going to put the authors of each of these maps below the map titles, to give some more spotlight to the crew at Level Infinity. Without further ado:

The Village
Aaron Barber

A pumping MIDI accompanies you on this stroll through a world far past its own time. The Village is sleek, decently paced and bleeds 90s charm. The retextured keys make for a great touch, as the key switches are replaced by bronze masks that must have enough sentience to open doors for you. The rest of the new textures all look quite nice, especially for 1997. Some of them definitely have a ton of artifacting, but in my opinion I think it adds to the charm of this map's visuals. I definitely see the complaints about the cryptic nature of these maps already. The Village is one of those maps where the only way you open non coloured doors is via switches. However, if you keep your wits together and always make sure to keep an eye for hidden switches, no door puzzle in this map is overly convoluted. The only switch and door combo that can stump you is the one with the big lever. There's a marking above the lever and the door it opens which connects the two. This map also happens to be really varied. There's a fishing village which Level Infinity would expand upon (ironically enough) in Twin Dragon, a small spot of grey caves, a wooden stockade, a marble plaza and a main city hub with some nice verticality. The combat in The Village is definitely very forgiving, but map author Aaron Barber will still try to take you by surprise with leaping Enforcers and many flying Troopers. The triple attack of Commanders at the end of the map isn't exactly difficult, but there's also quite a lot of annoying cover to get yourself stuck on. The Village is certainly a good start to Secrets of the Acropolis. I like this map quite a bit!

7.5/10.

This post has been edited by Quacken: 02 September 2022 - 03:46 AM

3

User is offline   juvenite 

#5

Alright, I finished Twin Dragon. It was an interesting play, and it enlightened me a bit when it comes to some things Shadow Warrior.
This addon made me realize why SW can be considered a mixed bag by a lot of people. Although I don't 100% agree when it comes to the base game (or at least not as far as I've played, I haven't finished it yet), but I can definitely say this regarding this addon. It seems to amplify a bit of what's good and everything that's bad in the original game.
The amount of deathtraps in later levels gets really annoying. I died a bunch on The Fishing, some my own fault, others just unfair shit like mine traps. Yes, these are things that are also present in SW, but it seems they went much harder on this. Some levels straight felt like Deathtrap Simulatorsâ„¢. Getting lost wondering what to do next was also somewhat of a common occurrence.
The new added levels are okay for the most part, could be better, but they don't feel like they are part of an official addon that'd be commercially released.
Let's take Duke3D Atomic edition, for instance. A lot of people seem to argue that the 4th chapter is the least played one, some say that it's the weakest out of the 4, but in its favor, it decently added new stuff to the game. Had a new theme, new enemies, new music, which is refreshing while still staying true to the original game. Twin Dragon doesn't feel like that to me, however. They don't stand out from the SW's original levels enough to really feel like a proper addon in my eyes. No new enemies besides the new boss (and cutscene which is nice, gotta give credit where credit is due), no new music and the themes are not too different from what's already present either. I do understand that some of these things have limitations due to SW's specific thematic premise, but still. IMO it just lacked variety.
I still appreciate the extra content, the levels are reasonably well-built, plays solid as the original game does (save for some dick-ish traps and enemy placements).

If you like Shadow Warrior, sure, it's solid giving it a try. But if you're expecting a lotta custom stuff, you'll be disappointed. Just play it like they were an extension of the original episodes, I guess.
3

User is offline   Quacken 

#6

It's time for more SOTA. Up next is:

The Propylea
Cho Yan Wong (aka Tempy)

The Propylea is a great spelunking map that's even better than The Village. Tempy paid special attention to the lighting in this map, with there being many really nice looking areas with plenty of contrast. I also want to point out how beautiful the sky looks. I think it's just a recoloured sky from another game, but that shade of blue is really nice. The Propylea is also much better paced than The Village; there's no switches laying around and being obscured by coloured lighting, and no tricky navigational sequences other than when you blow a random hole into an underwater pillar after hitting a switch. Even this isn't that bad honestly, you'll probably find out what happened by looking around the nearby areas, and it's not that far to walk from that switch to the pillar. My main complaint is that there's definitely too much ammo. You get 20 Pipe Bombs and at least 15 rockets on top of a Chaingun you don't need, and that is basically everything you'd need to kill all 62 monsters anyway. Even the Battlelord at the end gets trivialised by the Shrinker. While it may not be as difficult as The Village, I think The Propylea is a better map overall. Tempy authored my least favourite map in Twin Dragon, so I'm very happy he was able to redeem himself with this map.

8/10.
3

User is offline   NNC 

#7

Actually the Gate TC was also made by the same team. I always thought Barber's E4L1 was pretty cool. In Twin Dragon, I fondly remember Crista Forest's Fishing Village. It's like a map you play through once, and will remember its layout until you call it a day.
2

User is offline   NNC 

#8

View Postjuvenite, on 02 September 2022 - 05:59 PM, said:

Alright, I finished Twin Dragon. It was an interesting play, and it enlightened me a bit when it comes to some things Shadow Warrior.
This addon made me realize why SW can be considered a mixed bag by a lot of people. Although I don't 100% agree when it comes to the base game (or at least not as far as I've played, I haven't finished it yet), but I can definitely say this regarding this addon. It seems to amplify a bit of what's good and everything that's bad in the original game.
The amount of deathtraps in later levels gets really annoying. I died a bunch on The Fishing, some my own fault, others just unfair shit like mine traps. Yes, these are things that are also present in SW, but it seems they went much harder on this. Some levels straight felt like Deathtrap Simulatorsâ„¢. Getting lost wondering what to do next was also somewhat of a common occurrence.
The new added levels are okay for the most part, could be better, but they don't feel like they are part of an official addon that'd be commercially released.
Let's take Duke3D Atomic edition, for instance. A lot of people seem to argue that the 4th chapter is the least played one, some say that it's the weakest out of the 4, but in its favor, it decently added new stuff to the game. Had a new theme, new enemies, new music, which is refreshing while still staying true to the original game. Twin Dragon doesn't feel like that to me, however. They don't stand out from the SW's original levels enough to really feel like a proper addon in my eyes. No new enemies besides the new boss (and cutscene which is nice, gotta give credit where credit is due), no new music and the themes are not too different from what's already present either. I do understand that some of these things have limitations due to SW's specific thematic premise, but still. IMO it just lacked variety.
I still appreciate the extra content, the levels are reasonably well-built, plays solid as the original game does (save for some dick-ish traps and enemy placements).

If you like Shadow Warrior, sure, it's solid giving it a try. But if you're expecting a lotta custom stuff, you'll be disappointed. Just play it like they were an extension of the original episodes, I guess.


I always thought the best episodes are only made by 1 person or 2 at most. The more people messing around, the more it will be a clusterfuck product. Actually The Birth is suffering from this as Randy had a completely different style to Allen and Levelord, and Levelord's unfinished levels were messed up. In SOTA/TD/The Gate there were an overwhelming number of people worked on the TC, and the quality never felt consistent. Neither the themes, if there were any. Actually many Doom wads, from TNT through Master Levels to even E4 or Doom 2 vanilla had this issue too.

This post has been edited by The Watchtower: 02 September 2022 - 11:35 PM

1

User is offline   Quacken 

#9

Here's another SOTA review:

The Erechtheion
Crista Forest (aka CD Warrior)

The Erechtheion makes a strong first impression. With a MIDI that sounds both goofy and strangely relaxing, accompanied by some tight visuals and a gettable secret behind a bed. There's a lot to like about Erechtheion, starting with more about the visuals: The ancient Greek architecture is the best it's been so far, with a big marble palace in the centre, great looking gardens, and bright blue bodies of water. I don't think water of this colour was present in the previous two maps The fights in this map don't take long, but they can kill you quick if you don't act in time. Finally, Forest is extremely generous with ammo and health. You get about 45 Shrinker Crystals alone to completely eliminate any relevant threats in this map, of which there aren't many to begin with.

This map does suffer quite a bit in terms of its progression, however. This is the first map where it's not easy to find the keys, and Forest often asks you to read between the lines before you can proceed. To get the yellow key for instance, you need to go into a dark corridor and hit a tiny button that's placed right next to the door you came through. And to open the path to the red switch, you need to look for a bloody hand print in between a row of trees. And before even finding the red switch, you have to trek through a cramped zig-zagging path of crushers and have Troopers spawn in your face. Erechtheion looks great and its combat is serviceable, but it's definitely the lowest map of the set so far, owing to its cryptic layout that is very unfriendly to first time players.

6.5/10.
2

User is offline   Radar 

  • King of SOVL

#10

My quick and dirty playthrough of "Secrets of the Acropolis". Thanks to FistMarine for that whole write-up in the OP. The history of the mod piqued my interest. I don't have time to write up a big review, but I did write a rather large description on my video so that may count as some sort of reflection write-up. 4k will process in about a day or so.


4

User is offline   juvenite 

#11

man, how large is your average 4k recording? shit must be 40GB every 30min
2

User is offline   Quacken 

#12

SOTA time!

The Parthenon
Ryan Isenberg (aka Tagg)

Despite only featuring the titular wonder of the world at the end of the map, The Parthenon is another solid map. Instead of tasking you with working your way through a holy temple, Parthenon is a tense dungeon crawler with not a lot of health. This is definitely the hardest map of the set so far. In addition to your lack of health compounded with there being hitscanners at every corner, the only non-secret big gun you get for a majority of the map is the Shrinker, which isn't great here. You'll have to constantly peak around corners with the Shotgun and Chaingun in close quarters. Parthenon happens to contain my favourite MIDI so far. It's slow and spooky, which is great for making you nervous at low health. This map also continues SOTA's streak of great visuals. This map is mostly flat compared to the previous three maps, but it has some fantastic lighting for the time, and there's some decent texture variety. I also happen to like a recurring theme this map set has, where if there's a body of water no matter how tiny, you can always submerge in it and find some place to explore. Though, I wish there were some unique areas to discover in the underwater tunnels, just to give them more of a use. The Parthenon is no nonsense stuff, and I appreciate its added challenge.

8/10.
3

User is offline   Radar 

  • King of SOVL

#13

View Postjuvenite, on 05 September 2022 - 07:45 PM, said:

man, how large is your average 4k recording? shit must be 40GB every 30min


I have an RTX 2070 with a very efficient and optimized NVENC encoder, which basically encodes lossless quality video even at medium encode settings. I've performed tests in Handbrake. A medium-setting encode compared to placebo setting is 4x faster and only a few MB smaller. They're basically the same video. The whole 70 minute video is just ~40 GB.
2

User is offline   Quacken 

#14

Here's another SOTA map. Just two more maps after this one...

Hades' Passage
Jim Semkiw (aka Ironman)

In which SOTA unfortunately has its first miss. Hades' Passage tries to be a vertical sandbox to make use of the Jetpack, but it ends up being cramped, stilted and weird. There is noticeably more resource deprivation in this map than the usual standard. Health is still not easy to come by like in Parthenon, but now you'll be hard pressed to have more than 15 shells on a consistent basis, and you'll be lucky to have a Chaingun with some ammo to use with it. That's not good for this map, where you're wrangling with annoying Troopers that always fly just high enough so you can't look up to shoot at them, and Pig Cops and Enforcers cowering in the darkness while taking cheap shots on you. I'm also not a fan of the Octabrain placements in this map, they along with some Sharks are shoved into extremely tight water spaces where taking damage from either psychic blasts or bites is inevitable, and you get the Devastator too late to really take advantage of it. Not that you'd want to anyway, because you'd probably take splash damage from trying to one tap the Octos. Despite some more overall solid visuals, Hades' Passage ends up being more frustrating than entertaining, and I think it's very mediocre.

5/10.
3

User is offline   Aleks 

#15

So, I've started playing Twin Dragon and after 4 levels, I gotta say it's rather poor compared to original SW or Wanton Destruction. I'd generally agree with most of Juvenite's comments. The first level is probably the best, there's more planning to the layout, some more interesting combat and even a drivable car (that unfortunately cannot get past the blown-up garage door), even some more creative interconnections. The 2nd level was the most bullshit one so far, mostly due to deathtrap mines placed behind every corner on the street without any purpose other than to annoy the player. Jumping on rooftops could have been more interesting as well if it didn't feel so labrenthine, also seems I've managed to skip part of the map at first due to going behind the red key door through the hole in the wall instead of the correct way, which made me wonder a bit. Also, after 2 levels I really noticed there's way too much ammo and goodies everywhere, also the enemy placement feels somehow random. My favourite part about the level design is how the shading is used, it's mostly detailed and highlighted, kinda on contrast with a bit plain texturing (then again, I think SW art in general looks kinda poor compared to Duke's, being mostly generic cartoonish/Doomish stuff outside of the Asian temples). Besides deathtraps, this level also managed to kill me on a few other levels, usually squishing me somewhere (most notably when trying to climb the ambulance/van at the end). The 3rd level is a hospital with what seems to be a nice, interconnected layout, yet the map managed to get me quite good due to having 4 coloured keycards in quite an "unlinear" progression, which made me wander the empty hallways looking for somewhere to put my yellow key in for quite a bit until I've noticed a small switch (which was notably turned on already) that would reconfigure the stairs going up into ones going down into a lower floor. Gotta say this was a cool effect even if not fitting the hospital theme at all (would work better for something futuristic or some medieval kind of hidden chamber), but it was so cryptic it's crazy. I liked the final fight with 2 sumos. The next level, for the better part, was just a sewer maze where each corridor would only be marked by dead baby rippers if visited earlier (gotta admit that it felt pretty satisfying killing them with shotgun with barely any threat), also here the design took a complete low with very lazy texturing and boring progression. So far, nothing special, this has a look of a more or less polished 90s TC, but definitely not of a "commercial" product.
2

User is offline   Quacken 

#16

Let's finish up SOTA. Soon, I'll be on to Twin Dragon!

Ancient Spaceport
Niel Munday

SOTA's secret level is even more awkward than Hades' Passage. You won't have enough ammo to get past the cloud of Octabrains in the water, so you'll have to swim past them and flip a switch to end up in the tomb. Finding the Shotgun isn't hard at all if you know where it is, but it's in a dark corner, and if you don't find it you're forced to hack it with the Pistol and Freezethrower until you get lucky enough to take a Shotgun off of a Pig Cop, which is ill-advised as frozen hitscanners don't drop ammo when killed. Even with the Shotgun though, you'll be constantly hurting for ammo and other supplies. You'll have to endure a tedious platforming session in the dark with dark platforms that have the same texture as the walls that punishes you with fall damage, some tight encounters with Enforcers and Commanders that will drain your shells dry, and a truly moronic six switch puzzle underwater. You're forced to kick each button just to activate and re-activate them, and you don't get a hint to solve it. That's worth a DNCLIP through the red door in my opinion. This was true for Hades' Passage also, but none of the key doors in this map are marked. They're marked with a Blood gargoyle, but none of them are coloured to match the key they require. The map finishes off with two mean Battlelords one after the other, which is the cherry on top of a dud of a map.

3/10.

The Hidden Temple
Nick Parde (aka Zarzoo)

With the task of finishing off SOTA, I'd say Nick Parde did a pretty solid job. For starters, this map has probably my favourite MIDI of the entire set. This dungeon crawler in a long line of dungeon crawlers probably didn't need a pounding metal track to go along with it, but I'm sure not complaining. This map looks pretty okay for the most part, but it remains at a fairly static light level throughout and doesn't deviate with many bright areas except for the final arena, which makes it look a little flat despite the good shading. The combat is also more of the usual standard. Hitscanners are aplenty in this underground temple, and Parde goes light on Commanders and Sentry Drones like the rest of his comrades. This map is also fortunately a lot more generous with ammo than Ancient Spaceport is. You've got about 50 Shrinker Crystals in total to stomp out all of the Commanders, and 45 Devastator rockets plus hoarding your RPG rockets is more than good enough to kill the Overlord at the end. The hardest part about this map is hunting down the four goons that spawn along with the Overlord so you can get 100% kills.

7.5/10.

Closing Thoughts

If I had to liken Level Infinity to a team that I'm more familiar with, I'd go with Team TNT. Both were late 90s mapping teams that produced content for their respective engines that were clearly products of their time. SOTA, much like TNT Evilution, is a divisive map set made with textures that were scrounged together in a pre-2000s Microsoft Paint, and they have design philosophies built upon non-linear navigation and friendly fights that are rarely ever crowded. I've come to appreciate when a map set is clearly well made but is held back by being made in the 90s, by people who hadn't quite figured what was the best formula for good gameplay and weren't extremely acquainted with the engine they were making content for. It's the difference between why I like SOTA but despise Last Reaction. Fortunately, SOTA's worst is far better than the worst that Team TNT had to offer, and I happen to think it's quite a solid map set. Its textures are very humble by today's standards but would have far eclipsed any of the custom textures people were making for Duke 3D or even Doom at the time; its collection of new MIDIs aren't as catchy as Duke Caribbean's, but are still serviceable, and it has a unique premise that definitely warrants at least one playthrough. My final rating for Secrets of the Acropolis is a 7/10. As a pre-2000s map set for Duke 3D, it is on par with Caribbean in terms of quality.
2

User is offline   Quacken 

#17

I didn't have anything else to do tonight, so I decided to start Twin Dragon. I haven't touched Shadow Warrior in a good while, so my skills are pretty rusty, but let's see what's in store...

Home Sweet Home
Neil Munday (aka Rimmer)

Home Sweet Home is an average starting level. The hornet nest inside of the basement is a pain in the neck to take out due to it being so cramped. The best strategy for me was to punch them all out. But apart from the hornet nest, nothing in this map will have a high chance of killing you. Even the Shadow Ninjas aren't a threat. The first one can be softened up with the Gas Bomb and then killed by unloading 4 shots from the Riot Gun into it, or camping the water and firing grenades when you surface. The other Shadow Ninja can be blown up with a very easy secret Nuke. I suppose I like the visuals, but there's more big and blocky sector-based couches than I think looks good, and it's a little too dark for my liking. Maybe that's just Redux's fog effect, but it'd still help if a light system was employed in this house. There's really not much to say about this map honestly. It's short and inoffensive, but when comparing it to SOTA's opener it leaves quite a bit to be desired.

5.5/10.
3

User is offline   Quacken 

#18

Another day, another Twin Dragon map. And this one's a doozy:

City of Despair
Cho Yan Wong

Ah, City of Despair. My old nemesis. City of Despair is a relatively brutal difficulty spike which tasks you with navigating a vertical city and using no good weapons for long distance combat until way later in the map. A big challenge of this map is knowing what triggers what. If you're unaware of where the mines in the opening section are you'll probably take a death or two on each of them. The fountain in the square is a death trap that will kill you instantly if you don't hide in the water for cover. My advice is to just hug the brick wall and you'll avoid turning into a red mist. And finally, gun to my head, I can't tell you how to get to the Riot Gun consistently. If you're even a handful of units close to the explosion that blows open a hole in the room to the left, you'll be mortally wounded, and if you're any closer, you'll be wondering why you just reloaded your last save. City of Despair is a map that requires you beat the map before actually trying to take it seriously. So why do I kind of like it?

The city streets are pretty fun to run around in. With your lack of Uzi clips at the start you're incentivised to go cut people down with the Katana, which is always fun to do in this game. If you fetch the Smoke Bomb from the dumpster near the fountain area you can make mince meat of the rooftops, including a Shadow Ninja that is suicide to take on otherwise. After that's done you get another Smoke Bomb and a Grenade Launcher which greatly helps with clearing the path to the red key. Wong is really generous with ammo in this map, and his health distribution isn't that bad too. This is definitely not a map that's meant to be rushed, you have to take your time. For a first time player, City of Despair is the meanest son of a bitch that Level Infinity ever put out, but on repeat playthroughs, taking your time and finding the best ways to utilise your powerups is quite rewarding.

6/10.
2

User is offline   Quacken 

#19

More Twin Dragon! I'm going to start doing these two at a time, just to speed things along.

Emergency Room
Jim Semkiw

Emergency Room is another pretty average map. It's visuals are up to standard and the combat is probably the most fluid it's been in Twin Dragon, but the map's slower pace and the lumbering song it's given due to the default order of Base Shadow Warrior make this map drag if you're not following the path Semkiw wants you to take. There's always one key that stumps me whenever I play this map that grinds it to a halt. For this playthrough, it was finding the switch in a dark corner that opened up the room containing the red key. This map contains the only triple Sumo encounter in commercial Shadow Warrior, but it's a non-fight. You can either pick them off one by one with the Rail Gun or the Missile Launcher, or awkwardly aim a nuke into one of the buildings to blow them all up. I chose the latter, and it took me more tries than I would have liked. Emergency Room is another average romp, and I don't really care for it.

5.5/10.

Hide and Seek
Nick Parde

It seems like Nick Parde really liked endless dark corridors, so he put them in both this map and Hidden Temple. Hide and Seek is a sluggish, clumsy trash heap of a map. I get the feeling this may have been one of Parde's first maps for Shadow Warrior, because it feels more amateurish than the previous three maps. The brightly lit basement sections do look and play pretty nice, even if there's not a lot of texture variety and there's some weird design choices like spawning Coolies in tight boxes. Then you get to the sewer!

This sewer section can bite me. It's one brick texture copied over a series of right angles, low light levels and far too many Baby Rippers. I'd estimate about 70 of the monsters in this map are just these assholes spread around the place. The water makes them difficult to gun down with the Uzi or one tap with the Katana, and their projectiles are fast and hurt a ton if you get combo'd by them. There's a little enjoyment in hunting all of them down, but overall it's just not a fun section. There's too little health spread around and not enough ammo for the big guns to make me feel comfortable blowing all of it.

4/10.
3

User is offline   Aleks 

#20

I've finished the 5th level of Twin Dragon, Warehouse, a few days ago and originally planned to write my "review" of it a bit later when I play more, but since I didn't have time and am travelling again on Monday, I'll forget everything about this map by the time I get back, so here it goes:
...
Well, there's really not much to say about this map. It lives up to its name - it's literally a warehouse, so just large rooms filled with crates, the most creative kind of design you can imagine in an FPS, there's not even much variety to their design or at least the angle at which they are placed. There also isn't much challenge in this map's combat, making it even duller than the sewers in Hide and Seek. At one point I thought I'll be operating a crane, but turned out the switch was just opening some random gate. Meh.

Anyway, gonna address some stuff from Quacken's posts:

View PostQuacken, on 13 September 2022 - 04:19 AM, said:

You won't have enough ammo to get past the cloud of Octabrains in the water, so you'll have to swim past them and flip a switch to end up in the tomb. Finding the Shotgun isn't hard at all if you know where it is, but it's in a dark corner, and if you don't find it you're forced to hack it with the Pistol and Freezethrower until you get lucky enough to take a Shotgun off of a Pig Cop, which is ill-advised as frozen hitscanners don't drop ammo when killed. Even with the Shotgun though, you'll be constantly hurting for ammo and other supplies.

I think back in the 90s, most people didn't design their levels with "pistol start" in mind (or well, "katana start" in Shadow Warrior), at least when it comes to episodes, hence your struggles with ammo/guns - normally you'd have plenty of ammo saved from previous levels. Personally, I've never really bothered playing like that and to be honest I tend to appreciate ammo being more on a scarce side, which encourages/rewards the exploration more, rather than sticking more rockets in my face than I could reasonably use on the enemies.

Also your reviews made me really want to replay SOTA, probably won't find time for that now though. I remember The Erechteion being my favourite level, feeling genuinely like a puzzle kind of map back when I first played it in the 90s. Also it's worth noting it was made by Crista Forest, somehow overlooked mapper/art designer that also worked on The Gate and made some of the more "atmospheric" levels there IIRC, in particular E4L2: Into the City, which always felt kind of impressive for me as this is where we really get to explore the alien... culture from the inside (I also think she made The Drone Chambers, which wasn't my favourite level, but a strong impression and a fine layout as well).
1

User is offline   Quacken 

#21

View PostAleks, on 17 September 2022 - 09:16 AM, said:

I think back in the 90s, most people didn't design their levels with "pistol start" in mind (or well, "katana start" in Shadow Warrior), at least when it comes to episodes, hence your struggles with ammo/guns - normally you'd have plenty of ammo saved from previous levels. Personally, I've never really bothered playing like that and to be honest I tend to appreciate ammo being more on a scarce side, which encourages/rewards the exploration more, rather than sticking more rockets in my face than I could reasonably use on the enemies.


It's strange, because ammo management on a pistol start is pretty reasonable not only in SOTA, but even when comparing the SOTA authors' works in Twin Dragon. Every map in SOTA prior to Hades' Passage had good health and ammo distribution. Hades' Passage itself was authored by Jim Semkiw, who was also the author of Emergency Room in TD. The former doesn't even give you more than 15 Devastator rockets, but the latter has more shells and explosives than you'd ever need to beat the map. I'd understand if it was a specific author who across all of his work deprived you of resources on a pistol start, because that would just be the author's intention for you to play his maps single segment. But this two-faced approach you see when comparing Semkiw's contributions to SOTA and TD makes me think there's no consistency at all, and the resource availability is just what the author was feeling like at the time.
2

User is offline   MetHy 

#22

I haven't replayed it recently but Secret of the Acropolis is great. If you check the readme, almost everyone involved would soon after be also involved in commercial products, in fact it wouldn't surprise me if that was the plan for SOTA as well (the only faux pas for a commercial product being the use of tiles from Blood and iirc Quake as well, but which could have easily been replaced and besides that never stopped NAM/WWII GI).
In the first level you can easily see Aaron Barber's style develop, for instance with the use of miniature constructions in unreachable places to simulate the idea that the place is far away in the distance, a somewhat unique idea for Build that he extensively used in Redneck Rampage: Rides Again later on. I believe he is probably responsible for bringing that idea to Rhett Baldwin's levels in that game too.

Then in the second level you could say the same with Tempest, the level being a temple very reminiscent in style and structure to his temple levels in Twin Dragon and Deadly Kiss: big interconnected rooms, a lot of attention given to natural ights and shadows, and an underwater network connecting several key areas.
1

User is offline   Quacken 

#23

It's time to Warrior some more Shadows. Our next two maps?

Warehouse Madness
Nick Parde

Oh great, Nick Parde gets to double dip. When I said City of Despair is the hardest map in this set, I forgot about Warehouse Madness, which is definitely the top of the charts for difficulty. Not in a fun way, though! Your foes are great at using the terrain to your advantage to an excruciating degree here. Trying to blow up the barrels that sit inside the cover the Ninjas use is way too precise than it needs to be. You could use the Uzi to blow them up easier, but I like to conserve bullets to have an easier time blowing up the barrage of Coolies that get thrown at your feet. Word of the wise is to make a beeline for the secret Missile Launcher. It is your life saver in this map and it makes the beginning much more tolerable. Only once you leave the left area with a Grenade Launcher and a used up Medikit will you have some kind of a foot in the door. With a steady supply of grenades, you can get by without too much of a hassle. The visuals are pretty forgettable. It's... sure a warehouse. You could have probably recreated this map with stock Atomic Edition textures pretty convincingly if you tried. Not much to say here. Warehouse Madness is a jarring spike in difficulty that's uncomfortable to play, and I don't really find it all that fun. I guess it's better than Hide and Seek, but it's not by much.

4.5/10.

Weapons Research Centre
Eric Boltjes

Just as Twin Dragon was already slipping into a malaise of averageness, newcomer Eric Boltjes brings forth an actually pretty fun map. The beginning is fast and frantic. With squads of Brown Ninjas bumbling about, you've got all the reason in the world to go cut them all down with the Katana. A shower of blood such as this is a sight for sore eyes. There's some patience required as you're forced to gun down Coolies and Guardians with the Uzi, but once you make it to the Smoke Bomb, you're treated to 25 seconds of carnage. This fight isn't particularly hard, but there's a mine and a few Coolies which discourages you from holding down M1. With a steady trigger finger, mowing down about 15 Ninjas with a powered up flurry of fists is the most fun I've had in Twin Dragon thus far. This map contains the first Serpent Lord of Twin Dragon, and if you burned your missiles somewhere else he's genuinely pretty tricky to take out. I was lucky to get a Gas Bomb from a Shadow Ninja, which softened up the Serpent and his Guardian goons, allowing for grenade spam to clean up the rest. Weapons Research Centre is a surprise sleeper hit! It requires some patience, but if you can bear the start, you'll be well rewarded with plenty of carnage to be unleashed, both with the Smoke Bomb and a healthy supply of grenades.

8/10.

This post has been edited by Quacken: 19 September 2022 - 03:54 AM

3

User is offline   Quacken 

#24

Let's get some more Twin Dragon done.

Toxic Waste Facility
Ryan Isenberg

Toxic Waste Facility isn't really a fitting environment for Shadow Warrior specifically, but Ryan Isenberg manages to squeeze out a pretty decent map. Though, I'd mainly attribute this to the music choice. I don't really care for most of the Shadow Warrior soundtrack, but Landwaster was always a track that stood out to me. It's cold, lonely and depressing, and it honestly saves Toxic Waste Facility from being a mediocre slog. The low lighting and monotonous steel corridors are surprisingly fitting for the description I gave Landwaster, even if I think it's entirely unintentional and mainly a fault of Shadow Warrior's lack of techbase textures. Isenberg also demonstrates good use of shadows in this map that reminds me a lot of his SOTA map, Parthenon. The fights blend together though, with the only notable one being a tight squeeze with a Shadow Ninja. Even this isn't too bad. Just watch where you're going and spam the doorway with grenades. While Toxic Waste Facility doesn't have much going for it in terms of combat, it ranks higher up the list solely due to its great atmosphere and lighting.

7/10.

Silver Bullet
Krystian Palys (aka Blade), Crista Forest, Ty Matthews, Jim Semkiw

I'm not sure why this map needed four authors, but I'm here to say that Ryan Isenberg made a better map than these four could muster together. Silver Bullet is fun in short bursts, but the action slows down whenever you're trying to find key doors. This map feels really underpopulated, and I think it suffers heavily from that. Picking up the yellow key triggers a bunch of rocks to fall on your head, and spawns... one Mini Ripper. The horror! The parking lot where the red door is has like four monsters in it and doesn't repopulate when you pick up the red key, even though it really should. Only the bank really feels alive since the map actually bothers to repopulate this area with new monsters once you solve the vault puzzle. The vault puzzle is stupid and has no strategy. You either know the order or you'll spend eight minutes brute forcing it. I guarantee that if you put this setup in a real bank vault, you'd drive down your theft attempts significantly. I don't hate Silver Bullet, but it's really boring unless you know where to go at every point.

4.5/10.
3

User is offline   FistMarine 

#25

Hey everyone! Thanks for your participation and also thanks Radar for uploading a playthrough of the mod on YouTube! Always appreciate when people upload playthrough videos of old Duke3D mods/TC. :)

As for the lack of activity, I am unfortunate to announce that my PC's hard disk died at beginning of the month (just a few hours after I created this topic) and so far I was unsuccessful to recover my data with help of some friends that know more about recovering data than I do. I am hoping to have my data recovered soon (we are talking about over 100 GBs worth of data!), even if it will cost a lot of money. I only managed to recover the backup stuff I had saved on my laptop and my USB stick, so that is only about 10% of the data I had, which is unfortunate. :(

Anyway, I will post my thoughts about SOTA since I played and finished it last week on my laptop. I played the mod in two sittings, Thursday and Friday and it's the second time I am playing the mod (previously in 2014 or so, I played it in EDuke32), though before I start reviewing, I will first to respond to some earlier posts:

Regarding Twin Dragon, I haven't played the addon in years, although I had a JFSW playthrough in progress on PC since few months ago and had done the first 4 levels but due to hard disk failure, all that progress is lost (until I manage to recover my data, if possible), so I will settle with playing the DOS version on my laptop for this month, as I already had it installed since a few months ago. So anyway, I agree with Juvenite's comments regarding SW in general. Too many death traps exist in the original game and its addons, coupled with some enemies dealing massive damage and being able to insta-kill you ruin the enjoyment of the game for me.

SW overall is still very fun mostly but I feel like those cheap traps drag the game down, meaning I have to save after every successful room cleared. Last month I completed the main game (DOS version) on No Pain No Gain for the first time (previously beat it twice on Who Wants Wang, as well as the shareware episode on NPNG) and starting with episode 3 (Bath House), the game turned into obnoxious saving/loading spam after each room cleared successfully. I had some levels where I got killed by the same goddamn enemy about 5 times, even when I had 100 HP.

Regarding The Gate, I know it's made by the same people but I didn't include it for this month due to the amount of maps it has, I thought for this month it was enough to have SOTA and TD. The Gate will be great when nominated another time, as I know it has been suggested before and it's a massive 4-episode TC for Duke Nukem 3D Atomic Edition. And I agree with Watchtower in regards to episodes being better when made by 1-2 people, I started to notice as of lately how inconsistent are the episodes made by multiple people. In the case of SOTA, it seems like there is a different mapper for each level. I am not very sure about as I am replaying the addon after these years but I will be sure to also post the author's name for each map when I review it.

Regarding the SOTA mappers becoming involved in commercial products (especially Redneck Rampage), I have read about this before but I haven't seen a comprehensive post that detailed who worked on each map. I've always wondered who made each map in both RR and RR:RA. Though I suppose this will be up for discussion when the RR games get nominated for the club (probably the next year), to not derail the topic.

Before I begin the actual review, I will first talk about the presentation and new stuff included in the mod.

If you download the installer version, you will notice that the mod comes with its own installer, going an extra mile to give the mod its own identity. This installer version (I took a couple pictures of the installer to show for everyone who is interested) is especially recommended for people wanting to play Duke3D 1.3D in DOSBox. I tried the extracted version for 1.3D and it didn't work, it gives an error about LOOKUP.DAT palette not found. This isn't the only time it has happened, I've had some GRP mods not work well in 1.3D in DOSBox. Because of this, if you want to play in the original release, you need to run the installer, which will extract the files into your DUKE3D directory and much like DC and Caribbean files extracted from GAMER software, they do not retain their original file dates. I am going to assume the files were going to be dated 28/08/1997, based on the installer's modified date. Maybe this works properly on an actual hardware, so maybe others can confirm here.

If you want to play SOTA in the Atomic Edition, you just use the extracted version and it runs fine. There are no new demos or anything like that and the name of the episode is only changed in the Atomic Edition because the original 1.3D release is hardcoded with original episode names that can't be changed (unless EXE hacking), so you just select L.A. Meltdown from the episode selection menu and you will begin playing SOTA!

Other new stuff as mentioned previously, include new textures and new music, as well as new modified sprites for the access cards. Otherwise, all the original Duke3D stuff (weapons, enemies and items) are unchanged. And to preserve compatibility with 1.3D, there are no new stuff introduced in Plutonium Pak/Atomic Edition. I took a couple of screenshots of the installer as well:
Attached Image: SOTA_SETUP_1.pngAttached Image: SOTA_SETUP_2.pngAttached Image: SOTA_SETUP_3.png
Attached Image: SOTA_SETUP_4.pngAttached Image: SOTA_SETUP_5.pngAttached Image: SOTA_SETUP_6.png

With that said, I will begin the review for Secrets of the Acropolis! Played in Duke3D v1.3D in DOSBox 0.74-3 on Come Get Some difficulty, all kills and secrets in each level with saves.

The Village - Ancient Greece
by Aaron Barber

Not a bad opener! The level is solid designed and presents a good challenge overall. The only annoying things are the confusing parts with the hidden switches that may make you stuck and the ammo being slightly tight early on (though just about enough to make it through the level). This is mostly caused by some enemies being paletted and as a result, they have twice as much health, which is a lesser known feature of the original 1.3D release. This was most noticeable with the Octabrains underwater that took about 4 shotgun blasts to die. I don't recall many other enemies being palletted but in some later levels, there were a few colored troopers and turrets that also had twice as much health (a colored trooper would basically become an assault captain in terms of strength, minus the cloaking/teleportation device). And you don't get all the weapons right away, you get only the first 6, while the registered weapons start appearing in the next level. :P

I admit I got stuck a few times and had to consult Mapster at two points (I avoided watching the playthrough that time), since it wasn't clear what one switch did and some rooms were also quite dark. And it also took me a while to find the last couple of enemies in the level, there was an optional room that had a few troopers and one enforcer.

I recommend saving the RPG (there are two pickups in the whole map) for the ending part with THREE commanders! Once you are done, you step into the sector with the centaur woman (?) and the level finishes.

Secret areas:
-At the beginning, go through a fake wall between two vases to collect a Portable Medkit.
-In the next room with the water fountain, going underwater you will notice two switches, one progresses the map and other opens a nearby secret temporary, after surfacing you will need to rush to the secret place which contains Portable Medkit and Steroids.
-At a later part in the map, jump through a window to collect an atomic health.
-When traveling on the bridge, jump above water to go through another fake wall, containing Pipebombs and Large medkit.
-In the dark room (after the E1L1-style staircase), press on the brown switch to temporary open a nearby compartment (near the bed), which contains Holoduke, Large medkit and RPG ammo.
-In the maze with the push walls, go to the other side and push one wall to access an atomic health and a captured babe.

Looking forward to the next level!
Attached Image: SOTA_E1L1_1.pngAttached Image: SOTA_E1L1_7.png

The Propylea
by Cho Yan Wong (aka Tempy)

I can say that I enjoyed this level a bit more. There weren't many confusing parts (maybe when one action on land caused an underwater wall to blow up, had me stuck for a while) and usually it was clear what you were supposed to do next. The level also focuses on some underwater action.
And yes, the Mini Battlelord at the end isn't that much of a threat, I was lucky to use the Shrinker and hit him in the feet right around the corner, so that made for an easy kill. And there is indeed a lot of ammo in this map, not to mention the registered weapons start appearing and you can have a fully stocked arsenal (almost full ammo on everything). To compensate, there seemed to be only one atomic health present in the map, so I recommend saving it for the end. The Portable Medkit and the health pickups present in the level will be enough to recover from taking a couple hits.

The blue sky in this level seems to remind me a bit of the one from Redneck Rampage, though it is very likely that some ART was shared from other build engine games. Most notably Blood and RR, probably some shared SW art as well? Since the mod came out around time SW registered came out, we don't know if some SW art was shared from the shareware version or none at all. Maybe others can analyze the textures better than I do. Methy mentioned some Quake textures used as well, though I don't know if I noticed any Quake textures used in any of the maps, I should be more familiar with Quake than with Blood and SW, considering I grew up with both Duke3D and Quake (as well as Doom 1 & 2, Heretic and Hexen) but never played Blood and SW until a couple years ago. Also when I first played SOTA back in 2014, I thought that the art was entirely new for reasons mentioned previously. :P The soundtrack should be entirely new, at least.

There are 3 secrets to find:
-At the beginning, to forward, take a small left turn and then right to the wall. Open the wall to reveal a Shrinker, Pipebombs and some ammo (for shotgun and devastator)
-Later in the map, jump on the place that contains shotgun and ammo, then jump higher to reach a door. Inside the place you can find Freezethrower, Armor and Large Medkit.
-In the place with bars at the window, look for where a trooper will fall from a window. Press the pillar nearby to enter the third secret which not only contains two troopers (and one commander on skill 4) but also Shotgun, RPG, Armor and NVGs. You can also stand on that pillar while lowering/raising to jump to nearby window (where the trooper was standing earlier) to collect some stuff inside. Sorry if this sounds confusing, I tried my best to explain how to get this secret!

Overall, nice level! What about the next one?
Attached Image: SOTA_E1L2_2.pngAttached Image: SOTA_E1L2_4.png

The Erechtheion
by Crista Forest (aka CD Warrior)

Well, this was definitely an interesting level. It had plenty of ambushes (mostly in form of spawned troopers and enforcers) as well as various death traps.

I admit I died once at the very end at the stupid trip mine trap underwater. Didn't expect it at all. Shouldn't have dived in the middle of the sector. Oh well, at least I am glad I had saved and using multiple save slots, so I didn't lose much progress. Because the next part after that, seems the corridor starts collapsing. You might want to grab EVERYTHING before getting to this part. At the end when you reach last sector underwater, after the collapsing corridor, you need to go around the glass and enter it from the opposite side while two Octabrains will spawn. They can be ignored and just get to the exit. But for completionists out there, you might want to kill them as well. Just use the Devastator and they will die instantly, saving ammo in the process (using Shrinker works too but sometimes the shots won't cause them to shrink). By this point, if you were a resourceful player and found every secret, you should have everything at maximum (except for 7 pipebombs and the jetpack, the latter which is only found in two later levels).

Since I'm writing this review after I beat the whole episode, I am happy to say that it was my ONLY death in the entire episode. I may have to pistol start this map and record a demo separately (like I did for sixth level of DUKEDC), though maybe at a later time. :P

Oh yeah and since I forgot to mention in first level, due to playing in v1.3D, the sharks are small and difficult to hit. They are also more aggressive (possibly are counted as actual enemies too) and can deal quite a bit of damage to you, while you are getting close enough to hit them with pistol/shotgun/chaingun, as sometimes the autoaim will hit below/above them. Sometimes throwing a pipebomb near a group of them was an effective way to take them out. If playing in Atomic/source ports, they aren't as aggressive and they are large enough to be taken out with ease.

Secrets to find:
-In the areas with the beds, go behind the curtains and the bed to collect a Shrinker and Armor (will also cause a few enemies to spawn).
-In the area with statue and water in the middle, go to one of the corners and jump on it to reveal a nearby Freezethrower (will also cause a few enemies to spawn). Additionally, go behind the statue to collect an armor pickup and go in water to collect a Portable Medkit on one side, Atomic Health on the other side.
-Later in the map, when you enter a room with two enforcers and chaingun in the middle, after you kill them, jump behind the chaingun to go through the wall and access Armor and Devastator but also look out for two troopers spawning behind you!

Overall, this was certainly an interesting (though quite confusing) level, easily taking me the longest time to complete (around 50 minutes). I only stumbled upon the two hidden switches (a button and a handprint) by accident and then I remembered this is what got me stuck back in 2014 until I found my way or checked an YouTube video (I recall there was someone who went through the TC back then). I imagine most people got stuck here on this level back in the day. With that said, let's move on to the next map and hope it is less confusing!
Attached Image: SOTA_E1L3_6.pngAttached Image: SOTA_E1L3_9.png

The Parthenon
by Ryan Isenberg (aka Tagg)

I wouldn't say this was the hardest map so far, since it didn't have any death traps compared to the previous level. It had a few challenging parts but most of the challenge came from two parts that got me stuck. For one thing, at a later point in the map (around the place you find the Shrinker in a box), you need to push a box to advance. Looking at the automap, I noticed the path where I had to go but didn't think to push the box. I climbed on it and pushed the wall and saw nothing happened, I eventually looked in Mapster and I realized how dumb I looked at that time. :P

Though the next part that got me stuck was blowing up the pillar. My instinct was telling me to look up for a hidden switch or anything but I didn't look carefully at the pillars that had cracks in them. I didn't even notice the single pipebomb lying down on the floor. It was easy to miss and I already had 50 pipebombs, so it went unnoticed. Yes I know I am playing the DOS version at low-res 320x200, so it certainly doesn't help to spot hidden cracks and switches and stuff like that. Makes me wonder how people played the episode back when it came out, unless their PC was powerful enough to handle Duke3D at a higher resolution, though I still insist that the DOS version plays fine on the default resolution, meaning that only RR games (possibly NAM and WW2GI as well?) should be played on a higher resolution, such as 640x480.

Anyway, the ending is a point of no return since you need to drop down to get to the exit (which also forces a small health loss), so make sure to grab EVERYTHING before dropping down! Secrets:
-In the room with the beds, go towards one and then turn around to notice a switch above, in front of you. Press it to open a compartment behind you, containing Portable Medkit, two large medkits and RPG + ammo!
-In the room with the crates, find a way to get up and go through the poster/screenshot to be rewarded with Freezethrower and LOTS of ammo for it (125 freezer ammo in total).

As for the actual map, it was fine, though I wish these maps were slightly less confusing.
Attached Image: SOTA_E1L4_3.pngAttached Image: SOTA_E1L4_4.png

Hades' Passage
by Jim Semkiw (aka Ironman)

The map was interesting to say at least but also painful to navigate at times. I keep getting stuck at times, then advance slowly, then get stuck again and so on. I suppose I should have used the jetpack at times (it is one of the two maps you can find it, the other being the secret map) but I wanted to see if you can complete the map without using it and yes, you can do that. But you also need to make some difficult jumps. Like to get to the yellow card, I found you can strafe jump to the place that holds the Shrinker and an Atomic Health, then jump from that platform to the nearby one that contains it. But this might take a few attempts, so I recommend saving beforehand.

Another noticeable thing is that the secret exit is found in this map and it is directly next to the normal exit. I am not exactly sure what unlocks the secret exit (if it isn't revealed by default) but this is an offer you can't refuse! So I highly recommend getting to the secret level! Which reminds me, the only secret available in this level is the secret exit sector, so jump into it to register the secret. That's all I can talk about the map.

Overall, it was ok but also a bit confusing at times. Let's see how the secret level compares.
Attached Image: SOTA_E1L5_1.pngAttached Image: SOTA_E1L5_3.png

Ancient Spaceport
by Niel Munday

While I didn't have as much of a bad time in this map (due to playing continuously, so I started this map with full everything), there are a few things to keep in mind about this map. The key locks aren't marked, as Quacken pointed out. I took a picture with the card in inventory near where you are supposed to insert it, to help others if they get stuck in this map, although the key locks aren't very far away from each other to keep trying until finding the right door. Still though, this is something that absolutely plagued the original Redneck Rampage, to say the least. And considering some of the SOTA mappers also worked on Redneck Rampage and its sequel (or only its sequel? correct me if I'm wrong, I'm only basing on the information from MetHy's posts around the forums), this probably explains why some maps were a bit confusing.

As for the actual map, the only irritating thing was not being able to get all the kills. I don't know what happened with two enemies but I couldn't find them even after going through the whole map. Later while exploring, I came across a sector that spawned two enforcers and also found two cracks I didn't blow up (which returned me to the water area) but neither of these affected the missing enemy counts, still had 2 missed at the end of the day. And yes I destroyed all 8 (red and blue) turrets in the map that ambush you at certain times. I have no idea which enemies could have glitched or disappeared outside of map. If anyone knows more details (and if people managed to get all kills in this map), please let me know! I would be willing to go through this map again, since it's pretty late in the episode, though at this point I might as well replay the episode by going through the extracted version in Atomic v1.5, it might as well be a memory bug in the original 1.3D release that causes some enemies to randomly disappear (I remember something like this happening few times when I was a kid and playing Duke3D on Windows 95 or 98 PC).

The switch puzzle underwater is really annoying, I agree and I don't regret looking for solution in Mapster. If I'm not mistaken, back then I also looked up the solution in Mapster for this puzzle. The correct solution is the two switches in the middle and one in the right side of the pillar (the one closer to where you grab a new scuba gear). Once you get the correct solution, it reveals a window containing the Shrinker and red card.

The ending part has two Mini Battlelords and while the first one wasn't too bad to take down, the second one caused me quite a bit of pain with three well aimed mortars that traveled at insanely fast speed, bringing me down to around 60% health. But once I took him out and the remaining enemies around this area, the map was pretty much done. You just need to complete another switch puzzle by kicking/shooting at two switches under the ship (the correct answer are two switches in the diagonals), then the exit opens.

There are four secrets to find, as well as some sort of a super secret accessed with jetpack:
-At the beginning, press on one of the pillars to collect a hidden Shotgun. If you missed this secret, it can still be reached with the jetpack later, either the way you came from or by flying above the ship at the end of the level, find a switch to press and unlock those bars that lead to starting area.
-In the room where you are supposed to unlock the red card, go through that corridor you would return after resurfacing, press the middle wall and it leads back to an earlier area for faster backtracking (possibly contains a few small medkits as well).
-When ambushed by turrets at one point, go through one of those yellow/orange pictures to collect a Portable Medkit.
-In the place you see those pig cops on ledges (including a translucent pig cop), go behind where the translucent one was standing, to collect a box of pipebombs.

Bonus secret (doesn't count towards the secret tally): Fly with the jetpack on top of that ship at the end of the level, you can collect some ammo and two atomic healths, as well as allowing you back to the beginning of the map, in case you missed the first secret, though you can still return the way you came from too.
The existence of this bonus secret is hinted in a room earlier (where you would platform to get the blue card), if you found a hidden room with a monitor (the only one in the entire episode!) which shows the location of the ship and the "secret" in question.

Overall, while I didn't hate the map, instead I hated not being able to get all the kills and there is no explanation what could have been those two missing enemies. No, I don't use DNCLIP cheat to find them (and it would be pointless since I looked everywhere!), because in v1.3D it doesn't even work properly, when you go through a solid wall, you die instantly (and might also crash the game) even with God Mode cheat enabled, for the same reason you can't visit outer space sectors. This was all changed/fixed in the Atomic Edition.

Either way, I hope the final map doesn't disappoint!
Attached Image: SOTA_E1L7_2.pngAttached Image: SOTA_E1L7_7.png

The Hidden Temple
by Nick Parde (aka Zarzoo)

The final level is pretty solid overall but there are a few annoying things about it that I will point out. First, the explosion at beginning can make you lose around 50 health as it happened to me (that's where the extra health from previous level comes handy). Second, there are a few switch puzzles that need to be taken care of. Not as bad as the ones from the previous level but still, must be noted as pressing some switches opened some nearby panels containing a switch that had to be shot/kicked in order to advance the map. There is a "puzzle" involving stepping on some buttons which opens some nearby doors. I managed to open the middle one required for progression but there were two others that opened the other doors that contained a few monsters and I didn't know about these until I reached the last part of the map and then backtracked.

Which brings me to the most important part, you can backtrack from the ending part to the beginning as long as you DON'T press all the switches that reveal the Overlord! If you do, the central area/elevator gets closed. So you might want to hunt for enemies and grab everything (secrets, supplies, etc) before doing that! Then the last four enemies (two red troopers in the Overlord's lair and two commanders spawned in the central room) to get taken care of before taking the Overlord himself. Once you defeat him, enjoy looking at the E1 cutscene where Duke executes the Battlelord. Yeah, I know, no new cutscene and since the episode was put into E1 slot, you get to look at the original Battlelord cutscene, which doesn't make any sense story wise. At least Twin Dragon had an actual ending cutscene but this is just lazy. I shouldn't expect too much from a free episode/TC, considering not many mods back then had new cutscenes.

To end the post on a positive note, SOTA was fun and those minor things are easily forgivable compared to most 90s TCs! At least SOTA has charm, pretty good level design, nice new textures and soundtrack, etc.

Almost forgot to mention the secrets to find:
-In the room where you see a pool of water, go to nearby wall to reveal an atomic health and portable medkit.
-Near the room with the four touch buttons (touch plates?), jump through the white window to access Freezethrower + ammo and atomic health.
-After taking the elevator to the basement/dungeon (which contains a bunch of troopers), by looking around, you should find a hidden area with a trooper guarding a RPG and atomic health.
Attached Image: SOTA_E1L6_1.pngAttached Image: SOTA_E1L6_5.png

Closing/Overall thoughts on SOTA

Secrets of the Acropolis is a nice old TC that looks and feels almost commercial quality at times. To me it seems closer to compare to Duke It Out In D.C., which much like SOTA, it contained new textures, while everything else was the same as before. I don't compare SOTA to Duke Caribbean which had new art for the weapons/enemies/items as well, as it wouldn't be fair. Well with the exception of the access cards (which also had new sprites in Caribbean) but everything else is the same as before.

Another interesting comparison of SOTA to DC is that there are no shrinking puzzles. Leaving aside the mirrors in some DC levels (and the possibility to play in multiplayer mode where other players can shrink you), there is virtually no way to get shrunk in any of the SOTA levels, so you don't have to worry about that, especially with the absence of Atomic Edition enemies. Not to mention the total absence of the mirrors and monitors (due to the mod's setting), besides one monitor in the secret level in a hidden area that hints at a particular non-secret area, as I specified above.

I will continue the Twin Dragon (DOS version) playthrough I've started a while ago and hope to finish it before Friday, which is the day I will post my next review and the voting for next month, hopefully making it in time. I do an exception and give the participants a whole week (from 23rd to 30th) to vote for next month's choice (instead of the usual 25th date) because once again, there will be one new nomination that I won't spoil for now, so that it will give people more time to decide! All that assuming I make it in time, otherwise the voting begins as soon as I finish with Twin Dragon and its review, which can be as late as 26th. And yes, I will also cover the three extra DM maps available in TD as well, as not many people know about their existence!

And as always, you can download the full album of SOTA pictures below. Other than the six setup screenshots, I only limited myself to uploading two screens per each map, to not clog the topic. :)

This post has been edited by FistMarine: 21 September 2022 - 05:00 AM

3

User is offline   MetHy 

#26

View PostFistMarine, on 21 September 2022 - 04:48 AM, said:

Regarding the SOTA mappers becoming involved in commercial products (especially Redneck Rampage), I have read about this before but I haven't seen a comprehensive post that detailed who worked on each map. I've always wondered who made each map in both RR and RR:RA. Though I suppose this will be up for discussion when the RR games get nominated for the club (probably the next year), to not derail the topic.


As far as I know there are no known level designer credits for either Redneck Rampage game (Xatrix policy not to have signatures in level?), but I did some research regarding Rides Again you can find in those two posts.
1

User is offline   juvenite 

#27

Unfortunately due to my computer being very unstable (refusing to turn on for a while now which is annoying in so, so many levels), me travelling and college exams being on the horizon, I don't think I'll be able to finish my SOTA playthrough in time. I got stuck in the 3rd level IIRC, wandering around a lot still clueless as to what to do next.
So I'll just (very briefly) speak my mind about the short experiences I had with it up to this point:
SOTA is a very well done episode with fun maps, although progression is too cryptic at times for no real reason, maybe othef than trying to artifically inflate playtime? the scenery and mood are perfect, lighting is quite impressive for the time too. Really wish I could finish this thing.

Quote

I took a couple of screenshots of the installer as well:


that installer looks cute! really 90's, me likey.

Also, hope you're able to recover your stuff FistMarine! Losing your data like that sucks hard.
1

#28

Gotta admit this mod must be the only one I have ever ever ever seen boasting its own unique installer like that O_o
2

User is offline   FistMarine 

#29

@MetHy, thanks, that was great to know! I remember reading these posts a few years ago (I can't upvote the posts again) but now reread them and find this fascinating, although I wish we could tell who also did the original RR maps. I only know that one of the main RR mappers (Sverre André Kvernmo) also contributed some levels in the Master Levels for Doom II. I hope that next year we can get the RR games and The Gate to be chosen for the club, then we can analyze their maps again, as there is a lot to talk about them.

@Juvenite, thanks for the support about the data, hope I can get to recover it in the following days. And I agree about the installer looking really cool (probably one of the most unique installers for Duke3D mods), also agree about the possibility of the puzzles inflating the playtime (7 levels isn't that much if we compare to the length of DC and Caribbean), which IMO was what plagued the original Redneck Rampage for me with many of its levels being stupidly confusing for no reason at all, probably to make up for only having 15 SP levels (and 7 extra DM maps) in total. But that's a discussion for another time.

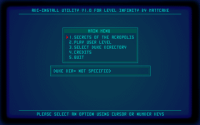
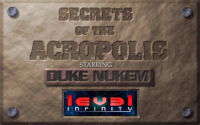
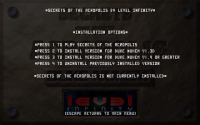
@TheDragonLiner, I agree, it must be one of a few mods to have such an unique installer. I can imagine this being sold back in the day as a commercial addon, you insert the SOTA CD in your drive and then it starts this cool installer!

Though I must say that while Twin Dragon also has its own cool launcher to start the expansion, I never ever came across a download of Twin Dragon in its original installer form. The closest is the extracted zipped version (tdragon.zip) containing a bunch of files, including the launcher and its own modified SW.EXE file (to change level names). If anyone knows where to download the original Twin Dragon setup file (if it still exists to this day), then please let me know! I am similarly looking for The Last Warrior (another one of the SW TCs, a possible nomination for the future) in its original form, as all I could find is the Mac version (probably works fine for DOS version as well) and the repacked version for source ports but I can never find it in original initially released form (with the launcher and new level names). To further elaborate, the two versions of the Last Warrior addon I could find are: lwmacv1.zip (from gamers.org) and LastWar_v11.zip (from ProAsm's website). The original DOS version of The Last Warrior may have been lost in time (funny because there is another SW addon named In Time or rather, Lo Wang in Time).

I also noticed now I misspelled the author's name for the secret map in SOTA. I just copied the authors' names from Quacken's posts and didn't notice the spelling mistake. Now I can't edit the post to fix it. Oh well, I will be sure to get the author's name correctly here in this post. :)

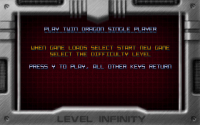
Anyway, for today's post (LONG POST AHEAD!), a few days ago I continued the DOS playthrough I started a few months ago (I only had the first level finished) and finished Twin Dragon (original release, tdragon.zip) in Shadow Warrior 1.2 (the only registered version) in DOSBox 0.74-3. Who Wants Wang, with frequent saves, all kills and secrets. I played continuous, except a later level I started from scratch (you will see why below). I will also cover the addon's 3 extra DM maps, as not many people know about them. They are accessed either with -LEVEL## command (replace ## with 23, 24 or 25) or within the TDRAGON launcher. In both cases, you will be put on default skill 3, unless you specify -S4 parameter as well (if using parameters to warp to the map) to play on hardest skill if you dare (for SP levels obviously, as DM maps usually have no enemies).

I won't be talking too much about the levels themselves this time around (Quacken does a much better job at reviewing the levels), nor I will be listing the secrets (maybe some notable items to collect), instead I will offer a few helpful hints about each level and also offer the secret guides on Steam, that may be helpful to find all secrets:
https://steamcommuni...s/?id=162460625
https://steamcommuni...s/?id=167009756
YouTube playthrough by pagb666: https://www.youtube....UOxkb9LT1Dz0J5w

Additionally, here are a couple helpful hints about Shadow Warrior in general:

1) Armor comes in two flavors, gray (50 points) and red (100 points). The armor absorbs 60% of damage per each hit and will protect you even from fatal hits and even when you have only 1% armor remaining, it will still absorb an attack's full damage, unlike other games where having a single armor point equals to just having an extra health point. Also you can't stack two gray armors on top of each other, meaning it's best to grab a new armor pickup when the current one has ran out entirely, otherwise you will waste precious points of armor. You should also try to save an armor pickup for the end of the level (usually the red one but if one isn't available, then at least save a gray one), so you start the next one with some armor.

2) Ammo for most weapons is very common (especially Riot Gun and Uzis), so you should never have problems with ammo. I would also suggest grabbing the ammo when you actually need it, instead of grabbing the pickups when near at full ammo. Also, the Riot Gun ammo comes in form of packs giving 24 shells, up to a maximum of 52 shells. This means that you are free to spam the shotgun if some ninjas are giving you a hard time. The Uzis can be dual wielded after grabbing another one (press number 4 to toggle between one or two Uzis at a time). Just like with the riot gun reloading after 4 shots and the Duke3D pistol reloading after 12 shots, one Uzi reloads after 50 shots and both Uzis reload after 100 shots, in all cases the reloading animation happens if the number is divisible with the number I mentioned. And because of the long reload time of the dual Uzis, you may want to switch to a single one when near at 100 ammo, so you don't get killed during the battle while Lo Wang reloads both Uzis.

3) Some weapons have alternate firing modes. The Missile Launcher has two extra pickups required for the other two firing modes. One is a heat seeking card that makes your 5 next shots (if you choose so) to become homing and the other is a nuclear missile that is difficult to use properly (except maybe killing a room full of enemies or dealing significant damage to a boss). It is easy to kill yourself with the nuclear missile, so you better find some cover after you fire it. You also need to wait about 5 seconds before you can fire the missile, so after you get the nuclear warhead, select the missile launcher, select this mode, wait a few seconds and then you can have it ready in the inventory, though don't forget to switch back to regular missiles if you plan on utilizing the rockets normally soon enough.

4) Selecting the fists will stop certain enemies from attacking you. They are helpful in taking out guardians and rippers, as the former will stop firing at you and the latter will be much less aggressive. Snake bosses/mini-bosses will also stop firing at you, though their melee attacks still hurt a lot (snake's sword does 75 damage). This allows you to take them with ease, especially the guardians since their swords do little damage overall. And since Lo Wang's melee weapons are pretty powerful, they have a chance to gib the enemy too for a comedic effect!

5) Destroying the guardians and rippers (including the giant brown ones) with explosives (and railgun) will make them sometimes drop their weapons (Guardian Head and Ripper Heart). Gibbing them with melee weapons will NOT cause them to drop anything, so if you want them to drop the weapons, then finish them off with an explosive and hope they drop something.

6) Destroying the Coolie with explosives/railgun will prevent them from raising as a ghost. And if they raise as a ghost when killed under normal conditions, you can stand near their corpse and wait for them to rise, then immediately kill them before they start flying around.

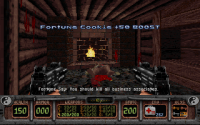
7) Punching the training dummies (there are two types of objects, sometimes near each other, like at the beginning of first level in original SW) will restore health up to 100! However if you have 101 or higher health, then they will restore all the health up to 200! It is similar to Water Fountain trick in the original Duke3D, except it heals faster/slower, depending on how fast the game decides!

8) The ninjas sometimes commit suicide. This applies to the stronger variants as well.

9) The Smoke Bomb makes you partially invisible and enemies will stop attacking you during the time, including the bosses! It also increases the range of the fists, making them more useful in hitting moving targets! However, the crouching ninjas (possibly turrets as well?) are still attacking you and the Coolies will probably still run into you. And finally, DO NOT pick up another smoke bomb while one is in effect or else you will replace the current one and the new one gets automatically used too. Funnily enough, the used smoke bomb gets transferred between the levels as well.

10) While getting all the kills is possible in pretty much every level (at least in the Twin Dragon expansion, in the original game you can't get all kills in Level 4 and Level 20), there are a few things to keep in mind about two important conditions:

First, DO NOT USE the Ripper Heart! While it will create a helpful ally/ghost version of Lo Wang armed with a railgun, that clone is counted as an enemy and once the clone dies, it doesn't count as a kill (whether the clone expires or dies), so you end up with a missing enemy. If you care about getting 100% kills, AVOID USING THE RIPPER HEART! Just collect it and keep it in inventory. The heart is also useless against invisible enemies like Shadow Ninjas, since the clone won't see them. This hint I remembered since back on my first SW playthrough (in 2014?) when I used the Ripper Heart occasionally and it wasn't until I read a post somewhere that mentioned that it will prevent getting all kills.

Second, when killing the Snake boss, make sure you kill him just in the second while he threw ALL his accursed heads and BEFORE HE SUMMONED ANY NEW ONES! He summons about 12 of them at once with occasionally throwing them at you and if you kill him while surrounded by those skulls, then those skulls destroyed will NOT add towards kills! Since the original DOS version of SW also has the option for showing Level Stats (though not enabled by default), then you can check this out and note in the future, so you won't do this mistake again.

Third, in the original SW level 4 (and also custom maps/mods) with the Snake boss that ends the level/episode with the boss still alive (due to the snake boss escaping and returning as a proper boss fight in Level 5, aka the first level of registered episode), it is impossible to kill that boss for the reason mentioned, so maximum you can get is one kill less in that particular level and that if you manage to time your shots so that the rocket hits him just after he threw the last skull. Still don't know what causes the missing kills in the very last level of Shadow Warrior (Level 20: Stone Rain), as I had 3 enemies missed when I defeated Zilla in my last playthrough but otherwise, in last level of Twin Dragon I got all kills normally. There are also very rare situations (like in Level 3 of original SW) where you may end up with an additional enemy killed than what stats say (e.g. 101/100 kills) but not sure what influences this, I very rarely noticed this in the main game.

There may be more hints that I'm forgetting at the moment. If SW gets chosen one day for the club, I will be sure to revisit the hints list! :)

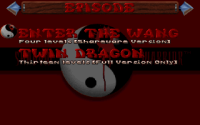
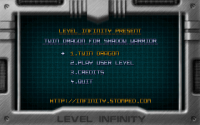
Finally, let's talk about the levels themselves! And note that some levels have alternate names in the text file (possibly in the repacked versions as well) and to better highlight which map is which, I will also put the map's filename in parentheses. But first, the screenshots of the launcher (and episode selection in game):
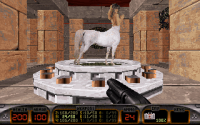
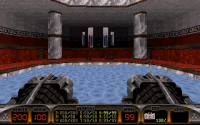
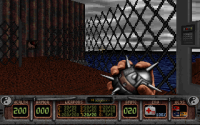
Attached Image: TDRAGON_1.pngAttached Image: TDRAGON_EPISODE.pngAttached Image: TDRAGON_EXIT.png
Attached Image: TDRAGON_2.pngAttached Image: TDRAGON_3.pngAttached Image: TDRAGON_4.png

Wang's Home (aka Home Sweet Home) ($WHIRL.MAP)
by Neil Munday (aka Rimmer)

Not bad! I feel like this map opens up the episode nicely. It is not very difficult, outside of a few later parts. I think I may have died once, not because of the Shadow Ninja (at least not in this playthrough) but I think a Coolie may have gotten a bit too close (after unlocking the silver key door), which took out all my 100 HP instantly. Design wise, it's fine, I guess, though nothing really spectacular. You can also decide if you want to use the repair kit (the red toolbox) or keep it in inventory and blow up the cracks with your explosives.

Other things to note are an armor pickup (gray) near the woman on toilet. Since the anime girls in SW are hostile to the player (sometimes even if the player isn't touching them), it is recommended to kill them to avoid taking unnecessary damage! At least there is a training dummy to allow boosting your health up to 200, so better save that fortune cookie for later! Looking forward to the next map!
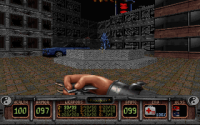
Attached Image: TDRAGON_L1_1.png

City Of Despair ($tank.map)
by Cho Yan Wong (aka Tempy)

While the map is very impressive in terms of looks (gotta love the city styled maps), it is not very fun to play. Between the random mines that explode in your face and some harsh enemy placement, you will have to save-scum at every corner to overcome the challenge as most of the time either you will be sniped by ninjas across the map or insta killed by some mines. Of course you can use the Railgun to kill those ninjas and guardians on the buildings and taking it slowly at times but I felt like the enemy placement in this map was quite cheap. At least the last battle (guardians, mini snake boss and shadow ninja) is pretty cool.

And no, you can't avoid the fall damage from inside the secret room containing the red armor, so maximum you can have is 100 health and 97 armor when finishing this map. There aren't any fortune cookies, which explains why the map is quite brutal. Even coming with extra health and armor from previous map won't help much because of how fast you can lose your health AND armor in this game! At least the author was kind enough with a few armor pickups inside secret places and the health items (red medkits and portable medkits) are provided in good amounts. Speaking of health...
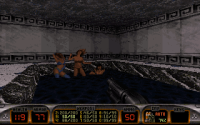
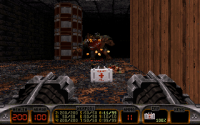
Attached Image: TDRAGON_L2_1.png

Emergency Room ($BOAT.MAP)
by Jim Semkiw (aka Ironman)

A decent hospital styled map that won't give you too much trouble in terms of difficulty, as it is pretty stuffed with health pickups (for obvious reasons). You may get stuck at a few points if you don't figure out how to get a certain access card. The ending with two mini sumos was pretty cool, although you can kill them easily with a Smoke Bomb. Use the fists and they won't fight back. I believe on hardest skill, there's THREE of them but once again, the same strategy applies. I didn't bother to nuke them (heh) because it is too risky to utilize the nuke correctly, so the fists + invisibility seemed to be the best combo. Oh and there are two fortune cookies (though one requires taking fall damage and fighting a spawned ninja) as well as one red armor, which may help for the next level (if playing continuous). What about the next map?
Attached Image: TDRAGON_L3_3.png

Hide And Seek ($GARDEN.MAP)
by Nick Parde (aka Zarzoo)

Probably one of the weakest maps in the entire addon, this is another one of those sewer type of maps. Most of the enemies come in form of baby rippers and they can be easily killed with one shot from the Riot Gun. Since the shells are plentiful in pretty much every SW map, you shouldn't have trouble with the ammo management. Health seemed okay, then again I played continuous. Most secrets can be found in the sewers by blowing up the cracks.

Interestingly, there is a Ripper Heart on top of a shelf that you can't grab. Even if you manage to jump to it, the heart won't be picked up. The possible reason for that is that the mapper didn't place the correct tile, as it appears that the heart isn't beating as the usual heart pickups do. This is something that may have been fixed in the repacked grp versions of the addon, though I can't confirm, so I will ask the people who played the repacked version (I don't remember if I picked it up or not in my JFSW playthrough but I seem to remember I had difficulty picking it up). Oh and as a final insult, there are no fortune cookies present in the map, as well as two gray armors and no red ones!

The only good part about the level was the final part with the sumo mini-boss. If this map was disappointing, then I hope the next one is better.
Attached Image: TDRAGON_L4_2.png

Warehouse (aka Warehouse Madness) ($OUTPOST.MAP)
by Nick Parde (aka Zarzoo)

Quite a brutal map that will kill you multiple times at various points, due to the high amount of ninjas you fight in this map. While the health provided is in decent amounts, it seems like there is not a single armor pickup! And since the armor from the previous level will most likely be gone from a random explosion at the beginning, then prepare to suffer a lot of cheap deaths! Which also leads to the fact that armor pickups aren't very common in SW in general and the armor doesn't last too long either, not helped by the armor pickups only giving either 50 or 100 points. I feel that the armor pickups in SW should have given twice the amount they give normally (gray 100 and red 200), then the armor pickups wouldn't have been immediately consumed by the attacks. Or at least have the gray armors stack on top of each other like the used armor in Duke3D does.

What about the map? I think it was a bit bland at times, though certainly better than the previous one. Next map please.
Attached Image: TDRAGON_L5_2.png

Military Research Base (aka Weapons Research Center) ($HIDTEMP.MAP)
Eric Boltjes

Gotta agree with Quacken, this map was actually pretty fun. I didn't have much of a trouble beating it, as the enemies weren't as aggressive as in other levels. The ammo and health are plentiful, while there aren't any confusing sections to stop you from enjoying action. I can imagine this level would have fit well alongside the original SW maps. Hope the next map is just as good!
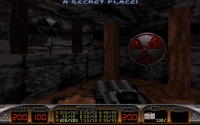
Attached Image: TDRAGON_L6_1.png

Toxic Waste (aka Toxic Waste Facility) ($plax1.map)
by Ryan Isenberg (aka Tagg)

Again, a pretty decent map overall. I liked the theme and felt like another map that could have been part of the original SW. The only problem is the cramped corridors where coolies can be dangerous if they surprise you, as I had 2-3 times I got surprised from a coolie that spawned at some points but thankfully I survived in all cases. There also seems to be a generous health and armor distribution (about 3 of each: portable medkits, fortune cookies and gray armor pickups), so you shouldn't have any trouble with all of that.

I only wish that the next level's continuity made a bit more sense. This map ends on a boat and the next map takes place on a train station (and then inside the train). Well I am mostly referring at the starting sector because the next level certainly doesn't start you on the boat...
Attached Image: TDRAGON_L7_2.png

Crazy Train (aka Silver Bullet) ($BATH.MAP)
by Krystian Palys (aka Blade), Crista Forest, Ty Matthews, Jim Semkiw

I have mixed feelings about this one. First, I don't get why there were FOUR mappers working on the same map, as Quacken pointed out! Second, that puzzle was really stupid (it seems similar to the puzzle at end of third level in original game), I agree with that! I just kept trying for minutes until it worked and opened the door and I am glad I had saved just as soon as the puzzle was completed because the gray ninja killed me instantly with a grenade after that! I think I recall something similar happening years ago and frustrating me because I hadn't saved after completing the puzzle but this time I did it, at least. Good thing I am used to save the game often, so shit like this doesn't make me rage quit!

Yeah, I know, I died a couple times in this map, struggled at a few points with low health (though medkit distribution wasn't too bad) because of a couple gray ninjas that were lucky to insta-kill me with a well aimed grenade and some progression issues where I had to look for some cards, I think I quickly checked YouTube at one point. There is also that trap where picking up a key makes the rocks fall into your head (had that happen once to me), so be careful with that.

The part at the end with TWO Serpent mini-bosses, it is impossible to backtrack (that platform is too high to jump back) UNLESS you manage to lure and somehow jump on a snake's head and then you can escape. So I'd advice to collect every secret until that point, if you don't plan to come back. If you want to backtrack and maintain 200 health and 100 armor with full ammo for all weapons, then do the following: kill the first serpent, injure the second one, make a save before and after (it may take a few tries and you have to be careful to not get slashed by his sword!), then kill him from above, backtrack to get everything and once you are done, you can leave the level as normal.

If this level was another disappointment, then I have a feeling the next one is better!
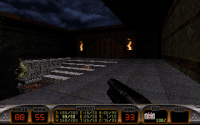
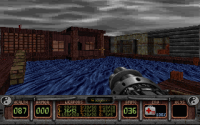
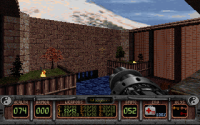
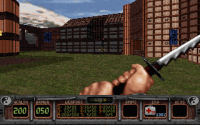
Attached Image: TDRAGON_L8_1.png

Fishing Village ($AIRPORT.MAP)
by Crista Forest (aka CDWarrior)

Interesting map and certainly one of the most memorable maps in the episode, seriously, it was one of the few maps I remembered from my past playthrough of Twin Dragon.

There are a few tricky progression choices (such as a few paths leading to the keys) but my main gripes were from a few mines exploding in my face and a few cheap deaths, mostly in the area with the arrows trap. An individual arrow may not hurt much but many of them at once are something else. The end has you defeating one (or two?) snake mini bosses and that's it. I'd say it was an enjoyable level overall, despite its issues.
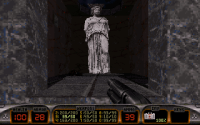
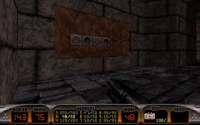
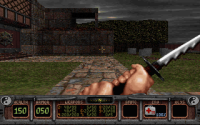
Attached Image: TDRAGON_L9_5.png

The Garden (aka Secret Garden) ($refiner.map)
by Cho Yan Wong (aka Tempy)

Now for the infamous level, though not for reasons you might expect! The level on its own is fine. It contains a few mini bosses (mini snakes and mini sumos) near the end of the map to give this map a great conclusion, after various low-level enemies you fight in the majority of the level. And I didn't struggle with it as much as with other levels that killed me a bunch of times, since I was generally in good health (except 3 cheap deaths from a single shadow ninja and one death from being cut by a mini snake). But then you get to the ending and that's it. You can't advance to the next map, you are stuck there with no way out. You can get all kills and secrets and then spend the rest of your eternity standing here in front of the fortress. The door won't open! What's going on?

An explanation from a page containing an unofficial fix for this map:

Quote

Twin Dragon's level 14, The Garden ($refiner.map), has a would-be exit sector that's mis-coded with a LoTag "216", instead of the correct "116". This error causes the player to be unable to exit the map normally and advance to level 15 (The Fortress)...

This is unfortunate and the only option in my playthrough is to warp to the next level with katana/sword only. Too bad about that because I had everything at maximum by the time I had reached the end of this one.

Part of me is glad this addon didn't become official and another part of me screams at the mapper "WHY WASN'T THIS NOTICED?". Speaking of the next map...
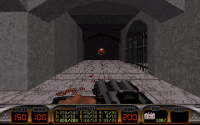
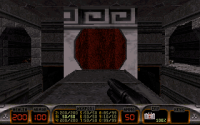
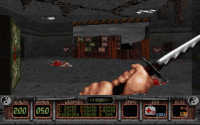
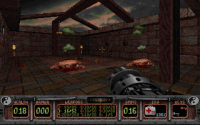
Attached Image: TDRAGON_L10_2.png

The Fortress (aka Hung Lo's Fortress) ($newmine.map)
by Alan Bellows

A bit painful to do it with the sword only, although you can get a head start by just using the sword on the first ninjas (ignoring the ninjas on top of the fortress) and eventually come across the Uzi and the Riot Gun. You may struggle with health at some points but thankfully the level is fairly generous with health pickups. You will still die a few times but there shouldn't be any part that gets you stuck. And thankfully, you will recover ALL your weapons in this level (some will be at full ammo by the time you finish).

Oh and this level contains the SECRET EXIT! You need to make some platforming to get to it and once you drop down the path, there is NO WAY BACK! I suggest first clear the whole level normally, hunt for secrets, do the platforming section and THEN drop down. There will be one last ninja with red pants that is crouching behind the exit bars but after taking him out and collecting the fortune cookie, then you are ready to get to the secret level!

You may be wondering where is the last enemy. Other than spawned enemies all across the map and hunting them down, you may end up with an additional enemy. Turns out he was hiding in a locked room that contains the SAILOR MOON! Unfortunately I couldn't figure out how to get there and pressing on Sailor Moon makes her give you up to THREE free items (though sometimes she may not give you anything at all!). So my only answer is throwing grenade through the door's bars to clear this room and ended up gibbing a ninja (?) in the process, who turned out to be the last enemy in the level. Too bad Sailor Moon didn't survive the explosion but at least I got all the kills. If anyone is wondering, no, I don't think the anime girls count as enemies but I still found this weird that there would be a locked door (without any way to open it?) containing an enemy inside that can be potentially missed.

Moving on to the secret level...
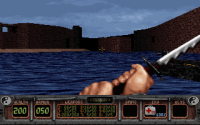
Attached Image: TDRAGON_L11_4.png

Prison Camp ($SHORE.MAP)
by Ty Matthews

Pretty decent secret level. It wasn't too difficult or confusing. I died twice (once from a shadow ninja and once from a turret) and I admit looking up YouTube just to get the silver key but then I realized I didn't check one window. I guess I forgot to open that small window containing the key, after I got distracted by some enemies. Oh and this level contains THREE red armors! One in the cage with the gold key and Lara Croft, another inside a secret area later in the map and another is found inside the water (probably inside the mansion). I don't think I ever came across a SW map containing 3 (!) red armors! Meaning that this map shouldn't be too difficult overall (I ended up with a spare armor) and there's about two fortune cookies as well. Secrets aren't difficult to find, either. Most will require to blow up cracks, inside/near trees. And to avoid the arrows trap (near the turret), just crouch while walking in the water, they will not be able to hit you.

Onto the final map...
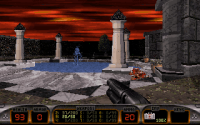
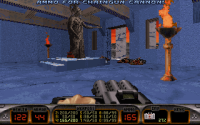
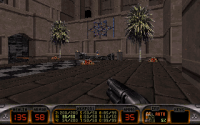
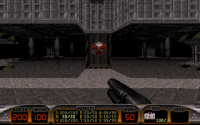
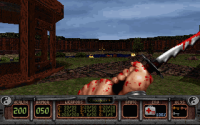
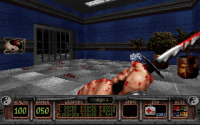
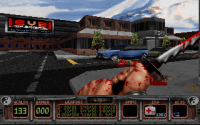
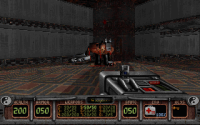
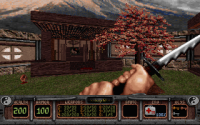
Attached Image: TDRAGON_L13_5.png

The Palace (aka Hung Lo's Palace) ($volcano.map)
by Ryan Isenberg (aka Tagg)

Pretty interesting final map. I won't talk about the beginning but I will say that to make the boss appear, you need to find and hit four numbered hidden switches. Sounds familiar? If yes, then the setup is similar to SOTA's final level where you pressed on 3-4 switches to summon the Overlord. In this case, you've got Hung Lo (the evil twin brother, nothing more than a reskinned Zilla) assisted by a few enemies. Grabbing some goodies in the corners will also spawn some Coolies nearby, so look out for them! The boss is as easy as Zilla, as he moves and attacks slowly. A well placed nuke will take about 25-30% of his health. You should watch out for his heat-seeking missiles and his rare railgun attack. The other attack he does is firing Uzis but it doesn't seem to deal as much damage as you'd expect. While the battle was easy to win (and I beat him about 3 times, just to take a few different pictures), my only deaths in this level came from a few earlier parts.

Once taking out Hung Lo, enjoy a new cutscene with Lo Wang executing his twin brother using a nuke! The developers have learned that SOTA lacked a cutscene, so they came up with a new cutscene for this addon! Too bad I didn't have the music in background (since playing SW in DOSBox doesn't give you music by default unless you mount a CD image), so I didn't get to listen to Lo Wang's rap. :(
Attached Image: TDRAGON_L12_5.png

As an additional fun fact, the Twin Dragon maps are placed on slots 5-15, as well as 20 (The Palace) and 21 (Prison Camp). I imagine this is due to hardcoded behavior and that final boss level must be on level 20 slot.

Which reminds me, what about the extra DM maps? In case people don't know, the original Shadow Warrior has 6 extra maps included (23 which seems to be sort of a joke map where you fight two big snake bosses with very limited weapons, ammo and health, 24-26 are actual DM maps and 27-28 are CTF maps). Twin Dragon includes 3 new DM maps as well on slots 23-25. They are the following:
Ninja Training Camp (Tank.map) (by Matt Harris, aka MattCake)
The Morgue ($DMWOODS.MAP) (by Neil Munday, aka Rimmer)
Island Caves ($dmshrin.map) (by Nick Parde, aka Zarzoo)

Not much to say, as I never played them before, I only explored them in SP mode and collected all the stuff available. I will attach a screenshot for each map to take a look at them and then decide for yourself.
Attached Image: TDRAGON_DM1.pngAttached Image: TDRAGON_DM2.pngAttached Image: TDRAGON_DM3.png

Closing/Overall thoughts on Twin Dragon

Twin Dragon is a pretty decent Shadow Warrior addon that I could see this being released in stores back in the day, had Shadow Warrior sold better (wish it was released and finished earlier). At the same time, TD lacks polish in some areas, especially The Garden with its ending sector being miscoded and unable to progress to next map by normal means. How did this end up unnoticed back then? It's probably better this didn't end up a commercial product or else most people would have gotten stuck there and quit.

At least you can get around this in two ways: using its launcher and selecting the $refiner.map from the Twin Dragon User Maps list or warping with parameter -LEVEL15
(SW.EXE -LEVEL15)

This will warp you to the next level in the progression with just the sword.

But yeah, back to the episode, I think most of the levels would have fit well as another episode in the original Shadow Warrior. Even if some levels were a bit bland overall and others were unbalanced. I still had fun with it and I recommend checking out Twin Dragon for any SW fans out there! I wish I had finished my JFSW playthrough as well (before the hard disk dying incident), so then I would have confirmed that The Garden (aka Secret Garden) advances normally to the next map in the repacked version. Maybe another time when I revisit Twin Dragon (DOS version, JFSW and Classic Redux), possibly on No Pain No Gain as well. Pictures are provided, only one per each map, as well as the Twin Dragon launcher (if you enjoyed the SOTA installer, then you will also enjoy the Twin Dragon launcher, no idea how the Twin Dragon installer would have looked like if it actually existed). Full album with 66 pictures can be downloaded in the zip below.

Now for the nominations (pardon my very long post, it sure took a couple hours to write)

JJ Duke Nukem 3D
Mikko Sandt's Maps + Duke Tournament + MSSP Episode + The Brave New World
The Birth + Alien World Order +
WGRealms + WGSpace Episode

I nominated and voted for the new option, which includes the official episodes 4 and 5 of Atomic Edition and World Tour respectively. This is because both of these were initially released in October 1996 and 2016 respectively (both had an update released in the following month(s) as well). And since back in April I couldn't make all 4-5 episodes played in the same month (much to some people's disappointment), I decided to leave the expansion episodes for a much later time. Now the time has come for the episodes' anniversary and it's up to you to decide what gets chosen for the next month! Don't forget that this time, you have a full week until the voting ends and the next month's event starts! I felt like this is a fair trade-off, because I may not be able to post in the next few days and because of this, the next month's topic may be up the next Friday, late in the evening (Eastern European Time) or if I don't get to host it in time, then sometime early in October.

Have a nice weekend!

EDIT: Forgot to attach the full album zip. Here it is. Also fixed a few errors in the post. :D

This post has been edited by FistMarine: 23 September 2022 - 04:47 AM

3

User is offline   Quacken 

#30

We've nearly finished Twin Dragon! Just two more posts including this one, and I'll be waiting for next month.

Fishing Village
Crista Forest

Crista Forest's solo contribution to Twin Dragon is quite good. Fishing Village is an intentionally slow burner. I think Crista intentionally (and ironically) styled this map like a log flume ride: It's very slow with some high points here and there, but it still overall maintains a low heart rate. At least with how slow the map is, you get time to soak Fishing Village's good visuals. Forest's houses are busy with detail but never feel cluttered or overly distracting, and the focus on water helps to break up the trees and sand. This map also happens to be decently challenging. Grabbing the Riot Gun will send an Orange Mini Ripper barreling towards you in a tight space, and the Shadow Ninjas aren't total pushovers to take out without an early Missile Launcher. Forest set a few landmines in his sleepy village, but the only one that will instantly blow you up is in an optional area that contains a fairly unnecessary Gas Bomb. The rest of the mines can actually be used to your advantage. At the temple, making a beeline for the key turns the area into a pit of misery for the monsters, as a set of Caltrops and two Gas Bombs get set off that will cook the Mini Rippers, Coolie Ghosts and Guardian alive, if you season the pot with some grenades. The large amounts of Fish in the water could have been a chore to clean out with the Uzis and Riot Gun, but Forest thankfully showers you with grenades seemingly for the purpose of blowing up the river. While Fishing Village's slow pace might be a turn off to some, but if you maintain some patience, it contains some fun and honest fights.

8/10.

Secret Garden
Cho Yan Wong

The biggest surprise upon revisiting Twin Dragon was seeing that Secret Garden is an out and out success. Secret Garden is an improvement on just about every aspect of the formula presented in Cho Yan Wong's other contribution to Twin Dragon, City of Despair. It's much less meaner than that map while also delivering in an equal challenge. The monsters are on equal footing with you now, but there's 35 more of them, and Wong is done playing nice. At the start, Wong practically goads you into taking the Katana and cutting down everything you see. Everything in this area dies in one cut, and you both know it. You'll get some early weapons in this map including a Riot Gun with a full belt of ammo that makes punching a hole into Orange Rippers a non-issue, and he gives you a Smoke Bomb as a reward for clearing an optional area which you can use to remove the rest of the battlements. Wong throws a new challenger for you around every corner. The Shadow Ninja that comes after you when you open the red door is equal parts a nasty trick and an easy one and done with the Riot Gun, and the resulting mini fights are also quite fun if you've pillaged all the explosives you can find. This map's usage of Serpent Lords and Sumos are a lot more proactive than they were previously. If you know where the Sumos are you can get the jump on and absolutely humiliate them with a combination of Gas Bombs, explosives and Riot Gun shots. Fast paced, challenging and gratuitously rewarding, Secret Garden is Shadow Warrior at its finest.

9/10.

This post has been edited by Quacken: 23 September 2022 - 04:45 AM

3

Share this topic:


  • 2 Pages +
  • 1
  • 2
  • You cannot start a new topic
  • You cannot reply to this topic


All copyrights and trademarks not owned by Voidpoint, LLC are the sole property of their respective owners. Play Ion Fury! ;) © Voidpoint, LLC

Enter your sign in name and password


Sign in options