Duke4.net Forums: Importing models into eduke32? - Duke4.net Forums

Jump to content

  • 8 Pages +
  • « First
  • 4
  • 5
  • 6
  • 7
  • 8
  • You cannot start a new topic
  • You cannot reply to this topic

Importing models into eduke32?

User is offline   Kyanos 

#151

Quote

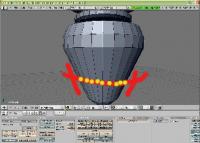
That model animation is kick-ass. I also saw some you-tube videos today showing face motion capture and animation for blender.

All done using 3rd party motion capture software, a quick search showed prices ranging from 1 to 5 K. :D

This post has been edited by Drek: 20 November 2011 - 05:47 AM

0

User is offline   Tea Monster 

  • Polymancer

#152

Or as little as £100 :D


0

User is offline   Kyanos 

#153


Looks like Microsoft just caught up to the kinect hackers out there and realized what a powerful device they made. How long till those prices start to go up I wonder.
0

User is offline   Tea Monster 

  • Polymancer

#154

If I were them, I'd put together a higher-res one with a mo-cap package for a few hundred, just for studios and game artists.
0

User is offline   Nukester10 

#155

Tea Monster are you aware whether or not there is a glich in the Edgeslide Tool for Blender version 2.49b?
Because I followed the Katsbits tutorial to the letter and I'm still having a problem removing Rem Doubles.
Maybe if you'd explain how you do it,it would make a whole heck of a lot more easier to understand then
from how I may be possibly interpreting it from Katsbits. This is where I'm at at the moment on this mod.
Earlier I was highlighting two vertices at a time on the leg and removing one.I don't seem to have
any problem doing it this way but as you could imagine it's also pretty time consuming.

Spacebar>Edit>Vertices>Merge a small popup says,"removed 1 vertices"and yet as easy as this is you
don't have to press the Rem Doubles Tab under Mesh Tools but yet you're told your supposed to if you're
doing a whole bunch of vertices at one time....now why is that?

You know if I highlight a whole bunch of vertices at one time like in the third pic below,I press the Rem Doubles
Tab nothing happens!? Not only that but the message you get for the number of vertices removed would look
like this,"removed 0 vertices" I just don't get it!? Could you please explain what's going on here?
Because it would really suck if I'm only able to deal with two vertices at a time.I'm really not
concerned about the time factor of doing it this way,what I'm really concerned with is distorting
the mod itself If I'm forced to go this route.

Posted Image

Posted Image

Posted Image

Posted Image

Posted Image
1

User is offline   Tea Monster 

  • Polymancer

#156

Rem Doubles and Merge are two different things. Rem Doubles merges verts that are a specified distance away from each other. Great if you have accidentally duplicated a row of verts twice and one set is sitting on top of the other. There is a box below the button that specifies how far you want to have Blender consider verts "on top of each other"

Merge is for when you want to get a load of verts and actually make them into one. Select the ones that you want to merge and hit 'Merge'. You will be prompted whether you want to merge them to the first vert you selected, the last or to a middle point.

Oh, and as of about a month ago, Drek's MD3 exporter (based on Xembie's) works a charm with Blender 2.60 and 2.61 (not tested with 2.62).
0

User is offline   Kyanos 

#157

Just tested 2.62, all is good. :lol:

The next update in April will introduce B-mesh, methinks it will cause a mess.

Anybody have input on changes I could make. For starters the next script will no longer set the log to a full dump, I've seen some HUGE log files. I will try to automate a [filename].md3 extension for the first export. Any feedback from the community here would be appreciated.
0

User is offline   Tea Monster 

  • Polymancer

#158

Cool! Does yours auto-triangulate on export?

Yes, B Mesh is going to complicate things enormously for plug-ins, but they are writing an API specifically for modelling tools. We already have a proper knife tool now and modelling in Blender is going to get better and better over the next year or so.

This post has been edited by Tea Monster: 04 March 2012 - 02:03 AM

0

User is offline   Kyanos 

#159

I know auto-triangulating is possible, I will try to work it into the script. Shouldn't be too hard. I was thinking of getting rid of the "md3shader" custom property requirement also. It's in there to work skin paths into the md3 file itself, more for other engines than Eduke32. I want to keep it for backwards compatibility sake, yet it annoys me.
Anyone else have an opinion on the custom property requirement?
0

User is offline   Tea Monster 

  • Polymancer

#160

It annoys the heck out of me, but I know that other projects use it as 'proper' Q3 games need the shader path in the MD3 file itself. Maybe you could have it so that it isn't required for export? At the moment, it won't include the UV map if it isn't specified.
0

User is offline   Kyanos 

#161

I'm going to work on the script today. I should clean up all these little details before the next update. Anything else I can change?
0

User is offline   Tea Monster 

  • Polymancer

#162

Nothing really jumps up a the moment. PM me and I'll test it.

This post has been edited by Tea Monster: 04 March 2012 - 06:30 AM

0

User is offline   Nukester10 

#163

Quote

Tea Monster
Merge is for when you want to get a load of verts and actually make them into one. Select the ones that you want to merge and hit 'Merge'. You will be prompted whether you want to merge them to the first vert you selected, the last or to a middle point.


Like I said in my last post I have no problem removing verts if I only highlight 2 at a time but if highlight a whole bunch of them at one time
this is what will happen,I'll explain it to you in these pics,

This first one simply just shows the verts I want to move,

Posted Image

This next shows the verts chosen being moved up in Edgeslide mode,

Posted Image

This one here shows the verts after Edgeslide mode is deactivated,by pressing the left mouse button,
then I highlight the line of verts I want to remove the doubles from by pressing ALT + Rightmouse
button near the line,

Posted Image

I tested Merging in all three modes this is a pic of the first one AT CENTER
not what I was looking for,

Posted Image

AT CURSOR again not what I was looking for,

Posted Image

And finally COLLAPSE once again not what I was looking for,

Posted Image

Like I said earlier,I'd rather not have to do 2 verts at a time because not only is it so time consuming
more specifically I'm more concerned with distorting the mod doing it in this manner.You know
especially the round edges just won't be what they originally where by doing it in this way.So if
possible could you explain how I could remove the doubles again without having happen what
was just shown in the pics above?

This post has been edited by Nukester10: 04 March 2012 - 12:37 PM

1

User is offline   Tea Monster 

  • Polymancer

#164

Try Del key, then on the pop up, choose 'Edge Loop'. That will delete all the verts on the edge and join the mesh.

This post has been edited by Tea Monster: 04 March 2012 - 10:13 AM

0

User is offline   Nukester10 

#165

View PostTea Monster, on 04 March 2012 - 10:13 AM, said:

Try Del key, then on the pop up, choose 'Edge Loop'. That will delete all the verts on the edge and join the mesh.


Excellent! It worked like a charm!

Thanks so much Tea Monster!

Earlier when I first attempted doing this,I was wondering whether or not being I wanted to be careful as not to distort the shape of the mod,would it make any difference what line you got rid of in the end? I quickly found out the answer being yes to that question.For example if you noticed how I used Edgeslide in pic #2 you see where I stopped at right?Because in testing I noticed if I kept on going all the way up to the second line after removing the third line,the actual shape of the mod overall would change and that is something I did not want to have happen.

I'd guess an expensive program like,3D's Max would have some sort of sensitivity setting on it so as to quickly Edgeloop the entire mod in a short amount of time,yet not distort the mods shape at all.But what about Blender? Do you really have to have an expensive program like 3D's Max or even Maya in order to do this fast or are there any commands to get this job done quickly as well in Blender?

Once again,

Thanks Tea Monster!


Posted Image

Posted Image

In case anyone's interested the commands for doing this are,

1. ALT + Rightclick to choose the line of verts you want to move.
2. Ctrl + E = Edge Specials choose,"Edgeslide".
3. Move the line of verts you now have activated in Edgeslide Mode towards whichever new line you want then, Left Mouseclick.
4.At this point,if the whole line is still highlighted you can just simply press DEL then EDGE LOOP to remove the extra verts you wanted to get rid of.

One more thing worth mentioning in command #4 Sometimes after moving the verts in Edgeslide Mode,after you Leftclick the mouse,sometimes just the verts may be highlighted and NOT the whole line at all.
In order to fix this,after moving the verts in Edgeslide Mode and Leftclicking them where you want them to be,
if at this point the whole line plus the verts IS NOT ENTIRELY highlighted,simply chose the A Key to deselect everything then press ALT + Rightmouse Click again on the line you originally wanted to remove the verts from THEN go back to choosing the DEL and EDGE LOOP keys once again.Once you Leftmouse Click,you'll most likely see a whole bunch of FACES light up,simply press the A Key to select none and the job's finished.

This post has been edited by Nukester10: 04 March 2012 - 07:32 PM

2

User is offline   Tea Monster 

  • Polymancer

#166

Forgive me, but I'm not 100% sure what you are after here. I'm thinking you want a smoother shape to the bottom of that bulb shape. The only way I know of doing it is to add an edge-loop in there. Just Cntrl-R on the object. You'll get a purple line through it. RHM on it once to be able to slide the edge to where you need the extra form. Then RHM again to 'freeze' it. If you get it wrong, just use edge slide to adjust it.

Attached Image: rings.jpg

There are funky ways to use Spin Dup and other methods, but I personally find that the fastest way is to create a circle, then extrude, 'S' to resize, then 'E' to extrude and repeat. This works great for table legs, monster arms and even tank sides.
0

User is offline   Nukester10 

#167

View PostTea Monster, on 05 March 2012 - 12:01 AM, said:

Forgive me, but I'm not 100% sure what you are after here. I'm thinking you want a smoother shape to the bottom of that bulb shape. The only way I know of doing it is to add an edge-loop in there. Just Cntrl-R on the object.


"I'm thinking you want a smoother shape to the bottom of that bulb shape".

Yeah,pretty much but without distorting the shape in any way,let me explain.
Here are the before and after edgeslide pic's of the area of the centerpost I was working on,

Posted Image Posted Image

You'll notice in the after pic I've removed a good number of verts and I'm now pretty much satisfied with the final results.

Now moving on to a different area,the top of the centerpost,

Posted Image

Here I'll attempt the same thing,

Posted Image

But notice in this pic,even though the verts have been removed successfully,the main spherical section of this centerpost has obviously been distorted and not what I was looking for.I wanted the verts removed yes but not at the expense of distorting the overall shape of the object itself.

This is what I'm talking about,

Posted Image

Here's the same thing in Object Mode,

Posted Image

So if you know how to remove the verts without changing the shape of the object,could you explain that?
Because if you do a Ctrl-R to create an edge-loop and in the end you're only adding more vertices then
you're removing,that pretty much is defeating the whole purpose of going through the process of removing
the vertices in the first place,isn't it!?

This post has been edited by Nukester10: 16 April 2012 - 03:44 PM

1

User is offline   Tea Monster 

  • Polymancer

#168

Is this actually a game model? I'm thinking it may not be due to the number of vertices you are using.

The reason I ask is that if it isn't, you can add a sub-surf modifier onto it and then drastically reduce your poly count. The Sub-Surf will draw nice smooth lines between your vertices. It's great for rendering, but you can't do it in a game engine.

If it IS a game model, you have to add polys to influence the shape. If you hit the 'smooth' button, you can get a bit of help with the shape, but not a lot. Using the edge-split modifier, you can choose which edges need to be sharp and which need to be soft to help the illusion.

If you really want the illusion of nice smooth shapes in game, you have to make a high-poly 'renderable' version and then bake off normal maps to wrap around your low poly game model.

Oh, in the 4th picture down, notice the ring of selected verts. There is a yellow 'trail' coming down from those verts, but no corresponding trail heading up. That means that you have one edge loop sat directly on top of another. That is a waste of polys that you could use elsewhere.
0

User is offline   Nukester10 

#169

View PostTea Monster, on 16 April 2012 - 04:56 PM, said:

Is this actually a game model? I'm thinking it may not be due to the number of vertices you are using.

Yes,it is a game mod.

View PostTea Monster, on 16 April 2012 - 04:56 PM, said:


The Sub-Surf will draw nice smooth lines between your vertices. It's great for rendering, but you can't do it in a game engine.

If it IS a game model, you have to add polys to influence the shape. If you hit the 'smooth' button, you can get a bit of help with the shape, but not a lot.

Ok,you basically said that you could use Sub-Surf if it's not a game mod but you can't do it in a game engine but what you didn't say is whether or not you could use the 'smooth' button in the game engine,if it where a game mod of course?

View PostTea Monster, on 16 April 2012 - 04:56 PM, said:

Using the edge-split modifier, you can choose which edges need to be sharp and which need to be soft to help the illusion.

Once again,your not stating whether or not you can use this modifier within the game engine.So unless you say otherwise I'm going to assume you can actually mix these two modifiers within the mod code when importing into mapster32 and the end results will be the same as when you finished the mod in Blender and exported it out.

View PostTea Monster, on 16 April 2012 - 04:56 PM, said:

If you really want the illusion of nice smooth shapes in game, you have to make a high-poly 'renderable' version and then bake off normal maps to wrap around your low poly game model.

How well do these types of high-poly 'renderable' version's work in eduke 32 and while where on the subject would these also work in Duke 3D as well?

View PostTea Monster, on 16 April 2012 - 04:56 PM, said:


Oh, in the 4th picture down, notice the ring of selected verts. There is a yellow 'trail' coming down from those verts, but no corresponding trail heading up. That means that you have one edge loop sat directly on top of another. That is a waste of polys that you could use elsewhere.


Yeah,I didn't even save that,I just used that for a quick screengrab to demonstrate to you what I was talking about earlier.

In a nutshell all I really want to do is carve out the leg for this table then create two more legs from that leg then expand out a tabletop and wah-lah! done.But in the present process of edgesliding I've found that it's much more difficult to do this around curved surfaces vs. a flat surface without distorting the overall shape of the object you're working on.

And the reason I went to the edge-slide process before creating the other legs for the table is because I thought it would be a whole heck of a lot easier to accomplish getting rid of these extra verts while the other legs are out of the way.

Remember I said this table is 1 piece,not a whole bunch of separate pieces combined together.The reason I did it this way is because I thought it would be a lot easier when approaching the Compile stage because modeling more complex shapes is going to take more time.I'm not in a rush or anything but fiddling around with a game that should take at the most 1 year to make ending up taking 3 years or more to make kinda makes me anxious I guess.

This post has been edited by Nukester10: 18 April 2012 - 09:17 AM

1

#170

That's it. I'm gonna learn how to use blender.
0

User is offline   Mark 

#171

I tried a couple of times but the way the program and it's menus are layed out I couldn't get the hang of quick enough so I gave up. Too many features to wade through. Now if they made a "lite" version that would be cool. If I could learn Blender I wouldn't hesitate a minute to go out and spend 200-300 bucks for one of those motion capture products.
0

#172

I have tried 2 times before. But this time i will look at tutorials on their website, and some videos they have uploaded. This is much harder to learn than mapser was :huh: But knowing how to make good looking models, and making models quickly would be amazing. So i want to learn it <_<
0

User is offline   Tea Monster 

  • Polymancer

#173

First off, I'd choose 8-16 vertical rows, or points in your initial circle.

You can use Sub-Surf, but you'll have to apply it before you use it in game, as it will create the extra geometry to 'fill in the gaps' and shoot your poly count through the roof. Nowadays. Its much better to do it manually and choose where you need the geometry to define your shape.

Smooth works in Polymer. I'm not sure about Polymost. I think it does.

To anyone thinking of starting Blender, If I can learn it, anyone can! We now have, courtesy of Drek, a working MD3 exporter for Blender 2.62. I HIGHLY ADVISE new users to take up the latest version rather than use 2.49. It's much easier to use and is much more 'Polymer Friendly'

A great 'getting started' which covers installing, basics and getting around up to modelling and animation:

http://cgcookie.com/...etting-started/

and more game-centric tuts are here:
http://www.katsbits.com/
1

User is offline   Nukester10 

#174

Quote

TeaMonster
"We now have,courtesy of Drek, a working MD3 exporter for Blender 2.62. I HIGHLY ADVISE new users to take up the latest version rather than use 2.49. It's much easier to use and is much more Polymer Friendly".


TeaMonster based on your statement here,I myself am also interested in going with Blender 2.62 as well but I'd like to ask a question or two beforehand as I quite haven't decided just yet.

1st Question,

Is this the Drek MD3 exporter for Blender 2.62 available for download on Katsbits listed under,

"MD3 Importers, Exporters and Viewers" that you're talking about? And if it is why is it listed as,

Blender MD3 export 2.60a:Drek and not Blender MD3 export 2.62:Drek?

www.katsbits.com/tools/

I have a feeling your going to say,"Yes Correct,That's The One!" but then again.....you may not.

2nd Question,

Have you are do you know of anyone else who've exported a significant number of models to come to the conclusion
that this exporter does what it was designed to do without any bugs and is basically is as good of the
exporter for Blender 2.49 that I have been using for a while now?

I hate to be a stickler about the version numbers but the last time I went through this I jumped on the latest
version of Blender and at the time that was version 2.57.It wasn't until a few posts later that you mentioned,


Quote

TeaMonster Posted 13 April 2011 - 05:18 PM

"Use Blender 2.49B - There is an exporter for the 2.5x series, but it only works with 2.53, not the latest code."


It wasn't your fault and it wasn't my fault.As a Newb I assumed I was supposed to download the latest version which at the time was 2.57 so I didn't know any better,so it wasn't my fault.And it wasn't your fault because I never told you that I was using the wrong version of Blender for the MD3 exporter to properly work at the time in the first place.

But what is important is that this time around I make sure to ask some more questions about this before I do anything else because what happened last time was I went from Blender 2.49B to 2.57 and then back again to 2.49B again and you know as well as anybody else what a pain in the arse it can sometimes be to remove and/or download any version of Blender the way it's filing system is layed out.My point being out of all of this is if I could possibly get it right the first time that would really be great and that's why I'm asking more questions this time around.

This post has been edited by Nukester10: 26 June 2012 - 10:29 AM

1

User is offline   Nukester10 

#175

Oh yeah and the reason I'm typing here is because I somehow duplicated my last post twice
and I don't see any tab to remove THIS post so if anyone could explain to me how to delete a duplicate post
that would be swell Thanks!

This post has been edited by Nukester10: 26 June 2012 - 10:45 AM

1

User is offline   Tea Monster 

  • Polymancer

#176

The extension works with 2.62 really well. Drek says he has one ready for 2.63a (which uses a different mesh system).

MD3's are ancient game formats that are only used by one or two engines that are decidedly 'niche'. We are lucky to have Drek who will arse around with these scripts to keep them up to date.

I'm pretty sure the one he's using is this one.
0

User is offline   sedition 

#177

Just two small question about modelling:
What is the recommended max polycount for md3 models in EDuke/Mapster? And is there a way or a tutorial for Blender on how decrease the polymost?
0

User is offline   Tea Monster 

  • Polymancer

#178

Generally, you should be OK with about 5,000 - 8,000 for most enemies. 8,000-15,000 for bosses, 1,000 - 3,000 for props. It depends on what you are doing, what sort of lighting there is (this hits polymer hard) and how much stuff is on the screen at one time.

Did you mean decrease polygons? If you want to make a low-poly out of a high-poly, then that is slightly different. If you only want to shave a few K off here and there, cutting out edge loops where you can would be your best bet. If it's more involved than that (say, a ZBrush model), then you will have to do something called 'Retopo'.

Explanations are:


0

User is offline   Nukester10 

#179

Posted Image

TeaMonster I don't know about anyone else following this thread but I did decide to go with your suggestion of moving on from Blender 2.49b to Version 2.62 as you can tell from the pic above,the real funpart now will be getting it set up properly.

I first went to that link you posted on how to install Blender I chose option b this time lol
then,I just opened the file and created a shortcut to my desktop>check

Then,I downloaded the Drek's MD3 Exporter>check
I noticed that there is was only one file in the manila folder,

"io export MD3 Python File 22kb"

and I'd assumed there would be 4 or 5 files like there was with
versions 2.49 and 2.5 anyhow,

Next I needed to find out which Blender folder I needed to drop it into.
If you recall in version 2.5 Xembie suggested placing the MD3 file into the "IO" folder.Well in this newer version 2.62 there is no "IO" file.

So then I looked on katsbits and they did have install tutorials for later
versions but not for this version 2.62 basically they said to place it here,

C:\Blender Foundation\Blender2.57\scripts\addons\

On the Xembie blog for version 2.63a the same location was pretty much mentioned,

"Place folder in “Blender/2.58/scripts/addons/”

So that's where I placed this single MD3 file,within the scripts/addons/ folder.

From there the first thing I noticed when I started up Blender 2.62 was that the cursor was
flashing within the first gui that comes up but it was not checking before the Main Gui popped up
to see if Python was installed.Firstly are there any other scripts or environment variables that need to be
set up in order for that first gui to check whether or not Python is actually installed
like it did with version 2.49 or is it not necessary?

The reason I'm asking this is that notice in the pic above,I went to User Preferences and checked off the
"Import-Export:MD3 (md3 +shaders)"tab.Also notice,I don't know if you can read the rest but
it says,

Export To Quake Model 3 (.md3)
Python:bpy.ops.export.md3( )

Next,an experiment.I closed Blender,removed the Drek MD3 file and placed it on the desktop for a second.
I reopened Blender again and Blender actually had an "error message" at the bottom that stated that
basically there was a file missing and even stated which file was missing,the file I just removed of course.
Not only that,when I clicked on User Preferences again,then clicked on Import-Export tab,
even the option to tic off,"MD3 (md3 +shaders)" disappeared completely but once I went back
and dropped the Drek MD3 file back into the same folder again,once I reopened Blender again,
both the,MD3 (md3 +shaders) option returned so you could tic it off if you wanted to,
which I did and also the tab returned you see my cursor sitting on in the pic above.
The reason I believe that all of these previous things occurred may have been due to
the fact that there was another tab I clicked on at the bottom of the,"Import-Export"
tab that said,"Save As Default" in which I ticked off before and after I went through this
little experiment.

I also even noticed that If I clicked the tab,

MD3 (md3 +shaders)

that this Gui would come up,

Posted Image

Now if I didn't know any better I would have said that if I'd chosen to at this point in the pic,
I could have actually accomplished doing an MD3 mod export.

But I question at this point in actually being able to accomplish this task.....why?
Because from having previous experience with setting up Blender 2.49b

It's this gui I'm concerned with mostly that if I did attempt to export,would it or would
it have not worked? What's you're opinion on this,do I have to have the first gui pop
up with a message like this when I start Blender 2.62 or is it not necessary?
And if I do have to have more Python scripts installed so that you'd see a
message pop up like the one below,where would the link be and also
one last thing.Would I also have to set up Environment Variables as
well and where could I find a tutorial on this?

Posted Image

This post has been edited by Nukester10: 01 July 2012 - 07:19 PM

1

User is offline   Tea Monster 

  • Polymancer

#180

Right, first off, you need to be using 2.62 for now, as there are a lot of changes to the mesh system in 2.63 and Drek hasn't issued a script for that one (though he says he has one nearly ready) .

So, for now, please use 2.62.

The best way I find to do this is to download the .zip file from Blender.org.

1. Download .zip version of Blender 2.62 for your operating system from here.
2. Unpack somewhere convenient. My Documents will do or leave in the Downloads folder.
3. Drop the script into the blender-2.62-release-(Your OS version here)\2.62\scripts\addons folder.
4. Go to File-Load Factory Settings.
5. Go to File-Save User Settings. (4 & 5 will clear out any settings for the new stuff in 2.63 that may cause you problems)
6. Go to File-User Preferences and enable the exporter (also enable 'loop tools' if it isn't, this will make your modelling life a lot easier though it has nothing to do with the exporter.)
7. Select each mesh object you want to export in the viewport. For each mesh object (one at at time) go to the 'Object' tab in the properties window (the one that looks like a cube). Go to the bottom of the tab where it says 'Customer Properties'. Under Custom Properties, select the 'add' button. A new property called 'prop' will appear. Click on 'edit' to edit the names. Under 'Property Name' type "md3shader". Under 'Property Value' type in "model/s.jpg" If you don't do this your UV map won't export.
It should look like this:
Attached Image: MD3Properties.jpg
8. Select the model and the skeleton.
9. Export to MD3.
10. Choose a file name. By default the script does NOT automatically put .md3 at the end of the file name.

NOTE 1: There is one strange thing with this exporter. The model has to be larger than 1 blender unit to avoid some distortion. If the MD3 looks like it's been through a wood chipper, then scale up the model by 2 and try again.
NOTE 2: Blender 2.5/6x series has Python built in, you don't need to mess with it at all.

This post has been edited by Tea Monster: 18 July 2012 - 12:03 PM

0

Share this topic:


  • 8 Pages +
  • « First
  • 4
  • 5
  • 6
  • 7
  • 8
  • You cannot start a new topic
  • You cannot reply to this topic


All copyrights and trademarks not owned by Voidpoint, LLC are the sole property of their respective owners. Play Ion Fury! ;) © Voidpoint, LLC

Enter your sign in name and password


Sign in options