[added 2012-04-14] True Room Over Room Mapping Guide @ EDuke32 wiki (primary editor: Micky C)
[update 2015-02-18] Fixed URLs.
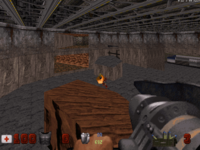
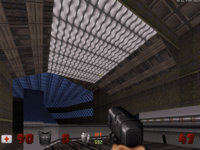
First off, some screenies to get you into the mood:
 *
*  *
* 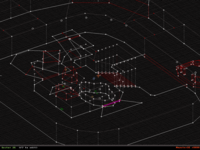
As you can see, multiple sectors can be stacked on top of each other. Because they're at their actual position, 'true' RoR. Before I dive into the tutorial, a quick historical note. The system was originally devised for Polymer because of its ability to render 'any' geometry. But it turned out that making it work for classic is very much possible using multiple passes (I plan to write up a more technical post some time). You might be wondering why there are no Polymer shots. That is because Plagman hasn't gotten around writing the necessary extensions to the renderer yet. I decided to release it now so people can start working on the maps and be done when P'mer support comes around.
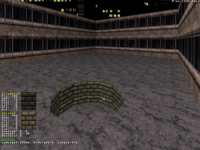
Alright, let's start with a simple example. Suppose you want to have a manhole leading to a sewer, the kind for which you'd normally use teleporter SEs.
 *
* 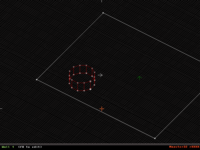
Highlight the inner sector and press Ctrl-E (for 'extend'). You'll be prompted for whether the adjoining sector should be constructed above (a) or below (z). [note: you don't have to do this in side-view mode, it's for illustration purposes only].
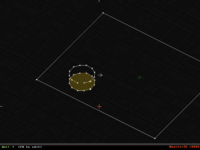
Here's how things look like after the extension.
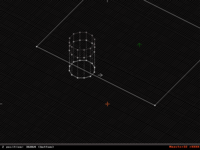
And in 3D mode:
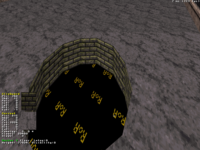
The fake RoR texture is toggled with 'I, giving us the manhole in its full height:
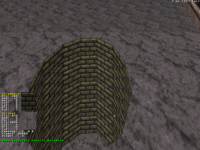
At this point, the top and bottom manhole sectors will be linked together so that e.g. changing the z position of the floor of the upper one will automatically set the ceiling of the lower one. Dragging points works just as expected.
So far, so good. Now the graying-out feature has to be put to good use. There are two ways to use it in the context of TROR. Either enter side-view mode, and change your z position with MMB. Any extended sector whose [ceiling, floor] bounds fall outside the z position is made inactive for editing. Alternatively, you can toggle levels with PGUP/PGDN, but that can be a little unpredictable.
Switch to the lowest level and add a neighbor to the sector just constructed.
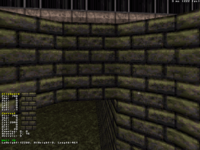 * http://lunatic.eduke...or/capt0009.png
[aww, image limit exceeded :/]
Easy, huh? Well, that's just the beginning. Surely you'd want to decorate the street a little.
http://lunatic.eduke...or/capt0012.png
That translucency is toggled with 'T'. Ceilings and floors now also have blocking and hitscan bits. To make submergible water, teleporter SEs have to be used here, and the floor and ceiling (above and underwater, respectively) have to be blocking.
Now you might decide that one of the houses needs a roof, but constructing one above the windows would normally be impossible. No more! Change to 2D mode, highlight all sectors having the parallaxed ceiling, and extend them above.
http://lunatic.eduke...or/capt0014.png * http://lunatic.eduke...or/capt0015.png
Take note of the message: "Extended ceilings of highlighted sectors, creating bunch 2". What this means is that now, all ceilings of the just highlighted sectors have been given a single upper neighbor sector and that the ceilings of the former together with the floor of the latter have been given the bunchnum 2 (i.e., the third bunch in the map).
This 'N:1' rule has a couple of desirable consequences. Since the only wall-points that need to be aligned to the lower sector are those at the outline, you'll be able to edit the inner portions of the sectors freely and independently of the other. In fact, drawing a loop in any extended sector will automatically insert another one of reverse orientation, making a new inner sector out of it. Put more generally, a bunch is a collection of ceilings and floors covering the same connected planar area (respectively), where the number of each can be >=1 (I call this the 'N:M' property).
Back to our example map:
http://lunatic.eduke...or/capt0016.png
(the alleyway after extension)
http://lunatic.eduke...or/capt0020.png
(and after attaching a new sector to the upper level)
http://lunatic.eduke...or/capt0019.png
(invaders! note that while the UFO's and fire truck's walls intersect when looked from above, they don't need intersecting points, since they're in completely different sectors.)
For our original goal of having a roof above the windows, all we need to do is to change our z position to the uppermost level, and draw a new next sector adjacent to the facade. The results look like this:
http://lunatic.eduke...or/capt0021.png * http://lunatic.eduke...or/capt0023.png
One thing to watch out is to press space on every point on the facade -- remember that it is an outer, "constrained" wall to bunch 2! Another pitfall is considering the two rooms and the roof sectors as ROR'ed -- they're merely plain old sectors stacked above in sector over sector fashion, and therefore won't be grayed out due to TROR (but they will if you set the editorzrange manually with Ctrl-R).
Thus ends this tutorial. I hope you had as much fun reading it as I making the system. Now goeth forth and maketh some awesome-looking maps
P.S. Random trivia for which I was too lazy to write down prose
- extended sectors can be sloped, but the bunch has to be 1:1 in that case
- some more advanced editor functions aren't yet very well integrated with TROR. I tried to make editor robust against breaking the map, but wouldn't trust it entirely. So, as always, don't forget to make backups.
- Maps containing one or more TROR bunches are saved in a new map format (v9) since some fields had to be taken over: xrepeat is unavailable on TROR'ed floors and ceilings, and on walls it's lotag if the ceiling, and extra if the floor of the wall's sector is extended. When in-game, these get transferred to internal arrays though.
- the system is supposed to be used for 'large-scale' RoR, as a rule of thumb each affected sector should be at least a Duke high [that's too strict though].
- a couple of engine functions don't know about TROR yet, most notably clipmove and cansee.
- A useful helper in Mapster32 is Ctrl-ENTER on a TROR'ed ceiling or floor, pasting 'visual' fields to all ceilings or floors of the bunch of the aimed-at one.
- A (badly formatted) pdf version of this tutorial is here

 Help
Help
 Duke4.net
 DNF #1
 Duke 3D #1


