Duke4.net Forums: Duke Map/Mod of the Month Club - April 2022 - Duke4.net Forums

Jump to content

  • 3 Pages +
  • 1
  • 2
  • 3
  • You cannot start a new topic
  • You cannot reply to this topic

Duke Map/Mod of the Month Club - April 2022  "Duke Nukem 3D Full Version v1.3D"

User is offline   Merlijn 

#61

I fell off the Duke grid for a while, been busy with a lot of other stuff.. But this is a great change to replay the original game and see how well it holds up (spoiler: very well :) ).
I'm not going to write very long reviews for each maps since most things have been said already, but I will share some childhood memories and observations about them from my perspective. Before concluding with final thoughts per episode.

Episode 1: LA Meltdown

1. Hollywood Holocaust

We all know and love this one, it's an iconic opening level and most of us can dream the layout. My first experience with Duke was the shareware version, which was part of a compilation disk.
This disk also included the shareware versions of Doom, Hexen, Blood and even a demo of Redneck rampage which only included 1/3 of the first level (IIRC).
Anway Duke immediately jumped out thanks to the first few seconds alone, very cinematic. Doom would just start in a hallway, Duke starts with you landing on a rooftop while your skycar goes down in flames and crashes into a skycraper.
Not to mention we immediately get the first immortal one-liner from Duke here. Pretty elaborate for the time and one hell of a first impression!

Onto the level itself, it's pretty much a perfect intro map which can be finished pretty quickly but also rewards exploration (the hidden RPG, the famous red appartment room etc.). I remember finding the red appartment by accident because I was randomly shooting rockets at the palm tree and one of them missed and went through the masked window :D. This map immediately shows off the capabilities of the build engine, with earthquakes, walls /environments that can be destroyed and room over room. Gameplay really eases you into the rythm of the game, with mostly just the low tier liztroops. Overall still a damn fine map! Also a shout out to the artists who created the skybox, being surrounded by all these huge skycrapers and seeing the hollywood sign in the back adds so much to the immersion. Also love the music, one of my favorite tracks!

2. Red light district

Perfect follow up, it ramps up the action with its pig cop ambushes and shows off even more effects that were impressive at the time. I always loved the recon patrol vehicles and they get introduced right at the start here. The map is pretty much as series of memorable moments, there's something new in every corner. Wether it's blowing up a building, playing pool, pig cops coming in from an exploding roof or the strip club. Almost makes me think the game as a whole is too front loaded, but that was often the case in the shareware days. And I'll get back to that thought once we move into the next episodes.

Not much else to say. As a kid I used to think that the ambush at the end could be avoided by jumping through the window in the ceiling right before the ambush. I tried to make that jump so many times before finally giving up. :D Looking back it's not a weird thought, the map kinda sets it up like it could be a possibility with the stacked crates right next to it. Perhaps it used to be possible before it got scrapped.

I also wish the bar/stripclub could be accessed from the sewers, giving you 2 possible entryways. But it's a small complaint.

3. Death row

This always felt like a tonal shift to me, as we move away from the city into more hostile and less colorfull environments. The episode does get darker and more atmospheric from this point onwards. Case in point, this one starts with you on an electric chair and no weapons. But I always cheese the first pig cop by kicking him through the window. :P Not much to say about this map what hasn't been said, it's a well executed jailbreak map. Although as a kid it took me a while to find the passage behind the poster, they could have added some stronger hints here. Again this game felt much more cinematic than its contemporaries. You're not clearing out random hallways, you're breaking out of a highly secured prison and taking over a submarine.

4. Toxic dump


A map that gets overlooked IMO, to me it's a highlight of the episode. And that says something, as the entire episode is very strong. The amount of different environmental puzzles is very impressive here and it really feels like an epic adventure. As a kid it felt like a huge accomplishment to reach the end in one piece. Aleks already broke this down so I'm not going to repeat everything he said. But this map is very creative and a lot of fun to play. The only drawback is that it (again) makes the game as a whole feel a bit front loaded.

The amount of secrets is a bit ridicilous though, I don't know if I ever found them all. Missed a couple in this playtrough. Also I feel the map is a bit too generous when it comes to atomic health, especially if you know where the secrets are. But that's the only complaint I have really.

6. Launch Faciltiy
As the others have said, easily the weakest map of the first episode. No wonder it's the secret map. I do like the central room where you have to circle your way to the top though, that's a cool layout. The other rooms feel like more of the same compared to the last 2 maps. The rocket itself looks cool, both interior and exterior. But the "launch" feels like a repeat of the destroyed building in Red light district and doesn't have the same impact. Not much else to say. Playing this gives you a new jetpack but that's pretty much the only reason to play it.

5. The Abyss
Fucking love this map. This is where the environments get really atmospheric and hostile. It's also the only map where the rock texture gets stretched out, makes for a pretty interesting and unique look. The ominous music fits like a glove. It's one of the most memorable tracks from the game, which is why I was compelled to make my own version. As a kid the parts with the strange disembodied chants freaked me out, to the point where I completely skipped them and used dnclip to get to the ending. I still think it's pretty effective, it really helps to build up the tension. And of course the ending is very memorable, with the huge alien ship buried in the rocks. Again it feels much more cinematic compared to the FPS'es that came before. I feel like the could have done more with the boss arena (especially considering that the battlelord has a hitscan attack) but on the other hand you get enough health to survive.

Overall thoughts on LA Meltdown: this may be nostalgia talking, but this still feels like a perfect FPS experience. Each maps has its own identity and offers something unique. And there's this feeling of building tension from Death row onwards, which cumulates nicely in the large alien spaceship at the end of The Abyss. Easily my favorite episode of the game and it holds up very well.

This post has been edited by Merlijn: 15 April 2022 - 07:21 AM

7

User is offline   Quacken 

#62

Just finished up Shrapnel City, so here's my thoughts on the first 6 maps. I took 6 deaths during this episode, 7 if you count an intentional suicide I did because I believed I soft locked myself. Here goes:

Raw Meat: A pretty fun map. The combat is fun and the map flows well. There's admittedly not much else to say about this map other than the fact it re-introduces the Pig Cops, making Shotgun ammo a little more prevalent and generally decreasing the amount of Chaingun ammo in turn. The music is pretty average too. In Hiding is a pretty forgettable track in my opinion. Despite it being a little forgettable, this is a solid start to the episode.

7.5/10.

Bank Roll: This is also quite a fun map, though I like it less than I remembered. Bank Roll has the first of quite a few tricky starts in Episode 3. With plenty of hitscanners abound including a few Enforcers, it's a bit tough to make it past the starting line. Shooting out the bank and leading the monsters into trip mines is also a good time too. Definitely my favourite thing about this map is the music. Going After the Fat Commander is very catchy and fits the mood of a bank shoot-out very well. It always sticks in my head after finishing this map. I remember this map being longer than it actually is. I have a very shaky memory when it comes to Episode 3, and I think it's in part due to both the quality of the maps and my own forgetfulness. Going back to Bank Roll though. It's shorter than I would have liked it to be, but this is still a very good map.

8/10.

Flood Zone: This is definitely my favourite map of Shrapnel City. The start can get potentially hot if you don't act fast and/or pick up the out of the way Shotgun under the water, and it stays hot for nearly the entire map. From start to finish, this map throws platoons of Assault Troopers and hitscanners, clouds of Assault Commanders and Octabrains, and to top it all off two very devilish Battlelords that you might not have the health or ammo to kill. I also like this map for how open-ended it is from the beginning. I took my first death here because I thought I could try a cheeky sequence break at the start, and I ended up triggering about three monster closets that I didn't want to. One last point is the music. Taking Names is a nifty little beat that I like most of the time, but like a lot of Bobby Prince music it tends to wear on me if I listen to it for too long. I really like Flood Zone. It's challenging and it never lets up on the action.

8.5/10.

L.A. Rumble: I honestly think L.A. Rumble rounds out to be pretty average. The part of the map before the non-secret Jetpack is not all that engaging to me. There's pretty much only Pig Cops at the very start and some mean Enforcers up top the skyscraper, and after blowing a hole in the abortion clinic, the Sentry Drones that teleport in bother me quite a bit. This was the level I intentionally committed suicide on. I must have skipped the trigger for blowing up the Quake Site because it wouldn't budge any time I got close to it, and I couldn't figure out how to beat the level. After grabbing the above mentioned Jetpack the level does pick up some steam. It's quite fun to fly around blowing up everything with the RPG, especially if you hoarded all of your rockets like I did, but it comes a little too late for me to have lots of fun with the concept. I feel like this level would have been better to me if you got the Jetpack around the time the first Sentry Drones teleported in and you could fly around the level like it was more of a sandbox to play around in. With one half I don't think is fun and another I think that is, L.A. Rumble ended up being the first of a long line of forgettable, blended together maps in Shrapnel City.

6/10.

Movie Set: Goodness, this map is tiny. I think Movie Set is cute for its creative use of skybox and Lunar Apocalypse textures, but it feels really flimsy in the combat department. The turrets placed in the main hub that connects each of the main movie sets annoy me on a subconscious level. They make breaking out of the very start asphyxiating and I don't like it at all. For about 51 monsters, this map is also way too overstocked. There's like three Atomic Healths and an RPG to make clearing out the only challenging monster, the Battlelord, really easy. Movie Set has the looks of a baby turtle, but about the staying power of one too.

5/10.

Tier Drops: I kinda like this one. For being a gimmick secret map, Tier Drops has some of the more refined combat of Shrapnel City. I like blowing up the first true Octabrain cloud of... probably ever in the desert rock section, and the grey brick section, while easily trivialised with the Shrinker, actually killed me because the additional Battlelords spawned in at the wrong time. Tier Drops is a welcome reprieve from the averageness of the previous two maps.

6.5/10.
3

User is offline   Aleks 

#63

Few words about the first 3 levels of Lunar Apocalypse:

Spaceport
Brilliant start of the episode and of the full version od Duke 3D. The start in the completely new environment, next to a large window showing the outer space, with Duke saying the line that ended first episode and the Klingon bird of prey approaching and shooting rockets at you is quite a thing. I remember being sucked into this new environment as a kid, exploring and finding so many new things - the weapons (between here and the start of Shrapnel City, which we played in parallel), enemies, how different it felt. The map has quite a unique layout, with central hub being a vertical shaft. The gameplay is good for a start, not too challenging, but also not too lenient for the player.

The music also takes us into outer space - having a distinct military/formal tone due to the marching drum, but also the futuristic/spatial feeling, perfect for a level that's set on a space station that still belongs to mankind.

Score: 8/10

Incubator
Once again, this one starts with kind of a gimmick with docking into another space station. The strongest memory from this level I have is the alien infestation and green goo that's overcoming the whole installation, from further point of view I also think this level is important due to setting a more bleak tone to the game and explaining why they are capturing the babes, at least as far as the story/lore of a 1996 FPS games goes. There's also some neat effects like the control panels elevating, which is simple yet impressive, or operating the water dam towards the end. Combat wise, the beginning can be a bit tough with the sentry drones attack, then the finish with octabrains is quite epic.

I've seen most people not liking the music here, but I don't mind it. It is quite intrusive, but I think works well with the level - not too moody, but setting this intrusive tone and kinda drilling into your brain, also it's pretty memorable.

Score: 7.5/10

Warp Factor
A dark and atmospheric level, but for some reason I mostly remember from my childhood times the central forcefield/warp reactor thing, the staircase for yellow key guarded by the Battlelord and the transport between the "nacelles". This level welcomes us with one of the most challenging starts, which can be deadly playing on DIG or pistol starting with all the sentry drones, few next rooms are also quite difficult and feel kind of desolate with the general destruction of the ships and mostly drones as enemies. I only realised the double secret here was a reference to Star Trek much later, then when I started watching all the series, it all became clear to me how much this level is inspired by the franchise - all the way from the title to the layout resembling the shape of Enterprise, which is quite awesome and made the level grow a lot on me. Besides that, there's a lot going on in here and how the Battlelord respawns across the whole map is quite dreading part. Bad thing about the map is how cramped it feels at parts, especially the corridors in the nacelles where even sentry drones can get stupidly stuck.

Not a fan of the original music here, which is kinda boring and anticlimatic IMO. However, I love Lee's Black Beans assigned to this map, one of my favourite tracks from his last CD.

Score: 8/10
3

User is offline   Quacken 

#64

I'm fully awake now so it's time to get to writing about the latter half of Shrapnel City. Oh goody.

Rabid Transit: Rabid Transit is undoubtedly a cool novelty map, but it again doesn't have much else that's notable. Jumping from a train car up to the ledge with the first key always makes me nervous, and trying to kill the Enforcers up there on foot makes me doubly nervous. The first two Battlelords can be very easily cheesed by running for the trains and letting them get on the tracks, but they both teleport in and sandwich you on a dark staircase and it's just a little too RNG reliant for my taste. The length of this map really took me out of it. I was surprised when I swam up to the exit button. I could have sworn this map was just a little longer on my previous playthroughs, but apparently not. Rabid Transit peeks out of the mound of averageness that is Shrapnel City's latter half due to its gimmick and great Lee Jackson music, but aside from that it is a profoundly mediocre experience.

6/10.

Fahrenheit: It's fine. The best thing about Fahrenheit is its music. 233.778 Celsius is (ironically) a very chill track. It gives the map a laid back feel to it that I can definitely appreciate. This map's combat feels pretty misbalanced. You get way too much Shrinker ammo so all of the Enforcers and Assault Commanders can't touch you, and the Pig Cops are easy to counter with the amount of right angles in this map to hide behind, and they are always placed in groups to be bombed with explosives. I do like the locations in this map, even if the fire station is noticeably lacking in details and is too dark. The radio station is a bit funny though. I wanted to like this map more than I did, but I ended up not really gaining much of anything from it.

6.5/10.

Hotel Hell: After a series of five easy and forgettable maps, Hotel Hell ratchets up the difficulty and doesn't let go (until you get the Shrinker). The start is genuinely pretty tricky, with Pig Cops having the height advantage on you and behind doors, ready to shoot; explosions are happening everywhere, Enforcers are out for your head and the reception desk decided to arm themselves with miniguns. I managed to take another death here while playing sloppy before the yellow key. There's also of course Lord of L.A. being hammered into you, which is one of the few Bobby Prince tracks that doesn't grate on me. After getting the Shrinker though the map gradually starts losing its charge. I used it to trivialise the Battlelord at the pool and the Octabrains in the water, which is the last fight in this map that's threatening. Hotel Hell is a welcome reprieve and I respect Levelord for trying to hike the difficulty up.

7.5/10.

Freeway: I'm not sure about Freeway. Its emphasis on verticality is nice to see, and with its dread inducing music, lack of supplies throughout and the three Battlelords that all appear in the open street I can see this map tries to be a survival horror-esque map in the same way that Warp Factor is, but I don't know. Something about Freeway just feels off to me. Maybe it's the music not having the same vibe as Gut Wrencher, maybe it's the fact that the teleporting Battlelords don't get woken up early enough, creating the same anxious anticipation in Warp Factor, or maybe it's the Terminator joke near the end that breaks my immersion. This map did still manage to kill me once near the start when I face-rocketed myself, and it's certainly much more difficult than Warp Factor or even Hotel Hell. I like Freeway, but I don't love it, and on a bad day it can get lumped in with E3L4 through to E3L7.

7/10.

Stadium: It's down to you and a sultana with an eye, limbs and two rocket launchers. I've always thought that Urban Jungle was the wrong music for this. Lord of L.A. not only makes more sense thematically (the Cycloid Emperor is the Lord), but it seems like it'd be timed well to the lift you come out of at the beginning. Stadium took my final two deaths while I was dicking around trying to pick up everything, but on attempt 3 I circle strafed my way to victory. Game over!

3/10.

Closing thoughts: I thought Shrapnel City was pretty boring, which is both surprising and a little disappointing to me, as I remember quite liking Episode 3 more than I did on this most recent playthrough. These maps are extremely small and feel noticeably scaled back compared to Lunar Apocalypse, in both grandiose setpieces, combat and even choice of locations. It's a shame we're excluding Episode 4, because I would have liked to gone back to it and see what I thought of it.

Final score: 6.5/10.

Thoughts on Duke 3D's original three episodes: I think these are a pretty solid set of maps. Despite some that miss the mark, I still had fun replaying my favourites, and despite their waning quality in my opinion, I can appreciate the immeasurable influence Blum and Levelord's maps have had on the few pieces of custom content I've had the chance to play. My collective final score for L.A. Meltdown, Lunar Apocalypse and Shrapnel City is a 7.5/10.

I also had a lot of fun with participating in a Monthly Club for the first time and writing up what I thought of each map. I'm definitely looking forward to May's submission!
3

User is offline   Aleks 

#65

Fusion Station
One of the most unique and memorable levels of the game. This one I can clearly remember from my childhood leaving super strong impression, with it's literally outwordly set of textures and - perhaps even more - sounds for the alien elevators and doors (the gurgling one was especially neat). I couldn't make heads or tails of the layout back then and remember we were struggling quite a bit with it, for me the hardest part was running past the timed door back then. Of course the map can also be cheesed with the jetpack (which I personally find to be the only flaw with this map, as the player can pretty much skip some of the best design in the whole game). Nevertheless, with time I grew to appreciate this map even more. There's super strongly pronounced verticality, the central tower is a brilliant example of SOS with some pretty neat effects like the floating bridges, each floor is quite distinctive (I admit that my favourite one has probably became the part with spacewalk in that maskwalled corridor, which is quite scenic). Then there's the combat, which is quite on the more difficult side (I'd go as far as saying this is the most difficult level of E2, despite no Battlelords - due to how tricky some encounters might get with either all the verticality or close quarters with commanders or enforcers). And of course the atmosphere, which is perfectly set here...

...which is greatly helped by the music. Again, one of my favourite pieces, Robocreeping fits the level perfectly and sets the alien/horror theme for the whole map. It seems quite simple, yet does the job.

Score: 9.5/10

Occupied Territory
This one is quite shorter, but the scale seems bigger. The feeling that it was supposed to be a boss map is strong, but it also works as a mid-episode "boss" kind of level I'd say. I mostly remember all the battlelords from it as a kid, and also not really understanding what's going on in the central hub here. Now I appreciate this level more for stuff like the sloped space windows, how the bridge extends to the battlelord room and what's really going on here, i.e. the map's name - as if the aliens are attacking an Earth station and docked with that infested/gooish part of the map. The combat here is quite heavy, but fair and doesn't really feel overwhelming, also there's some quite scenic fights even if we take the minibosses out of the equation - i.e. the commanders and sentry drones in the sloped windows hall or the alien part after traversing the fast conveyor belts. This might not be the best or most memorable level, but it's quite a strong statement from the designers and it does feel quite underappreciated after all.

The music doesn't get in the way, it's once again moody and spacey. It doesn't feel as much as building some kind of tension, but rather like assessing the casualties after some kind of a disaster, which works well here. Not sure if a heavier track wouldn't work better here, but this one does the job quite well.

Score: 8/10

Spin Cycle
Both of the secret levels in Lunar Apocalypse, as well as Tier Drops, were only found by me much later after completing the game. Or rather I really learned about there being more and first completed them through DNSCOTTY before finding how to reach them through regular play. Not much to say about this one - it's based on a gimmick and can be either quite funny or annoying to tackle. Unfortunately, it usually feels like the latter, also there's lots of switches to press, but I'm never sure if I need them all or just some. The music never stuck with me, it's quite forgettable as well, so no point in discussing it for me really. Perhaps the weakest level in the game for me.

Score: 5.5/10

Tiberius Station
This level stuck with me quite much when I was a kid, but perhaps for the wrong reasons. Now I probably see it as one of main Blum's level design flops. I remember I was quite sure the intended progression in it would be to run into the timed door with red light inside, which was opened from the control room and seemed like a logical progression, also the orange/red light, as I mentioned before, always seemed associated with level ending for me. On the other hand, the other door where I should have went never really brought my attention. So, I spent like 1-2 weeks using up all my PC time tryingto get in the orange lighted room, failing and getting frustrated - then when I did I was super disappointed to realise there's nothing really interesting there and picked up the intended progression. Bleh. The level feels much more chill than the previous few, despite how treasonous the final battlelord can get. The scale is quite large, we also get on the moon surface, but it doesn't really hit as hard as in the next two levels. The mirror tricks and ventilation shafts filled with slimers are perhaps the most interesting thing about this one.

The music is quite mediocre and doesn't really fit this level that well. I much prefer Lee's proposition of Fast Forward to the 90s over Pizzed.

Score: 7/10
3

User is offline   LakiSoft 

#66

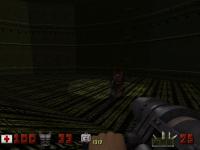
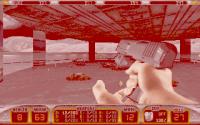
Well enough, i decided to replay the entire thing just for fun. Though this time i am doing it in Duke HRP v4.0 with DukePlus 1.9 bundled for a change. I have enabled interesting DukePlus features such as Double Sized Levels, Mirrored Levels, Random Monster Attributes, MP5 replacing Chaingun Cannon, and Double-Barreled Super Shotgun and this way i replayed L.A. Meltdown. I got interesting results with Mini Alien Queen appearing in Red Light District (E1L2) and Prison Row (E1L3) and having some registered version weapons appearing in E1L4 and onwards. Generally, in essence, this sweet DukePlus features used in original levels do indeed make things more interesting and mystic. Definitely good combination that i recommend everyone trying. Since i completed L.A Meltdown this way, i am planning on doing the same with Lunar Apocalypse and Shrapnel City. Maybe even with The Birth, but I'll see about that one. Anyway, here's some screenshots:

Attached Image: eduke32 2022-04-20 04-10-53-286.jpg Attached Image: eduke32 2022-04-20 04-11-38-943.jpg Attached Image: eduke32 2022-04-20 04-19-24-026.jpg Attached Image: eduke32 2022-04-20 04-24-16-402.jpg Attached Image: eduke32 2022-04-20 04-29-23-267.jpg Attached Image: eduke32 2022-04-20 04-44-07-470.jpg Attached Image: eduke32 2022-04-20 04-45-31-702.jpg Attached Image: eduke32 2022-04-20 04-47-47-258.jpg Attached Image: eduke32 2022-04-20 04-48-09-808.jpg Attached Image: eduke32 2022-04-20 04-51-14-816.jpg

Attached thumbnail(s)

  • Attached Image: eduke32 2022-04-20 04-48-06-658.jpg


This post has been edited by Gingis Khan: 19 April 2022 - 07:18 PM

2

User is online   Ninety-Six 

#67

yep this took a while


Before I begin I would like to talk about Lunar Apocalypse itself for a moment. Way back in the day, this used to be my least favorite episode, like most people. The common critiques generally applied. I didn't hate it by any means, but the fact that it didn't resemble anything in particular (at least until the moonbase, which I somehow managed to not pick up on as a kid), combined with its darker tone which I already mentioned I didn't like as a kid, and yeah it was low on the list. Still enjoyable, but not as good as the others.

Of course, today, my opinion couldn't be any more opposite. It's now my favorite of the 3DR episodes, and a lot of that is explicitly because of that dark tone. That moody, grim, and almost depressing atmosphere that reminds you that references and one-liners aside, there's still an invasion going on. There's still people to protect and a planet to save. This was before Episode 4 introduced a higher saturation of comedic elements, but even with that in the picture I still argue Lunar Apocalypse fulfills a special role of grounding the whole game. Perhaps even moreso. It highlights the dark undertones that prevail throughout the rest of the game and gives it the spotlight. It puts you, alone, in space, against the threat you just learned was way bigger than you first thought. It puts into perspective what came before and what comes after, that Earth it on its own, and only you can save it. It's the "laughing through gritted teeth" depiction of Duke Nukem throughout the original three episodes, with the focus on the gritted teeth.

I realize a lot of that was talking in circles, but I'm trying to convey what I mean by "grounds the game." It's the true backdrop of the game, what it's all about when you remove the more superfluous elements like the humor and the build engine showcase. Those are still important, but they are built on a strong backbone of atmosphere and combat, and it's what DNF didn't quite understand. This episode renders that backbone naked and it still holds up.

I know it sounds like I'm overanalyzing, but I genuinely believe that's what this episode is. It's the one that hard-focuses the atmosphere and even horror. And this all came about because of a special moment I had as a teen (that we will get to later), where this game I was playing went from this fun and cool FPS I loved as a kid to...well, a genuine experience and showed me kind of what games can do. Art, I guess, though I kinda hate using that word due to how stained it has become by the snooty types.

I also really love the episode soundtrack. This is going to be the only one where I comment on the music each time.


One last tidbit before we get going. As a kid, I didn't quite understand that most of these levels were all mostly separate space stations. I thought this was all on one space ship, and every level was just us traversing more and more of this massive vessel until we reach the moon (Tiberius Station) and then eventually touch down on it (Dark Side). I'll be the first to admit, I was a little disappointed once I had the awareness to realize the truth. In my defense, the transition from Occupied Territory/Spin Cycle to Tiberius Station implies a continuation despite the hundreds of thousands of miles of separation.

Still kind of wish for that experience now, though.


Spaceport
Fun fact. For reasons I'm not sure of, when I think of Duke 3D, this is immediately the first level I think of. This was true even back when E2 wasn't my favorite. I have no idea why.

I may not be sure why it's the one I think before all others in other episodes, but it's definitely one of the more memorable levels of the episode. Just setpiece galore. The orbiting alien ship shooting at the station, the ship Duke took to get here, the dim glimpses of the earth before taking the elevator see the earth and moon in its full glory. Actually that's something this entire episode does really well. The natural lighting. Yeah, strong shadows and contrast is all over vanilla Duke, but I'm not talking about that. I'm talking about the way rooms pay attention to where the sun is, and draw the light from it accordingly.

It's a really small thing but it really lends a grandiose sense to all the space views in the episode, considering the entire rest of the game doesn't have natural lighting like that. It's all set at night, or dusk if you're lucky. But even in the latter case, there's no sun. It's all implied. Something I like to do in this episode is stand right at the threshold between light and shadow and see just how well the shadows follow the view from the windows. I do that a few times in other games, because as I mentioned before, I'm part moth and lighting in FPS games are something I'm drawn to. Lunar Apocalypse is one of the most accurate I've seen, even compared to the rest of the game.


But back to Spaceport. Something that I always wondered about was why there was a teleport to Duke's ship. You can even see the docking tunnel. Never quite understood why they put the teleport there when they also put in the effort to make it look physical. Maybe there's some technical reason I'm not privy to.


This level also has the rare claim to fame to being one of the only levels I have any direct memories of it outside the game itself. See, I don't really know if I have any true nostalgia for this game. When people talk about nostalgic video games from their past, they always talk about the stuff they remember doing in their life, like coming home from school to play it or whatever. I don't...really have that. I have next to no memories about my life surrounding the games I've played at any given time. I kinda played these to escape, and I was poor too, so what games I did have I played a lot. All this to say that there's mostly just mush instead of memories. And the few memories I do have are random and pointless.

Case in point, the memory of playing this level at my uncle's house one weekend night. Pretty sure it was like 10 PM or so, well past my normal bedtime, but nobody had come to stop me yet. Parents might have been in the basement. Or gone elsewhere, I really don't remember (see this is exactly what I'm talking about). I don't even think it was my first time with the level. It was just a time. I remember walking around that first room with the strobe light, in the living room, in the dark.

Yeah that's it. That's literally the entire story. That's my "nostalgia." I don't even remember any feelings. Just an image and "yeah this was a thing that happened." Don't remember anything before or after.


Another thing about the ship that bugged me. Actually this was something that bugged me about all the original three episodes. It always felt like we were missing a part of the story. Namely, how we got from the end of the previous episode to the start of the next. I mean, we can assume that Duke got in that spaceship and flew here, but wouldn't it have been cool to play a level where you had to fight your way to the launch platform? Or from the alien mothership back down to L.A.? Yeah it doesn't matter but we skipped over stuff that could have had some gameplay to them. Oh well.


"Future Military Conquests" is an absolute favorite of mine from this entire soundtrack, and that's saying a lot. The heavy military drums are a perfect accompaniment to the dim corridors of this space dock under attack, and the best introduction to the overall themes of invading overrun military space bases this episode has. I wish I had more to say about it, because it's like in my Top 5 favorite DN3D songs, but it's just really good.


Incubator
The big boy. The introduction to the other major theme of the episode: hives filled with women. Will never forget the first sight of the hive at the end of the level. Nor exactly how glum the stakes were drilled in with that sight, and all without words ("Kill me" doesn't count).

This is the second level I always think of, by the way, right after Spaceport. Though this one is easier to explain, because I can promise this level just left a massive impact on me. It didn't change anything about me in a major way, it was just a massive punch in the stomach. When I talk about the episode really grounding the game to show what's at stake, levels like Incubator are exactly what I'm talking about. It continues the dark, almost horror-like atmosphere that The Abyss left off on (and the darker tones of the end of E1 in general), and opens up to put the true evil of the invaders on display. This is what you're gonna be seeing for the rest of the episode, so get used to it. It's like the game is grabbing you by the back of your head and forcing you to witness the atrocity.

Even as a kid, as amazingly oblivious as I was, I couldn't miss this one. It's what hit me in Red Light District multiplied ten times over. I won't say this is the peak of the episode for atmosphere, but it probably is the peak for dark moments. Probably of the whole game, too.


And "Space Storm" is the perfect song for this. It's another favorite of mine, and the slow, echoey beeping at the start and end of the song is haunting. It really just feels like desperately clinging on to the first thing you can in a dark void, no matter how much you'd rather not.

Apparently this song is kind of unpopular, and I don't know why. I wonder if soundfont choice has anything to do with it? It does sound atrocious in OPL, so maybe that's it...? Whatever.

What's important is that it compliments the level perfectly, and all together Incubator is an unforgettable achievement for this episode, with a few more to come.


Also special shoutout to the computer that creates itself as you walk into the room. Always thought that was the definition of needlessly cool.


Warp Factor
The level that never registered with me what it was until years later and I'd actually watched some Star Trek. And even then, it took reading something online pointing out that the level was in the shape of the Enterprise. Now it's fun recognizing the various teleporter pads from both renditions of the famous ship (well, both at the time. Enterprise the show was still a ways out yet), the warp core, the bridge.... Still, not like that was necessary to play the level.

That said, this probably is the weakest level of the episode for me. I still like it, and the idea that the EDF has what I'm assuming is a warship that you can explore (not unlike what I thought the whole episode itself was back in the day. Look I have a thing for space cruisers okay), but just compared to the rest it's not as strong.

Same can be said for the song, "Gut-Wrencher" too. Not bad, but doesn't really stand out amongst the rest of the episode's soundtrack.


For years until I finally managed to find the bridge, I used to think the observation deck and what I think is the war room was the bridge. I didn't recognize it from any Star Trek, but they said the moon lander in Movie Set was supposed to be the moon landing despite looking nothing like it too. Now that I have found it, it bugged me that the orientation was reversed. The bridge and the viewscreen faced the wrong way. But given the recreation of Picard's office, I'm actually going to assume it was a deliberate choice so that the Earth could be viewed through his window like on the show.

It's funny that they picked this rendition to give the "Really" Ready Room to, considering that was a Kirk thing, and Picard was the exact opposite.


My only real complaint with this episode becomes really apparent with this level. I mentioned how Occupied Territory and Tiberius Station's connection didn't make sense, well this is the opposite. How exactly do we go from the bowels of a warp core onto an alien space station? There's not even a token effort to link the two locations this time. You're in a red room with a tiny red door, and then you're in a big green room with a giant gray alien door behind you.

Also, can anyone explain the magical disappearing atomic healths? You can never seem to reach them, and I've never heard of nor seen some kind of "despawn" function in any other map in existence that I've played.


Fusion Station
If Incubator was peak dark, then this is DN3D's attempt at horror. In the core of some kind of alien space station, surrounded by alien technology, alien walls, alien lights (fun fact. I didn't realize they were lights until I played Maarten's various alien-themed maps where he uses those pyramids the same way), where every hallway is dark and narrow, and the only brightly lit area is the most dangerous one. You have those weird window panes that look like interconnected arms, those weird walls with those inexplicable circles...

If they wanted an incomprehensibly alien environment they knocked it out of the park. Helped by the song, "Robo-Creeping," which I never got the name of. Nothing robotic about it. There's a reason this song always crops up in alien hive user maps.


I sort of have a love/hate relationship with this level. I love just about everything except that aforementioned dangerous central chamber. Just because it keeps spawning drones. Which are actually really not much of a threat here, they're just a pain when playing completionist because it means you're gonna have to dive down to the lava to hunt down the inevitable stragglers that decided to drop instead of continue attacking.

I don't have much else to say, unfortunately. I do really like everything that's not the drones, including the part where you blow up a reactor as a callback to Duke's previous outings where that was a very common obstacle you had to blow up (didn't realize this until coming back years later after having played them). But I don't have any childhood memories associated with this level, since as a kid I'd just use the jetpack I entered the level with to skip all of it. Not even because I disliked it but because I could. How could I know if I liked it, if I pretty much never saw the real meat of the level in the first place?


Occupied Territory
aka Battlelord Hell. When I was finally brave enough to start upping the difficulty, first to LR and then CGS, this level was the one I kind of dreaded. E2 and E3 are both guilty of getting really battlelord-happy, but I think this one takes the crown for having five of them in an otherwise fairly short level.

This level is also the one I think has the most responsibility for making me think the entire episode was one long ship ride. First for the reason above where it connects to the moonbase somehow, and then the second for that room. You know the one, right after you open the first big door, and you get this cool octagonal room where the walls lower to reveal views out into space. I've always seen that kind of thing in cargo bays for spaceships, so this level having it just further cemented the falsehood.

Not much else to say, unfortunately. I have no distinct childhood memories with this level either, not because I skipped it (my kid brain never realized the exit was just above the center chamber you open the door to), but because it's too short to really have any.

"Stalag-3D" is this level's name incarnate. When I hear this song, and even when I show it to other people who have never played this game, the image that everyone says comes to mind is infiltrating...well, enemy-occupied territory.


My father showed me this secret exit, too. By the way, has anyone else noticed that every fifth level of the original four episodes has a secret exit (You could argue E1 doesn't count with its deliberately broken secret exit for Faces of Death, but I counter that it only had five normal levels, so instead the secret level just leads into level 5 instead)?


Spin Cycle
aka Drone Hell.


Nah I don't really mind them that much. They don't hurt all that much, and unlike Lost Souls once they attack you never have to deal with them ever again (as opposed to being rammed over and over again). I actually enjoy this level past that opening bit with the drone swarm, because then it becomes a festival of chaingunning troopers, which is some great catharsis after fighting the battlelords (even though there are more of them here, and in literally every level henceforth until the end of the episode). This level looks weirdly cozy to me. With the light from the Earth shining in and the sun from above, and what looks almost like carpet on the floor, it feels almost dreamlike.

I used to have no idea that this episode or episode 3 had two secret levels. So when I read about the secret level that let you go "720 degrees in a circle," I thought they were talking about this level. Is it 720 degrees? No, but it is a spinning circle within a stationary circle so I thought there was just some weird technical math going on. Weird that both secret levels of this episode are about circles, innit?

Apparently this was originally a DM map that was converted into SP for a secret level, and yeah I can see it. Unfortunately never had a chance to play DM on it.

"Gloomy" is a fitting name for the song. I guess it fits for the drone swarm, but after that the level feels a lot more chill. I suppose it describes the somewhat grand scale of the turntable?


If anyone wants to trip out, use polymost, install Fox's classic skyboxes, stand in the middle of the spinning circle, and look up. Friggin' hypnotic.


Tiberius Station
This is where the episode really starts to kick off. Finally we arrive at the moonbase to begin cleaning it of vermin (or, if you're kid me, then the big ship is starting its descent). No longer in random orbital stations, we are at a massive single location that takes us three whole levels to check. I love how they held back on letting you even see the lunar surface until the end, let alone walk on it. Sure it was in the texture, but all that does is give the impression that you're in an overhanging structure. 3DR knew exactly what they were doing when creating this part of the episode. The whole first person exploring of recognizable locations that the game had been doing slowly comes back into play. And what is more recognizable than the moon? They spend this level and the next one teasing you with it. They knew that players would want to explore the moon, and built it up (maybe a little too much for the payoff).

It's probably unintentional but I see the entire Tiberius Station set of the levels (I'm assuming that's the name for the entire moonbase) as the devs styling on id a little. "This is a moonbase." Phobos and Deimos as seen in Doom famously looked nothing like their namesakes, with the bases being pretty generic. 3DR tried hard to make their moonbase look like a semi-feasible one, and gave its areas purpose. Tiberius Station itself features the return of the restroom, not seen since Death Row. Clearly labelled supply and armory rooms, making this appear to be some kind of military checkpoint. Admittedly it is still a little generic, but that gets completely fixed by the next level.


As a bit of a tangent, this is something I actually hold against Last Reaction for. As genuinely cool a concept as New L.A. is, a city on the moon, it does kinda go against the more realistic tone DN3D itself shot for. Sure, the moonbase is a bit more on the scifi side for having normal gravity, force fields, corridors larger than an oil tank, etc., but besides those is still tries to work like an actual moonbase. Access to the outside is very limited, it's obviously meant to fit only a small number of staff despite the less-cramped nature vs. what a real moonbase would be like as there are very clearly defined areas that people would work at...

Though to be fair, a lunar city only really works against DN3D itself, but not against the comic book nature of the first two games. It's really not a big deal for me about that episode (it has way bigger problems and the level itself is the first one I didn't hate), but it always did bug me that an episode claiming to be the continuation sort of went against the spirit of semi-realism the base game had.


I remember as a kid this level always made me super excited for the ship to "land." I used the jetpack to skip this level again, so I have nothing more specific about it. I just really wanted to get to the surface.

"Pissed!" is a fun song. It's the first halfway upbeat song of the entire episode, and the mechanical tones suit the arrival at an enclosed lunar facility.


Lunar Reactor
Let's get this out of the way first. "Aliens, Say Your Prayers" is a really good song, and it's popular for a damn good reason (enough to be used for Megaton's trailer). It used to be my personal favorite, and even though it's not anymore it still commands a respectable second place. I don't know what to say about it that hasn't already been said a thousand times over. Some may say it's overrated, and I don't know what to say to that. But it is the brightest song in a sea of dark tunes, and it's a much-needed lift in spirits after the oppressive nature of the first half of the episode.

I'm just going to give a shameless plug to my own cover of the song:

I'm also going to shout out my favorite remix of this song that I never thought would work but oh god does it work:


Now that that's out of the way. Lunar Reactor is a level I struggle to measure by its own merits for how strongly its music affects my opinion. What I can say factually is that this is where the defined nature of the moonbase starts. Every area is something significant, and I like how the level both begins and ends with doors marking the radioactive danger of the reactor being in this part of the base. The crew quarters, the restroom (marked as "Restricted" which I always thought was funny), and of course the reactor core. Which of course you blow up, because again this is Duke Nukem and blowing up reactors is something he's done since the first game. Really spectacular destruction sequence too.

Regardless it's definitely the first level in a long time where you can know where you are and what the place you're in exists for. The episode is steaming along towards its climax, with this as the last view of anything positive for a while.

My experience as a kid and my experience as an adult are mostly the same, except the level is harder now. Loved the song, loved the reactor meltdown, and love the respite this level provides after the heaviness of the episode previous.


Even if the music affects my judgement, I do still love this level and consider it a favorite from the base game. It was also the first level I ever did from a pistol start (to help a friend).


Dark Side
And so at last, we arrive at the climax of the episode, and our destination we worked through the whole episode to reach: the lunar surface. If Incubator was the peak of the game's darkness, and Fusion Station was the peak of horror, then this level is the peak of atmosphere. The three main themes the original game aimed for, all given an entire level dedicated to them, all within this episode.

God I love Lunar Apocalypse. But I'm getting ahead of myself.

Something I always remember doing as a kid, and still sometimes do even to this day, is rush right to that tiny dome just outside the level start. The area with the eggs and enforcers, that grants you the first real look at the lunar surface as rendered by the Build engine. No longer just a texture, now you can see it for real. It always made me think "Wow, I'm here. I finally made it. I'm on the fucking moon." No other game I've played has ever managed to capture that same eerie yet beautiful majesty. None actually, except DNF of all games. I'll cover why in a bit, because that feeling ties heavily into what happens later.

For now, let's talk about how massive this level is. And apparently it used to be even bigger, which is impressive. Credit has to be given for how the progression isn't confusing at all, even to an idiot child, thanks to the wheel-and-spoke hub system the level employs. A simple solution to be sure, but an effective one. I think what's even more impressive is how each area has its own unique feeling. You have the infirmary and the morgue off on one side, the backup reactor and waste disposal on another, and then of course the exterior airlock. I really do wish they kept the space suit, but I can see why they cut it. It really would have only been used for the end of this level, and even then just to wade through a short lunar canyon. It was kind of not worth it, but I still wish they kept it at least for modding purposes if nothing else. Of course, that short arena and canyon being the only two true excursions onto the surface does make all the buildup the previous two levels put in place into a bit of an anticlimax.


But.... none of that really matters. Not to me. Because this is it. This is the level. The one that changed everything. The one that skyrocketed this episode, and the whole game alongside it.


Allow me to set the scene once more.

A teen, reunited with this game for the first time in the better part of decade. I ordered this game straight from 3DR when they were still in business, because I loved this game too much to pirate it despite already owning it previously. Going through the game relieving these levels I had already played so much, but now doing it for real instead of with liberal application of god mode. Fighting out of L.A., into space, and then finally to the moon. I battle my way throughout that moonbase, three levels long, including the massive portion within Dark Side itself, finally leave the base behind and set foot upon the surface, fight that massive drone swarm, and then....

Silence. There's nothing left. Sure there's a battlelord behind a force field but he's out of sight and not awake yet. It's just me. Me, this massive crater, the Earth distant and high above, and nothing but the empty and beautiful Plasma to grace my ears.

In that moment, standing beside nobody and opposed by the same, staring up at the Earth, everything suddenly clicked. The long road it took to get here, the tonal heights that had its atmosphere take you on a journey through horror, disgust, and isolation; the constant battle against the alien threat, the fact that the only living things you encountered were either still more aliens or captured women that were beyond saving. Everyone else was dead, and you went in without backup. And with the moonbase silent once and for all, you were well and truly alone. Outside in the beautiful inhospitable land of the moon, where you would soon be leaving altogether. The moon would be silent and empty once again the moment you stepped through the monolith yet to come.


This isn't my favorite level (though don't get me wrong; this is still a really good level). But I do think it's the most important level in Duke 3D. Because it is the end of a long journey, spending an entire episode fighting in orbit and then down through a moonbase until you finally set foot on lunar dust. It marks the denouement of the overall tone and atmosphere as you head into the endgame. You've seen it all by now. The peak of the horror, darkness, and the loneliness of space.

Am I reading into it too much? Maybe a little, but only a little. This was still the climax of the episode. This was what it had all been building up to, both in terms of atmosphere and visuals. From cold floating bases steeped in alien terraforming, and the dire fate of the captured women, and the isolation of being so far from home, all giving way to the visual and emotional relief of reaching the moon and stepping outside for the first time. Who hasn't wanted to visit the moon? This game promised exploring familiar locations, and here's the only familiar one a tiny handful of people have ever seen firsthand.

And 3DR, the mad geniuses, made you work for it. It had such a prominence in the episode until now, taking up a larger than normal chunk of the sky texture, and the name of the episode was Lunar Apocalypse. You knew you were going there, but 3DR kept dangling the carrot in front of you until you finally make it there. It might be shorter than it could have been, but that moment is still special. Most other games, they just put you on the moon. Even the first Duke game did that. But only Duke 3D makes it a journey to get there, whether the whole episode was one giant space ship or just random space bases. Well, only Duke 3D, and Forever's DLC (which did a really good job of capturing the beauty of the lunar surface and let you see a whole lot more of it).

It's a journey you could argue started all the way back in the first episode, since episode 3 doesn't quite carry on the legacy of The Abyss like the entirety of this episode does (The transition back to familiar cityscapes is pretty abrupt in my opinion. I still love episode 3 but there's no tonal throughline between E2 and E3 like there is between E1 and E2).


"Plasma" is the perfect song for this level. Is it my favorite song of the episode, no, but it's still damn good, and I couldn't possibly imagine a more fitting song. The haunting emptiness contrasting the cold beauty is a perfect mirror for the lunar surface itself. It's perfect. The song reminds me a lot of Ecco the Dolphin (specifically the sequel) on the Sega Genesis, for those who have played it. Much of its music is of a similar caliber, and this song really wouldn't feel out of place in either of those games. I could see Ecco braving the dark dangerous depths of the sea to this song.


I love this episode. Dark Side would not be anywhere near as good in my opinion if it didn't have the rest of the episode before it to elevate it into a resolving position of the emotional journey this episode takes you on. This is when Duke 3D stopped being a game I liked as a kid. This is when Duke 3D became one of my favorite games ever made. The fact that Duke Nukem, of all franchises, could elicit this kind of response, makes me love it all the more.

You can still argue I'm reading too much into it, but the fact of the matter is I didn't have to think about any of this. I just felt it, in that one special moment out alone on the moon staring up at the Earth, still under attack while the moonbase still smoulders from the damage and rot of the alien and human corpses. The fact that the game could produce this kind of effect at all counts for something, I think.

Duke 3D itself would be less of a game without this episode and this level to bring it all to release. Still a good game, but the game needed this dark detour to make the rest of the game stand taller all the for it. Duke as a franchise needs this kind of dark background to work, which even the Birth and all games after it understood, except DNF (despite doing good with the moon itself). It's what most people don't understand about the franchise, myself included, until this special moment made me realize that there was way more to DN3D than it seems on the surface. Below the machismo parody, there is rock-solid gameplay, genuine atmosphere and attempts to take the player on an emotional journey, and a deeper personality to the entire experience than most want to give credit for (I don't mean personality for Duke as a character, but for the original Apogee/3DR games).

It's why Duke Nukem doesn't need to "grow up." He's already as mature as your Dooms and Quakes if you just spend some time to look past the veneer of parody and into the game design that is just as solid as its contemporaries. And to be perfectly honest, as much I like Doom, Doom never managed to pull off what Duke did here. It's one of the many reasons I think Duke is better. It took what Doom did and refined it.


I could honestly stop here because this is all my thoughts on Lunar Apocalypse as a whole contained into this single level, but there are two more levels to go.


Lunatic Fringe
My father didn't know about this level, and as a result didn't show me, so I didn't know about it either. I didn't find this until after the "reunion" and I learned about its existence.

This is about as showoffy as DN3D gets with its engine. "Look what we can do! We can make reality our bitch!"

I think the part I find most pleasing about that is that, with any other game, this kind of thing is what modders find. It's usually them to discover quirks of the engine to create features that never existed, or to bend reality. But no, here's 3DR beating modders to the punch by creating an Escher level way before it was cool.

My other favorite part about that is this is just the Build engine being the Build engine. There's nothing else fancy going on. It's just an application of SOS in the same way it's normally used, but here the floor heights are the same. It's kind of the engine being exposed a little, but dressed up as some kind of eldritch reality.

These days, you can't do that kind of thing natively. You can only use trickery like portals and silent teleports. It's not a built-in feature of the engine to just have space on top of space, because engines aren't 2.5D anymore. Not even GZDoom can pull this off without trickery AFAIK. This is something only Build can do, and it just makes me love the engine even more. It's a quirky janky mess, but it's got charm, especially stuff like this.

Simple level otherwise. I wonder if the "Duke Nukem Must Die" quote was actually supposed to play all the way back in Red Light District, when you lower the sign with the same name. And then instead of that quote in this level, it'd be the otherwise unused "Lunar Attack Force Defeated" line which makes way more sense for the penultimate level of the episode.


Good ol' "In Tents." If you want to make a creepy/horror-esque Duke 3D user map, this is the song you pick. And why not? It is pretty unsettling with the discordant tones and the...bubbling? in the background. Well-suited to a level where reality is no longer what it seems, beneath a strange lava sky. A fusion of human and alien, warped together in a mobius strip.

Neat level. No childhood memories with it due to not knowing about it until much later. Always did find this song while scrolling through the music and very quickly changing again before I could hear the rest. Too creepy for me back then. It was unfamiliar and had no idea where it was supposed to go, but it wasn't the first strange song on the list, nor the last.


I actually had a dream where this song played continually a few years back. It wasn't a nightmare but it came damn close.


Overlord

Not much to say about this one either, unfortunately. Like with Fusion Station, you could just skip the entire level with a jetpack. Hell, I didn't realize I was skipping the whole level because the vent is so big you can jump into it with a well-executed strafejump. I thought it was just meant to be short, kind of like Stadium later on. The fact that the level was just called "Overlord" didn't help its case.

As an adult who now plays the whole level, I still think it's too short. Yet again I'm denied the chance to explore a big spaceship because this is pretty tiny.


"Alfred H" is the song you pick for your horror map if you think In Tents is too overdone. It's a lot more on the creepy/eerie side vs. Robo-Creeping, which is a bit more in-your-face about it. I guess it suits breaking into the enemy stronghold in the middle of nowhere, though it's weird that this episode back-loads the creepiest music. Not a complaint, just something I thought was odd.


I already gave my whole thoughts on this episode with the Dark Side talk. These last two levels are still good, but they're definitely the falling action of the episode. Dark Side is the climax it all built towards, with Overlord and the secret level just being the cleaning up.

Though I love how the episode ends. Duke's a man of his word and that's just beautiful. A nice moment of brevity to end the darkest episode on.


See you all in 10^137 years when I write up episode 3 and the bonus levels.

This post has been edited by Ninety-Six: 19 April 2022 - 11:57 PM

6

User is offline   NNC 

#68

View PostNinety-Six, on 19 April 2022 - 11:48 PM, said:

See you all in 10^137 years when I write up episode 3 and the bonus levels.


See you in 10^137 attoseconds.
3

User is offline   LakiSoft 

#69

Great review of Lunar Apocalypse, @Ninety-Six. This was so interesting to read.

Anyway as an Addition i have did some of bonus for this month's club.

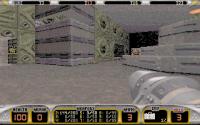
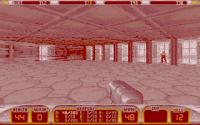
Thanks to @DNSKILL420's simulated Multiplayer playthrough who inspired me to this, I have played E1L8, Cigam.map and Chuckles.map in 4-player simulated Multiplayer game inside Duke Nukem 3D Atomic Edition v1.4 executable. And man, those Plutonium Pak Duke Bots have vaporized me. :P Maybe i shall had have used Sob-Bot instead. :D Anyway here's the gameplay videos and screenshots of all three maps.

Duke Nukem 3D Multiplayer - E1L8.MAP Gameplay video: https://files.fm/f/vnuyy7fad

Duke Nukem 3D Multiplayer - CIGAM.MAP Gameplay video: https://files.fm/f/dhs3gnhrx

Duke Nukem 3D Multiplayer - CHUCKLES.MAP Gameplay video: https://files.fm/f/35crstd69

Attached Image: bandicam 2022-04-20 08-18-12-758.jpg Attached Image: bandicam 2022-04-20 08-26-19-995.jpg Attached Image: bandicam 2022-04-20 08-41-36-255.jpg

This post has been edited by Gingis Khan: 20 April 2022 - 01:21 AM

4

User is offline   Aleks 

#70

Before I start my own ramblings about the last few levels of E2, I'm gonna respond to some of Ninety-Six's thoughs just to prove I've read through all that long post. Nah but honestly, I really appreciate the insight given in that massive post, great job!

View PostNinety-Six, on 19 April 2022 - 11:48 PM, said:

I'm talking about the way rooms pay attention to where the sun is, and draw the light from it accordingly.

It's a really small thing but it really lends a grandiose sense to all the space views in the episode, considering the entire rest of the game doesn't have natural lighting like that. It's all set at night, or dusk if you're lucky. But even in the latter case, there's no sun. It's all implied. Something I like to do in this episode is stand right at the threshold between light and shadow and see just how well the shadows follow the view from the windows. I do that a few times in other games, because as I mentioned before, I'm part moth and lighting in FPS games are something I'm drawn to. Lunar Apocalypse is one of the most accurate I've seen, even compared to the rest of the game.

Always cool to see more people appreciating such details. I think my favourite example of this is in the Dark Side outside area at the hub, but yeah, it works so well and is quite important. I remember Mikko writing about his MSSP9 how he just made the shadow angled to look nice and without actual regard to the position of the sun, which is an honest and proper take as well, but it's always more impressive when stuff can be legitimately pulled "by the book" in this department.

Quote

It's funny that they picked this rendition to give the "Really" Ready Room to, considering that was a Kirk thing, and Picard was the exact opposite.

IIRC Kirk didn't have a ready room at the bridge at all, and the "Really Ready Room" seems more appropriate for a joke towards Picard as well. BTW, probably nothing new here, but Tiberius Station is another reference for Star Trek, as the T. in Kirk's middle name stands for Tiberius :)

Quote

Also, can anyone explain the magical disappearing atomic healths? You can never seem to reach them, and I've never heard of nor seen some kind of "despawn" function in any other map in existence that I've played.

Could you elaborate on this? No idea what you meant here really, but this sounds interesting, where are these atomics?

Quote

If they wanted an incomprehensibly alien environment they knocked it out of the park. Helped by the song, "Robo-Creeping," which I never got the name of. Nothing robotic about it. There's a reason this song always crops up in alien hive user maps.

Apparently Lee doesn't have a clue about how the name is what it is here either, to quote him: There is no wordplay in the title of the song. In fact, I don’t know why I chose this title for the song. It really doesn’t match anything beyond the beginning couple of measures. Every once in a while I strike out, and this is an example of one of those times, I guess.
On the other hand, I always found the high-notes here resembling some form of mechanical insect, so the name seemed kind of appropriate.

Quote

No longer just a texture, now you can see it for real. It always made me think "Wow, I'm here. I finally made it. I'm on the fucking moon." No other game I've played has ever managed to capture that same eerie yet beautiful majesty.


Don't wanna blow your beautiful story about reaching the moon, but you kinda forget the chasm in Lunar Reactor, which might not be as memorable as the dome in Dark Side, but it's damn large and impressive, and sure looks like a moon surface to me! ;)

Time to move to my own ramblings, but I'll also still debate one of the points from Ninety-Six's post later on in here.

Lunar Reactor
Everybody likes this level and that's surely for a reason (and not necessarily the song). It's long and quite action packed, but also distinctive enough not to feel tedious at any point. I have very strong memories from this level as a kid, basically about almost every area - but of course, most importantly from the lunar chasm and the collapsing tunnel with the yellow key, then the final reactor room. Also the radioactive gates at the beginning and end always felt particularly memorable, but I've never realised it was because of the damn reactor until reading Ninety-Six's post, so good catch! Also the keycard being in the toilet felt particularly curious here. Anyway, the level is fun all around, the vast corridors serve a good purpose for dodging the enemy attacks from either drones or commanders. As a kid, this level really felt so long that I'm pretty sure I used to mentally break it into a few levels, which in turn never really made me feel how grand and memorable it is.

The music is, along with Fat Commander, my favourite piece in the game, not much else to say. The name also seems, once again, quite damn suggestive - you're kicking alien asses pretty hard up on the moon with this epic track playing in the background.

Score: 9.5/10

Dark Side
Again, Ninety-Six summed this level up pretty well. It's again one of the levels I've spent most time being stuck in as a kid, because I couldn't realise that the structural part of the dome is accessible, so was just stuck there with the Battlelord dramatically roaring behind the forcefield. Agree though that when thinking of general Duke 3D experience, a lot of the moments from this level come to mind - and it's not just the picturesque moon surface, the entrance to Overlord's ship or the train rides, but also the dead pig cops, the rotate-rise bridge with octabrains and sentry drones or these fancy maskwall door arches. The level has somewhat more chill atmosphere, despite being maybe the longest in the game, it doesn't necessarily always keep the players on their toes, but rather just lets them enjoy the setting and progression.

With time, I started to appreciate more stuff about this level, from the neatly done SOS on the hub part, where you can access the rooftops and the inside leading to the trains, the subtle application of effects, how great the sentry drone swarm works in the moon dome and finally the 2001: A Space Odyssey reference with the monolith towards the end.

Plasma is a wonderful track, so different from anything else in the game, yet so awesome and working perfectly with the level. Despite being only around 2 minutes length, you just can't get tired with the track looping many times throughout the length of the level.

Now to debate Ninety-Six's opinion of this level being the climax of the episode - as far as I can agree about this level having the perfect atmosphere and being absolutely great, I've never considered anything to be even close to finished or accomplished here. We clear the aliens from the human structures, but now it's time to really move in and kick their asses back to wherever they came from.

Score: 10/10

Lunatic Fringe
Again, only found this one way later on, so not much first-memories here. I liked it more than Spin Cycle, but it took me a while to realise the gimmick in this level (other than how cumbersome the navigation seemed), but really learning you are traversing a 720 degree circle is quite mind-fuckingly impressive. Again, not even gonna try to top the "A fusion of human and alien, warped together in a mobius strip" comment, which is just the perfect description of this level.

However, never found In Tents to be specially memorable, perhaps because I also haven't played this level as many times as the others so it never did stick with me.

Score: 7.5/10, just for the sake of abusing the shit out of the Build engine. Definitely the best of the gimmicky secret levels though.

Overlord
Now this is a true climax for me. I remember there being some discussion about how there's something notably ominous about this level, and I can't help but agree with it. This is an alien ship that is really alien, while there's some recognisable rooms and stuff, the whole layout with the waterfalls seems quite outwordly. This part of the level also seems to be patched from some older version, which might be while it kind of sticks out, but in a good way. Also the fact that you can go and explore the whole ship, clearing it from all the alien personnel, or just head straight to kill the boss, is quite remarkable here. There's even a combination lock that you don't really need to solve to progress. From the design/details stuff, I've always loved how the Overlord's cockpit/bridge is designed, and the shrinkers shooting at the Earth are such a neat effect to fill the level with more lore (theory: what if we don't see any people in the city levels of Duke, because the constant shrinker bombardment left them long-term shrunk? :D ). Now for the boss itself and my memories from the level - it always felt quite nightmarish to me as a kid, both Overlord and the level itself. We first get the cathartic oozcan/slimer massacre, then the boss just comes at us. Sure now he might seem slow or boring with a single attack, also can be cheesed quite easily from the jetpack spot, but back in the day it used to scare the shit out of me (still sometimes does) with how it would rather charge towards the player rather than use its missiles, and the discomfortable panting sounds he makes. Such a strong impression to end the episode in a truely horroresque way for me!

The song, however, is once again quite meh IMO.

Score: 8/10
6

User is online   Ninety-Six 

#71

View PostAleks, on 20 April 2022 - 02:15 PM, said:

IIRC Kirk didn't have a ready room at the bridge at all, and the "Really Ready Room" seems more appropriate for a joke towards Picard as well. BTW, probably nothing new here, but Tiberius Station is another reference for Star Trek, as the T. in Kirk's middle name stands for Tiberius :)


Yeah, I know about the name. I also know he didn't have a ready room, it just stands out that the captain with legendarily no game has such a room. It probably was still a Kirk reference, it just looks funny adjacent to Picard's office.

View PostAleks, on 20 April 2022 - 02:15 PM, said:

Could you elaborate on this? No idea what you meant here really, but this sounds interesting, where are these atomics?


Right when you start the level, you go through the door straight ahead, and then the door straight ahead from there. You end up in a small observation room where two lizards spawn in, and you can look at the warp core you descend at the end of the level. On top of the spinning walls are two atomic healths that vanish by the time you actually reach that area.

View PostAleks, on 20 April 2022 - 02:15 PM, said:

Don't wanna blow your beautiful story about reaching the moon, but you kinda forget the chasm in Lunar Reactor, which might not be as memorable as the dome in Dark Side, but it's damn large and impressive, and sure looks like a moon surface to me! ;)


I haven't forgotten, I just didn't count it, because it's entirely underground. Not so much being "on" the moon than "in" the moon. It's just another example of 3DR teasing your eventual lunar excursion by tossing you a meager scrap of meat to keep your attention.


That's why I call Dark Side the climax, because everything in the episode was building up towards getting to the moon. That's not to say Overlord is a bad level or even an unfitting finale, but I do see it as part of the winding down, the "Battle of the Shire" from the Lord of the Rings, after the proper climax on Mount Doom.

After all, your arrival aboard the alien ship is pretty unceremonious. You just walk into a monolith. It's a neat setpiece but that's really all it is. You don't even have to fight all that hard to reach it, minus one battlelord a good distance away from it. And even when you reach it it's only guarded by some troopers and eggs.

I'm not saying it's lazy or poorly implemented. Just the link between the moon and the alien ship is fairly tenuous and almost token. I think it would have worked better if the alien ship was on the moon (and it looks like it is on the E2 end screen, but not in the level itself where it uses the normal orbit sky).
3

User is offline   FistMarine 

#72

Hey everyone! Thank you very much for the participation this month! I enjoyed reading the comments so far and it's great to see everyone's opinion about the original Duke3D maps. Personally I love all 3 episodes equally, there is so much nostalgia involved that it is difficult to tell which level is better, as each one is unique enough from the other. Because of this, I will not talk much about the original levels (other than maybe giving some useful advices for certain parts, though I will still talk about E1L7 and E1L8, as they are lesser known), as other people have said it better and I don't want to repeat myself, so I will just link the secrets guide at both 3D Realms (original website) and Infosuite, to help others in finding all the game's secrets. The guides can be found here:
3D Realms
Infosuite

And yes, to clarify any confusion, we are only doing the original 3 episodes this month! I apologize for not clarifying earlier, though I did mention in the first post and I thought at that time, it was clear enough, as I feel like the 3 episodes are enough for this month. To make up for that, I included a few bonus maps, the option to play the otherwise inaccessible E1L7 and E1L8, the extra bonus maps that come with the game (SE, ST and ZOO, sorry for forgetting to mention them earlier!) and the Levelord's leftover maps (Chuckles, Cigam, Sewer and Sweeney) that didn't make the cut for the final game.

Anyway, for the club, earlier this week, I replayed the old Duke3D versions in DOSBox 0.74-3. I first did the shareware versions (1.0, 1.1 and 1.3D) on Let's Rock, which I downloaded from the website RGB Classic Games (which hosts all shareware versions) and then I did the original Duke Nukem 3D Full Version v1.3D on Come Get Some skill. I have gotten all kills and secrets and have never died once this time around, thankfully! Though I died a bunch of times in Faces of Death (as well as two other bonus maps, which will be talked about next time). I will give short information about each map, mostly talking about extra secrets, tips and tricks. Note that this post is going to be quite long!

L.A. Meltdown

Hollywood Holocaust

-A pistol clip is located behind the crate at the start of the level
-A stash with pipebombs in the entrance of the theater, go to right (near elevator that leads to arcade room), jump on the trash bin and open the wall.
-Holoduke in the arcade room, press on the Duke Nukem II arcade machine, which causes Duke to say: "Hmm, don't have time to play with myself!".
-Another Holoduke, in the bathroom vent, there is a crack you can blow up, which contains a Holoduke.
-In the bathroom, you can find shotgun shells behind the couch.
-To avoid taking damage at the exploding wall (after the arcade room) which reveals the pig cops, stand behind the crate.
-In the exit area with the bridge, use the jetpack from the secret place earlier and fly to the top, destroy two turrets, collect extra jetpack and 20 shotgun shells.
-I recommend saving two atomic healths and one armor for the next level, to start it with 200 health and 100 armor. For me, I first grab the armor from the secret place (in the theater room) as early as possible, while the atomic health I grab is in the projector room as it reveals two troopers and RPG. The second armor (from the cinema room) and the rest atomic healths, I grab when I exit the level.

Red Light District

-The only unofficial secret is an extra NVG inside the bathroom. Press on the hand dryer to reveal the "secret".
-You can also activate the switch to blow up the building without the blue card, though you need to crouch behind the switch. I have seen this trick first time on YouTube many years ago (mostly on speedrun videos) but personally I do it the intended way.
-When finishing the level, since you are losing everything anyway, just make sure you save two atomic healths, so you can have 200 health for the next level. I recommend saving the two atomic healths from the beginning of the level, while grabbing the other two during gameplay (the one in sewer and the mandatory one in the vent required for progression).
-You can bypass the bars at the end by just using the jetpack but the nuke button is hard to activate and you still lose everything in the next level anyway. Plus that way the last pig cops won't appear, so you won't get all kills.
-There is a glitch with a missing enemy. What I learned back in 2015 and kept in mind for nowadays, there is apparently a RECON that is supposed to spawn but he won't show up since the RECON can't be spawned (a vanilla Duke3D bug). I also learned about the glitch that adds an extra kill by killing an enemy under a door and the door squishing its corpse. This makes up for the missing enemy and allows you to get all 105 kills (5 of which are the spawned troopers from killing the strippers).

Death Row

-Kill the pig cop at beginning by kicking him through window carefully (if playing v1.3D, you can use both feet at once!). He may drop a shotgun (1-4 ammo) or an early armor (50 or 75 points), though you should get the pistol and shotgun early on anyway. Then look out for a spawned pig cop nearby.
-First unofficial secret, after opening the curtains, there is a wall you can open that contains a Holoduke.
-At the rotating gears, grab the atomic health on the ledge carefully, then walk on the ledge carefully and then press on the wall to reveal a hidden NVG.
-Since this level has a ton of atomic healths (so it is easy to end up with 200 health), I will talk about the ARMOR conservation. There are two armor pickups (not counting whatever gets dropped by pig cops), one is inside the secret in the church, the second is inside the vent in the rotating room (with the Battlelord head hologram). Assuming you didn't get any early dropped armor, grab the secret one first and save the other for the later.
-In the church, you can destroy the monk's corpse (that monk is from ROTT!) which spawns an atomic health.

Toxic Dump

-The first unofficial secret is inside one of those turret holes at beginning (when you grab blue card and RPG), it contains a Holoduke and the message "HOW DID YOU GET HERE?". I don't know why this doesn't count as a secret area, I think it used to count in the beta 0.99 version at least.
-The second unofficial secret is located underwater, right after rotating gears, dive inside one of the corners, contains Armor and Scuba Gear
-The third unofficial secret is also underwater, near end, with the two things you have to ride while shooting at the button. You must shoot the button, quickly submerge and then enter the hole to collect RPG and ammo. I recommend first breaking the vent to win an extra second, then repeat the procedure above. You should make it inside.
-In the cranes room, you can wait for the crane to pick up a barrel and then it will detonate the trip mine.
-In the original v1.3D release (both full and shareware, doesn't happen in any other version of the game), there appears to be a pig cop that spawns in that second shrink room. It seems most of the times, he is stuck in the corner and just walks on the spot. He is supposed to spawn on the conveyor belt but due to overlapping sector, he ends up warped there. If playing on easier skills, just stand in the first part of the room and wait until you return to normal size while hoping he doesn't come over you. If playing on harder skills, there will be another trooper present here, so stand in the middle of the room (pray that the pig cop doesn't move from his location) and you should be fine!
-As with Death Row, this level is very generous with atomic healths, so to conserve armor, I recommend saving the one from the conveyor belts room (where you will find the tubes with the atomic healths).
-You can crouch-jump into the small holes without shrinking to bypass the puzzle. This trick works in other maps as well (The Abyss and Lunatic Fringe). I learned about this trick many years ago on YouTube, by watching speedrun videos. But personally, I do it the intended way.

Launch Facility

-There aren't unofficial secret places but you can try to save one of the armor pickups, you get one near beginning (where two troopers will come from) and another inside one of the secret areas.
-As with most levels in the episode, there are plenty of atomic healths to keep you alive and start the next map with 200 health.

The Abyss

-A hidden chaingun (near the small hole) located behind the fountain. It also contains a water fountain you can drink from.
-There are plenty of atomic healths, so try to have 200 health before reaching the Battlelord. There is a single armor pickup located near the entrance (before you drop down the Battlelord Lair), on top of whatever pig cops will drop for you if you are lucky.
-Two compartments that have RPG and Chaingun + ammo after dropping down the Battlelord's lair. You can use the jetpack to fly here OR you can just walk around the room until two compartments with ammo (Chaingun and RPG) will open, which will also raise two steps that help you to reach those places.
-You can skip the shrinking part with the jetpack or even a well timed jump.
-You can reach the inside of the room where shrink rays will come from, you will see the message "YOU'RE NOT SUPPOSED TO BE HERE". It requires the jetpack acquired from Launch Facility.
-To get all kills (assuming you play on every skill except DIG), note there may be a few "lost" enemies during the level. You can backtrack in the whole level (Jetpack from Launch Facility will also help) and finding those few leftover enemies can be painful. Luckily, I can help finding those few enemies: there is one trooper that spawns near beginning of map, upon collecting the blue card, he will be present on the entrance of the beginning point. FOUR troopers will spawn at the platforming section near end (the platform that contains the RPG), two will spawn in front and two behind you. They will mostly fall into pit (and they will NOT die!), so try to kill the two ones in front quickly (preferably have RPG selected, then launch rockets as they are spawning), then go back behind, fall into pit and fly with the jetpack to find and kill them (I recommend using the shotgun here). Watch out for the jetpack fuel to not have a nasty surprise!
-Assuming continuous playthrough, I recommend conserving the jetpack fuel for the Battlelord boss fight. You can find an extra jetpack and armor behind those 3 trapped babes. Kill them and collect the goodies while the Battlelord shows up.
-To kill the Battlelord quicker, shoot at his head. He takes more damage if you hit him in the head. He seems to go down in like 20-30 RPG shots as opposed to 40 or more.
-You can trick the game and avoid getting locked in the final room. I leave that for the reader to discover the trick, though personally I recommend just fighting him directly into main room, just using the jetpack and keeping the distance from him. With all the health and armor you have, he shouldn't be able kill you!

Faces of Death

An interesting DM map that features a bunch of Mini Battlelords! This one is quite tough (since it's a forced pistol start in the original versions of the game, unless you are noclipping through Abyss and Launch Facility again to access it) and it killed me a couple of times. The solution is to get the Shrinker and then you can shrink them all and step on them. This is extremely difficult to do in the original v1.3D release due to the shrinker blast being weaker (it has 650 units compared to Atomic's 680) and the auto-aim really likes you screw you. So try aiming around corners at their feet. This is easier said than done. Because most of the time you must make them SEE YOU first (or else if they get hit during the inactive state, nothing happens to them) and this is very difficult when all you have is just 100 health and no armor, they will kill you quickly.

Once you are done clearing the main room, grab the blue card and all goodies, insert it into one of its compartments where the blue slot is located, watch out for trip mines, activate the rest switches, shrink the last Mini Battlelord and you are pretty much done with the map.
There are two secrets to find, in the main area, just fly inside the lava walls to collect armor and atomic health.
In the last area, there are a few extra items inside the small lava spaces, they are extremely difficult to collect as you will get squished if you try to collect them. Using steroids helps to get through the part and collect the items, you will end up falling inside one of the secret areas. But this doesn't always work and it's not worth the trouble.
The level was apparently included and modified in the Total Meltdown's Plug n Pray episode, to feature an exit (though not in the spot you would expect). The level was further updated in World Tour edition with an actual exit and the level is accessible from The Abyss, as originally intended. Unfortunately, upon finishing it, it forces you to play through The Abyss again, so all they should have done is make it more like Duke Nukem 64 did, having a separate Boss map that only has the Battlelord's Lair.

User Map (aka Dukematch Level 1)

Not much to say. It's just a small space themed arena with all the registered weapons thrown in. The map was updated in Atomic Edition to include expander ammo and then further updated in World Tour to include the Incinerator and ammo for it.

Overall, L.A. Meltdown is an excellent introduction episode. The two bonus/extra levels (E1L7 and E1L8) are forgettable but the main 6 levels are superb! Onto the next episode!

Lunar Apocalypse

Spaceport

-In the room where you find the blue access card, press on the nearby wall to enter the water, you will find a hidden chaingun, as well as NVG.
-In the room where you insert the blue card, press on the right monitor to access a hidden Holoduke.
-There are a fair amount of atomic healths present in the map, as well as two armor pickups. I recommend saving the two atomic healths underwater (where you will get the second jetpack and red card) for the end of the map, while the armor you MUST grab is the one hidden in a corner in the room you get the blue card. Save the one armor from the Shrinker secret for the end.
-You can fly on top of the orange central column, which contains a health pickup and another pair of NVGs (as well as 3 tripmines in multiplayer).

Incubator

-There's a few extra compartments you can open. The one at the end is notable, where the turret is placed and firing at you, destroy it, then fly with the jetpack to access a box of pipebombs.
-There's two slimers that can be easily missed, they are behind two windows (when unlocking the last part of the level) where the water currents are. This is useful to know for the completionists.

Warp Factor

-The two official secrets are both located inside the Star Trek Easter Egg room. The second one is trickier to register, so make sure you walk around that room a few times.
-Besides a few compartments containing goodies, you can find a hidden Shrinker behind the panel later in level (in between the places where you insert the cards).
-Near the switch disabling the forcefield leading to the exit, you can find a hidden Holoduke.

Fusion Station

-Besides the 7 official secrets, there aren't any unofficial secrets as far as I know. So I will give some advices to survive this level since this is one of the hardest in the entire game.
-Be careful with the crushers and exploding canisters in the level, as well as the large amounts of enforcers, commanders and sentry drones, they can give you a hard time if not approached carefully. At least there aren't any mini battlelords present.
-In the room with those crushers, you have the option between shooting through the small hole with the pistol to hit that button far away or go inside one of the secret places to access that button and also collect two atomic healths.
-Try to save one of the armors (and the two atomic healths you get at the end with the jetpack) for the next level.
-You can skip the map with a jetpack (not recommended).

Occupied Territory

-Like with previous map, there aren't any unofficial secret places, so I can only give advice to be careful with the monsters present in this level, especially the large amounts of Mini Battlelords (5 present on CGS!).
-As usual, try saving an armor pickup and two atomic healths for the next level.

Spin Cycle

-Not much else to say at this level, just be careful with those two spawning Mini Battlelords at end of level!
-There is a glitch where some doors will be opened. I think this is caused by the sentry drones opening the doors themselves. You may notice when pressing on the switches and they close the doors instead. This may confuse the player but thankfully it doesn't make the map unbeatable.

Tiberius Station

-Again, there isn't much to say, there aren't many dangerous traps in this level other than a few trip mines and the Mini Battlelord at the end of the level.
-I would recommend saving the two atomic healths and one armor from some secret places.

Lunar Reactor

-IMO, this is the hardest level in the original 3 episodes (excluding Faces of Death, which is harder for different reasons), at least based on the trouble it gave me as a kid!
-There are many things that can screw you up in your current playthrough (based on my past experiences), from crushers, to random explosions, to the monsters you face, that rotating gear that can randomly squish you (it doesn't help that you must get behind it to get the optional red card, to kill a few hidden enforcers and access one of the official secret areas!) and so on.
-I was lucky to do it without dying this time around, so here are some obvious advices:
-Always be careful when navigating the map, look out for any monsters spawning at certain times when approaching certain places.
-Time it correctly when going through the trash compactors (you also need to access a secret area, like the one which contains TWO atomic healths).
-When getting behind the rotating gear, there is a chance it might crush you against the wall. The safest method I found in the most recent playthrough (which worked) is turning on the jetpack and positioning yourself in the middle, hopefully you should make it. Repeat the procedure when getting out of the place.
-There is a jetpack at the bottom of the pit (located around the area where you would get the yellow card). Just fall into pit, enable the jetpack at the right time, collect the new one and fly back to the land. If pistol starting, the jetpack at the pit can be only gotten with the trip mine glitch (place a trip mine while falling to reset the falling counter).

Dark Side

-Not as hard as the previous map but it is the longest map in the entire game. Thankfully it provides you with plenty of supplies to make it through. It is also one of the best and most memorable levels in the game and it is even shown in the first opening demo (the original v1.3D). Though interestingly, the demo is played on skill 1.
-It is difficult to give some advices aside from the usual health/armor conservation, although this time around there are at least 5 armor pickups that armor should never be a concern, while atomic health appears often enough that you should save two for the next map, preferably from one of the secret places.

Lunatic Fringe

-Just watch out for the Mini Battlelords, there's 4 present on the CGS skill! Other than that, the rest opposition comes in form of troopers and enforcers.
-Sometimes you may get warped to the other side of the map due to overlapping sectors, at least in the original v1.3D release. So be careful with that, to not get warped near an enemy or something.
-You can finish the level while shrunk, by using the jetpack and pressing the nuke button. Be warned that in the original v1.3D release, if Duke returns to normal size while flying, he will hit his head to the ceiling and die, so I recommend just waiting to return to normal size first.
-You can bypass shrinking by jumping and then simply crouching when landing into the hole, this trick is much easier to do here than in Toxic Dump.

Overlord

-Unlike most of the previous E2 maps, there are some unofficial secret places this time around. The first one is an extra atomic health at beginning of the map (underwater).
-The second unofficial secret is in the room with the Mini Battlelord, open the window where you can find 20 shotgun shells and a large medkit.
-The third one is inside the waterfall in the next room, contains another hidden atomic health!
-You can skip most of the level with the jetpack or even with a well timed strafe jump (not recommended). Like with Fusion Station (and L.A. Rumble in next episode), this was a fun thing to do as a kid but as an adult, I don't recommend skipping the levels randomly like that. It's much better to complete them properly, as it feels more satisfying.
-The last official secret is quite tricky to get, as it requires you to enter the Overlord's room and then it will open a place on the other side of the room. Be careful to not get destroyed by the Overlord while going for the secret!
-You can safely kill the Overlord by hiding in the water in the left side of the room, although in that case, since the Overlord will be nearby, don't use explosives, as you will hurt yourself!

Overall, Lunar Apocalypse is an excellent episode and while different than the rest two episodes, it is still great. I never understood why it gets so much hate, I mean sure there's some parts to dislike and sometimes monster placement can get annoying (especially the Sentry Drone spam), as well as the various insta-kill traps but to me I will easily forgive these flaws as I enjoyed my time with the episode as a kid and I liked admiring the space environment, as well as walking on the moon in the Dark Side. I only wish the Spacesuit was implemented in the final game, I imagine it would have been fun to have it fully functional and used at least for Dark Side. Now for the final episode!

Shrapnel City

Raw Meat

-The start of the level can be quite tricky. Grab the nearby Devastator, kill the spawned enforcer (most of the time he will drop chaingun ammo, which is better than nothing, though rarely he will drop the chaingun), then take care of the remaining monsters. You can then grab the chaingun down there on the right side and also the atomic health (you can decide to grab this one or the one nearby from the secret area).
-Approach the next areas slowly, watch out for the sneaky turrets (the first one placed high on the wall should be avoided for now until you get more ammo) and other monsters hiding, grab the portable medkit and secret armor immediately, to stand a fair chance again the rest enemies. If you did everything correctly, you should have no problems with the encounters in this level and save two atomic healths for the end and one armor pickup (located near kitchen, behind the large door).
-Other points of interest, include hidden teleporters. Press on the cash register (near where you get the blue card) to unlock the teleporters. In the karaoke room, there is another hidden teleporter you can access. These teleporters are obviously meant for DM.

Bank Roll

-Watch out for the trip mines at halfway point in the level.
-When unlocking the gears room, just press the 3 main switches, don't bother with the multi switch. Also grab that hidden Shrinker behind the multi switch.

Flood Zone

-This level is shown in the second demo (of the original v1.3D release) and it is one of the most interesting levels in the game. I also realized rather recently that the demo player never collected an armor pickup throughout the whole demo. Unlike the first demo, this one is played on skill 2.
-The only advice I can give is to look out for assault commanders and mini battlelords that get revealed at a few points, also watch out for the sharks spawning later (there are many sharks present in the level and they are smaller, harder to hit and more aggressive in the original v1.3D release)
-Carefully monitor your scuba gear oxygen. There are two present in the level in SP and you should already have the one from Raw Meat. I recommend saving the one present at the start of level for the end, unless pistol starting, though the rest of the episode doesn't have many points of underwater diving, so saving it for the end may not be needed.
-There is one armor pickup located underwater (near the slimer eggs), don't miss it! As this level lacks pig cops, you must have rely on the armor from the previous maps and the single armor pickup the map gives you.

L.A. Rumble

-The only advice I can give is to watch out for the many enemies spawning at various points.
-Inside the abortion clinic, press on a wall near where the troopers are found, you can find hidden devastator ammo and a large medkit.
-You can skip the level with the jetpack (not recommended).

Movie Set

-There are NO armor pickups in this level at all! Actually there is one located in the unused room located outside of map but in normal gameplay, all the armor you have access to is the one from previous maps and whatever pig cops drop for you. Thankfully the atomic healths are plentiful in the level.
-If you go towards the normal exit path, there is NO WAY back, so have a backup save handy if you do by accident. That exit room contains a chaingun and a portable medkit, as well as two troopers that will spawn in (they don't affect the kill count if you don't go this path, as at that time they aren't spawned in the map, so you won't have any enemies missed).
-You can skip the level by jumping while holding crouch button, at the gate to the normal exit path (not recommended). I didn't know about this (same with RLD blue card skip glitch or TD shrink ray skip) until I watched videos on YouTube in 2007 or so.

Tier Drops

-The only advice I can give is to be careful with the Mini Battlelords present in the level. There is one present by default but what is unique in this level is that killing the captured babes will spawn 3 more mini battlelords, as well as various supplies around that gray room.
-Be also careful with the warping glitch, at least in the original v1.3D. In some rooms, you may get warped into another by accident. I remember a few years ago I had the misfortune of being warped directly into the exit room with the Mini Battlelord. You can already guess how that ended up.
-Because of the above, I highly recommend first clearing that lone Mini Battlelord in the exit room, so he won't cause you any trouble later.
-Somewhat related to the warp glitch (although rare to happen), you may get bitten by slimers while they don't even show up in your face, which you may not tell right away until you notice your health decreasing.
-Since the exit room contains 3 atomic healths, you don't have to worry about health conservation too much (the starting room also contains 3 large medkits). Armor and other helpful supplies can be found in the small compartments located near the actual secret places.
-There are a bunch of tubes that you can jump into and they transport you into another room (each tube is marked by the color representing each room). This isn't recommended as you will take falling damage and it's not worth it. Just go around the level as usual.

Rabid Transit

-In this level, be careful when traveling on the train tracks. I suggest to wait until after the SECOND train passes you (both trains are synchronized to leave at once), so then you have enough time to travel on foot on the train tracks (thankfully the tracks aren't electrified, so you are safe to stand on them).
-If an enemy gets hit by the train (similarly, if an enemy gets eaten by a slimer), then that enemy is removed from the game and won't add to kills. Thankfully, this is offset with slimer eggs that add extra kills, so this isn't really noticeable during gameplay (you should have all enemies killed when finishing the level).
-The only unofficial secret is at beginning, pressing on the cash register lowers the book shelf containing a pair of NVG.
-When going the path towards the red card, be careful as stepping on the stairs will spawn a Mini Battlelord (appears on all skill levels) right behind you. You can avoid the spawn by destroying the canisters and then jumping through that broken wall OR just using the jetpack to avoid the trigger. Though, another one is present anyway (at least on CGS skill) near the red card, so you might want to get all the kills anyway.
-Also, mini battlelords can't be killed by trains, they will just ride the train and give you a nasty surprise if you try to run away from them. So I don't recommend doing that.

Fahrenheit

-There isn't much to tell about this level, sadly. The only thing I can mention is to be careful with the Mini Battlelords at the end, as they are located in a rather inconvenient place. Thankfully, this level is quite generous with the health, as it contains FOUR portable medkits, as well as other health supplies (and a single armor pickup), so health shouldn't be an issue!

Hotel Hell

-There are 4 Mini Battlelords present in this level (at least on CGS skill). Two of them are located in the reception room. Strangely, I noticed every time I fire a RPG at the first one, the second one dies instantly from the explosion. Does anyone know exactly why this happens? Either way this first Mini Battlelord can give you a bit of trouble if he rushes you to the main room, so take him out quickly.
-The only unofficial "secret" is an extra atomic health found in the bathroom, that you get by surfacing from the pool (which also spawns two pig cops nearby)
-The mirror is broken by default in the level, so you can't shrink yourself, which would have probably led to skipping the level, since you probably would've been able to get below the door and arrived inside the pool (although there is a crack that needs to be broken first).
-For the Indiana Jones secret (located near secret exit), just grab the atomic health and run. Optionally, you can destroy Jones' corpse, though he doesn't spawn anything.

Freeway

-The first unofficial secret is a crack located underwater, you can blow up at the beginning of the level, containing various goodies.
-The second unofficial secret is inside that crashed sloped building (near end of level), inside it you can find a few enforcers, as well as a jetpack to let you get out.
-Strangely, this level doesn't have any assault troopers present, most of your opposition comes in form of pig cops and enforcers, as well as a few octabrains, sentry drones and 3 Mini Battlelords (present on CGS skill, though two of them are spawned upon grabbing the blue card, so they appear on all skills).

Stadium

-Blow up the Blimp to spawn a whole bunch of goodies (also a small correction, in past I used to think in v1.3D the Freezethrower doesn't get spawned into the level with RESPAWN effect but now after examining carefully, the Freezethrower DOES get spawned, therefore it gets spawned from blowing up the blimp. My confusion was caused by the fact the player doesn't drop the freezethrower upon dying and this is in fact a v1.3D bug, it has nothing to do with Freezethrower not being spawned from trash cans or the blimp)
-Killing the cheerleaders causes two assault commanders to spawn, so if you want to get extra kills, you have to kill them (though they often get blown up by the Emperor anyway)
-Besides the Cycloid Emperor and the spawned commanders, there are also a bunch of troopers that appear on the other side of the stadium, depending on the difficulty chosen. All the difficulty settings do in this level is whether you get to fight more troopers (LR and CGS) or none at all (on POC).
-The original v1.3D ending screen with the Duke Team, was much cooler than the one from the Atomic Edition.

Overall, Shrapnel City is also an excellent episode. All 3 episodes are all excellent in their own right, with NO bad levels in them, at least IMO. Maybe some of the secret levels might seem underwhelming at first but to me the 3 episodes that defined my childhood will always remain timeless classics to me.

I always find myself replaying the original Duke Nukem 3D Full Version 1.3D in DOSBox (I wish I still had the old Windows 95/98 PC!), as well as the Atomic Edition v1.5 once at every few years. Few games manage to maintain a consistent level design like Duke3D. Most of the games have the first episode as their best but the level design gets weaker as you get further into the game.
Thankfully, this isn't the case with Duke Nukem 3D. All 3 episodes are very good and are a blast to play to this day. Whether The Birth is as good as the original 3 episodes, it is up to you to decide! Personally I also enjoyed The Birth (most levels are very good) but it didn't have the same magic that the original 3 episodes did. Speaking of which, we will revisit The Birth later this year, so I apologize that I didn't include it for this month but I think 3 episodes were enough for this month.

Overall thoughts: What else needs to be said? Duke Nukem 3D is a timeless classic.
Attached Image: DUKE3D_E3L9_1.pngAttached Image: DUKE3D_LOGO.pngAttached Image: DUKE3D_DUKETEAM.pngAttached Image: DUKE3D_E3L9_2.png

I will talk about the extra maps soon, in the next few days. Those being the 3 maps found in the GOODIES folder on your Duke3D CD (SE, ST and ZOO), as well as the 4 cut maps (CHUCKLES, CIGAM, SEWER and SWEENEY) by the Levelord! With that occasion, I will also vote for the next month! Voting will begin on the 25th and in that day, I will nominate THREE new choices, so I recommend to begin the voting for next month, after I make the next post, so you can take a look at all the nominated choices. New nominations are also welcomed, again starting with 25th.

Have a nice weekend, as well as a happy Easter with your family! :D

This post has been edited by FistMarine: 22 April 2022 - 12:31 PM

4

User is offline   LakiSoft 

#73

Hey @FistMarine, thanks for providing InfoSuite link man. Although i already heard of Infosuite website, and even visited it in past, i still wasn't aware how it actually could be useful at times. In fact, i just taken a look on the link you provided and found out for some secret areas in original Duke Nukem 3D levels that i even wasn't aware of their existence until now. Yet i replayed Duke Nukem 3D thousands of times for all these years. How Ironic of me. :P

BTW, your own hints were also very useful and very interesting to read too. :D

P.S. Happy Easter to everyone! :)

This post has been edited by Gingis Khan: 22 April 2022 - 07:24 PM

3

User is offline   LakiSoft 

#74

Played Sewers and Sweeney. It's noteworthy that i used Duke3D 0.99 BETA executable and played from there in order to get more intended experience for these levels, as they were made with old Duke3D versions in mind. Personally, i liked both levels by Levelord and it's shame they didn't made in final game.

Duke Nukem 3D - Sewage Company - Gameplay video: https://files.fm/f/upmg3fkyp

Duke Nukem 3D - The Sewers Below - Gameplay video: https://files.fm/f/tyhtxx9bt

BTW, Happy Easter once again. :D
2

#75

I didn't know there was a hidden HoloDuke in the vent in E1L1 O_o
Not that it makes any difference >_>

About one-shooting BattleLords in E3L8. I've tested with my EDuke32 build, 1 RPG shot in the middle of the room (without any of them seeing you) kills them both in 1 hit. However using a PipeBomb doesn't, it behaves normally.

I notice that the 2 BattleLords are surrounded by 3 Red Troopers very close, (the 4th one being a bit away). I am wondering if, by any chance, there could be some sort of glitch that is similar to Doom's glitch where monsters being stacked together too closely causes explosive damage to be dealt several times with 1 shot.

Maybe I'm wrong, but the circumstances feel kinda similar to me :/
3

User is offline   FistMarine 

#76

@Gingis Khan: Thanks my friend! Glad to hear that you found my links useful. I hope it helps you to get all secrets in the next playthrough. And hope everyone had a wonderful Easter with their family! ;)

@TheDragonLiner: About the mini battlelords in Hotel Hell, I never understood why a sudden RPG rocket kills them instantly if they haven't seen you first, considering that in many other cases, firing a rocket at an inactive Mini Battlelord doesn't do anything. What you are saying with the RPG doing more damage if more monsters are clustered together is also a possibility (and yes I read a while ago about that rare Doom glitch too). It's also great to know from now on, in E3L8 reception room, to make sure to fire the RPG before any of them have seen you, so that you kill them both instantly with just a single rocket. :)

BTW I need to clarify a few things mentioned previously, as I forgot to clarify/talk about some more stuff:

First, about Toxic Dump. As Aleks already explained, those underwater "secrets" can't be tagged as actual secrets because the sectors are already tagged as underwater sectors. If they were tagged as secrets, then that sector wouldn't be underwater anymore and Duke could breathe in that sector (I noticed a few user maps tagging an underwater secret like that, not realizing that it would have a side effect during gameplay, especially when lacking the scuba gear).

There is also a shortcut that can skip the second half of the level. You will not know that on the first playthrough but once you reach the normal exit, you will see a teleporter that sends you back to halfway through the level (where you raised the water levels). If you know its location, you can jump through the fake wall (near where you would find one secret) and get teleported to the end of level immediately. As with other levels shortcuts mentioned earlier, this isn't recommended to do, unless you are speedrunning. But either way, I like that you are being offered to backtrack earlier in the level, this is very much appreciated to hunt down for missing secrets or more supplies you saved for later! :)

Second, about the extra atomic healths in Warp Factor. This is what I wondered in past as well and I only noticed this in past few years, on my previous Duke3D playthrough (I think in summer 2020). What happens is that those atomic healths are placed on those rotating platforms and there is an engine glitch where an object that stands a long time on a moving platform, it will then start moving randomly until it gets outside of the map. This also happens to that rotating sector in Spin Cycle (I remember seeing trooper corpses and pistol clips moving outside of map or moving randomly outside of the main sector) and the items placed on the trains in Rabid Transit (the latter I actually noticed somewhat recently in Lunar Crossroads, one long E2 map from Fernando Marquez' FMX series).

And back to those atomic healths seen at the beginning of E2L3, by the time you reach the end of the level, they have already moved outside of their starting position. It is impossible to collect them in time, which sucks because while there are 5 other atomic healths present in the map (3 of which are located close to another), they could have been useful, especially with all the drones and enforcers that are present in the map.

Also two screenshots of E1L7 and E1L8 (which I forgot to upload in the previous post)
Attached Image: DUKE3D_E1L7.pngAttached Image: DUKE3D_E1L8.png

Anyway, time to talk about the bonus maps!

SE (Sector Effector Demo Map) and ST (Sector Tag Demo Map) are just short test maps demonstrating various effects. There isn't much to say about these.

ZOO (Zoo Map) on the other hand, is a great test map containing ALL the monsters, weapons and items. You can also see stuff like Space Suit (which was a working item in the older Duke3D versions) and even a box of donuts, suggesting that it was a health pickup at one point.

There are actually two versions of these 3 test maps. What I played recently is their original release (dated 19/04/1996, same day as Duke3D v1.3D game files) directly from the Duke3D CD. There are also the Atomic versions of these maps (dated 21/10/1996, same day as Duke3D v1.4 game files), which in case of the ZOO map (not sure if there is anything different in SE and ST maps), it contains the extra stuff introduced in Atomic Edition. The Kill-a-Ton Collection only includes the Atomic versions of these maps, so if you want to play the original versions, you need to have the original registered Duke3D CD.

Anyway, there isn't much else to talk about these maps. SE and ST don't have any exit, while ZOO has an exit that restarts the level the first time around, the second time completes it for real. This is because of the nuke button being a different pal than 0. Because of that, I completed ZOO twice (with the normal exit) and killed each boss as well (after first killing all the enemies). Don't forget to explore the underwater parts as well, with the sharks and the underwater mines. I died a few times in the ZOO map (when trying to shrink the Mini Battlelords and the Cycloid killed me a few times) but other than that, it's not a difficult map and you can choose between the normal exit or killing any of the boss, to end the level. The latter of which ends the entire episode and the level won't loop on completion.
Attached Image: DUKE3D_ZOO_1.pngAttached Image: DUKE3D_ZOO_2.png
Attached Image: DUKE3D_ZOO_3.pngAttached Image: DUKE3D_ZOO_4.png

Now to talk about Levelord's cut maps:

Chuckles and Cigam are just two simple DM maps. I can see why they were dropped, as they are not particularly impressive visually. Chuckles is a map full of teleporters, while Cigam is a very small map with some warp tubes that act like the ones from Tier Drops.
Attached Image: CHUCKLES.pngAttached Image: CIGAM.png

Sewer and Sweeney are the two SP maps that would have fit well in the third episode. Sadly, they lack polish and are rather unbalanced. Most notably Sweeney is much harder than it should be, with the Octabrain and Pig cop spam. Both maps also lack secrets, so there isn't much exploration to do. The Watchtower made a great post mentioning the issues about these two maps. I will still talk a bit about the maps:

Sewer (aka The Sewers Below)

An interesting map that could have easily fit into E3 (probably somewhere early in the episode), it begins in the streets and has you make your way into the sewers. There is a vent you can break right at the beginning, though I recommend exploring the streets area first, to grab all the necessary equipment to stand a chance against the enemies. The map is quite confusing at times and the item placement could have been better. The Devastator isn't present in the map, as it was a late addition into the game, so now I see why it's not included. It would have helped against the Octabrains. I also noticed the fire hydrant is not placed correctly into the map, as it hangs in the air.

My main issues with the map are that navigation is a bit painful, it's rather dark (the sewer area at least) and I also couldn't find the last enemy in the level. I went through the whole level and I can't figure out where that last enemy went.
I even explored the optional area (with the moving platforms over acid) after I looked in Mapster to see how to open that big brown door. It turns out that switch you press (near the locked door) temporary opens that big door, so rush over there and kill the Octabrains. Eventually you will be able to unlock that locked door you saw earlier.
The jetpack you acquire in the sewers area will be a great help in navigating this map. You also get 5 boots pickups, so you don't have to worry too much about the acid! The armor pickups are also plentiful, once again being 5 armor pickups and that's without mentioning the fact that pig cops can drop more for you, so armor is never a problem in this map. Health is also provided in decent amounts, with the fire hydrant at beginning helping a lot in case you get low on health.

Overall, the map was decent. I had fun with it but I wish that enemy didn't get outside of map, so I could get all the kills.
Attached Image: SEWER_1.pngAttached Image: SEWER_2.png
Attached Image: SEWER_3.pngAttached Image: SEWER_4.png

Sweeney (aka Sewage Company)

Another interesting map that would have also fit into E3 (though mostly later in the episode). Unfortunately, this map was a miserable experience for me due to the abundant monster placement and the rather lack of resources (mostly health). I found the armor when I was nearly dead and after I started finding medkits and stuff, later into map I started running out of health once again and it turned into save/load spam fest (suffered about 10-15 deaths). Unlike with Sewer, there was no water fountain to help (I could have used some water refill, at least once!) but once I found another portable medkit later into the level (by the time it was nearly over), it was a great help, mostly for some optional blue card hunt, which eventually rewarded me with a RPG that would have been VERY useful early in the map. The devastator is once again absent, like with Sewer's case. The trip mines were also absent this time around, unless I missed them.

Oh and I later realized that all those pipebombs that were given to me, would have been very useful for the few octabrain hordes. I only realized how effective they were by using them on the underwater group of octabrains and it killed them all in just 3 explosions. Otherwise, it's not something you would do in the main game, as most enemies survive 1-2 pipebombs and you also run the risk of an enemy shooting the pipebomb thrown (it's rare but it can happen). I never found the pipebombs affective as a direct attack, as other weapons would do the job better.
Other than some other strange design choices, I also found strange how one door switch gets broken after the explosion, so you can't open that door anymore (though I think you can still access it from the other side).

At least I was able to get all kills, so no more missing enemies at the end of the level. I will admit that I didn't enjoy my time with this map too much. I understand it was balanced for 0.99 beta but this is a clear example how the map played at that point when enemies had less health and how it feels in the final game when enemies have a lot more health. Additionally, according to 0.99 beta con files, in E3, Sweeney was placed on the third level slot and Sewer was placed on the fourth level slot. So they were clearly intended for episode 3.
Attached Image: SWEENEY_1.pngAttached Image: SWEENEY_2.png
Attached Image: SWEENEY_3.pngAttached Image: SWEENEY_4.png

Bottom line is, I wish Sewer and Sweeney would get touched one day and re-released, as they would have been cool to be included in the main game. Maybe back then, they could have been touched up and included for The Birth, had Levelord still been working at 3D Realms back in 1996 (yes I know about the controversy and that he left halfway during the making of Plutonium Pak). I could see these maps touched up and working well into the E4 slot, considering The Birth doesn't have level continuity for some of the maps.

For the moment, I'm still interested in playing the revised versions by The Watchtower, hoping to have a better time with them.

Despite their issues, all these bonus maps are worth checking out if only just for curiosity sake.

Overall, this month has been a blast, despite my participation being late into the month and only for a few days (after all, on 19th April was Duke3D Full Version's anniversary, so I had to finish the entire game that day, doing it in an 8 hour marathon, with the remaining bonus maps done the next day), I enjoyed my time and I hope to see the next month active as well! And once again, thanks everyone for the participation! I enjoyed reading all people's opinions on the original Duke3D maps!

As today is 25th, it's time for voting for next month. Here are the previous month's nominations and a few new nominations from me:

Billy Boy's Maps + KaiseR Land Trilogy
Community Build Project Series
Duke It Out In D.C. + Duke Caribbean: Life's a Beach + Penthouse Paradise
Mikko Sandt's Maps + Duke Tournament + MSSP Episode + The Brave New World
The Gate

There are a couple of changes since the previous month's suggestions.
First, Redneck Rampage has been removed and replaced with The Gate TC, which was mentioned/nominated in a spoiler the previous month (it has about the same length and some of the people that worked on The Gate, also worked on RR). The decision was made because Build engine games are one time only nominations per each year. The same happened last year with Shadow Warrior (which was also my nomination), although it wasn't removed immediately until a few months after I realized it won't win (SW will get nominated again later this year, I promise).
This rule may seem new but it needed a start, since this is the first month where we played an actual Build engine game and I think Duke3D was a great start (RR was nominated as a competitor to Duke3D, considering both games came out in April and they kinda competed even back then). Other build engine games can also be nominated, preferably at a later time. If anyone objects to this rule, they are free to nominate RR again at a later time this year.

Second, Billy Boy's maps have been combined with KaiseR Land Trilogy into a single choice. The reason for that is there are only a couple of Billy Boy's maps and Kaiser Land maps are only 3, so I think they can be merged into one choice, in case they get selected. Make no mistake as Billy Boy's maps are infamous for being confusing and long, so even if they are about 5 maps, they each can take you up to two hours to complete. I have little experience with two of Billy Boy's maps, only managing to complete one of them. If they get selected, I hope this time around to finish all of them properly.

Third, I have added two separate nominations also made up with combined choices. This was made because for example, the two Duke3D expansions would work well paired together (I added Penthouse Paradise just recently as a last-minute decision, seeing as it's only one level and would also fit well when paired with DC and Caribbean). While for certain authors, depending on the number of maps/mods made, their works can also be combined together to be played into a single month. We had similar stuff happening in past club events and I think this is a fair thing to do.

When voting, please copy the entire selection and add a + to your choice. This time around, I would also like if people highlight their choice. Here is an example:

Choice 1
Choice 2
Choice 3 +
Choice 4
Choice 5

As you can see, the choice was highlighted in bold and added a + near it. Copy the selection mentioned above (not the example!) and do the same. That way it is easier to tell when people vote for something. I will not vote this month as there are many interesting choices and I want to see what others would choose and want to play for next month.
Once the month ends, I will count the votes and make the new topic, with the winner(s) being played. If there is a tie between two or more choices, the winner will be decided randomly. Though each participant is encouraged to vote, to avoid the rare situations in the case of a tie.

And as usual, thanks everyone for your participation! The last two months have been especially a blast and looking forward to see you on the next month club!

This post has been edited by FistMarine: 24 April 2022 - 11:35 PM

4

#77

About the BattleLords in E3L8.

Shooting an inactive BattleLord is the same as with Enforcers > it depends on the sprite. If it's the sideway view sprite, then it won't do anything. However if it's the front view sprite, then it will react.


I have just made a small test that confirms my thoughts about the Doom Glitch > I launched the level on Skill 2. I have only 1 BattleLord and it is surrounded by only 2 Red Troopers this time. And guess what ! I tried to kill the Red Trooper who stands just in front of the BattleLord with the SG, that way it is dead and the BattleLord didn't react. I thus had the BattleLord alone with the other Red Trooper on the side. I shot a Rocket in the middle of the room and he DID NOT die in one hit !
HOWEVER, if I reproduce the same deal, but without killing the Red Trooper in front of the Lord, then it WILL die in one hit !

I have tested the damage the BattleLord recieved when I shot a rocket after having killed a Trooper (thus having only 1 next to it). It dies in either 3 RPG shots, or 2 RPG + 3 SG shots.


After some heavy dnclipping shenanigan, I've tried killing both Red Troopers without triggering the BattleLord and then give it a try. It takes 5 RPG shots in these conditions. I don't want to sound hyped as if I had cracked a code or something, but my few tests sure sound a lot like the explanation for the Doom Glitch I mentioned ^_^

This post has been edited by TheDragonLiner: 25 April 2022 - 04:56 AM

5

User is offline   Aleks 

#78

View PostFistMarine, on 22 April 2022 - 12:27 PM, said:

-Another Holoduke, in the bathroom vent, there is a crack you can blow up, which contains a Holoduke.

For a moment I thought I never knew this one, then after checking in Mapster it seemed familiar, so probably just forgot it, but still nice one!

Quote

Launch Facility

-There aren't unofficial secret places but you can try to save one of the armor pickups, you get one near beginning (where two troopers will come from) and another inside one of the secret areas.

Well there's the super-secret compartment with chaingun ammo in the green-brick acid sewer secret, that probably barely anyone knew about until Gingis revealed it last year or so :P

Quote

Tiberius Station

-Again, there isn't much to say, there aren't many dangerous traps in this level other than a few trip mines and the Mini Battlelord at the end of the level.

Not sure if I'd count the orange room with devastator and fast-closing door as an unofficial secret place, but as I mentioned before, it's a bitch navigation-wise :D

Quote

Flood Zone

-This level is shown in the second demo (of the original v1.3D release) and it is one of the most interesting levels in the game.

Not sure if you'd count it as an unofficial secret or not, but the broken elevator with steroids in the yellow key underwater building can be easily skipped, and this seems to be the only steroids pick-up in the entire map, which can be crucial especially in multiplayer.

View PostFistMarine, on 24 April 2022 - 11:25 PM, said:

There is also a shortcut that can skip the second half of the level. You will not know that on the first playthrough but once you reach the normal exit, you will see a teleporter that sends you back to halfway through the level (where you raised the water levels). If you know its location, you can jump through the fake wall (near where you would find one secret) and get teleported to the end of level immediately. As with other levels shortcuts mentioned earlier, this isn't recommended to do, unless you are speedrunning. But either way, I like that you are being offered to backtrack earlier in the level, this is very much appreciated to hunt down for missing secrets or more supplies you saved for later! :)

Forgot about this one as well, also I've always thought it becomes available only after getting past the gears part the "hard way".

Quote

Second, about the extra atomic healths in Warp Factor. This is what I wondered in past as well and I only noticed this in past few years, on my previous Duke3D playthrough (I think in summer 2020). What happens is that those atomic healths are placed on those rotating platforms and there is an engine glitch where an object that stands a long time on a moving platform, it will then start moving randomly until it gets outside of the map. This also happens to that rotating sector in Spin Cycle (I remember seeing trooper corpses and pistol clips moving outside of map or moving randomly outside of the main sector) and the items placed on the trains in Rabid Transit (the latter I actually noticed somewhat recently in Lunar Crossroads, one long E2 map from Fernando Marquez' FMX series).

And back to those atomic healths seen at the beginning of E2L3, by the time you reach the end of the level, they have already moved outside of their starting position. It is impossible to collect them in time, which sucks because while there are 5 other atomic healths present in the map (3 of which are located close to another), they could have been useful, especially with all the drones and enforcers that are present in the map.

Just checked and I admit I completely forgot there even were atomic health there. Anyway, I can confirm this bug with items being thrown off from rotating sectors persists in EDuke32 and also they start to offset even if you don't take a look at them before being able to collect them (as some actors require you to look at them for activation, e.g. babes are apparently immortal and can't move on conveyor belts before you see them). They seem to drift towards the center of the warp core, so it was still possible for me to collect one of them after about 6 minutes of gameplay.

Also two more things worth mentioning about this map: the Battlelord and about 10 enemies in total can be skipped by simply not entering the optional room with devastator at the end of 2nd nacelle. Also the combination for yellow key safe can be skipped by just crouching and shooting the button inside of the safe.

Quote

There are actually two versions of these 3 test maps. What I played recently is their original release (dated 19/04/1996, same day as Duke3D v1.3D game files) directly from the Duke3D CD. There are also the Atomic versions of these maps (dated 21/10/1996, same day as Duke3D v1.4 game files), which in case of the ZOO map (not sure if there is anything different in SE and ST maps), it contains the extra stuff introduced in Atomic Edition. The Kill-a-Ton Collection only includes the Atomic versions of these maps, so if you want to play the original versions, you need to have the original registered Duke3D CD.

Don't think I've ever seen or player the original 1.3D versions of these maps, but pretty sure _SE and _ST maps are modified for the atomic version as there's a bunch of new effects, such as the thunder and incremental sector rise. Side note, too bad these maps don't show the possibilities of the "hidden" ST and SE, hell even ST3 for Cycloid movement isn't displayed.

View PostTheDragonLiner, on 25 April 2022 - 04:52 AM, said:

About the BattleLords in E3L8.

Shooting an inactive BattleLord is the same as with Enforcers > it depends on the sprite. If it's the sideway view sprite, then it won't do anything. However if it's the front view sprite, then it will react.


I have just made a small test that confirms my thoughts about the Doom Glitch > I launched the level on Skill 2. I have only 1 BattleLord and it is surrounded by only 2 Red Troopers this time. And guess what ! I tried to kill the Red Trooper who stands just in front of the BattleLord with the SG, that way it is dead and the BattleLord didn't react. I thus had the BattleLord alone with the other Red Trooper on the side. I shot a Rocket in the middle of the room and he DID NOT die in one hit !
HOWEVER, if I reproduce the same deal, but without killing the Red Trooper in front of the Lord, then it WILL die in one hit !

I have tested the damage the BattleLord recieved when I shot a rocket after having killed a Trooper (thus having only 1 next to it). It dies in either 3 RPG shots, or 2 RPG + 3 SG shots.


After some heavy dnclipping shenanigan, I've tried killing both Red Troopers without triggering the BattleLord and then give it a try. It takes 5 RPG shots in these conditions. I don't want to sound hyped as if I had cracked a code or something, but my few tests sure sound a lot like the explanation for the Doom Glitch I mentioned ^_^

That's really awesome discovery and good job and working it out, guys! Wonder if it works in EDuke as well or just in DOS Box? Pretty cool you can kind of pull a silent assassin kill on these guys though, if it works in EDuke, I might try to exploit this trick in Back in Business final level...

Anyway, here's my vote:
Billy Boy's Maps + KaiseR Land Trilogy +
Community Build Project Series
Duke It Out In D.C. + Duke Caribbean: Life's a Beach + Penthouse Paradise
Mikko Sandt's Maps + Duke Tournament + MSSP Episode + The Brave New World
The Gate
4

User is offline   Merlijn 

#79

Finally found the time to go through Lunar Apocalypse. I see many people already left their detailled reviews, so I'll try to not repeat too much.

Spaceport
Just like E1L1 this one leaves a very strong first impression: you immediately get to see the beautiful skybox (again fantastic work from the artists) while Duke spouts his one-liner and a spaceship is firing rockets at you! The mappers really went the extra mile to sell the illusion that yes, you are in space now. This is pretty much a constant throughout the episode. Another thing that's consistently well done in the entire episode is the usage of moving sectors, lightning effects and ambient sounds. I mention it now so I don't have to point it out every single time. :P As for the map itself, it's a very strong opening map. I especially like the vertical aspect of it, and the fact that the jetpack opens up a completely optional upper area for you to explore. As a kid I would have fun by flying to the highest point and letting Duke drop all the way into the pool at the lowest floor. The liztroop and the sentry drones are introduced here, but they're not coming at you in overwhelming numbers (yet). Also love the music here, fits the space theme very well.

9/10

Incubator
As others have mentioned things get darker here. Here we see the first signs of alien infestation and terraforming (which will be recurring theme from now on) as well as the poor babes in the alien hive. While it didn't get such a strong response from me as Ninety-six was describing, it surely adds to the darker atmosphere of this episode. I should probably mention that I already saw 'Alien' at this point, which was a lot more traumatizing to me as a kid. :P Overall a solid map altough I wouldn't call it a standout. The usage of moving sectors is especially strong here, for instance those ammo cabinets are a cool little touch.

8.5/10

Warp Factor
A mostly dark and claustrophic map, in fact a lot of the indoor design reminds me more of 'Alien' than 'Star trek'. There's some really cool looking rooms in this one (the room with the devastator comes to mind!). This one also feels more epic compared to the previous maps, seeing the entire ship from multiple angles really helps to sell that desolate feeling of being stranded in space with only aliens to keep you company. As others have mentioned, hearing the battlelord roar from the other side of the map was a great touch, it adds a lot of extra tension. I only dislike some of the sentry drone spam here, you're forced to fight them in very tight rooms and corridors. This makes it almost impossible to dodge them all. It's probably usage like this that makes them such a hated enemy. To be fair there's always enough health nearby, but still.. it's not that much fun to deal with so many of them when there's limited space to move in. Of course the secret star trek bridge is awesome so I have to mention it, I think I found this one pretty quickly as a kid but my memory is a bit hazy tbh.

9/10

Fusion Station
And all of the sudden we're on an alien spaceship? This is one of the main flaws of this episode, they kinda give up on the continuity here and it makes the journey less epic. Setting that aside, this has always been of my favorites so I was kinda shocked to see many people (including Civvie :o) dismissing it. It's true that the map can be skipped by using the jetpack which is a bit of a shame. Because the trek through the ship is a great experience, moving from the lower bowels through different levels, floating platforms and alien hallways. Great usage of vertical movement and SoS effects. I also love those strange windowpanes, especially if you see their silhouette juxtaposed with the earth in the background. Just adds a lot to the stange alien atmosphere. This map also greatly ramps up the difficulty, even without using the battlelords. Especially the reactor room and the final commander ambush get quite hectic.


10/10

Occupied territory
...and now we're back on a human spaceship, albeit partly terraformed and taken over by aliens (or did they dock one of their spacecrafts to the side to worm their way in? who knows). I wonder if the mapping sequence would have worked better if this map and the last one were switched, because this always felt somewhat anti-climactic to me. Going from a partly terraformed ship to a full alien ship sounds like a more logical progression to me. This map is also a bit easier than the last one, despite having 5 battlelords (!), because there's a ton of room to move. The encounter with the 3 battlelords is easily the highlight here, it also has a great build-up (seeing the battlelords in the viewscreen, the bridge extending and then seeing that big door with the battlelord head on it and knowing what's behind it). The rest of the map is ok but at this point it also feels as 'more of the same'.

8/10

Spin Cycle
I see a lot of negative comments about this one, but honestly I quite enjoyed it! It's basically one huge arena fight where you can control the timing of the next enemy wave, and it's fun for what it is. Of course it's a gimmicky map, but the big rotating sector is still a pretty cool gimmick. Not much else to say, it does it's job as a secret map IMO.

7/10

Tiberius Station
And now we're suddenly on the moon. The lack of proper transitions do hurt this part of the episode. Especially after doing a good job in the first 3 maps (even going as far as adding a space shuttle in the beginning of map 1, to explain how Duke got into space). Perhaps they were running out of time? Also the moon is only a skybox at this point, I get the feeling you could easily swap it with the bigorbit sky and it wouldn't make much of a difference. My point is that they could have done more with Dukes arrival on the moon. Not even judging it by modern standards but by the standards set by the previous maps!
As for the map itself, I kinda hate it. It feels unpolished and not all that engaging, the hallways with the mirrors are about the only thing that stand out to me. There's the red room that seems to serve no purpose at all but still requires some effort to enter (as Aleks mentioned). Also, the design and texturing is really crude at times. For instance the bathroom doesn't even bother to use a separate sector for the lamp, instead the entire ceiling is covered with the lamp texture. Just looks weird and unfinished to me. Also remember being disappointed with the 'wave effect' on the sludge here, after they did such a great job with the waves in Toxic dump. Dunno, everything about this map just screams 'low effort' to me. Especially compared to what's coming next..

6/10

Lunar Reactor
Tiberius Station walked so Lunar Reactor could run. But seriously, this map repeats a lot of ideas from the last map but implements them so much better. This is probably the best map of the episode from an 'objective' point of view, even though the next one is more epic. Design and layout is just really tight here, and there's basically not a wasted moment here. The map flows insanely well, and it's the first time we get to see a more realistic looking human base. This time we get a much better looking bathroom, the crew quarters and of course the titular reactor. The lunar chasm is a highlight op the episode, including the Luke easter egg. Gameplay also gets pretty spicy, especially the climax at the reactor. I actually got killed there once, a commander managed to catch me off guard. Oh and the music kicks ass.

10/10

Dark side
The big one. I can't add much to what's already been said, this map is a masterclass of mapping and is filled with memorable scenario's. The moment you get on the lunar surface and you see the swarm of drones emerging from the black void of the tower with the earth in the background is.. well, cinematic! ;) I also like that we see the bodies of the killed astronauts here, really drives home the fact that you're completely on your own and everyone else is dead. As a kid I didn't recognize the reference to 2001 with the monolith, but it's a striking visual all the same. Epic map!

10/10

Lunatic Fringe
The craziest usage of SoS and build trickery ever, the fact that 2 places can exist in the same space at the same time is.. pretty insane. Best not to think about it too much. The map itself is mostly just a curiosity, a piece of completely abstract mapping. The gameplay itself is nothing all that special, although the battlelords add a bit of extra tension (especially if they get out into the circle and you don't know exactly where they are).

7/10

Overlord
We finally get to the 'titanic alien spaceship' that was teased in the end screen of E1. Unfortunately we only get to explore a small part of it, but what's there is pretty good. There's the opening room, the room with the waterfall, the alien vents.. all look pretty cool. A lot of cool little ideas here, like the chain explosion to take out the eggs right before the boss and the alien gun firing at earth. The boss itself can easily be killed with the devastator, but with the RPG only it's still a fun fight. I do like the design of this boss the best of all 3, it looks pretty creepy with those huge jaws. It's a shame they didn't include mini versions of it in E3. Not much else to say, it's a solid boss map.

8/10

Overall:

Lunar Apocalypse is easily the darkest and most atmospheric episode of the original game. It also has some of the best maps of the entire game and it includeds many memorable moments. It could have even been my favorite episode, but it falters in a few areas. For one, the waves of sentry drones can be annoying. Especially if there isn't much room to dodge them. The pacing in the middle could also be stronger, with a better sense of progression between maps. Finally it would have been cool to have at least one more map on the alien mothership. I would have probably swapped out Tiberius Station for that. For these reasons it's behind LA Meltdown, but overall still a strong 8/10

This post has been edited by Merlijn: 26 April 2022 - 11:07 AM

4

User is online   Ninety-Six 

#80

View PostMerlijn, on 26 April 2022 - 11:05 AM, said:

There's the red room that seems to serve no purpose at all but still requires some effort to enter (as Aleks mentioned).


There is an atomic health in there...
4

User is offline   LakiSoft 

#81

This was really great month and great fun. Anyway my vote for upcoming month is:

Billy Boy's Maps + KaiseR Land Trilogy +
Community Build Project Series
Duke It Out In D.C. + Duke Caribbean: Life's a Beach + Penthouse Paradise +
Mikko Sandt's Maps + Duke Tournament + MSSP Episode + The Brave New World
The Gate
3

User is offline   Quacken 

#82

Billy Boy's Maps + KaiseR Land Trilogy
Community Build Project Series
Duke It Out In D.C. + Duke Caribbean: Life's a Beach + Penthouse Paradise +
Mikko Sandt's Maps + Duke Tournament + MSSP Episode + The Brave New World
The Gate

In the interest of going with what I know I'm voting DC and Caribbean, but realistically any of these could be voted and I'd be okay with it.
3

User is offline   Merlijn 

#83

View PostNinety-Six, on 26 April 2022 - 12:26 PM, said:

There is an atomic health in there...


That's true, but also half a dozen enforcers (in a very tight room nonetheless) that can easily wittle down your health if you're not prepared.
That's what happened to me, and then the single atomic health feels like a pretty meager reward. Guess that made extra pissed at that particular part. :D

PS I'll refrain from voting since I probably don't have enough time to play next month.

This post has been edited by Merlijn: 26 April 2022 - 11:55 PM

4

User is online   Ninety-Six 

#84

View PostMerlijn, on 26 April 2022 - 11:54 PM, said:

That's true, but also half a dozen enforcers (in a very tight room nonetheless) that can easily wittle down your health if you're not prepared.
That's what happened to me, and then the single atomic health feels like a pretty meager reward. Guess that made extra pissed at that particular part. :D


Fair enough I suppose.

Personally I always use the shrinker on Enforcers. Makes it so that you take way less damage from them, especially when swarmed. Sure it sacrifices chaingun drops but those are usually common enough within levels to be worth the price.


As far as voting goes, it's strange that we're putting the two sunstorm expansions up, but not episode 4?

This post has been edited by Ninety-Six: 27 April 2022 - 02:16 AM

3

User is offline   Merlijn 

#85

Played through Shrapnel City. I think I need to mention that this always was my least favorite episode, despite the urban theme. It always felt rushed and less epic compared to the other 2. So my nostalgia for E3 isn't as strong as it was for the first 2. In fact I remember being somewhat disappointed with the small scale of most of the maps, and the generally less polished look (IMO of course). So keep that in mind during this review. I learned to appreciate the episode for what it is later and now I don't think it's that far behind in terms of quality. Plus it's the only original episode where all the enemy types are present so it does feature the most challening gameplay. Let's get into it.

Raw meat
The introduction doesn't feel quite as memorable as the last 2, you just start on a roof top this time with no real fireworks. Of course there's the bubblegum line, but that one was straight up stolen lol. But putting that aside I actually quite like this level: they did a good job with the sushi restaurant theme, the re-introduction of the pig cops is well done and we now see alien hives in the middle of the city. That's some nice visual storytelling, showing that the aliens are starting to terraform parts of the city already. The beginning is actually quite challenging on CGS, you get attacked from all sides and it takes a bit before you're fully equiped again. Once you found your footing the map becomes easier but still a lot of pig cops and enforces to keep you on your toes. Overall a short but solid opening map. Seeing a glimpse of the next map was a nice touch as well.

9/10

Bank roll
Another solid map, I especially like the outdoor area and the bank theme is well executed. I used to dislike those weird turning cogs but I can appreciate them now. At this point I did start to notice that the build engine was kinda running out of tricks though, which ties back to the game being somewhat front loaded. Gameplay wise intensity does ramp up here. The recon patrol vehicles make a welcome return here, as well as the fat commander. The last fight with the battlelords is pretty heated. I really like how the explosions at the end break the level open and grants you access to the ledge you saw in the beginning. Also the music is great.

8.5/10

Flood Zone
So as a kid I couldn't appreciate this map for a somewhat weird reason: I didn't understand why we suddenly returned to rocky terrains while being in the middle of the city. Now I assume this part of the city sunk down which why it's partly crushed by rocks and partly flooded. Or it's just 90's design and I'm overthinking it. :P Anway I appreciate the more ambitious scale they went for here but I never loved this map. Traversing it just isn't all that much fun, at least for me. Also there's a lot of respawning enemies here, which gets a bit tiresome at a certain point. Fighting battlelords accross rooftops is fun though.

8/10

LA Rumble
This one comes closest to LA Meltdown, the scale of the outdoor area is larger again and it's darker compared to the previous maps. Like Fusion Station you can pretty much skip the entire level if you happen to have the jetpack. But for some reason it's only held against Fusion Station. The map is better without the jetpack, jumping from rooftop to rooftop is much cooler. The outdoor section is probably the best of E3, with lots of optional ledges to explore and the circular building plus the huge neon sign being memorable landmarks. Great use of vertical progression. I only don't like the heavy usage of respawns, basically each new ledge spawns new monsters. It feels like E3 in general is a lot more reliant on respawns compared to the last 2 episode. I only noticed this now when replaying them all in succession. Anyway not much else to say, like others I didn't recognize the abortion clinic as a kid. Just thought it was a cool looking location. One of the stronger levels.

9/10

Movie set
Cool explosive opening, even though at this point the game starts to repeat beats. Even the one-liner reflects this ("that's the 2nd time..."). This map starts breaking the 4th wall, apparently they're already making a movie of the 2nd episode. :D Overall this map feels like a missed opportunity. A Duke map taking place at a film studio? There are some many possibilities. Unfortunately we only get to visit 2 sets and both are from Lunar Apocalypse. It's still funny to see the skyboxes used as wall paper of course. But think of all the movies they could have spoofed here. Anyway the map is short and not very remarkable. Even gameplay is weaker, the map is pretty easy compared to the previous ones. I do like the battlelord spawning outside though.

7/10

Tier Drops
Not much to say about this one, it's another gimmick map. This time there's 4 locations existing in the same space. That's cool and all but Lunatic fringe did it better. I do like how each room has a very distinct theme though.

6/10

Rabid transit

As a kid this was one of my favorites. I just really like the design of the subway stations, also the music may have something to do with it. Overall it's another very short map, and again it feels like they could have done more with the theme. I still quite enjoyed it though. I panicked and ran into one of the subway cars during the battlelord battle, which lead to some interesting situations. One of them managed to board a subway and follow me to the other station (which scared the crap out of me) but then it got on the tracks and died when it got hit by the other subway car. :D I guess that's also a strategy!

7.5/10

Fahrenheid
Ehh. As a kid this was by far my least favorite. There are multiple reasons: for one the outdoor area seems way too bright (this is supposed to be night time after all), the small scale is kinda disappointing and the fire station is pretty underwhelming. I warmed up to it now, it's not a bad map. The fights can get pretty challenging at times and the KTIT segment is really cool. Still I wish the street area was a bit bigger, everything feels so small and compact here. A far cry from maps like Red Light District or Dark Side. Also the last fight is kinda BS, having to fight 2 battlelords and a couple of Enforcers at close range with zero cover.

6/10

Hotel Hell
Often called the best map of the episode, and with good reason. We finally have a fully realized location again, a hotel with 2 complete floors stacked on top each other. This map is a ton of fun and offers you a lot of freedom in how to traverse it. Do you charge the battlelords in the lobby head on or do you clear out the street area first? Do you use the elevator or the staircase to reach the 2nd floor? Do you tackle the pool area via the bar or do you take the long way around and visit the hotel rooms in the mean time? That's completely up to you. Just classic Duke at its very best. The fact that there's only 2 hotel rooms is kinda hilarious, but as Aleks said the whole game is only semi-realistic with roads running into concrete walls, buildings without doors etc. So this never bothered me either. The only thing I don't like is the bugged skybox, wish they would have fixed that.

9.5/10

Freeway
A secret map that's not a gimmick map? Woah ;) Jokes aside this one was a lot of fun to play again. The scale is finally a bit larger again and there are some really cool moments here, like the titled building, the tilted cop car an the terminator reference. Gameplay is a bit on the easier side. The battlelords pose less of threat here because it's easy to keep distance. The map is almost too good to be a secret map, but on the other hand it's a nice reward for those who like to explore.

9/10

Stadium
The big showdown! As others have said, it was always a bit disappointing to see no actual stadium. Instead you're on a football field surrounded by a flat sector vaguely shaped like a stadium. I get that they needed to save framerate, but still more could have been done here. Since it's the final battle and all. Still it was a cool idea to end the game on a football field, and the blimp was a cool touch. The boss itself is pretty easy to beat of course, esp. with a full devastator. What's even worse, if you fly high enough above him he will kill himself (I actually had to make sure this couldn't happen in Shaky Grounds because it's such a cheap way to win haha).


6/10

Overall I still think it's the weakest of the original 3 episodes. It still has plenty of cool stuff and gameplay remains solid throughout, but it does feel like the game was starting to run out ideas towards the end. Some maps ended up feeling rushed and not reaching their full potential. Also could have used at least 1 really epic map in the vein of The Abyss or Dark Side. It really feels like you only traversed maybe 1 city block, while E1 and E2 felt like an epic journey. 7.5/10

This post has been edited by Merlijn: 01 May 2022 - 12:04 PM

4

Share this topic:


  • 3 Pages +
  • 1
  • 2
  • 3
  • You cannot start a new topic
  • You cannot reply to this topic


All copyrights and trademarks not owned by Voidpoint, LLC are the sole property of their respective owners. Play Ion Fury! ;) © Voidpoint, LLC

Enter your sign in name and password


Sign in options