Hey everyone! Thank you very much for the participation this month! I enjoyed reading the comments so far and it's great to see everyone's opinion about the original Duke3D maps. Personally I love all 3 episodes equally, there is so much nostalgia involved that it is difficult to tell which level is better, as each one is unique enough from the other. Because of this, I will not talk much about the original levels (other than maybe giving some useful advices for certain parts, though I will still talk about E1L7 and E1L8, as they are lesser known), as other people have said it better and I don't want to repeat myself, so I will just link the secrets guide at both 3D Realms (original website) and Infosuite, to help others in finding all the game's secrets. The guides can be found here:
3D Realms
Infosuite
And yes, to clarify any confusion, we are only doing the original 3 episodes this month! I apologize for not clarifying earlier, though I did mention in the first post and I thought at that time, it was clear enough, as I feel like the 3 episodes are enough for this month. To make up for that, I included a few bonus maps, the option to play the otherwise inaccessible E1L7 and E1L8, the extra bonus maps that come with the game (SE, ST and ZOO, sorry for forgetting to mention them earlier!) and the Levelord's leftover maps (Chuckles, Cigam, Sewer and Sweeney) that didn't make the cut for the final game.
Anyway, for the club, earlier this week, I replayed the old Duke3D versions in DOSBox 0.74-3. I first did the shareware versions (1.0, 1.1 and 1.3D) on Let's Rock, which I downloaded from the website RGB Classic Games (which hosts all shareware versions) and then I did the original Duke Nukem 3D Full Version v1.3D on Come Get Some skill. I have gotten all kills and secrets and have never died once this time around, thankfully! Though I died a bunch of times in Faces of Death (as well as two other bonus maps, which will be talked about next time). I will give short information about each map, mostly talking about extra secrets, tips and tricks. Note that this post is going to be quite long!
L.A. Meltdown
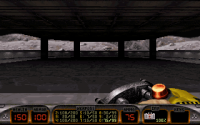
Hollywood Holocaust
-A pistol clip is located behind the crate at the start of the level
-A stash with pipebombs in the entrance of the theater, go to right (near elevator that leads to arcade room), jump on the trash bin and open the wall.
-Holoduke in the arcade room, press on the Duke Nukem II arcade machine, which causes Duke to say: "Hmm, don't have time to play with myself!".
-Another Holoduke, in the bathroom vent, there is a crack you can blow up, which contains a Holoduke.
-In the bathroom, you can find shotgun shells behind the couch.
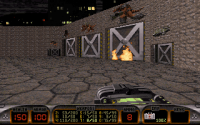
-To avoid taking damage at the exploding wall (after the arcade room) which reveals the pig cops, stand behind the crate.
-In the exit area with the bridge, use the jetpack from the secret place earlier and fly to the top, destroy two turrets, collect extra jetpack and 20 shotgun shells.
-I recommend saving two atomic healths and one armor for the next level, to start it with 200 health and 100 armor. For me, I first grab the armor from the secret place (in the theater room) as early as possible, while the atomic health I grab is in the projector room as it reveals two troopers and RPG. The second armor (from the cinema room) and the rest atomic healths, I grab when I exit the level.
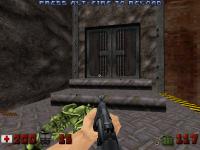
Red Light District
-The only unofficial secret is an extra NVG inside the bathroom. Press on the hand dryer to reveal the "secret".
-You can also activate the switch to blow up the building without the blue card, though you need to crouch behind the switch. I have seen this trick first time on YouTube many years ago (mostly on speedrun videos) but personally I do it the intended way.
-When finishing the level, since you are losing everything anyway, just make sure you save two atomic healths, so you can have 200 health for the next level. I recommend saving the two atomic healths from the beginning of the level, while grabbing the other two during gameplay (the one in sewer and the mandatory one in the vent required for progression).
-You can bypass the bars at the end by just using the jetpack but the nuke button is hard to activate and you still lose everything in the next level anyway. Plus that way the last pig cops won't appear, so you won't get all kills.
-There is a glitch with a missing enemy. What I learned back in 2015 and kept in mind for nowadays, there is apparently a RECON that is supposed to spawn but he won't show up since the RECON can't be spawned (a vanilla Duke3D bug). I also learned about the glitch that adds an extra kill by killing an enemy under a door and the door squishing its corpse. This makes up for the missing enemy and allows you to get all 105 kills (5 of which are the spawned troopers from killing the strippers).
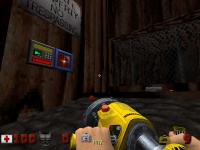
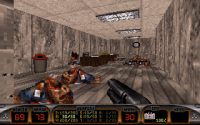
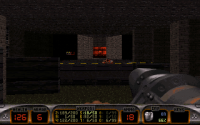
Death Row
-Kill the pig cop at beginning by kicking him through window carefully (if playing v1.3D, you can use both feet at once!). He may drop a shotgun (1-4 ammo) or an early armor (50 or 75 points), though you should get the pistol and shotgun early on anyway. Then look out for a spawned pig cop nearby.
-First unofficial secret, after opening the curtains, there is a wall you can open that contains a Holoduke.
-At the rotating gears, grab the atomic health on the ledge carefully, then walk on the ledge carefully and then press on the wall to reveal a hidden NVG.
-Since this level has a ton of atomic healths (so it is easy to end up with 200 health), I will talk about the ARMOR conservation. There are two armor pickups (not counting whatever gets dropped by pig cops), one is inside the secret in the church, the second is inside the vent in the rotating room (with the Battlelord head hologram). Assuming you didn't get any early dropped armor, grab the secret one first and save the other for the later.
-In the church, you can destroy the monk's corpse (that monk is from ROTT!) which spawns an atomic health.
Toxic Dump
-The first unofficial secret is inside one of those turret holes at beginning (when you grab blue card and RPG), it contains a Holoduke and the message "HOW DID YOU GET HERE?". I don't know why this doesn't count as a secret area, I think it used to count in the beta 0.99 version at least.
-The second unofficial secret is located underwater, right after rotating gears, dive inside one of the corners, contains Armor and Scuba Gear
-The third unofficial secret is also underwater, near end, with the two things you have to ride while shooting at the button. You must shoot the button, quickly submerge and then enter the hole to collect RPG and ammo. I recommend first breaking the vent to win an extra second, then repeat the procedure above. You should make it inside.
-In the cranes room, you can wait for the crane to pick up a barrel and then it will detonate the trip mine.
-In the original v1.3D release (both full and shareware, doesn't happen in any other version of the game), there appears to be a pig cop that spawns in that second shrink room. It seems most of the times, he is stuck in the corner and just walks on the spot. He is supposed to spawn on the conveyor belt but due to overlapping sector, he ends up warped there. If playing on easier skills, just stand in the first part of the room and wait until you return to normal size while hoping he doesn't come over you. If playing on harder skills, there will be another trooper present here, so stand in the middle of the room (pray that the pig cop doesn't move from his location) and you should be fine!
-As with Death Row, this level is very generous with atomic healths, so to conserve armor, I recommend saving the one from the conveyor belts room (where you will find the tubes with the atomic healths).
-You can crouch-jump into the small holes without shrinking to bypass the puzzle. This trick works in other maps as well (The Abyss and Lunatic Fringe). I learned about this trick many years ago on YouTube, by watching speedrun videos. But personally, I do it the intended way.
Launch Facility
-There aren't unofficial secret places but you can try to save one of the armor pickups, you get one near beginning (where two troopers will come from) and another inside one of the secret areas.
-As with most levels in the episode, there are plenty of atomic healths to keep you alive and start the next map with 200 health.
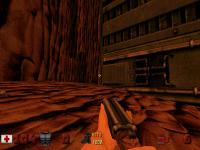
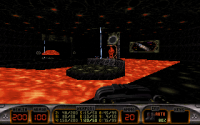
The Abyss
-A hidden chaingun (near the small hole) located behind the fountain. It also contains a water fountain you can drink from.
-There are plenty of atomic healths, so try to have 200 health before reaching the Battlelord. There is a single armor pickup located near the entrance (before you drop down the Battlelord Lair), on top of whatever pig cops will drop for you if you are lucky.
-Two compartments that have RPG and Chaingun + ammo after dropping down the Battlelord's lair. You can use the jetpack to fly here OR you can just walk around the room until two compartments with ammo (Chaingun and RPG) will open, which will also raise two steps that help you to reach those places.
-You can skip the shrinking part with the jetpack or even a well timed jump.
-You can reach the inside of the room where shrink rays will come from, you will see the message "YOU'RE NOT SUPPOSED TO BE HERE". It requires the jetpack acquired from Launch Facility.
-To get all kills (assuming you play on every skill except DIG), note there may be a few "lost" enemies during the level. You can backtrack in the whole level (Jetpack from Launch Facility will also help) and finding those few leftover enemies can be painful. Luckily, I can help finding those few enemies: there is one trooper that spawns near beginning of map, upon collecting the blue card, he will be present on the entrance of the beginning point. FOUR troopers will spawn at the platforming section near end (the platform that contains the RPG), two will spawn in front and two behind you. They will mostly fall into pit (and they will NOT die!), so try to kill the two ones in front quickly (preferably have RPG selected, then launch rockets as they are spawning), then go back behind, fall into pit and fly with the jetpack to find and kill them (I recommend using the shotgun here). Watch out for the jetpack fuel to not have a nasty surprise!
-Assuming continuous playthrough, I recommend conserving the jetpack fuel for the Battlelord boss fight. You can find an extra jetpack and armor behind those 3 trapped babes. Kill them and collect the goodies while the Battlelord shows up.
-To kill the Battlelord quicker, shoot at his head. He takes more damage if you hit him in the head. He seems to go down in like 20-30 RPG shots as opposed to 40 or more.
-You can trick the game and avoid getting locked in the final room. I leave that for the reader to discover the trick, though personally I recommend just fighting him directly into main room, just using the jetpack and keeping the distance from him. With all the health and armor you have, he shouldn't be able kill you!
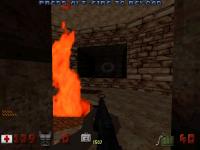
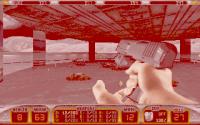
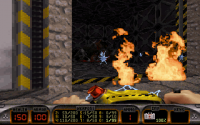
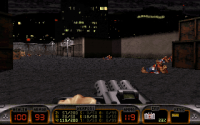
Faces of Death
An interesting DM map that features a bunch of Mini Battlelords! This one is quite tough (since it's a forced pistol start in the original versions of the game, unless you are noclipping through Abyss and Launch Facility again to access it) and it killed me a couple of times. The solution is to get the Shrinker and then you can shrink them all and step on them. This is extremely difficult to do in the original v1.3D release due to the shrinker blast being weaker (it has 650 units compared to Atomic's 680) and the auto-aim really likes you screw you. So try aiming around corners at their feet. This is easier said than done. Because most of the time you must make them SEE YOU first (or else if they get hit during the inactive state, nothing happens to them) and this is very difficult when all you have is just 100 health and no armor, they will kill you quickly.
Once you are done clearing the main room, grab the blue card and all goodies, insert it into one of its compartments where the blue slot is located, watch out for trip mines, activate the rest switches, shrink the last Mini Battlelord and you are pretty much done with the map.
There are two secrets to find, in the main area, just fly inside the lava walls to collect armor and atomic health.
In the last area, there are a few extra items inside the small lava spaces, they are extremely difficult to collect as you will get squished if you try to collect them. Using steroids helps to get through the part and collect the items, you will end up falling inside one of the secret areas. But this doesn't always work and it's not worth the trouble.
The level was apparently included and modified in the Total Meltdown's Plug n Pray episode, to feature an exit (though not in the spot you would expect). The level was further updated in World Tour edition with an actual exit and the level is accessible from The Abyss, as originally intended. Unfortunately, upon finishing it, it forces you to play through The Abyss again, so all they should have done is make it more like Duke Nukem 64 did, having a separate Boss map that only has the Battlelord's Lair.
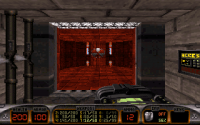
User Map (aka
Dukematch Level 1)
Not much to say. It's just a small space themed arena with all the registered weapons thrown in. The map was updated in Atomic Edition to include expander ammo and then further updated in World Tour to include the Incinerator and ammo for it.
Overall, L.A. Meltdown is an excellent introduction episode. The two bonus/extra levels (E1L7 and E1L8) are forgettable but the main 6 levels are superb! Onto the next episode!
Lunar Apocalypse
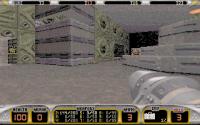
Spaceport
-In the room where you find the blue access card, press on the nearby wall to enter the water, you will find a hidden chaingun, as well as NVG.
-In the room where you insert the blue card, press on the right monitor to access a hidden Holoduke.
-There are a fair amount of atomic healths present in the map, as well as two armor pickups. I recommend saving the two atomic healths underwater (where you will get the second jetpack and red card) for the end of the map, while the armor you MUST grab is the one hidden in a corner in the room you get the blue card. Save the one armor from the Shrinker secret for the end.
-You can fly on top of the orange central column, which contains a health pickup and another pair of NVGs (as well as 3 tripmines in multiplayer).
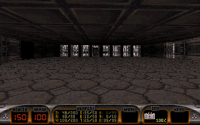
Incubator
-There's a few extra compartments you can open. The one at the end is notable, where the turret is placed and firing at you, destroy it, then fly with the jetpack to access a box of pipebombs.
-There's two slimers that can be easily missed, they are behind two windows (when unlocking the last part of the level) where the water currents are. This is useful to know for the completionists.
Warp Factor
-The two official secrets are both located inside the Star Trek Easter Egg room. The second one is trickier to register, so make sure you walk around that room a few times.
-Besides a few compartments containing goodies, you can find a hidden Shrinker behind the panel later in level (in between the places where you insert the cards).
-Near the switch disabling the forcefield leading to the exit, you can find a hidden Holoduke.
Fusion Station
-Besides the 7 official secrets, there aren't any unofficial secrets as far as I know. So I will give some advices to survive this level since this is one of the hardest in the entire game.
-Be careful with the crushers and exploding canisters in the level, as well as the large amounts of enforcers, commanders and sentry drones, they can give you a hard time if not approached carefully. At least there aren't any mini battlelords present.
-In the room with those crushers, you have the option between shooting through the small hole with the pistol to hit that button far away or go inside one of the secret places to access that button and also collect two atomic healths.
-Try to save one of the armors (and the two atomic healths you get at the end with the jetpack) for the next level.
-You can skip the map with a jetpack (not recommended).
Occupied Territory
-Like with previous map, there aren't any unofficial secret places, so I can only give advice to be careful with the monsters present in this level, especially the large amounts of Mini Battlelords (5 present on CGS!).
-As usual, try saving an armor pickup and two atomic healths for the next level.
Spin Cycle
-Not much else to say at this level, just be careful with those two spawning Mini Battlelords at end of level!
-There is a glitch where some doors will be opened. I think this is caused by the sentry drones opening the doors themselves. You may notice when pressing on the switches and they close the doors instead. This may confuse the player but thankfully it doesn't make the map unbeatable.
Tiberius Station
-Again, there isn't much to say, there aren't many dangerous traps in this level other than a few trip mines and the Mini Battlelord at the end of the level.
-I would recommend saving the two atomic healths and one armor from some secret places.
Lunar Reactor
-IMO, this is the hardest level in the original 3 episodes (excluding Faces of Death, which is harder for different reasons), at least based on the trouble it gave me as a kid!
-There are many things that can screw you up in your current playthrough (based on my past experiences), from crushers, to random explosions, to the monsters you face, that rotating gear that can randomly squish you (it doesn't help that you must get behind it to get the optional red card, to kill a few hidden enforcers and access one of the official secret areas!) and so on.
-I was lucky to do it without dying this time around, so here are some obvious advices:
-Always be careful when navigating the map, look out for any monsters spawning at certain times when approaching certain places.
-Time it correctly when going through the trash compactors (you also need to access a secret area, like the one which contains TWO atomic healths).
-When getting behind the rotating gear, there is a chance it might crush you against the wall. The safest method I found in the most recent playthrough (which worked) is turning on the jetpack and positioning yourself in the middle, hopefully you should make it. Repeat the procedure when getting out of the place.
-There is a jetpack at the bottom of the pit (located around the area where you would get the yellow card). Just fall into pit, enable the jetpack at the right time, collect the new one and fly back to the land. If pistol starting, the jetpack at the pit can be only gotten with the trip mine glitch (place a trip mine while falling to reset the falling counter).
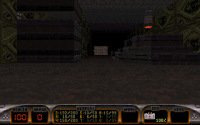
Dark Side
-Not as hard as the previous map but it is the longest map in the entire game. Thankfully it provides you with plenty of supplies to make it through. It is also one of the best and most memorable levels in the game and it is even shown in the first opening demo (the original v1.3D). Though interestingly, the demo is played on skill 1.
-It is difficult to give some advices aside from the usual health/armor conservation, although this time around there are at least 5 armor pickups that armor should never be a concern, while atomic health appears often enough that you should save two for the next map, preferably from one of the secret places.
Lunatic Fringe
-Just watch out for the Mini Battlelords, there's 4 present on the CGS skill! Other than that, the rest opposition comes in form of troopers and enforcers.
-Sometimes you may get warped to the other side of the map due to overlapping sectors, at least in the original v1.3D release. So be careful with that, to not get warped near an enemy or something.
-You can finish the level while shrunk, by using the jetpack and pressing the nuke button. Be warned that in the original v1.3D release, if Duke returns to normal size while flying, he will hit his head to the ceiling and die, so I recommend just waiting to return to normal size first.
-You can bypass shrinking by jumping and then simply crouching when landing into the hole, this trick is much easier to do here than in Toxic Dump.
Overlord
-Unlike most of the previous E2 maps, there are some unofficial secret places this time around. The first one is an extra atomic health at beginning of the map (underwater).
-The second unofficial secret is in the room with the Mini Battlelord, open the window where you can find 20 shotgun shells and a large medkit.
-The third one is inside the waterfall in the next room, contains another hidden atomic health!
-You can skip most of the level with the jetpack or even with a well timed strafe jump (not recommended). Like with Fusion Station (and L.A. Rumble in next episode), this was a fun thing to do as a kid but as an adult, I don't recommend skipping the levels randomly like that. It's much better to complete them properly, as it feels more satisfying.
-The last official secret is quite tricky to get, as it requires you to enter the Overlord's room and then it will open a place on the other side of the room. Be careful to not get destroyed by the Overlord while going for the secret!
-You can safely kill the Overlord by hiding in the water in the left side of the room, although in that case, since the Overlord will be nearby, don't use explosives, as you will hurt yourself!
Overall, Lunar Apocalypse is an excellent episode and while different than the rest two episodes, it is still great. I never understood why it gets so much hate, I mean sure there's some parts to dislike and sometimes monster placement can get annoying (especially the Sentry Drone spam), as well as the various insta-kill traps but to me I will easily forgive these flaws as I enjoyed my time with the episode as a kid and I liked admiring the space environment, as well as walking on the moon in the Dark Side. I only wish the Spacesuit was implemented in the final game, I imagine it would have been fun to have it fully functional and used at least for Dark Side. Now for the final episode!
Shrapnel City
Raw Meat
-The start of the level can be quite tricky. Grab the nearby Devastator, kill the spawned enforcer (most of the time he will drop chaingun ammo, which is better than nothing, though rarely he will drop the chaingun), then take care of the remaining monsters. You can then grab the chaingun down there on the right side and also the atomic health (you can decide to grab this one or the one nearby from the secret area).
-Approach the next areas slowly, watch out for the sneaky turrets (the first one placed high on the wall should be avoided for now until you get more ammo) and other monsters hiding, grab the portable medkit and secret armor immediately, to stand a fair chance again the rest enemies. If you did everything correctly, you should have no problems with the encounters in this level and save two atomic healths for the end and one armor pickup (located near kitchen, behind the large door).
-Other points of interest, include hidden teleporters. Press on the cash register (near where you get the blue card) to unlock the teleporters. In the karaoke room, there is another hidden teleporter you can access. These teleporters are obviously meant for DM.
Bank Roll
-Watch out for the trip mines at halfway point in the level.
-When unlocking the gears room, just press the 3 main switches, don't bother with the multi switch. Also grab that hidden Shrinker behind the multi switch.
Flood Zone
-This level is shown in the second demo (of the original v1.3D release) and it is one of the most interesting levels in the game. I also realized rather recently that the demo player never collected an armor pickup throughout the whole demo. Unlike the first demo, this one is played on skill 2.
-The only advice I can give is to look out for assault commanders and mini battlelords that get revealed at a few points, also watch out for the sharks spawning later (there are many sharks present in the level and they are smaller, harder to hit and more aggressive in the original v1.3D release)
-Carefully monitor your scuba gear oxygen. There are two present in the level in SP and you should already have the one from Raw Meat. I recommend saving the one present at the start of level for the end, unless pistol starting, though the rest of the episode doesn't have many points of underwater diving, so saving it for the end may not be needed.
-There is one armor pickup located underwater (near the slimer eggs), don't miss it! As this level lacks pig cops, you must have rely on the armor from the previous maps and the single armor pickup the map gives you.
L.A. Rumble
-The only advice I can give is to watch out for the many enemies spawning at various points.
-Inside the abortion clinic, press on a wall near where the troopers are found, you can find hidden devastator ammo and a large medkit.
-You can skip the level with the jetpack (not recommended).
Movie Set
-There are NO armor pickups in this level at all! Actually there is one located in the unused room located outside of map but in normal gameplay, all the armor you have access to is the one from previous maps and whatever pig cops drop for you. Thankfully the atomic healths are plentiful in the level.
-If you go towards the normal exit path, there is NO WAY back, so have a backup save handy if you do by accident. That exit room contains a chaingun and a portable medkit, as well as two troopers that will spawn in (they don't affect the kill count if you don't go this path, as at that time they aren't spawned in the map, so you won't have any enemies missed).
-You can skip the level by jumping while holding crouch button, at the gate to the normal exit path (not recommended). I didn't know about this (same with RLD blue card skip glitch or TD shrink ray skip) until I watched videos on YouTube in 2007 or so.
Tier Drops
-The only advice I can give is to be careful with the Mini Battlelords present in the level. There is one present by default but what is unique in this level is that killing the captured babes will spawn 3 more mini battlelords, as well as various supplies around that gray room.
-Be also careful with the warping glitch, at least in the original v1.3D. In some rooms, you may get warped into another by accident. I remember a few years ago I had the misfortune of being warped directly into the exit room with the Mini Battlelord. You can already guess how that ended up.
-Because of the above, I highly recommend first clearing that lone Mini Battlelord in the exit room, so he won't cause you any trouble later.
-Somewhat related to the warp glitch (although rare to happen), you may get bitten by slimers while they don't even show up in your face, which you may not tell right away until you notice your health decreasing.
-Since the exit room contains 3 atomic healths, you don't have to worry about health conservation too much (the starting room also contains 3 large medkits). Armor and other helpful supplies can be found in the small compartments located near the actual secret places.
-There are a bunch of tubes that you can jump into and they transport you into another room (each tube is marked by the color representing each room). This isn't recommended as you will take falling damage and it's not worth it. Just go around the level as usual.
Rabid Transit
-In this level, be careful when traveling on the train tracks. I suggest to wait until after the SECOND train passes you (both trains are synchronized to leave at once), so then you have enough time to travel on foot on the train tracks (thankfully the tracks aren't electrified, so you are safe to stand on them).
-If an enemy gets hit by the train (similarly, if an enemy gets eaten by a slimer), then that enemy is removed from the game and won't add to kills. Thankfully, this is offset with slimer eggs that add extra kills, so this isn't really noticeable during gameplay (you should have all enemies killed when finishing the level).
-The only unofficial secret is at beginning, pressing on the cash register lowers the book shelf containing a pair of NVG.
-When going the path towards the red card, be careful as stepping on the stairs will spawn a Mini Battlelord (appears on all skill levels) right behind you. You can avoid the spawn by destroying the canisters and then jumping through that broken wall OR just using the jetpack to avoid the trigger. Though, another one is present anyway (at least on CGS skill) near the red card, so you might want to get all the kills anyway.
-Also, mini battlelords can't be killed by trains, they will just ride the train and give you a nasty surprise if you try to run away from them. So I don't recommend doing that.
Fahrenheit
-There isn't much to tell about this level, sadly. The only thing I can mention is to be careful with the Mini Battlelords at the end, as they are located in a rather inconvenient place. Thankfully, this level is quite generous with the health, as it contains FOUR portable medkits, as well as other health supplies (and a single armor pickup), so health shouldn't be an issue!
Hotel Hell
-There are 4 Mini Battlelords present in this level (at least on CGS skill). Two of them are located in the reception room. Strangely, I noticed every time I fire a RPG at the first one, the second one dies instantly from the explosion. Does anyone know exactly why this happens? Either way this first Mini Battlelord can give you a bit of trouble if he rushes you to the main room, so take him out quickly.
-The only unofficial "secret" is an extra atomic health found in the bathroom, that you get by surfacing from the pool (which also spawns two pig cops nearby)
-The mirror is broken by default in the level, so you can't shrink yourself, which would have probably led to skipping the level, since you probably would've been able to get below the door and arrived inside the pool (although there is a crack that needs to be broken first).
-For the Indiana Jones secret (located near secret exit), just grab the atomic health and run. Optionally, you can destroy Jones' corpse, though he doesn't spawn anything.
Freeway
-The first unofficial secret is a crack located underwater, you can blow up at the beginning of the level, containing various goodies.
-The second unofficial secret is inside that crashed sloped building (near end of level), inside it you can find a few enforcers, as well as a jetpack to let you get out.
-Strangely, this level doesn't have any assault troopers present, most of your opposition comes in form of pig cops and enforcers, as well as a few octabrains, sentry drones and 3 Mini Battlelords (present on CGS skill, though two of them are spawned upon grabbing the blue card, so they appear on all skills).
Stadium
-Blow up the Blimp to spawn a whole bunch of goodies (also a small correction, in past I used to think in v1.3D the Freezethrower doesn't get spawned into the level with RESPAWN effect but now after examining carefully, the Freezethrower DOES get spawned, therefore it gets spawned from blowing up the blimp. My confusion was caused by the fact the player doesn't drop the freezethrower upon dying and this is in fact a v1.3D bug, it has nothing to do with Freezethrower not being spawned from trash cans or the blimp)
-Killing the cheerleaders causes two assault commanders to spawn, so if you want to get extra kills, you have to kill them (though they often get blown up by the Emperor anyway)
-Besides the Cycloid Emperor and the spawned commanders, there are also a bunch of troopers that appear on the other side of the stadium, depending on the difficulty chosen. All the difficulty settings do in this level is whether you get to fight more troopers (LR and CGS) or none at all (on POC).
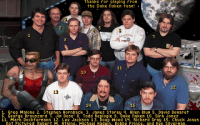
-The original v1.3D ending screen with the Duke Team, was much cooler than the one from the Atomic Edition.
Overall, Shrapnel City is also an excellent episode. All 3 episodes are all excellent in their own right, with NO bad levels in them, at least IMO. Maybe some of the secret levels might seem underwhelming at first but to me the 3 episodes that defined my childhood will always remain timeless classics to me.
I always find myself replaying the original Duke Nukem 3D Full Version 1.3D in DOSBox (I wish I still had the old Windows 95/98 PC!), as well as the Atomic Edition v1.5 once at every few years. Few games manage to maintain a consistent level design like Duke3D. Most of the games have the first episode as their best but the level design gets weaker as you get further into the game.
Thankfully, this isn't the case with Duke Nukem 3D. All 3 episodes are very good and are a blast to play to this day. Whether The Birth is as good as the original 3 episodes, it is up to you to decide! Personally I also enjoyed The Birth (most levels are very good) but it didn't have the same magic that the original 3 episodes did. Speaking of which, we will revisit The Birth later this year, so I apologize that I didn't include it for this month but I think 3 episodes were enough for this month.
Overall thoughts: What else needs to be said? Duke Nukem 3D is a timeless classic.


I will talk about the extra maps soon, in the next few days. Those being the 3 maps found in the GOODIES folder on your Duke3D CD (SE, ST and ZOO), as well as the 4 cut maps (CHUCKLES, CIGAM, SEWER and SWEENEY) by the Levelord! With that occasion, I will also vote for the next month! Voting will begin on the 25th and in that day, I will nominate THREE new choices, so I recommend to begin the voting for next month, after I make the next post, so you can take a look at all the nominated choices. New nominations are also welcomed, again starting with 25th.
Have a nice weekend, as well as a happy Easter with your family!

 Help
Help
 Duke4.net
 DNF #1
 Duke 3D #1


 ).
). Not much to say about this map what hasn't been said, it's a well executed jailbreak map. Although as a kid it took me a while to find the passage behind the poster, they could have added some stronger hints here. Again this game felt much more cinematic than its contemporaries. You're not clearing out random hallways, you're breaking out of a highly secured prison and taking over a submarine.


 ) dismissing it. It's true that the map can be skipped by using the jetpack which is a bit of a shame. Because the trek through the ship is a great experience, moving from the lower bowels through different levels, floating platforms and alien hallways. Great usage of vertical movement and SoS effects. I also love those strange windowpanes, especially if you see their silhouette juxtaposed with the earth in the background. Just adds a lot to the stange alien atmosphere. This map also greatly ramps up the difficulty, even without using the battlelords. Especially the reactor room and the final commander ambush get quite hectic.

