Thanks everyone for the comments so far! Glad to see people are happy about this month's choice. Might as well write about the first part of Last Reaction. Wasn't sure if to write about each segment (meaning first 3 maps, then next 3, then the rest 5) but I ultimately decided to go with this route, since there is a LOT to talk about each segment. I will see how I will split Water Bases into two or three segments and then with Chimera episode (one or two posts), as well as overall thoughts for the episodes.
And apologize for taking forever to get into the mod, I've been having a couple of life related issues as of lately. And Ninety-Six, yes I was talking about the original version of Chimera (linked in first post) which has the non-working nuke button in level 7 (the addon compilation fixes this, the missing chaingun sound and other bugs). When I get around Chimera, I will mention that again (and hope I can also do that Hidden Zone map, if I get to finish everything before the end of the month).
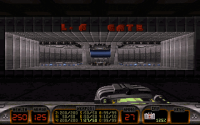
Anyway, let's first start with the mod's presentation, which includes the extra contents. As specified before, it contains 2 new episodes (11 levels each) and a new intro demo but that's not all. It also includes a cool new opening intro, the new AQUATIC logo (to replace ATOMIC logo), a new 20-min demo (which unfortunately desyncs in first few minutes and the rest of the demo shows the player dead, the other two demos aren't replaced but still decided to watch them anyway and while Area 51 demo desyncs halfway as expected, the Duke Burger demo somehow manages to play flawlessly until the end, with the only difference being the extra 25 health that Duke has), new art, new features (some of which were mentioned in earlier posts) and there's even two new ending cinematics for the two episodes! All these extras give the mod its own identity. It's not often you see mods going an extra mile to replace as many assets as possible. Some mods succeed doing so, while others don't bother doing that or fail to impress.
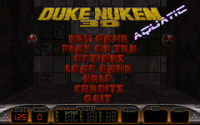
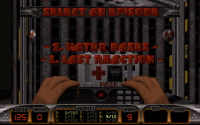
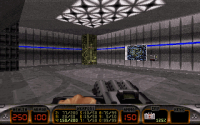
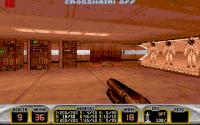
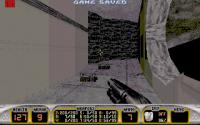
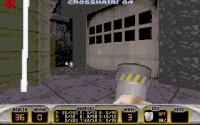
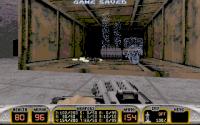
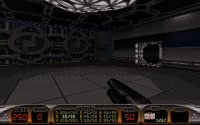
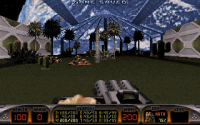
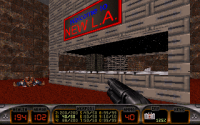
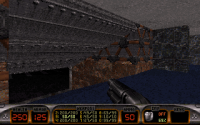
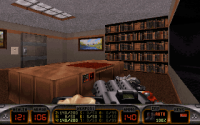
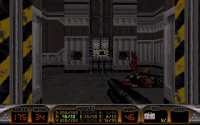
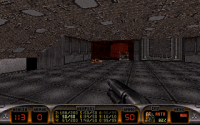
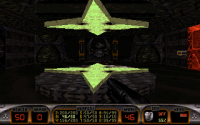
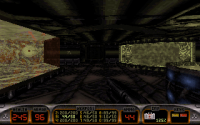
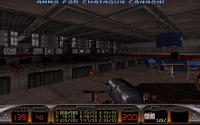
Before reviewing the maps, here are two screenshots of the main menu (includes the new logo) and the episode selection (notice the order of the episodes, which tells you which episode should play first), which were taken while the demo plays in background. For second screen, I purposely show the new Medkit item, which includes Steroids and Armor as well. I believe the new medkit only appears in Water Bases episode (and possibly later in Chimera as well).
Now for the long awaited moment! Reviewing the actual maps. The mod is played in Duke3D v1.5 in DOSBox 0.74-3, on Come Get Some skill, using saves for obvious reasons! Warning: LONG POST AHEAD!
Last Reaction
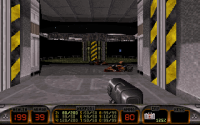
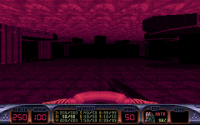
The first level of the Last Reaction episode shares the same name as the episode. But is it any good? Let's find out!
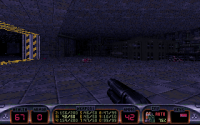
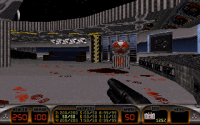
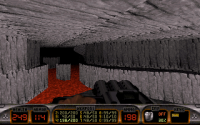
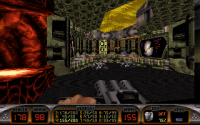
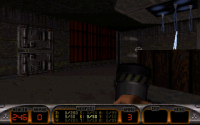
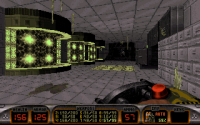
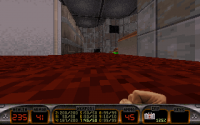
You begin the level and you see a bunch of enemies are already attacking you from far away. I suggest to quickly enter the nearby building, kill those troopers (one of which is a new yellow variant, that uses freezer), grab the shotgun + shells and start blasting the pig cops away. Be careful with the other enemies around, including drones, octabrains and turrets! Be sure to explore to find secrets as they offer large rewards and can absolutely make difference between life and death!
This might seem a bit demanding and unfortunately, the author expects you to find secrets in order to survive and EVEN THEN, you will still struggle at some particular points but you will not be in a hopeless situation if you are lucky and take advantage of drinking water. Though that assumes you have time to backtrack to that bathroom from the beginning of the level, to take a piss and drink water to refill health back to 125. I recommend saving the portable medkit for a desperate situation later in the level, where every health has been exhausted and you need health immediately! You should also carefully pick up the atomic healths that are scattered around the map, though they are mostly contained in secret areas!
Oh and there are a couple of balance issues:
First, the ammo is in general scarce. You will find secrets containing ammo and there is a hard to find secret that contains an ammo cache, easily the most rewarding secret in the entire level. But how many will find that particular secret? Otherwise, you have to rely on monsters dropping stuff for you, mostly enforcers (whom are numerous in the level).
Second, there are NO armor pickups with the exception of a single armor pickup in that secret area containing all the weapons, most inventory items, health and the single armor. You will often take damage from monsters and without armor, Duke is rather fragile. Your health will go down easily if you constantly get hit by enforcers or by commanders, for example. It doesn't matter if you have 175 or 250 health, you will find yourself with less than 100 if you are unlucky or even dead if the enemies hit you hard! And you will get hit a LOT!
Third, there are many enemies present in the map, especially on CGS skill. I know that the difficulty settings in Duke3D only change the amount of enemies present at the start of the map, depending on how the author tagged the monsters to appear on harder skills. This means that if the mapper didn't implement difficulty settings, then it doesn't matter what difficulty you play on, as the experience will be mostly the same (unless you play on DIG, in which case good luck, especially with a few extra enemies present in DIG as well). However this also means that monsters spawned throughout the level will always show up, no matter the skill level. So if a mapper constantly spawns monsters when you reach a particular place, then difficulty settings won't help you here. This is worse for maps that have little to no enemies present at start and abuse spawning enemies throughout the map at every opportunity.
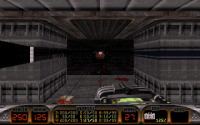
Alright. Now with the most technical stuff out of the way, what about the new enemies? There are a few new enemies present, in the first map you will meet the yellow trooper (mentioned earlier, fires freezer shoots and drops freezer ammo), upgraded octabrain that spams projectiles at you (I just realized now this existed in original version of the mod and wasn't broken in EDuke32 as I thought years ago, though not sure if the author actually intended for that octabrain to spam the missiles) and later in the level, you will meet the new prototype (aka LameDuke) drones. There will be many other new enemies later on as well, so keep an eye for them!
Since the ammo is scarce, I recommend you to grab the Devastator underwater at the beginning of map and use it EXCLUSIVELY on the Octabrains. You will save a LOT of ammo doing so. Then as usual, use the pistol against troopers, shotgun against pig cops and chaingun against enforcers. You will save a lot of ammo doing so. You don't have access to RPG or Shrinker yet, so you have to be careful with ammo conservation because by the time you reach those dark caves, you will easily run short of ammo, EVEN if you conserve it and find secrets! This is a huge flaw of the map and it's what causes most players to give up early on!
On top of that, the scuba gear intended to dive in that deep hole, is hidden in a NON-SECRET area! There is a crack near that hole you have to dive into, just use an explosive and grab that very much needed scuba gear (which shouldn't have been hidden at all). Then you can dive deep down and progress with the map! Oh and don't forget to first climb on those rocks at beginning, you will find some hidden atomic health and other stuff. Be careful with those turrets hiding around for a cheap shot at you!
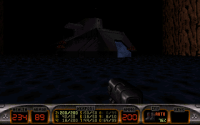
So once you're ready, hop into that hole and dive. Avoid the sharks (or just kill them with your pistol/shotgun), then go further and after a while, you will arrive in what seems to be an alien room. It contains a couple slimer eggs, octabrains and protectors, so be careful! There are also a bunch of hanging babes (thankfully they don't seem to spawn enemies but because I was afraid I would run out of ammo, I left to kill them once I reached the end of the level, yes you can backtrack to whole level). Press that switch (opens a way into the starting area which leads to an elevator that leads to those dark caves), collect goodies (atomic health and jetpack), kill a few spawned enemies and dive back up. Each dive will take around 10-15% of the scuba gear oxygen, so just be careful to not waste it too much, especially if you plan to return later here!
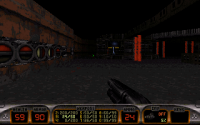
Once at surface, use the jetpack and go into that opened place. Look out for some trip mines first! Then once you blow them up, watch out for those enforcers lurking in the dark cave! There is a pair of night vision goggles that is hidden on top of that mountain (where the water fountain is found) which will GREATLY help to see those enforcers in the dark! There are also two secrets to find in the dark cave, one of which is hinted from a symbol (contains octabrains, devastator + ammo and atomic health) and other is a hard to see crack (that contains jetpack, chaingun + ammo and atomic health). Both are useful secrets that are needed.
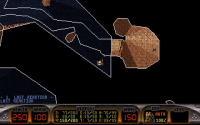
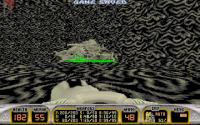
Before I contine with the map, I want to mention that there is a place on top of that waterfall at beginning that you can fly to, it contains a couple more enemies (octabrains + turrets) and a hidden underwater path to that big secret. There is also a place you can softlock yourself if you go further in that small space (after you killed the turrets) and then find out it's a one way wall, preventing going back. This happened to me once and I just threw a pipebomb to commit suicide. That was my first death (out of 10 or so I had in total). That problematic place is located close to that underwater path that leads to that "super secret" which is very much needed! I took a picture of the automap to greatly help to find that secret (as well as avoiding that place you can softlock yourself). There is another similar looking spot that is correctly blocked, so you don't get softlocked.
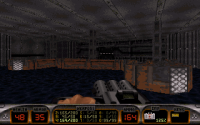
Right. Now back to the main progression, in the dark caves. You have to find the blue card, which is guarded by a few enforcers. Once you find it, go all the way until you come to a room with two further paths. I think the right one leads to the blue key slot. Once you do that, you have to backtrack all the way to back to where you were before (also be careful with more spawned enemies) and go further into that part with some rocks containing lava. Once you go further, you will see the door that was previously present, is now unlocked. If the door is still there, then that means you haven't placed the blue card yet. All this backtracking was totally unnecessary and makes navigating these caves really painful. Not to mention the hard to see enforcers and the lack of armor, really make this whole thing more painful than it should be. At this point is when I had to go back a few times to drink water to refill health, whenever it fell below 50 or so. I wanted to conserve the medkit just in case. I also died once when a commander fired a rocket and hit the other commander near me, so the splash damage took me out anyway (was below 40 health at that time). So when I loaded my save, I decided to use the chaingun anyway (wasn't sure what else to use), finish them off, go back to refill health and come back after a few minutes...
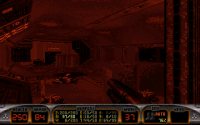
Once you make it past the door, you get to a large area filled with enemies (at this point is when I grabbed some atomic healths I saved earlier). A bunch of enforcers, commanders, protectors and a few sentry drones (forgot if there was something else). At this point you should just try to run around and gather enemies in one spot and have enemies hit each other (you will see why shortly). Tank damage from sentry drones by allowing them to hit you and use your chaingun (if you still have ammo) to take down some of the protectors and even enforcers (so they can still drop ammo). I was lucky that some/most of commanders/enforcers were hit by shrink rays, so that I could step on them. I sometimes saved during battle as well (on different slots, don't worry I made use of all 10 save slots, considering I installed the mod into its own LR&WB folder, which is a fresh copy of the ATOMIC folder). I died once more here when an enforcer that returned to normal size, just killed me with his chaingun but then again, I had only 4 hp left.
On my successful attempt (with help of 1-2 pipebombs when the enemies were gathered one near each other), I managed to clear the room with just 2 hp left. I saved and backtracked all the way to refill my health because I still wasn't certain if to use my medkit right now. It wasn't until I noticed two medkits were laying around in a dark corner, before the next door.
Speaking of which, I open the door and I'm greeted by a commander. I decided to simply squish him with the door. Not worth wasting any more ammo and still haven't found the shrinker, so I'm glad I used the protectors' shrink ray attack earlier to clear those few couple enemies and save a ton of ammo. I don't see how you could have done otherwise. No I didn't find that "super secret" yet at that time, I only found with the help of Mapster once I was done with the map...
Okay. Now you get to choose between 3 teleporters (blue, red, yellow). I recommend entering each teleporter at first, it teleports you to a large room with 5 more teleporters. There are some LameDuke drones being present behind those pillars but honestly, with the ammo being very scarce, just run into them. They will self-destruct. Sometimes you will not take any damage, other times you will take little damage (less than what a sentry drone will do to you). I had exactly 100 health when clearing the 3 main teleports. Then once I was ready, I saved and tried each teleporter. Some will send you back across the 3 teleporter rooms, others will advance the map in different rooms. One sends you to what seems like a small trap filled corridor with trip mines. This is a painful part I remembered and this time I somehow had no problem surviving it. I simply crouched as soon as I teleported and took no damage from the attack. The other trip mine from middle of room still caused me a bit of damage, though only 30 damage, which means going back and grabbing one of those leftover medkits. I eventually found a lava room with two teleporters and another with four teleporters. In middle was an octabrain. I used whatever chaingun/pistol ammo I had left, then probably finished off with the mighty foot. Eventually I got to a room with the red card and a protector drone. I decided to simply kill the drone with my foot. I did it fine with just a scratch, so once I was done, I went back outside, grabbed that last medkit from earlier, saved.
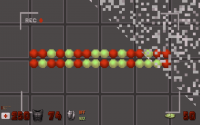
There is a teleporter that leads to a button puzzle with 5 switches, which is the way to unlock the exit. The correct combination (from left to right) is buttons 1, 3 and 4. After that, go to another teleporter and you should see a door is now opened and you can insert the red card you got earlier. This will unlock the exit in the large room from earlier (before the 3 teleporters).
I wish I could give more advice on the correct/exact teleporters you have to take but this is all I remember. Just try them all and make a save beforehand.
Before leaving the level, I highly suggest to grab all the useful stuff that you can find (especially that Super Secret), so you stand a better chance at the next level.
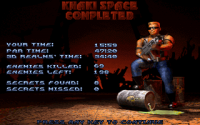
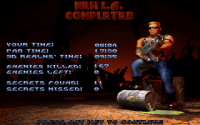
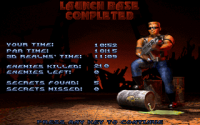
The whole map took me at least an hour (possibly two?) to complete.
Overall, this map was very amateurish and filled with MANY gameplay issues. This map on its own if released separately, would have been quickly forgotten (and for good reasons!). But to have it right at the start of one of the best Duke3D mods ever made, it's like the author never came back to polish his earlier maps. It's a shame that you have to suffer through THESE type of maps before getting to the real good stuff.
Will the next map be better or it will still suck? Let's find out!
 Mortal Transition
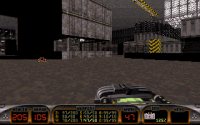
I can definitely say that this level is an improvement over the previous. It's still not great or even good by any means but the balance is better, therefore the map is much easier and shorter.
However there are still some areas that are filled with many enemies (such as tons of octabrains), then there's two maze-like areas (one underwater path and a lava path) that require you to navigate while taking care of the scuba gear and protective boots in your inventory. Then finally it ends up with the last room (which is dark) and filled with a couple of enemies.
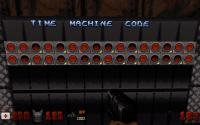
To give a short walkthrough and some helpful hints: at the beginning, shoot the second and third buttons (in other words, the middle buttons) with your pistol to open the entrance door.
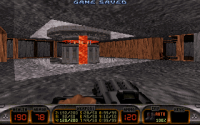
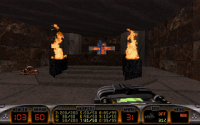
When you enter, kill the troopers, wait for the commander behind forcefield to take out himself (a neat trick that saves you ammo and health) alongside the enforcer, then go to the other room to find a switch (remember this room for later as this is where you will place the blue and red keys) and prepare to meet the Expander Enforcer!
Once you are done, go to the first teleporter that you unlocked earlier, which leads to a room filled with water. You have to position yourself to be able to submerge. Once you make it past that part, you should get into another room. You have to check every corner to advance, 3 corners lead to a goodie, the other to the main path you have to continue. You will find sharks and mines underwater. There is also a hidden crack underwater that leads to a non-secret area containing boots, shotgun shells and steroids.
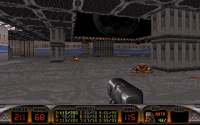
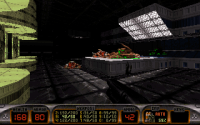
Eventually, you will resurface and you will find dozens of Octabrains, as well as two protectors and a bunch of slimers (they may or may not eat the protectors). Here I recommend you to just run past the octabrains, go to the elevator leading to blue key, switch to devastator and kill the octabrains. Then switch to shotgun/chaingun to pick off the last one or two of them if they manage to get close to you. Kill the remaining aliens and then you can go back to the starting area.
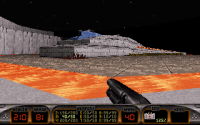
Once you go back, insert the blue card (look out for any spawned enemies) and go to the second teleporter, which will send you to the maze filled with lava. I recommend first to go to the large room (which is now locked, unless you found out the switch first) to kill all those octabrains (with Devastator), saving you from trouble later on!
To navigate this room, here are a few helpful hints: Use the automap and tap the jump button (A by default) in order to minimize the damage taken from lava, so your boots last longer. This won't always work as some sectors are marked as "liquid" and you will have to deal with this a couple of times.
Anyway, to progress, find a room containing a switch, which opens the big door, which contains the red card and various aliens. This includes a Mini Battlelord, a few commanders and protector drones. I actually got shrunk once by a protector drone and had to run away, I made it safely (since the aliens were getting closer) but then I reloaded the save to try doing without shrinking, as I felt I could have done a bit better. I couldn't shrink the Mini Battlelord since he was a bit submerged in lava (in those few softer sectors), so I had to take him out with the RPG. Once you get rid of the aliens and enter the large room again, press the switch to make the red card appear. Take a look at your boots in order to not run of them and pick up the new boots carefully (example if you still have 70% boots, you should just go on with what you have at the moment).
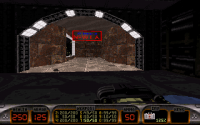
Go back to the starting room, watch out for other spawned enemies. Activate the red card to unlock the last teleporter leading to the last room. The last room is dark, so using the NVG is recommended. There are a couple of varying aliens, which include drones (all 3 variants), enforcers and commanders. You will find a locked door requiring the yellow card, which is present behind one of the other 3 doors. I recommend exploring as you will find a lot of useful stuff. Once you got the card, carefully position yourself to insert it. Don't align yourself in center because the door that opens behind you contains the MINI BATTLELORD guarding the exit! I remember this part from years ago, so I was ready for what awaited me. Just use the Shrinker to get rid of him (if you are lucky with hitting him around the corner) and then once you are done, backtrack for any goodies left for the end and once done, exit the map!
There are 4 secrets to find this time around and they are much easier to find. One is found in the underwater path (should lead to a small room with goodies), two are on the lava path (one is easy to find, other requires to blow up a crack, which is near the entrance to that large room with aliens) and the last secret is found in the last room of the level (one of the 4 doors should be the secret area).
An improvement over the previous map but still a bit underwhelming and confusing at times. At least it was much shorter and easier. Will the next map be better or worse?

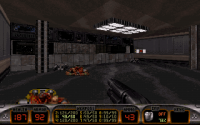
 The Jungle Zone
And now for another long-ass map! You start in a locked dark room. Just press the door in front of you to get out.
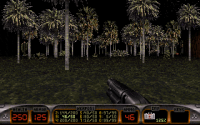
You will find yourself in a large jungle themed place. You can tell this map will probably take you at least an hour or so. I don't know how much it took me exactly but I think it was probably 2 hours or so.
Unfortunately I had to stop halfway in the map two days ago because I felt nauseous (especially with all the view shifting when going on slopes) that I had to stop playing (it actually made me throw up!) and continued the next day when I felt better.
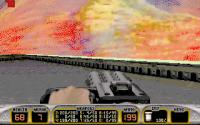
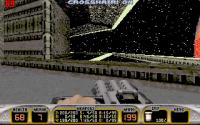
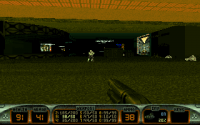
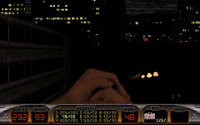
What I can say about the map, besides various enemies being utilized (even some invisible variants of octabrains and other enemies), your main objective is to get the blue card from those pyramids/temples area and then use it on top of mountain (that you have to climb, also watch out for those few trip mines!) to get the red card and then dive deep down a water hole that eventually leads to a dark red cave area. Hope you've got the scuba gear with more than 30% oxygen (I had 24% oxygen left from the previous map because I spent a bit too much time backtracking/exploring, so I needed to get a new one when my current one ran out while I was surfacing and lost a few hp from drowning). Don't forget to look for that secret inside that hole, it should be in a corner, look on automap to help guiding you. The secret contains various goodies and even a water fountain.
Oh yeah, before getting there, inside that building requiring the blue card, aside from a few monsters in dark places (including a mini battlelord in the bathroom, guarding the red card), there is a crack in the office room that contains a SCUBA GEAR (!), Boots and two Atomic Health. The scuba gear is very much needed, make sure you get it!
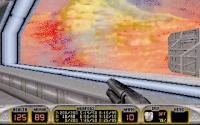
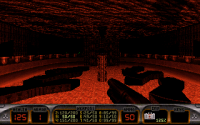
Once you are ready, dive down and after a minute of diving or so, you will see a couple octabrains and sharks. Kill them (use NVG to detect them), go further the path and eventually you will surface into a dark red cave.
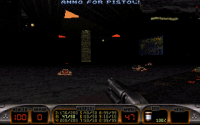
When navigating throughout the dark cave, watch out for various monsters (commanders and octabrains). Be sure to also grab the yellow card sitting on a platform (it should be near the entrance of the dark cave). There are two secret places inside the red caves (located close to where you will find Devastator ammo and atomic health, hidden in a corner), one which is contained inside another. Watch out for those trip mines and more enemies spawning!
The last secret (3 atomic healths) is easily found in the area that you unlock with red card, you must climb on the panel (there is an elevator that will help reaching or you can jetpack up here) but watch out for those spawning enemies! There are also 3 more atomic healths that you can grab from those crushers, you have to be careful when grabbing them!

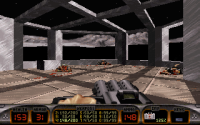
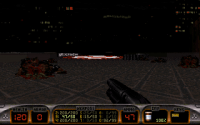
Eventually, after using the red card, you will teleport to the top of the lava mountains and fight more enemies. You should also find out on ground in that corner (an unmarked secret) that contains a stash of many goodies, this can be referred as the "DNSTUFF secret" that Ninety-Six mentioned earlier. It contains nearly everything! I recommend grabbing this stuff before exiting (watch out for a couple of protectors spawning), though sadly it doesn't include any armor for whatever reason. Speaking of armor, there was a single armor pickup in the whole level, in the dark bathroom inside the building that required blue card, that I grabbed earlier by accident (though my armor was running low anyway). Meaning I got to finish the level with 0 armor. The lack of pig cops (who only showed early in first level so far) means that there is no other way to get armor, so prepare to endure full damage from the aliens! Yes the levels contain a shit-ton of health in certain places but even with 250 health (maximum), you will quickly run low on health from getting constantly hit by enforcers and other crap (this was especially painful in the next level).
Eventually, you will have to find a spaceship guarded by various aliens. Use the yellow card to unlock the spaceship! Inside it, a MINI OVERLORD can be found! Take him out, explore the rest level (stock up on pretty much everything before exiting) and then you can finish it! As you can already guess, the next level will take place in space.
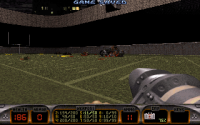
Overall, this level, much like the first one, was needlessly large and confusing and felt like a chore to complete, taking me far more than just a half hour (either 1 hour and half or two hours and half) and killing far more enemies than what is listed in that screenshot. The Jungle Zone felt at times like The Abyss on steroids, which is funny, considering the song from The Abyss plays in this level, also The Abyss was actually great and well balanced, The Jungle Zone is just meh at times (though interesting to explore, at least some parts).
I was also lucky to do this level without dying (much like the previous level) because I was very cautious at times. I was only afraid my jetpack would eventually run out (with all the backtracking I did, especially for that last secret in the dark caves) and I had to manage my inventory items constantly. It's not often you do this kind of thing in Duke3D. This time you have to balance the jetpack, night vision goggles, scuba gear and the boots all at once and grab the new items when done with the level, so you have everything maxed out.
But yeah, now with the first segment done (canyons and hi-tech bases), it is time for the next segment, the space maps! Will they be better or worse? Find out soon!

At the moment of writing, I'm currently on the fifth level (just finished Khaki Space last evening), hope I can finish the episode until Friday evening. Then I will see with Water Bases and Chimera in the next few weeks. Even if I manage to finish the episodes in time, it will take me a lot to write about them. I think all this pays off, having a very active topic and many participants, I felt like I did a good choice (thanks guys for the encouragement!) and I hope my walkthroughs will help others to be able to finish these confusing and long levels. No idea when I will write about Khaki Space and all the following maps.
Also nice screenshots Gingis Khan! I hope I can get to watch your videos soon. Since you did Water Bases first, I will have to first catch up and then watch the videos, to avoid spoilers!
Thanks everyone for the comments so far! I will most likely post about the space maps tomorrow or in two days, while trying my best to finish the episode and have an write-up done until the next week. I hope I can get the episodes finished until the end of the month, because the April nominations will be interesting!
Speaking of which, the nomination from Aleks' spoiler is interesting and considered for May, as I won't spoil what I have in store for April, because for that month, I will try to spice things up with some more unique nominations. Won't mention what that means until the 25th when voting begins.
Anyway for now, enjoy the screenshots!


 Duke4.net
 DNF #1
 Duke 3D #1

 Help
Help

 ). The theme and openness of the level worked quite well though, even if sentry drones once again were pretty annoying. Too bad that with transition to new level you lose all the supplies, hopefully I won't be struggling for ammo again like in the 1st level.
 Aleks, on 07 March 2022 - 03:19 AM, said:

 Of course there are plenty of mini bosses overall but many of them you can just shrink if you are lucky with your aiming (crouching and aiming at their feet around the corners works the best), otherwise just use RPG/Devastator. You should be fine, especially against Mini Overlords which are slow and you can easily get in their face and blast at their feet and hope they shrink. Although there wasn't as much RPG ammo as I was hoping (maybe I used the RPG a bit more than I wanted to), as I had less than 50 ammo by the time I reached the exit (had full of everything else, besides boots and scuba gear which were close to 100%)
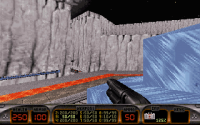
 png]
png]

 duke0000.png

 png]
png]


 png]
png]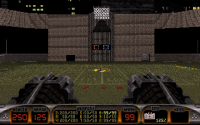
 png]
png]

