Duke4.net Forums: Duke Map/Mod of the Month Club - April 2024 - Duke4.net Forums

Jump to content

  • 2 Pages +
  • 1
  • 2
  • You cannot start a new topic
  • You cannot reply to this topic

Duke Map/Mod of the Month Club - April 2024  "An Expansion Pack For Duke Nukem 3D"

User is offline   LakiSoft 

#31

SS Observatory

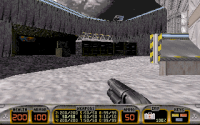
Nice level, like alternative version of Spaceport. inspiired by press release screenshots perhaps... I enjoyed this level so far.

Intercommunication

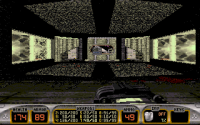
Like Warp Factor but on drugs again combined with some duke beta elements it looks like what could be Duke Betas were released. \nice Level.

Third Level (again forgot its name)

It was confusing so again i had to cheat sorry about that.
3

User is offline   LakiSoft 

#32

rbital Oblivion
------------------------
FM2X01: SS Observatory
FM2X02: Intercommunication
FM2X03: GnuStella Network
FM2X04: Optical Demounter
FM2X05: Alpha Core
FM2X06: Lunar Crossroads
FM2X07: Terran Moonshaft
FM2X08: Alien Fusion Tower
FM2X09: Viewport (Boss level)
FM2X10: Cycling Perimeter (Secret level 1)
FM2X11: Asteroid Stronghold (Secret level 2


Optical demounter
w
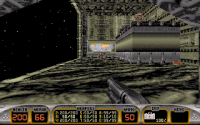
Another map inspired by beta screenshots. i had trouble finding the key so i had cheat here as well

Alpha Core

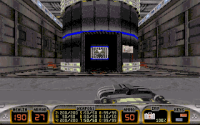
again inspired by certian pre-release sxreenshot. this is of most memoriabble level s of this pack.

Secret Level Cycling Perimeter

A nice little secret level, short but cool.
2

User is offline   Aleks 

#33

Helecopt Road
This level feels a bit like an afterthough and isn't that memorable. The whole base/cliff thing doesn't really sell any location in particular, there's some dickish enemy placements (invisible turrets behind the helicopter at the beginning while they are still unreachable) and there's some mundane wandering around. The enforcer trap in the "alien" tunnels that are uncovered behind the fountain is pretty bad, with a bunch spawning just behind you out of the blue and in an insignificant place of the level. I kinda like the design of the industrial parts with the catwalk and windows overlooking the outside bit. Again, overwhelming darkness in some parts looks unnatural and makes the navigation/combat become a chore.

Rating: 71/100

Boiler Cliff
The best level so far from this compilation! The progression is very straightforward despite looping back and forth on itself, there's some neat puzzles (including the shrinker/mirrors/tree one) along the way and it has fairly challenging, but balanced and fun combat. Even the sentry drones are used nicely, as they pose some actual danger when you're stuck on a rocky ledge while not being put straight in your face. Battlelords and commanders in particular are nicely placed too, especially the first since you'll most likely prefer to RPG them rather than shrink and stomp. There are some pretty effective set pieces, besides the shrinker puzzle, the lava going up near the yellow key (in theory this blocks one of the secret places I think, but I managed to somehow randomly open the teleporter to it from the other side, so may still be accessible), sliding down a long and windy lava river or the earthquake towards the end that reveals the final area. There's just enough supplies to have fun without conserving ammo too much, with some emphasis on the freezer and explosive guns. The design is really solid - very clear to read, for a change, and without the annoying darkness. Every keycard door is marked properly. Plenty of interconnections open up as you progress/blow stuff up, but somehow you are very cleverly guided through the level and don't really have to memorize anything along the way. The theme is quite fresh, reminds me a bit of Flood Zone but with lava instead of the water. I suppose this map can be cheesed quite a bit with jetpack, but not relying on it makes it all the more entertaining. Also, the level has my favourite soundtrack so far, the track is very upbeat and extremely catchy, and with the level taking about 30 mins, it's gonna be stuck in my head for a while...

Rating: 91/100
2

#34

ViewPort :

Final Level. Already starting to have "OverLord" vibes. Not only with the design of the corridors but also with the Cetral Room. Basically this level is that one portion of Overlord with the Water and the raised platform, but expanded upon, and I like the idea.
The area looks kinda impressive despite not being as sprawlingly detailed as what we saw before, and it makes for some interesting situations. The TripMine Trap being a good example. Also this is one of the rare times where JetPack is intended to be used for progression. That's so rare that you always try to find a way to move on without using it.

Unfortunately I can't find much to say since it's just a OverLord re-hash but with an interesting idea for how it's built and how progression is intended. Music is okay, it fits quite well.


Ep2 was a much stronger deal to me. More detailed levels, more original ideas. While a few levels felt like re-hashes, they're quite the minority and some of them just give vibes more than re-hash feelings. And regardless, the few re-hashes were done better than in the First Episode.


Durango Club :

Not a "Raw Meat" remake. I like the idea of scouring around a main building before entering it, though the outside area feels kinda empty. 1st Secret was quite the challenge to pull off without damage. Club House is hard for me to remember due to it being kinda basic looking despite having an easy navigation throughout. I must admit, when I first played the level, I got stuck several times. This one time I only got momentarily stuck when I obtained the RedKey which unlocks the path to the end.
Basically, I would have never thought there would have been new openings in the Water TWICE. Now truth be told, the presence of cameras in a seemingly useless place should have been the hint :/ And Cameras I usually don't look at when they're just showing you around, a classic player's mistake.

I really liked the big explosive set-piece in the water with ton of eggs and all the OctaBrains. One of the rare satisfying Devastator moments to me ^^

As for the music, I like it though it doesn't really fit the combat IMO, but by this point we've understood it's a deliberate fun factor.
3

User is offline   Aleks 

#35

Summer Beach Condo
This one feels like taken straight out of Duke Caribbean, but with the regular Duke textures. I think the coolest thing about this level is how it gradually unveils itself, at first the player gets an impression it's just going to be a a rumble through a bunch of houses and a hotel, with the gates being there just for the sake of properly situating the area - but noooo, turns out they can be opened and they unveil a whole new area, similar in size to the initial one! I like the idea of accessing the bungalows through the chimneys, but the combat inside is cramped as can be - first thing is, you fall in the middle of a bunch of monsters surrounding you, then you just get stuck on stuff across the room. On the other hand, monsters in the smaller rooms are placed in a way you can easily cheese them right from the door. The gameplay in the open locations works much better - the battles that start when opening the gates with a lot of new respawns and then the one when moving further towards the beach area are the highlights of this map. The design is done well with a pretty fresh and organic theme. The progression is fairly clear, the button hunt is marked quite clearly with jetpacks. THe only place I got a bit stuck was looking for the exit, as the area shown on camera was hardly distinguishable. The music kinda fits the level and is pretty good on its own, but is also absolutely distracting and therefore not a good choice IMO.

Rating: 85/100

Jungle Bay
The best level so far, no wonder it plays on the first demo of the mod. A nice mix of jungle theme with a lot of underwater action, surprisingly well balanced when it comes to the availability of scuba gear. The design is original and allows for some minor puzzles here and there along with a platforming section that isn't too annoying, the interconnections in the layout are awesome. The combat is nicely balanced - there's only one dickish enforcer spawning right behind you in a secret, but other than that its clear and entertaining, with a lot of different guns provided - besides clearing the octabrains underwater with devastator, freezer was also very useful here. The map is sprawling with different locations - the woods aren't overwhelmingly dark for a change, the underwater part has every important location clearly highlighted so you don't run circles with the oxygen meter running low. Finding the secret exit is quite difficult as it requires a minigame of its own, but quite satisfying to complete nevertheless. I like how there's a lot to do in this level and every location is quite distinct with different flair and central effects, yet none of them feels like a gimmick - even the cannon blowing up a hole in the wall makes sense. Once again, a great music track for this one, atmospheric and a bit ominous.

Rating: 92/100
3

#36

Helicopt Road :

Funny music, but gotta say it kinda makes me want to rush through that level while it doesn't deserve to be rushed. And it's also too hard to even dare rush through !

A much better level to me, it's basically just storming through the Building and its side areas. I liked the overal design of the area, it's more creative and unique than anything outdoor I've seen so far. Gotta like the little secret in the death drop. Inside the building, I especially liked the rooms you enter with the Blue KeyCard. That little factory like place, and with some small details like the consoles with the tubes and all.
I also appreciate the several opportunities it gave me to exploit the Enforcer's weakness.

I didn't get stuck this time, but I remember being stumped by that level when I first played it. Namely because of missing one of the hidden Switches which are just "findable' enough for me to not point them out as a bad decision. Besides the interiors are too small and cramped to give many hiding spots.
As for fighting, there's pretty much room for everything here. I found myself using every single weapon throughout this level, even the TripBombs once or twice. I especially loved the finally, using the 8th weapon in the Green Corridor filled to the brim with stuff that just explodes as soon as they spawn in ^^
Same with the many high tier enemies spawning to the Helipad once we hit the final switch.

So far my favorite level of Ep3 !


Boiler Cliff :

I feel I have bad memories of this level from first time playing ... *plays the level*.

Well it wasn't so bad ... Though it's not a favorite of mine. It's just too bland, everything looks the same with just different layouts. The Cave areas are more interesting in that they propose interesting situations to get around, while the Canyon areas are more interesting for their long-range combat, which I'm always a fan of.
Progression is fine too. Now I believe I must have had a bad memory of this level for 2 things. Firstly, I'm dead sure that the Shrinker Puzzle had F-ed me back in the days because of not noticing the cracked Tree Trunk on the one hand. And on the other hand, there is that bit for the Yellow Key where, not using the JetPack requires you to seemingly drop to your death. Surely you can see the platforms down there, but I've already seen decorated death drops so I wasn't too confident. It felt like it was uninteded.
Lastly, I didn't mind backtracking all the way, especially as it opened a short-cut or two. Now the question remains >> Why spawn a PigCop outside of the final cave just before hitting the Button ?

I'm sure this is a trick to have FistMarine be like "Where did I miss an enemy O_o !?"

Music is one of the few I remember, and not a favorite, it's too repetitive and not catchy to me. In the end, my least favorite level so far.
3

User is offline   FistMarine 

#37

Hey everyone, thank you for your comments so far! Glad to see this topic active with many people participating. I wish I had joined earlier but my grandmother passed away two weeks ago, so I really wasn't in the mood of playing/reviewing maps for a while. TheDragonLiner knows about that because we were talking about FMX series and Oblivion TC at that time and I let him know when that happened. RIP Grandma. :(

Anyway, since Duke Nukem 3D's 28th anniversary was last Friday (Happy Birthday to Duke3D Full Version!), I decided that day to spend playing through the original game once more in DOSBox 0.74-3 but this time on Damn I'm Good difficulty with a very cool twist! I actually ended up doing just FM1X (the first episode of FMX series) and the first episode of Duke Nukem 3D but maybe I should have stuck to my original plan of just doing the original levels that day, then maybe I would have done all three episodes in a single day, like I did back in 2022. Though yesterday I did FM2X (the second episode of FMX series) but that will get reviewed next time. The FM3X version (contained inside FM4X-FULL.ZIP) I'm playing is from the shared Microsoft One Drive folder, which is supposedly the latest/most recent version of the FMX series from late 2021, based on the date of some files in the directory. The one available on MEGA is dated early 2020 (according to when the files were uploaded), so I hope this clears some confusion.

So, what was the twist for this playthrough? The twist being: Everything Respawning! This FM3X/FM4X launcher taught me recently of a command I never knew before in Duke3D! The option to respawn everything as if it was a Multiplayer game. This includes Weapons, Inventory Items, Ammo, Armor, Health, Keys and All Enemies (enemies already respawn on DIG) in Single Player mode. And yes this persists even between the levels, quitting the game and coming back later to resume a saved game, etc.

The only things that don't respawn are: Duke himself, stuff dropped by enemies and stuff contained inside trash cans. Also when the Atomic Health respawns, it seems to hang a bit in air (maybe a bug in version 1.3D) but other than that, I haven't noticed any other side effects. Oh and single Pipebombs will respawn as long as they aren't blown up (if they are picked up, then it is safe to use explosives around their respawn point until they eventually respawn).

The option/parameter is /TX and can be used as the following (warps you at the beginning of each episode on DIG difficulty with Everything Respawning ON).

DUKE3D.EXE /V1 /L1 /S4 /TX
DUKE3D.EXE /V2 /L1 /S4 /TX
DUKE3D.EXE /V3 /L1 /S4 /TX


These are the parameters I used for the original game to start on DIG with Everything Respawning option. I have finished Duke3D on CGS countless times before (as well as FM1X and FM2X, though FM3X I only finished two times) but never on DIG (which is ironic as I have beaten RR, Blood and SW on their fourth skill setting in last couple years) and I wanted to do a DIG playthrough while also being able to get rid of all enemy corpses in the level. I did this mostly because of limited explosives in first episode of Duke3D. And I know I can speedrun through the game and only go for secrets but where's the fun in that? Also if you look at my screenshots and notice still having cards in inventory, that is because I picked up respawned cards at some point after using them. :P

Before I start reviewing FM1X: New York Rebellion, here are a couple replies (mostly focusing on those related to first episode, though Forge already clarified some of them):

Quote

Adding to FistMarine's post, I think it's worth mentioning that some maps might be broken in current EDuke32, as per NightFright

Thanks Aleks, I forgot to mention that there are game-breaking bugs in the newer EDuke32 builds. I have read NightFright's post in that FM4X topic before I made the topic and I forgot to mention this important thing. At this point I'd advise to either use an older EDuke32 build (latest 2020 build might work better? not sure) or just use RedNukem as per Aleks' recommendation. I recommend using it with FM4X.GRP from inside the FM4XATOM folder. Or maybe it also works well with fm4x.grp from the Addon Compilation folder.

Quote

OK either all the maps I've played so far got completely mixed in my memory, I took care of the Battlelords so easily and automatically that I don't even remember it or we play different versions of the maps, but I'm pretty sure I haven't encountered any battlelords at all until the first secret level... Anyway, continuing on

Mini Battlelords used to appear as early as the second level. In newer versions of FM3X/FM4X, the Mini Battlelords were removed completely from the early levels and they are only present in FM1X05, FM1X06 and FM1X07 when comes to the appearances in the first episode of the FMX series.

There were also enemies removed from the first episode which spawned upon entering many secret places, though unfortunately this still seems to be heavily present in the second episode where almost every secret causes one or more enemies to spawn nearby, which I just find unnecessary. Though it did have some good changes, like various softlocks being fixed in a couple levels and the way you progress in FM2X03, you just need to blow up a cracked pillar and escape (or just detonate the pipebomb while waiting in a different room) instead of also quickly shooting the revealed switch while explosions were happening in the background.

I guess Quacken is playing the Addon Compilation version but I don't know if it's the latest 3.14 or the pre-release 4.00 version of the compilation and even then I have no idea what version of FM3X/FM4X is included in the package, as there are so many FMX versions available on plenty of Duke map review websites that it's impossible to tell. It's also not helped by the Fake Date thing on the game files (FM3X is dated 29th September 1998 and FM4X is dated 12th August 1999), though at least I know the initial release of FM3X was dated 25th May 2015 (probably the one still available at MSDN), so it's only a problem when comes to identifying newer FM3X and FM4X versions which have their date set to late 90s. Even those in the OP (official download links at MEGA and OneDrive) are different from each other from what I remember when I compared the files, yet they have the same modified date. Maybe when Fernando will visit this topic one day, he can explain further for everyone to understand.

Quote

Had to check in Mapster, apparently there's a multiplayer-only switch that opens the first door to this area, there's also a non-functional teleporter inside as the player would get locked in judging from the setup and a nukebutton - but despite the room saying "secret level", the nukebutton apparently still takes you to The Lava Reef.

Interesting find. I had no idea there was another nuke button inside FM1X06, though it might be only accessible in multiplayer and it wasn't included in single player because of game limitations that might have been caused by entering a secret level while already inside a secret level. I also found while looking in Mapster another nuke button in FM1X05 (inside the Battlelord's lair) but that one is most likely a callback to The Abyss, seeing as the map is already heavily inspired from it. Might also be meant to be accessible in multiplayer.

Quote

Though the beginning can be an easy stump. I remember not being able to do it long ago until FistMarine actually told me how to get the Blue KeyCard.

Glad to have helped you locate the Blue Card. ;)

Also for the complaints about darkness and explosions, they seemed to be much more common in the second episode. I agree they are annoying and dragging down the quality of the levels, including the occasional confusing parts/puzzles but I think the levels themselves are mostly well done.

Anyway, here is the review of the entire first episode, including kill count, secret guide and inspirations for each level (mostly mentioning the level it is mostly inspired by).
And a screenshot for the launcher because why not.
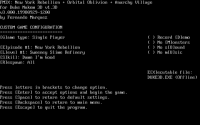
Attached Image: FM3X_LAUNCHER.png

NEW YORK REBELLION

Sweeney Slime Refinery

Kills: 63
Secrets: 8

This map is mostly inspired by Toxic Dump with bits of Red Light District (sewer section), Freeway (street section) and Sweeney (one of Levelord's cut maps).

Combat is not too difficult and you get a Freezethrower right off the bat with some extra ammo (in older versions I don't think it was there or if it was, then there was less ammo and/or the shotgun wasn't given immediately), which is a great help on Damn I'm Good difficulty, as you face some decent opposition too, though most of the enemies you face are troopers and pig cops.

Secrets:
1) At the very beginning, go left, open the window and jump through to collect an RPG.
2) In the room with the crane, jump on the green crate to the right and open the wall to access a dark room containing Devastator and 2x Small Medkit.
3) After getting picked up and dropped by the crane, kill the Pig Cop in the control room and open a panel, then jump through to collect Armor.
4) On the conveyor belt, there is a blue section filled with slime. Press the wall in right to access Protective Boots.
5) In the control room guarded by Troopers, you will find the Blue Card in left compartment. In right compartment, there is Armor and if you go inside, you can find a hidden Holoduke that can be reached by jumping.
6) In the next room filled with many Barrels and Troopers (where you insert Blue Card), go behind the barrels through a fake wall to collect 2x Atomic Health and 2x Devastator Ammo.
7) Inside the warehouse, where you find the Red Card, go to the corner at opposite side of the Atomic Health and press on the wall to access a Portable Medkit.
8) Inside the sewers infested with Octabrains, there is a bright wall that when opened, it reveals Chaingun + ammo.
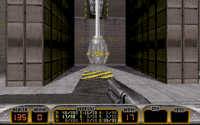
Attached Image: FM1X01_1.pngAttached Image: FM1X01_2.pngAttached Image: FM1X01_3.pngpng]

Dark Palm Hotel

Kills: 92
Secrets: 5

This map is mainly inspired by Hotel Hell. Progression is mostly clear and the balance is pretty good.

Fun fact: In earlier versions, Mini Battlelords were present in this map (at least two in the Reception room, might have been another one inside of the hotel rooms), so the map was much harder.

Secrets:
1) After taking the elevator behind you at the very beginning, kill the enemies and press on the cash register to open a nearby compartment with Chaingun + ammo.
2) Inside room 202, there is one compartment you can open to reveal the Blue Card. However, if you look closely, there is a red handprint that when pressed, reveals a Freezethrower.
3) Inside room 105, blow up the crack to reveal a secret infested room with a bunch of Octabrains and Slimer Eggs. Inside, you can also find Shrinker and Atomic Health.
4) In the reception room guarded by four pig cops (in older versions, there used to be two Mini Battlelords), press on the wall to reveal RPG and 2x Atomic Health.
5) Inside the men's bathroom, after taking out the pig cops and troopers sitting on toilet, there is a rubber can that needs to be destroyed, as you may notice a small tunnel. I recommend using the Devastator to carefully destroy the rubber can without destroying the mirror, then shrink yourself and go through the tunnel to reach the small room containing a box of Pipebombs and 2x Chaingun ammo. Wait until returning to normal size, collect the goodies, then press on the button to start the Shrink Ray Shooter to get out of the room.
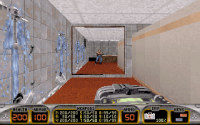
Attached Image: FM1X02_1.pngAttached Image: FM1X02_2.pngAttached Image: FM1X02_3.pngpng]

Lonely Street

Kills: 92
Secrets: 4

This map is mostly inspired by Hollywood Holocaust and Red Light District. Balance is again pretty good but progression can be pretty confusing on a first playthrough.

Your objective is to visit four buildings, each presenting a different challenge/puzzle, which unlocks one room (guarded by one commander and two pig cops) inside the building, containing a switch that will open one of the four gates that lead to the exit, as well as spawn two enforcers into the streets.

Arcade -> Push four arcade machines to lower them and to reveal switches. Press/Shoot all the switches to unlock the door.
Bookstore -> You will see three switches with the first one already pressed. You just need to press on the third switch to unlock the door.
Cinema -> Press on the two switches above the movie projectors to unlock the door.
Club -> You will see four switches on two speakers, one switch already pressed on the right speaker. Press on that switch #3 (upper right) to turn it off, then press on switches #1 (upper left) and #4 (lower right) to turn them on and unlock the door.

After all the switches have been pressed, go back to the streets, jump over the fence, kill the drones/turrets and the exit will be revealed upon approaching the wall.

Fun fact: In earlier versions of the map, there were Mini Battlelords present in the map. One was located inside the theater, two more were spawned on the streets upon completing two switch puzzles. Luckily, Fernando has rebalanced the map to get rid of them, so that in their place you fight two spawned enforcers to make it consistent with the other two switch puzzles. Also in earlier versions of the map, the Arcade Machines (the ones required for progression) were differently colored. Now they are using darker colors.

Secrets:
1) Inside the club, go upstairs, take out the pig cops and press on the EXOTICA poster to collect Steroids.
2) Inside the cinema, jump on top of a video projector (in the room with 2x Shrinker Ammo) to temporary open a small compartment containing a Jetpack. Don't worry if you don't get in time, you can retry as many times as you want.
3) Inside the bookstore, push the left cash register to unlock a shelf containing 2x Large Medkit.
4) Inside the arcade room, press on that gray door and go downstairs into a very dark arcade room guarded by two pig cops. Inside, you can find a Pistol and 2x Atomic Health.

Unofficial:
-Get the Jetpack mentioned above (or use the one you got from the first level), go inside the club and fly with the Jetpack inside a vent to collect 2x Atomic Health and Portable Medkit.
Attached Image: FM1X03_1.pngAttached Image: FM1X03_2.pngAttached Image: FM1X03_3.pngpng]

Sewer Confines

Kills: 84 (88 in Normal Exit)
Secrets: 6

This map is mostly inspired by Sewer (one of Levelord's cut maps). Note that the map is very dark, so you are encouraged to use the NVGs when navigating and spotting the enemies in the dark.

Hint: To safely jump on those moving platforms, you need to shoot some switches with your pistol to create some extra platforms (those are safe to stand on). Be careful of those moving platforms, as they can squish you even in air and even the monsters can get squished which can prevent you from getting all the kills (at least in DOS version and older EDuke32 versions), not that kills are important on DIG difficulty and the fact four kills are inaccessible if going on the secret exit path. If you want to easily complete the puzzle, use the Jetpack (acquired in the previous levels) to fly over the platforms.

Secrets:
1) Inside the control room, before getting the Blue Card, open the middle panel and jump inside to collect Portable Medkit.
2) Right where you pick up the Shrinker, crouch and press on a hidden switch to temporary lower the panel ahead, which contains 2x Shrinker ammo.
3) Shortly afterwards, you will get to those weird moving platforms that you need to jump on top of them. Before you do that, turn around and press on the brightened wall to access a secret room containing RPG, Steroids and a Multi-Switch to open those lockers (only one can be opened at a time) that contain various goodies.
4) After doing the platforming sequence, you will step on some block that will cause an explosion in the middle of the map. Jump through the nearby bright wall in your right to collect a Holoduke.
5) Right where you find the Red Card, press on the wall behind it to reveal the secret exit room with two troopers guarding it. You can also find a Freezethrower inside.
6) After using the Red Card to unlock the elevator and riding it up, kill the Pig Cops and press on the Fire Extinguisher sign. This will open a nearby secret that contains a Commander, as well as 2x Trip Mines (weapon) and a box of Pipebombs.

Secret Exit: See Secret #5

Note: It is impossible to achieve 100% kills if going for the secret exit. The reason is that the normal exit ends in the same type of sector as the one from Red Light District, with Duke getting captured by FOUR Pig Cops.
If pistol starting and going for maximum kills and secrets, then going for the normal exit is the better solution. But if playing continuously, then it is recommended to take the secret exit at the cost of not getting the four kills.
If playing on Damn I'm Good difficulty, you don't have to worry about missing kills since the Enemies Left counter reads N/A at the results screen.
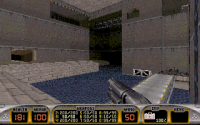
Attached Image: FM1X04_1.pngAttached Image: FM1X04_2.pngAttached Image: FM1X04_3.pngpng]

Launch Center

Kills: 83
Secrets: 6

This map is mainly inspired by Launch Facility. There are some tricky puzzles to solve and the Blue Card requires you to be quick to get it but you should be able to find your way in the level. Once you destroy the rocket, you go back to the beginning, find a blown up wall, get rid of one or more Octabrains and the exit will be there.

Secrets:
1) In the main corridor at beginning of the map, go left and press on the wall to reveal a small room guarded by an Enforcer. Inside, you will find Devastator Ammo.
2) In the main corridor at beginning of the map, go at the opposite side and press on the wall to reveal a small room guarded by a Pig Cop. Inside, you will find Freezethrower.
3) Inside the vents, there are various slimers and eggs. Get rid of them and break the vent from one of the sides with your kicks, you will find an Atomic Health standing on some vents. This will also spawn two slimers nearby. Be very careful to not break those vents where the item is standing, as you will fall to your death and not even the Jetpack will let you escape because Duke won't fit through the vent anymore!
4) Inside the control room, where you press a switch to go quickly reach the Blue Card, press on the wall in the right to collect an Atomic Health.
5) After deactivating the OFFICERS forcefield, take out the Mini Battlelord and open the door, then solve a 4-button puzzle. Press on the picture to reveal a Chaingun Cannon.
6) After deactivating the REACTOR CORE forcefield, take out the Mini Battlelord and open the door, then solve a 4-button puzzle. Press on the picture to reveal a Shrinker.
Attached Image: FM1X06_1.pngAttached Image: FM1X06_2.pngAttached Image: FM1X06_3.pngpng]

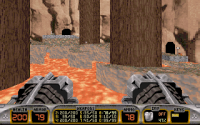
The Lava Reef

Kills: 15 (I'm guessing about 270 in total)
Secrets: 13

This map is mainly inspired by The Abyss, basically a bigger and meaner version of E1L5 with lots of epic battles that await towards the end. In fact, there's tons of enemies that the original DOS version has trouble counting when the kill count exceeds 255. And it's not the only level to contain this amount of enemies (there's at least two more in FM2X and possibly FM3X as well that exceed 255 enemies).

Interestingly, Duke doesn't lose his arsenal if he got captured previously by Pig Cops at end of FM1X04 (similar to how first level ended and second level started in Duke Caribbean), making me think canonically Duke takes the secret exit and avoids the ambush at end of FM1X04.

For completionists, I must point out that when entering Battlelord's lair, there is NO WAY BACK to the canyon areas of the level, so keep that in mind! Even the platforming part just before cannot be backtracked unless having a Jetpack to go back to the main canyon area. And this map also contains 13 SECRETS! They are all located before entering Battlelord's lair, so make sure you have found every secret in advance (in DOS version you have to double check if you got every secret due to lack of in-game stats).

Once you are ready, you have to clear two big rooms filled with many baddies, mostly Commanders and Mini Battlelords with a few other aliens thrown in the mix, as well as one room filled with many slimer eggs. Then once you insert the Red Card in the second room, you go back to the first room to see the Battlelord has spawned, as well as a couple troopers.

Also, if playing in any of the original DOS versions of Duke Nukem 3D, then as mentioned above, the kill count will be mostly glitched because there are about 270 enemies in total and once the kill count exceeds 255, then it goes back to 0. You will also not be able to tell how many enemies you missed because that counter will also be glitched (irrelevant on DIG difficulty as it reads N/A anyway on Enemies Missed). Source ports don't have this problem and will show the correct kill count.

Secrets:
1) At the very beginning, go along the water current and jump through the wall to the right to find a Portable Medkit guarded by a trooper.
2) After the lava area, there is an octabrain just before reaching the cave. Jump through the lava wall to find a secret room filled with 2x Captured Babes, Slimer Eggs and Devastator. Killing each babe will result in two Octabrains spawning nearby.
3) Inside the cave with the water fountain, jump through the waterfall to collect 2x Pipebombs.
4) In the next room, you will arrive in a cave filled with water and guarded by the first Mini Battlelord. Jump through the waterfall to collect a Scuba Gear.
5) In the same room, after taking out the Mini Battlelord, there is a box of Pipebombs. Press on the panel to reveal a small room containing 3x Trip Mines (weapon).
6) Inside the circular corridor you have to climb, just before collecting the Shrinker, there is a wall you can press that reveals an RPG.
7) Inside the room with THREE Mini Battlelords, jump through the red waterfall (on left side of the room) to collect the HoloDuke.
8) Afterwards, you will reach another circular corridor and fight a couple more enemies. The secret is activated by pressing on the fire, which will open a nearby wall. Inside, you can find Chaingun + 2x ammo, an Octabrain and two Captured Babes. Note that killing the babes will spawn a couple nearby troopers.
9) In the room filled with many troopers and Yellow Card, press on the monitor in left to reach a small room containing Armor, 2x Pistol ammo and 4x Small medkit.
10) After using the Yellow Card, jump on top of elevator and look for 2x Devastator ammo in a corner. You can also collect an Armor pickup.
11) In the room where you press the switches to blow up the canyon and reach the last part of the level, press on the right side of the monitor to reveal a nearby room containing 2x Atomic Health, as well as Freezethrower + 2x ammo.
12) Just before going downstairs leading to elevator, there is a hidden switch you can press on those pipes, which will lower the nearby wall. Inside, you can find 3x eggs, 2x Chaingun ammo and Shotgun ammo.
13) Inside the above secret, blow up the crack, then follow along the corridor to register the final secret.

Hints:
-In the room with the three mini battlelords standing on the pillars, jump on the pillars containing atomic health in order to lower those three bars.
-In the room with the many troopers present, there is one trooper corpse that holds the Yellow Card. Be sure to carefully look around, so you won't miss it.
-In the last two rooms, make sure to kill the babes to reveal switches and various goodies, including the Red Card. Just note that each babe killed will cause one or more troopers/octabrains to spawn nearby.
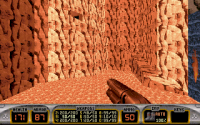
Attached Image: FM1X05_1.pngAttached Image: FM1X05_2.png
Attached Image: FM1X05_3.pngAttached Image: FM1X05_4.png

Damned Space Life

Kills: 58
Secrets: 4

This map is an unique take on Faces of Death but feels more similar to an E2 style map and can be completed, which leads to FM1X08. In order to reach this map, you have to:
-Use command line parameters to warp to the map (can also be done directly through the FM3X/FM4X launcher)
-Play it loaded as an User Map
-Use DNCLIP and go through walls in The Lava Reef to find a hidden regular Nuke Button inside the Battlelord's Lair. This should work similar to the hidden nuke button in The Abyss. Note that I have NOT tested this to confirm but I imagine the behavior should be just like the nuke button in The Abyss.

If choosing the first two options, you have to pistol start it, which might make the beginning a bit harder. It wasn't too bad even on DIG, since after killing the troopers, I rushed to find the box of Pipebombs to get rid of all corpses and afterwards it went pretty smooth.

Secrets:
1) On the first floor, kill the enforcers and between those two switches, go through the wall to collect an Atomic Health.
2) On the first floor, kill the sentry drones and between those two switches, go through the wall to collect Night Vision Goggles.
3) On the second floor, kill the sentry drones and between those three switches, go through the wall to collect RPG.
4) On the second floor, kill the enforcers and between those three switches, go through the wall to collect Freezethrower.

Hints:
-Press all the switches you come across to unlock the next areas.
-On the last floor, collect the Red Card and use it to unlock the exit.
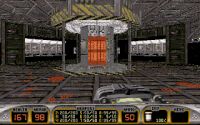
Attached Image: FM1X07_1.pngAttached Image: FM1X07_2.png

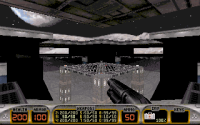
User Map

This map is obviously inspired by User Map (E1L8) but it is bigger and is made for Dukematch. The map can also be reached by finishing Damned Space Life (FM1X07).
Attached Image: FM1X08.png

ClipArt Gallery

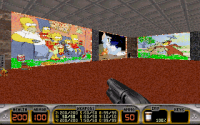
An original map for Dukematch with a couple rooms containing a bunch of pictures from Fernando's family members, pets, as well as various cartoons, movies, music bands/singers and TV shows.

While the art style doesn't match the original Duke3d art style and the pictures would be distracting during a Dukematch game, the map is still fun to explore in Single Player and looking at the various pictures.

The funny thing is I clearly remember an older version of the map (included up until older versions of FM3X I guess) that had some different pictures showcased in some places. This can be quickly checked by playing the version available at Duke Repository for instance.
Attached Image: FM1X09.png

Spinning Rooms

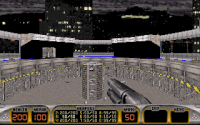
Another original map for Dukematch, with two different floors. The gimmick here being the spinning rooms that can make you a bit dizzy.

The only notable thing is grabbing the RPG on the top floor will sink the spinning sector into the ground.
Attached Image: FM1X10.png

Skyscrapers

Another original map for Dukematch, with the action taking place inside the various buildings that are inspired by the one found in L.A. Rumble.

There are two jetpacks located at the bottom and they can only be reached using the Trip Mine Glitch to negate the falling damage, then they can be safely collected and used to go back to the offices (about 25% fuel required for the trip back). Otherwise, you will die if you fall off the building.
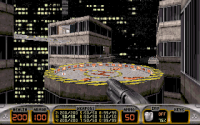
Attached Image: FM1X11.png

Overall, New York Rebellion may be a bit too similar to the original levels and some parts feel like they may have been directly copy-pasted but I still had plenty of fun revisiting this episode, as I have fond memories of the FMX series. I don't have a favorite level and I enjoyed pretty much every level in the episode, yes even Sewer Confines which is a sewer map and may be the weakest of the episode with how dark it is and being a bit confusing at times but I would still put it above the similarly themed RR map because in that one you fought against a single enemy type while easily getting lost. On FM1X04 you face multiple enemy types, you can at least tell where you are and where to go next (even if it's quite dark) and you have a great song playing in the background.

I even find Damned Space Life superior to the original Faces of Death but mostly in terms of balance because you fight various types of enemies instead of just SEVEN Mini Battlelords that have no difficulty setting applied to them! Plus the fact that FM1X07 can be finished, while the original version of E1L7 cannot be finished and I'm not counting the modified version included in Total Meltdown and World Tour (WT was released even after FM3X was already out).

When comes to the Deathmatch levels, User Map (FM1X08) is a great alternative to the original User Map (E1L8), while ClipArt Gallery (FM1X09) is interesting but feels a bit gimmicky with the custom art that you will not be able to appreciate during a match against other players or even DukeBots (if playing Atomic because DukeBots aren't supported in v1.3D), so the map is actually best experienced in Single Player. Spinning Rooms (FM1X10) definitely feels gimmicky but would probably work well with a 4-player Dukematch, while Skyscrapers (FM1X11) is the best of the exclusive Dukematch maps and would be probably the most fun of the bunch, especially with more players. Also all these DM maps contain Expander Ammo if playing in the Atomic Edition. I'm pretty sure even FM3X has the expander ammo included in the maps but doesn't cause any issues when playing the maps in Duke3D 1.3D.

I haven't mentioned the bonus map FM1X00 in my review, which is an early version of FM1X01 with a very different layout but I will save it for the end, probably if I make a separate post for the extra DM episode (including the overall conclusion) because I remember that one not being that great, as it's quite unbalanced, especially at the beginning and it's not part of the main episode, so it can only be played as an user map.

And while I'm here, I'm posting the only nomination for next month:
Merc 2 + Murder: The EDF Conspiracy + Pray Your Prayers 2000

I've got quite a busy week/month and just in case I won't make a new post on the 25th, then I might as well post this in advance, so people can start voting on the 25th. I don't have any new nominations for next month and I will most likely vote for this option which consists of three TCs from late 90s/early 2000s. I also hope to get FM2X reviewed before the weekend comes and then FM3X before the month ends.

Have a nice day everyone!

This post has been edited by FistMarine: 23 April 2024 - 05:00 AM

4

#38


Summer Beach Condo :

I remember whe I first played it, I hated the first part because of the hidden Switches in the houses. While I like the idea of every single build being explorable, I didn't like how the switches were kinda hidden. Now it's more tolerable because I have better eyes, but I still managed to miss the first one. Also, I'm not a fan of the initial area. It's a bit empty and closed off for a small condo compound like that. However it makes for some more long-range battles which I like.
The interiors are underdetailed to me, even though it's due to the more old-school aesthetics. The condos namely are a bit too cramped with the Chairs being solid.
Second Area however makes things a bit better. It's more open, I like the few Boats and the LightHouse and how you can shoot enemies from even farther. And the huge underwater area is saved by having the way forward clearly standing out. RPGing BattleLords from afar, always a plus.

Music I'm not a fan though.
In the end, I prefer this level over the previous one because it's less bland and more diverse but it's got worse music to my ears :/


Jungle Bay :

Probably my least favorite level. It's got a few good parts, like the UnderWater section and the Red Cave namely, but the problem is that it's all kinda empty and it doesn't feel like a Jungle to me. Zaxtor does these way better. My main grieves are that the Blue Key is hidden in a hidden place which, while obviously lit, can be missed. Then in the Underwater passage, there's no indication as to what the "Cannon Power" Switch did. I took me a while to see it blew up the Vent you would not necessarily go back through since you now have shortucts to go in and out.

And lastly, finding the Secret Level was a pain. While I like the idea of it being a Puzzle in the final area, with a good First Clue, the fact you actually have a second, less visible Hole to blow up isn't good IMO.
Also, why repopulate the Starting Area TWICE for no reason ? Other than to confuse you into believing there's something there now ?

Lastly, I don't like the music. Even less than the previous one X__X
3

User is offline   Aleks 

#39

View PostFistMarine, on 23 April 2024 - 04:45 AM, said:

Hey everyone, thank you for your comments so far! Glad to see this topic active with many people participating. I wish I had joined earlier but my grandmother passed away two weeks ago, so I really wasn't in the mood of playing/reviewing maps for a while. TheDragonLiner knows about that because we were talking about FMX series and Oblivion TC at that time and I let him know when that happened. RIP Grandma. :(

Sorry to hear that, man. I hope you are doing OK.

View PostTheDragonLiner, on 23 April 2024 - 09:02 AM, said:

Probably my least favorite level.

Had to read this one twice to make sure I get it correctly, but seems The Dragon Liner has a completely different taste when it comes to these levels than me :P

Anyway, played two more:

Loopy Shelter
This is Tier Drops in the jungle and amongst a lot of other stuff. The level doesn't have a central theme, we visit some hi-tech facility in the jungle that takes us to various different areas, but really seems to be just all over the place with lots of puzzles to solve. The combat can be quite challenging at parts, there's also the shrinker shooting through the whole hi-tech corridor which can lead to funny situations with the respawning monsters. The design, however, is a mixed bag. I appreciate the SOS in the Tier Drops part (although finding one of the switches in the huge stone bricks part took me a while, but the puzzle in itself were clear), but the other parts don't seem to be really all that planned at all. The dungeon part might be interesting due to using rather rare set of textures. The map started to drag a bit on me towards the end, but I still enjoyed some parts of it.

Rating: 77/100

Ghost House
A very competent haunted house level, this time the darkness at least serves some purpose. I appreciate all the horror tropes like the jumpscare with cycloid emperor, secret behind the mirror in one of the bathrooms, clicking sound around the kitchen/woods and how the design serves the theme. The house might be a bit cramped, but I've had so much fun just throwing pipebombs into the windows (especially on the upper floor, above the forest canopies) and blowing all the monsters inside (which backfired once, as there was a trapped babe that spawned a battlelord behind my back upon killing her). The design is genuinely good, sure this is not the Red series, but does the theme justice without dragging at all and has some interesting takes on the areas. The layout is pretty clever and impressive with how the SOS is implemented and having actual two floors to visit, the swimming pool part had quite an ambitious design and surprisingly well fit the theme. One of the better levels. The music is just perfect. So far the 3rd episode is definitely my favourite.

Rating: 91/100

Also, where the hell is Quacken?! :D
3

#40

Ghost House review is partially out of memory due to having lost part of the text to a strange glitch. We had to turn off the power, and despite my review being saved and closed, it still managed to loose part of its content, as well as the whole review for the level after.


Loopy Shelter :

3D Movie Maker music O_o ?
Shooting at an Extinguisher from the outside in order to get inside ? Now that's something I've never seen before. However we quickly hit a first roadblock with the First Puzzle. I admit I had to look up the Hint List on this one. That first Switch is just way too well hidden, and it's not even easy to use either !

I like the idea of the Falling Switch Shoot Puzzle, but it's tedious, at least we're rewarded with a good fight against a bunch of well seated enemies in a well designed room.
I also kinda liked the area with the tiny house and then getting inside makes it look bigger. Kinda too big too but I like it when senses of scale are off-put like that. The other area I liked was the small puzzle in the "Tier Drops" inspired thing. We don't see enough of those IMO.

Final area was basically the same as Start but harder. In the end, I liked the level namely for its being designed around a series of puzzles and a central corridor you progressively go through with Shrinker Blasts. The only puzzle I didn't like was the First due to its Switch.
Music I'm okay with. Odd choice but surprisingly fitting.


Ghost House :

A level I remember. Now I'm not a fan of those kinds of level because the Horror is only aesthetic and it doesn't add anything IMO. Especially when there's lots of enemies that are clearly present ahead of time. However the design of the house and the horror aspects are on point. Even the Pool area feels nice. And a lot of opportunities for using 4th, 7th and 0th weapons effectively thanks to the closed areas and the wide open Pool Area.

Now truth be told, I remember being had by the Emperor """jumpscare""" back in the days, instantly shooting at it while it's just cardboard. Progression is good, the only complain I would have is the Puzzle with the Light Switches. Personally, I almost never click on any of those in my D3ND playthroughs, so why would I bother here ? The darkness doesn't bother me. I actually knew this because I accidentaly read about it in the Hint List when looking for the Secret Level exit from before. That puzzle is my only complaint in the level, it's too easily missed. Clever, but too easily missed.


Combat is fine though, as usual, enemies are placed well, there's plenty of opportunities for 7th and 0th weapon, also some 8th with the Pool area.

As for the music, it works fine for the atmosphere, but I don't like the constant sound.
4

User is offline   NightFright 

  • The Truth is in here

#41

For anyone wondering which version of FM4X is included in the latest Addon Compilation:
Fernando added a Dukematch episode in Nov 2020. AFAIK this was the last time he updated it. This version is the one I'm using. Side note: He had also asked me to revert my remapping of the soundtrack, which I did.
3

User is offline   Aleks 

#42

View PostTheDragonLiner, on 24 April 2024 - 09:18 AM, said:

I like the idea of the Falling Switch Shoot Puzzle, but it's tedious, at least we're rewarded with a good fight against a bunch of well seated enemies in a well designed room.

I've just used the jetpack to hover and shoot the switches there at once, I realised what's the drill and appreciated the idea, but imagined it's gonna be tedious as all hell, especially with the original DN3D rendering "glitch" that prevails in Rednukem where fall SE7 blinks the other floor for a bit before you are actually transferred to it.

Quote

Progression is good, the only complain I would have is the Puzzle with the Light Switches. Personally, I almost never click on any of those in my D3ND playthroughs, so why would I bother here ? The darkness doesn't bother me. I actually knew this because I accidentaly read about it in the Hint List when looking for the Secret Level exit from before. That puzzle is my only complaint in the level, it's too easily missed. Clever, but too easily missed.

Hmmm I've had no idea there was any puzzle related to the lightswitches, I just clicked them and noticed the monsters appeared, but to be honest, never made the connection with this opening anything :D

Crescent Inn
This level is pretty fast paced and I can't complain about the combat and progression, but theme-wise it's just such a drop from the clever, fresh and original couple of levels that it's a bit of a letdown. At first we see a nice view of a cannon with waterfalls and buildings on both sides, so I hoped at some point I would traverse it, but it turns out the whole level takes place in a single building, the hotel - there's of course some action coming from the outside, but it just seems like an underused potential for something way cooler. It's even worse that falling down, the water/lake in the chasm is "fake" without the water lotag, so would kill Duke on impact. I've also died once more - got squished by a swing door leading to a secret that opened the wrong way, this didn't happen to me in a long time, the setup kinda sucks because this is a secret, so the player isn't aware at first that this particular piece of furniture actually opens... Now the progression here is straightforward as can be, with cards just serving as minor stops. Even all of the 9 secret places are kinda pedestrian and can be collected along the way. The layout uses pretty elaborate SOS with multiple floors layered upon each other, but since it's all enclosed and connected with elevators, you don't really get to notice and appreciate it while in game. The design is a bit dull, there are the strong contrasting shadows - a trademark of Fernando - but it all feels kinda generic and procedural, like a competently made, albeit pre-2000 user map. There's even the facade with windows texture used as a "wallpaper" on the 3rd floor, which looks very amateurish. The combat is fine though - there are some tougher fights with multiple enemies and generally there's always plenty of stuff to keep you busy while progressing, so at least there's that. Only the backspawn of enforcers while entering the men's bathroom on the 2nd floor felt kinda out of place.

Rating: 79/100

This post has been edited by Aleks: 25 April 2024 - 03:45 AM

3

#43

Crescent Inn is also out of memory as I had lost the whole text because of the power cut thing.

About the Switch Falling Puzzle, I used the JetPack too after having made only 1 attempt ^^ Doesn't require any more attempt to understand it's tedious. Still a creative idea !

Crescent Inn :

Looks more like a full on Hotel than an Inn to me O_o The outside area is quite empty IMO, but the real deal of the level is the hotel and to be honest I liked it. I like the idea of going up floor after floor and every one of them has unique aspects to them. Though I find questionable how the rooms have openable windows to the inside ...
My places were the Library, Arcade and Bar Areas. With an honorable mention for the Karaoke area. Combat was better than usual to me. Would you believe that I used ALL 13 TripMines I had at my disposal ? And would you believe that I emptied the FreezeThrower TWICE !? And I also loved using the Devastator in the Arcade and Karaoke.

To sum it up, this level made me use a bit of everything and that's great. The only downside is the spawning of enemies outside. They often hover down to the ground and it makes them harder to hit, though I got lucky. Also, the Commanders never managed to shoot at me due to hovering down.

Music I liked it, though not my style.
A solid level nevertheless. It's basically a "Hotel Hell" map, but with its own identity.


Knock-Out Factory :

I'm not a fan of the music however it definitely is a Final Level Music to me ! And it's a very good level too. The design and aesthetics of the Factory are well laid out and detailed. Progression is seemless and I like how you can approach certain areas from 2 angles. I especially liked the Reactor Room with the Yellow Pillars, it reminded me of "Critical Mass" but less eerie. However hiding a PigCop behind the Door was Oblivion stuff to me >_>

Crane Room was forgettable, however the Final Room was a good finisher. Being able to tackle it from 2 angles, and good enemy placements, yet another good fight to finish it off.
In the end my favorite areas were the Central Hub, the Reactor Room and the Final Room. I wish I could say more but it's hard when everything clicks so well together !

Might be my favorite level of the Episode, and one of my favorites of the whole game.
What ? It's not the final level ? It felt so much like one >.<
4

User is offline   Aleks 

#44

Knock-Out Factory
These last few levels are longer, so I don't play more than one per day - hence separate posts for each one. Knock-Out Factory is surprisingly good and the industrial theme feels somewhat fresh, here mixed with some nice puzzles. The level is pretty dark, but not to the point where this becomes an issue and seems there are less breakable lights, so farting in a room won't result in everything going pitch black as in some of the earlier levels. The layout of the level, with plenty of interconnected SOS layers and flights of stairs going left, right and diagonal, is definitely a forte - the level seems huge, but at the same time traversing between any two places is really fast. The combat is solid, with the final battle being actually challenging (and partially due to completely invisible commanders located in such a place that projectiles would just travel through them). The first battlelord that guards the yellow key IIRC also caught me by surprise at first. I didn't use tripmines because they're too slow, but similarly to The Dragon Liner, used most guns in my arsenal in this map. My favourite part was obviously the shrinker-mirror puzzle, not sure if it's the first use of this mechanic (but definitely not the last one - Mister Sinister did similar puzzles in Naked Dash, Lezing also used it in one of his maps and I made something similar but with a rocket in the final Conundrum level) and it is presented perfectly clear for the player. Moreover, there's a second layer to this puzzle, as it can also unlock the way to the secret exit. The regular exit will have Duke captured by the pigs yet again and this time they will dispatch him of his guns, but the secret exit is a neat train station guarded by a battlelord. In general, the 10 secrets along the way were pretty easy/natural to find, besides the secret exit (that required two secret places to access, in fact), my favourite one was the pipe with a jetpack inside, both considering the mechanic and how it was hinted. The level has some verticality in the fights and applied with a sense (I had similar feeling as TDL regarding the commanders and sentry drones besides the windows in Crescent Inn hovering down, but this time there are some more notable fights between levels, especially in the area with the turbine). The design itself is pretty strong too, with plenty of gradual lights and some fancy spritework machines.

Rating: 89/100
3

User is offline   NightFright 

  • The Truth is in here

#45

A fair warning, btw: Since I have recently played FM4X by myself - you will run into serious issues in ep.3 due to broken Shrinker behavior with recent EDuke32 snapshots. No idea which is the last build which is able to run this properly, but it may be good to find out while you are at it to get this addressed.
2

#46


Coliseum :

Real Final Level. Right off the bat, I hate the music >_< Other than that, I liked the Excape Sequence. The interior is well made and detailed, a small clever secret and decent combat without and with Pistol.

Took me a minute to figure out you had to destroy the X on the ground, though it was pretty obvious in the end :/ First Area I explored was the mistake. The Huge Maw in the wall looked nice and intimidating somehow. However once it's open, I had to pull off some strategic moves. Set the HoloDuke on the Left Ledge, make it back to the beginning, use all 10 RPG shots towards the BattleLord, making sure it doesn't hit anything else. Then empty Pistol on enemies, use SG to finish them off alongside the BattleLords 1 shot each. Once inside, wait for the Flying Troopers to come near you so you might recover some Pistol Ammo. I wasn't lucky enough to get the ChainGun early on the Enforcers.

Tough but stimulating. Second Area was much easier, I think this is the one I should have done first. Still cool to see we can do them both in whatever order. Second Area was much less interesting though. Fancy looking door opening, never seen that before. Final Area looks interesting but pretty empty in the end. I suddenly remember being stuck because of not seeing the Buttons on the Pillars before I saw Turrets Shooting me. It was the same this time but I spotted the shots very early because I was inspecting more cautiously due to not having tons of ammo.
Emperor Fight is ... an Emperor Fight >_> Only made harder by the surrounding area making Blast Damage extremely easy to recieve, and it's also smaller than normal.

A good final level. Not the best in design, but frantic combat, the first area made me improvice some strategy for once and I like the build up. Would have been even better had I done it in the correct order ... Hate the music though.


In the end, I will rank the episodes as Ep2 being the best, and Ep1 being the weakest.
3

User is offline   NightFright 

  • The Truth is in here

#47

Frankly spoken, Fernando's music choices are mostly... debatable, let's put it like that. For my taste, the MIDIs are too generic and sound more like some random collection one would expect to find on Windows 3.11 PCs in the late 90s. Maybe that was the idea. Sadly, it doesn't do the levels justice. Most of them have their atmosphere changed or, in the worst case, even ruined, with the assigned tracks. Often too happy, too hectic or even annoying.

It's a different experience with the standard Duke3D soundtrack, which is why I had it there as an option in the compilation. However, Fernando was against it, which is a wish I had to respect, of course.
1

User is offline   Aleks 

#48

Finished here as well!

University
This one was bit of a mixed bag. It's very straightforward and competent, sells the place nicely, but at the same time has extremely generic design and layout, which is symmetrical in most places so a lot of the areas are copied around the map without any changes at all besides maybe mirroring them or changing some goodies inside. The combat is pretty entertaining, along with the general design, the whole level could pass as a Duke It Out in DC map, perhaps mostly similar to Nuked Files. I like the finale though - first we get the interesting effect of the fountain opening to reveal a secret research base, then we have the "star shield" thing that is so rarely used you almost never see it around in the levels, but the code is seemingly there, so it looks pretty effective. Finally, we get some tough fights at the end against the battlelords with their minions, but since the next level will dispatch you of any weapons anyway, you are pretty much free to just go "overkill" mode on the stuff here, especially in the final room where you are trapped anyway. Feels a bit like a breather between two rather hardcore levels.

Rating: 82/100 (extra points for the final area)

Coliseum
Now we're talking! This is the best boss level in this episode, which is intensive and oppressive right from the start and even the Cycloid fight here works better than usual, despite the super "classic" surroundings. I assume the stadium is just put there so that the cutscene at the end makes sense, because otherwise it looks a bit ridiculous given the rest of the map... The design of the alien ship where we start is really impressive and original, might be one of my favourite structures in the whole FMX so far. It quickly sets the tone for the level too - we start without guns and are first given only a holoduke, which I found pretty useless because the first few troopers were easy enough to kick to death before getting the pistol. The ammo is still stingy throughout the map, I was lucky to get a shotgun from one of the pig cops early on then a chaingun from an enforcer before finding the "official" one (which wasn't so obvious BTW). The "puzzle" with blowing the Xs was pretty obvious, but I liked the way it opened up the map in two directions. I visited the "maw" part 2nd and started with the other one (BTW, what's the official way of getting to the secret place in the "maw" section? Simply falling down there would kill Duke, I suppose you can come back with the jetpack you get later on, personally I used the tripmine wall-hanging trick to soften the fall, but not sure if there's another way). The combat is pretty challenging, but this is mostly due to the limited ammo supply, especially for the pistol which works well for sniping the enemies across the rivers of lava. I loved the way how the final area opens up, with a sequence of bridges (could be slide doors, would look more elegant to be honest) opening one by one. The turret/pillar puzzles were obvious enough IMO, then the final fight is easier due to the Duff Beer dirigible spamming the area with goodies. Cycloid minions make this fight just a tiny bit longer/more tricky, as you have to watch for the rockets while focusing on killing something else. I didn't mind the music, it was pretty ominous and worked well to build up the tension.

Rating: 87/100

In my opinion, the 3rd episode was by far the best out of the three so far, even if E2 had some interesting stuff going on in some of the later levels. Basically from the 3rd level, this one became original and nicely designed, with lots of cool ideas stuffed in. As for the music, I liked it in general in this whole mod, it obviously wasn't on par with the original DN3D music or that from Duke Caribbean, but it was better than in most of the user-made mods besides some classics like The Gate. Even the more upbeat tracks worked fine with how abstract some of the puzzles seemed anyway, as in this was clearly all done as a "video game" and not pretended to be super realistic.

 FistMarine, on 23 April 2024 - 04:45 AM, said:

And while I'm here, I'm posting the only nomination for next month:
Merc 2 + Murder: The EDF Conspiracy + Pray Your Prayers 2000

I've got quite a busy week/month and just in case I won't make a new post on the 25th, then I might as well post this in advance, so people can start voting on the 25th. I don't have any new nominations for next month and I will most likely vote for this option which consists of three TCs from late 90s/early 2000s. I also hope to get FM2X reviewed before the weekend comes and then FM3X before the month ends.

I know I proposed these 3 mods myself and wouldn't mind if they get chosen, but if I may, I'd give a 2nd option:
FMX 4 + levels by Forge


2

User is online   Ninety-Six 

#49

 NightFright, on 26 April 2024 - 02:07 PM, said:

Frankly spoken, Fernando's music choices are mostly... debatable, let's put it like that. For my taste, the MIDIs are too generic and sound more like some random collection one would expect to find on Windows 3.11 PCs in the late 90s. Maybe that was the idea. Sadly, it doesn't do the levels justice. Most of them have their atmosphere changed or, in the worst case, even ruined, with the assigned tracks. Often too happy, too hectic or even annoying.

It's a different experience with the standard Duke3D soundtrack, which is why I had it there as an option in the compilation. However, Fernando was against it, which is a wish I had to respect, of course.


I agree that the music changes the atmosphere, but I actually think it works, especially in E3 and E4 when the level themes get more creative. One of the reasons Crescent Inn is one of my favorite levels is its dreamlike atmosphere, and the music plays a decent part in that (it's also one of the more straightforward levels).

Yeah FMX is not as oppressive as the original game when it comes to its atmosphere and choice of soundtrack, but I really don't think he was aiming for it to begin with. And the few times he tries to go dark (e.g. Ghost House) the music fits well enough I think.

Plus I just plain like some of the midis picked. The one for Helicopt Road is probably my favorite.
2

User is offline   FistMarine 

#50

Quote

Sorry to hear that, man. I hope you are doing OK.

Thanks man, I'm doing better these days. In same day I wrote the previous message, I also received a message from LakiSoft who said he is also sorry for my loss. Thanks guys for the support, I really appreciate it. :thumbsup:

Quote

I know I proposed these 3 mods myself and wouldn't mind if they get chosen, but if I may, I'd give a 2nd option:
FMX 4 + levels by Forge


I appreciate the nomination but I think I will pair them separately. I was planning to pair FM4X: The Uprising with two other classic styled episodes from late 90s (not spoiling them) for later this year, plus I feel it's too soon to play the episode after just playing/finishing the first three episodes. And for Forge's maps, there were a few authors that released a couple maps each and they would get paired together for the month with maps by various authors. Basically, I'm trying to keep the nominations consistent. I'm not sure if FM4X will work well paired with Forge's maps anyway, not to mention there's only 15 maps in that nomination. So, this means I will leave FM4X for another time and change the nomination into various maps by various mappers, which also includes Forge's maps.

I have a list with various old mappers (from around 2000s) who released between 3-5 maps and see who works better paired together (or even all authors together). Some of these were actually suggestions from last year and I kept them saved in a text file. Hope this will keep everyone happy. I will vote tomorrow when I get around posting FM3X review and the conclusion if there is still time, might make the overall conclusion into a separate post with the DM episode and FM1X00 review because each episode review post is already very long. And even if I have finished with the first three episodes last week, I still have to explore the DM episode and play the bonus map FM1X00. :P

List of proposed mappers and their releases:
Alan Page -> Jailbird 2, Sewage and West Was Won.
C3PO -> Leaving L.A., Research Station, Fruit Loops, Holiday Holocaust and Shocking Twist.
Daniel Aashage -> One To Zero, Near Life Experience, We Store Your Crap!, Streets of Gotham City and The Adventures Of "Poseidon".
James Duncan -> Big Orbit, Condemned, Hostile Waters and Overkill.
Mike Beaulieu -> Bobafett, Legends and Legends 2.

Correct me if I'm missing a release from the proposed mapper(s), I used MSDN's Hot Maps list as a reference. Either way they should be 20 maps in total (24 maps with Forge's), so this would be perfect for a month. Let me know if you agree with my suggestion or not.

Also I'm sorry if the review seems rushed as of lately, don't have a lot of things to say about each map and I had trouble describing many locations of the secret places, so I hope my post isn't too confusing in the end, even if it turned out quite long (been writing for hours in a text file during the weekend, the FM3X review isn't even halfway done).

I will also post this video from Fernando Marquez himself, since this is what happened back when he was developing FM3X and making the old episodes fully vanilla compatible, you can see the results in the reactor room from FM2X06. Luckily, the level was changed/fixed, so this doesn't happen in the FM3X/FM4X releases, so you can play in vanilla without any game breaking bugs. In short, Duke3D v1.3D has stricter memory limits that lead into oddities like these happening during the game.


ORBITAL OBLIVION

SS Observatory

Kills: 67
Secrets: 4

This level is mainly inspired by Spaceport and pretty much features double the enemy count of the original E2L1. Watch out for the occasional ambushes when entering a new area, Enforcers really like spawning in your back here! Also most secrets will cause a few enemies to spawn, which seems to happen quite often in this episode. And as final hint, Shotgun is the last weapon acquired, so make use of all the weapons you acquire until that point! Though the Chaingun will be your workhorse weapon in this level.

Secrets:
1) At the beginning, just as you go in the next room and kill the troopers, press on those panels to access a hidden room containing Portable Medkit. Note that this will spawn three Troopers outside.
2) Near the door requiring blue card, there is a darkened wall that can be opened. Inside you can find Jetpack, Holoduke and Devastator. Note that this will spawn an Enforcer nearby.
3) In the nearby room, jump through a darkened wall to enter a vent leading to Shrinker. Note that this will spawn three Troopers outside.
4) After taking the elevator to the last floor, near the pillar where you deactivate forcefield, look up for a hidden switch and shoot it. Then quickly run and fly inside the pillar to collect Steroids, Large Medkit and Armor.
Attached Image: FM2X01_1.pngAttached Image: FM2X01_2.pngAttached Image: FM2X01_3.pngpng]

Intercommunication

Kills: 81
Secrets: 4

This level is mainly inspired by both Incubator and Warp Factor. Once again, the enemy spawns can be quite annoying.

Fun fact: in older versions, if you didn't collect the Red Card, you became softlocked. In newer versions, there is now a teleporter to send you back to that room in case you missed the card when you dropped down the vent.

Secrets:
1) At the beginning, kill the troopers and press on the monitor showing the Earth. It will open the panel in the middle of the room which leads to a vent with a Holoduke and a flooded room filled with a couple ammo pickups. It will also spawn two troopers.
2) Inside the Star Trek room, press on the keyboard situated between the Blue & Green arrows to reveal the secret containing Portable Medkit.
3) In one of the rooms with switch puzzles (the one guarded by a commander and four drones), crouch and go through a fake wall to collect 3x Trip Mine (weapon). This will also spawn two troopers nearby.
4) In the room where you find the Red & Yellow card slots, press in the middle of the monitors to unlock two vents in the earlier room that contained a Mini Battlelord. Go behind the large medkits to find the vent, which leads to an infested room with eggs and slimers. You will find a box of Pipebombs, NVGs, Atomic Health. Three enforcers will also spawn outside.

Unofficial:
-Just before the doors requiring Blue Card, you should see a big crack on the wall in front of you. Blow it up to reveal a Shrinker.
Attached Image: FM2X02_1.pngAttached Image: FM2X02_2.pngAttached Image: FM2X02_3.pngpng]

GnuStella Network

Kills: 98
Secrets: 7

Funny and weird name, that's for sure. Even back in 2010 or so, when I first played FM1X and FM2X, I found this map's name strange.

As for the map, it doesn't seem directly inspired by the original E2 maps but does have a bit of Lunar Reactor vibes (at least one or two areas). Just be careful with the explosions, since this map features plenty of them.

It can be a bit difficult and confusing at times (the pillar puzzle for example) but when you understand the progression, it feels satisfying when you complete the level.

Fun fact: in older versions of the map (FM2X and possibly the initial FM3X release), there were a few differences:
-A secret (contains the Portable Medkit) was one time only. If you didn't get it when it opened, you couldn't access it again. Luckily, it was changed in later versions to be accessed again if you miss your chance.
-Shortly afterwards, that pillar puzzle worked differently, you had to blow it up and shoot a revealed switch and also get out of the room before you get blown up. Now all you have to do is simply blow up that pillar with a pipebomb and press the revealed switch in the other room.
-Inside the secret area with two atomic health, there was either a dead DoomGuy or hanging monk. But in newer versions, it is the unused Organic Turret enemy and gives you a sound error when you approach it (see screenshot). It can be killed with explosives at least, though I don't know if it counts as an enemy and/or adds to kills.

Secrets:
1) At the entrance to REACTOR CORE, press on the broken water fountain to lower the ground, which leads to a Shrinker. This will spawn two troopers nearby.
2) Afterwards, approach the computers room (near the blue card slot) and look for a crack on one of the monitors. Blow it up to access a room containing 2x Atomic Health and a hanged ORGANIC TURRET (unused duke3d enemy).
3) At the start, behind room 2, destroy the sentry drone and press on the computer to reveal a nearby teleporter. Taking it leads to a Devastator. This will also spawn two Octabrains near the beginning.
4) Inside the dark vents, you can find some Boots.
5) When approaching the infamous room where you must shoot a switch on a pillar which causes many explosions, turn around and quickly run to the temporary opened secret containing a Portable Medkit. In past versions, this was a ONE TIME ONLY secret but luckily, in newer versions of FM3X (and all versions of FM4X), this secret can be opened as many times as you want.
6) Inside the dark vents, kill a slimer and press on the wall to access a teleporter which will take you to a box of Pipebombs. This will cause nothing to spawn because nothing is attached to tag 992.
7) After the big doors have opened which lead to a large room filled with slime, collect the Scuba Gear.

Unofficial:
-Inside the vents, you can find a Freezethrower and Portable Medkit.
Attached Image: FM2X03_1.pngAttached Image: FM2X03_2.pngAttached Image: FM2X03_3.pngpng]

Optical Demounter

Kills: 100
Secrets: 6

Another interesting map with a few parts inspired by Tiberius Station and Lunar Reactor. Some secrets are quite tricky to find.

Fun fact: in older versions, there were some unfair explosions right at the beginning when going to grab the two Pipebombs in the orange corridor. Or maybe there was a separate trapped corridor that contained the RPG and it was taken out entirely, as that door has an OUT OF ORDER sign on it.

Secrets:
1) Inside the big room guarded by troopers and enforcers, there is a well hidden switch that you must shoot. It is located near the entrance and you have to look up to see it. Shoot it to lower the ground and access a corridor containing Freezethrower + 2x ammo.
2) Inside the room containing a Shrinker and Red Card slot, look for a switch hidden inside a locker which contains Steroids. Press/Shoot the switch, to access a room containing Portable Medkit and Pistol + 2x ammo. This will spawn three Troopers.
3) Inside the bathroom infested with Octabrains, go to the mirror, then turn around and look up for a switch. Shoot it to rotate the sector and arrive in a dark corridor containing NVGs. Watch out for the explosions! And as if that wasn't enough, two more Octabrains will spawn inside the bathroom.
4) Inside the room you get ambushed by three drones, press on a nearby wall which leads to a room containing a Devastator guarded by a Trooper.
5) Inside secret #4, go further to reach a room containing Chaingun + 2x ammo. Note that this will spawn three Enforcers.
6) Inside the collapsing corridor, go further until you reach a room guarded by Octabrains. Press on a switch to call the elevator, then go down and you will reach a corridor containing a Shrinker. Fall down in the trash compactor and quickly go through the vent to collect a Jetpack.
Attached Image: FM2X04_1.pngAttached Image: FM2X04_2.pngAttached Image: FM2X04_3.pngpng]

Alpha Core

Kills: 141
Secrets: 6

A map that isn't directly inspired by any E2 map and feels quite oversized at times. It is also a bit confusing at times but provides some pretty good gameplay and has some interesting things going on.

Secrets:
1) Very late into the map, when pressing a switch to disable forcefields, there is an Armor pickup in the corner of the room. Press on the wall to reveal a secret room containing a Portable Medkit. Note that it will cause one Trooper to spawn.
2) At the beginning parts, there is one room with a couple troopers. Press on the shelf to reveal a secret room containing an Atomic Health. This will cause two Troopers to spawn.
3) After taking the big elevator in the middle of the map, you will arrive in the room with a green forcefield (at the other side you can find the first secret). Jump on the shelf in the right and go through the vents until you reach a box of Pipebombs. However, this will cause two Enforcers to spawn.
4) Just before reaching the corridor leading to the normal exit, there is a Mini Battlelord. Take him out and press on the wall to find a secret room with 2x Atomic Health and the Secret Exit!
5) At the beginning, just as you are climbing on stairs and picking up a Shrinker, there is a blooded wall you can press, which lets you access a small secret room containing a box of Pipebombs! However, this will cause two Troopers to spawn.
6) In the area with THREE Mini Battlelords, go behind Door 2 to find a secret room containing a switch. The switch lowers the nearby ledge containing 3x Trip Mines (weapon).

Secret Exit: See Secret #4.

Hint: THREE Enforcers will spawn behind you when approaching normal exit, so be careful, especially if you are going for 100% completion.
Attached Image: FM2X05_1.pngAttached Image: FM2X05_2.pngAttached Image: FM2X05_3.pngpng]

Cycling Perimeter

Kills: 62
Secrets: 2

This map seems inspired a bit by Lunatic Fringe and it is quite short. It has some good stuff going on and the two secrets you can find are quite clever. The last couple fights are also pretty interesting.

I'm pretty sure in an older version of the map, you could blow up some crack on the stairs but that doesn't seem to be the case anymore in newer versions. Not sure if there was any benefit in doing that, probably get extra ammo or whatever.

Secrets:
1) At the very beginning, in one of the corners, you will see a bloody wall. Go through the wall to find an Atomic Health and a vent you have to fall through until you reach a platform containing Armor and Jetpack. Note that FIVE Sentry Drones will spawn but they will most likely blow themselves up when they approach you. Use the Jetpack to go back up and resume your mission.
2) At the very end, when you go into the small white room and press a switch to unlock the exit, press on one of the monitors to reveal an elevator that sends you into the ground. You will find an alien infested room with babes and slimer eggs. You can find Shrinker, Chaingun ammo and RPG ammo. Killing the babes cause Drones/Octabrains to spawn.
Attached Image: FM2X10_1.pngAttached Image: FM2X10_2.pngAttached Image: FM2X10_3.pngpng]

Lunar Crossroads

Kills: 5 (I'm guessing about 260 in total)
Secrets: 10

This is probably one of the most memorable maps from the episode. It was definitely present in Attrition mod at least (possibly in DNWMD as well, though I never played that mod). It is very much inspired by Dark Side with the trains from Rabid Transit.

It is also the longest map in the episode and can easily take you over an hour to complete especially if you take your time to explore, plus there's even more than 255 enemies if you look in the whole map, so people playing in vanilla won't be able to tell their exact time and kill count. :P

There were a few confusing bits but nothing too bad. Oh and those two sentry drones at start are annoying, though not any worse than the four ones you find at start of Warp Factor. Surprising that this map runs flawlessly in Duke3D v1.3D, if we count the FM3X/FM4X releases and not whatever older version is showcased in Fernando's video above.

Secrets:
1) At the very beginning, press on the broken Cola machine to reveal a secret containing Shrinker. Grabbing the weapon will cause two Troopers to spawn into the room.
2) When you reach the room with two tubes, a box of Pipebombs and Boots, there is a hole on the ceiling where you have to throw a pipebomb to detonate it on the other side of the wall. When done successfully, you will reveal a room containing 2x Atomic Healths. Grabbing the goodies will spawn three Troopers nearby.
3) Behind SERVICE ACCESS 01 door you unlock at some point, at the end of the corridor there is one door. In the right side, there is a wall you can open that reveals an elevator which leads to a secret room. Inside, you can find a Shotgun, Portable Medkit and Atomic Health. Two Troopers will also spawn nearby.
4) In the room with trip mines and Yellow Card, there is an elevator you can take which leads to a secret room with a Portable Medkit and 2x Freezethrower ammo at the end of the corridor. However, this will cause two Troopers to spawn nearby.
5) When destroying the reactor to cause earthquake and let you reach three switches that you need to turn off, you can go behind the wall and collect Holoduke. This will cause four Sentry Drones to spawn in the large area.
6) After disabling the forcefields and reaching the second subway, there is a crack on the vent, which needs to be blown up to access 3x Pipebombs. This will cause two Sentry Drones to spawn in the room.
7) Before reaching the large room containing the Red Card, look up to find a hidden switch placed on the vent. Shoot it to reveal a teleporter, which will lead into a secret room containing 2x Small Medkit, 2x Trip Mines (weapon) and Pistol. However, two Troopers will spawn in the room.
8) Near the Nuke Button, go through one of the sides to collect a box of Pipebombs. However, two Troopers will spawn in the room.
9) Inside those rooms with acid where you encounter Mini Battlelords, there is a wall you can open which contains an Atomic Health and a switch-operated elevator.
10) When going through those vents infested with slimers near beginning, there is a place that contains 2x Pipebombs and spawn two Troopers into the room with the tubes.
Attached Image: FM2X06_1.pngAttached Image: FM2X06_2.pngAttached Image: FM2X06_3.pngpng]

Terran Moonshaft

Kills: 105
Secrets: 7

Another pretty original level with creative Pipebomb puzzles at the beginning where you throw a pipebomb on the conveyor and wait until it reaches the canisters to detonate it. I'm pretty sure you had to do this twice in older versions of the map but in newer FM3X/FM4X versions, you just need to do this once.

The only thing I don't like is killing one babe in the alien room results in a Mini Battlelord spawning nearby, which can be instant death if you were shrinking and squishing the babes. :D

I know the original game had Mini Battlelords spawning in Tier Drops but still, my point still stands, especially as the other Babes in the room spawn Octabrains.

Secrets:
1) At the beginning, after solving the Pipebomb puzzle, shoot at the target on the Earth monitor, which will reveal a secret room behind you containing a Large Medkit, Chaingun ammo and a couple monitors. However, two Troopers will also spawn when entering the room.
2) In the room where you get ambushed by a few sentry drones, look up a crack in the wall near the Shrinker ammo. Blow up the crack to access a secret room with a Shrinker and a mirror.
3) Inside the above secret, shrink yourself and run through the tiny vent until you reach the end of it. Wait until you return to normal size to collect a couple goodies (2x Large Medkit, Chaingun ammo, RPG ammo, Devastator ammo, Freezer ammo)
4) At some point you will come across a slope and an Enforcer. Open a door to access a secret room with a box of Pipebombs and two Troopers.
5) Inside the above secret, approach the door and open it to access yet another secret room but watch out for two Troopers spawning behind you. Walk into the next room to collect a Chaingun and deal with five Slimers.
6) At the later points of the map, you will come across a 3D REALMS STUDIOS sign. Jump inside to collect an Atomic Health. You will also find an Armor pickup behind but when you grab it, three Troopers will spawn in the room.
7) Just before the exit, when going through the vent, go in the middle to find 3x Trip Mines (weapon).
Attached Image: FM2X07_1.pngAttached Image: FM2X07_2.pngAttached Image: FM2X07_3.pngpng]

Alien Fusion Tower

Kills: 112
Secrets: 5

Another original map that could have been similar to Fusion Station but ended up being the author's own take on that map. If you expected a map inspired by E2L4, you will have to look elsewhere.

Fun fact: The original release of the map (and older FM2X releases found at Dukeworld) required EDuke32, as DOS version and every other source port (such as JFDuke3D) crashed upon loading the map. Later FM2X releases (such as the one found at Duke Repository) fixed this problem and allowed the entire pack to be played in JFDuke3D at least. Starting with FM3X release, the map (and the entire package) is made fully DOS compatible.

Secrets:
1) Just as you take the ALPHA elevator and enter a room filled with troopers, take the next elevator and press on the nearby monitor to open a nearby secret room containing 2x Atomic Health and a switch that unlocks the first Secret Teleporter.
2) Right where you find the Yellow Card, there is a nearby vent that eventually leads to a Shrinker. This spawns three Slimers nearby.
3) Inside the green room where the Blue Card is dropped by the crane, blow up one crate to access NVGs.
4) Inside the reactor room, there should be a vent opened that eventually leads back to the beginning of the level.
5) Go back to the beginning and see a new section has opened, which leads to the last area and secret exit.

Secret Exit: Accessing the secret exit can be quite tricky, as you need to complete three puzzles found in three different sections (ALPHA, BETA and DELTA). Every time you complete a puzzle, a teleporter is revealed which sends you on a balcony with the switch.

Alpha: See Secret #1. When you solve the puzzle and use the teleporter, it will send you to a balcony with Devastator and a switch.
Beta: When you go underwater, fight Octabrains and activate two switches, look up a third hidden switch behind the pillar. Press it and go to the revealed teleporter (near Yellow Card room), which sends you to a balcony with RPG and a switch.
Delta: Near the Shrinker, there is a switch you can press which lowers the lift. Then you open the door and find a teleporter that sends you to a balcony with Freezethrower and a switch.

Once all three puzzles have been solved, the reactor at end of level cannot be blown up anymore and you just go back to beginning of level where the Devastator was found. Take out the Mini Battlelord and the rest enemies guarding the zone, then press the switch and enter the room to find the secret exit. Note that when entering the exit room, it is no longer possible to backtrack, so keep that in mind.
Attached Image: FM2X08_1.pngAttached Image: FM2X08_2.pngAttached Image: FM2X08_3.pngpng]

Asteroid Stronghold

Kills: 9 (I'm guessing about 264 in total)
Secrets: 6

Impressive but also very difficult and sometimes frustrating level, it feels quite miserable from a pistol start but when played continuously, it is mostly fun when you are able to use the Jetpack to navigate on those terrains near beginning. Especially when playing on DIG with Everything Respawning option, you can take advantage of that respawning Jetpack but you need to reach that room halfway through the map before you can do that. The map has some bits inspired by the original levels, such as Dark Side and Incubator.

Secrets:
1) After using the Blue Card and clearing the room of enemies, just before taking the elevators to reach two corridors remniscent of one secret area from Dark Side, press on the handprint to open a panel with a dead pig cop inside. Jump to collect 2x Pistol Ammo and a Holoduke.
2) After opening the big gate, there is a crack you can blow up. Inside, you will find a box of Pipebombs, a Pistol, a couple slimer eggs and two captured babes. Watch out for the trip mines and the enemies spawned upon killing the babes!
3) In the next room, look up a well hidden dark green switch. Press/Shoot it to reveal a dark red corridor leading to Steroids and 2x Small Medkit. This will spawn three Troopers nearby.
4) When you drop down in the small room where you collect Red Card and Jetpack to go back, there is a small wall you can press to enter a small room guarded by a trooper and a couple slimer eggs. Kill them and collect the Atomic Health but watch out for the three spawned Troopers!
5) In the Incubator-inspired room, there is a crack you can blow up. It leads to a Freezethrower but also spawns three Sentry Drones into the main room.
6) After the explosions sequence towards the end, there is a wall you can open in one of the corners. It leads to a room containing an Enforcer, a Devastator and an Atomic Health. However, two more Enforcers will appear in the other room upon claiming your rewards.
Attached Image: FM2X11_1.pngAttached Image: FM2X11_2.pngAttached Image: FM2X11_3.pngpng]

Viewport

Kills: 194
Secrets: 3

The map is mainly inspired by Overlord. Has some interesting parts, like the underwater part where you avoid trip mines. And despite the boss room being smaller, Overlord is much easier to defeat due to having cover.

Fun fact: in older versions of the map, there were no shrink ray shooters seen through the windows in the Overlord's room. They were added in newer versions of FM3X/FM4X, just like the original Duke3D had those shrink rays that could be seen inside the Overlord's room when looking at the windows.

Secrets:
1) Upon resurfacing, you will reach a small blue room containing a Pistol, 2x Small Medkits and 2x Slimers.
2) Upon resurfacing, you will reach the green room at the top, press on the big Earth monitor.
3) Pick up the Portable Medkit inside Secret #2. Note that two Troopers will spawn outside.
Attached Image: FM2X09_1.pngAttached Image: FM2X09_2.pngAttached Image: FM2X09_3.pngpng]

Overall, FM2X: Orbital Oblivion may be a bit too similar to the original Lunar Apocalypse episode but there are still plenty of good things to be found in the episode, as well as some really unique maps.

Sure, some of the issues from the first episode, such as darkness and explosions in your face are amplified in this episode, not to mention my biggest criticism is the annoying enemy spawning when reaching secret areas. Not every secret needs to spawn enemies, as it feels like you are being punished for it and unlike FM1X which toned down the enemy spawn a lot in later releases of FM3X/FM4X, it looks like FM2X didn't reduce/remove the enemy spawn from most secret areas, I'm sure they were the same in the early versions of FM2X. And while there are some confusing parts and some long maps in the package that took over an hour to complete (at least if you take your time to explore, for me FM2X06 and FM2X11 were such ones but they were also the only maps to exceed 255 kills, besides FM1X05), there is still a lot of fun to be had in the end, as the maps in general are very well designed.

Much like FM1X, I don't have a favorite level in the episode, as I pretty much enjoyed all of them, though the most annoying/frustrating level was probably Asteroid Stronghold because of the annoying navigation (at least the large terrain area), some really difficult fights and the corridor of death towards the end, which is also a point of no return, so the completionists need to be wary if they plan to thoroughly explore the map. But for the highlights of the pack, I think Terrain Moonshaft and Alien Fusion Tower stand out the most because they were also the last two maps finished when Fernando completed FM2X back in 2009 and they least resemble the original levels, so they end up more interesting and unique. That was also probably the time when Fernando stopped mimicking the original levels a bit too much (even though I had no problem playing rehashed versions of original levels), as you will see when you start playing FM3X.

Speaking of which, I hope to get FM3X reviewed tomorrow so the topic will (mostly) get wrapped up. ;)
3

User is offline   quakis 

#51

 FistMarine, on 23 April 2024 - 04:45 AM, said:

And while I'm here, I'm posting the only nomination for next month:
Merc 2 + Murder: The EDF Conspiracy + Pray Your Prayers 2000

Fingers crossed that I can free up some time next for month's DMOTD to play these, never played Merc, but I've been meaning to revisit Murder and PYP having last played them around 2003? Don't remember too much about them besides a weird habit back then where I'd force myself to complete entire campaigns in one sitting. That never faired well, I specifically remember getting lost in Murder trying to rush through later levels and then getting tired of it, so giving releases I put in that situation a proper chance is way overdue.
3

User is offline   FistMarine 

#52

Quote

I'm sure this is a trick to have FistMarine be like "Where did I miss an enemy O_o !?"

Funny because on my first playthrough when I saved in front of Nuke Button and exited, then I saw one or more enemies missed at results screen and pretty much said that. :D

Quote

Also, where the hell is Quacken?! :D

I was wondering the same, I hope he is fine. Though he still reads and upvotes our posts from what I noticed since a while ago. I only wish he finished the first episode review at the very least, really wanted to hear what he thinks about this map pack so far. ;)

Quote

Fingers crossed that I can free up some time next for month's DMOTD to play these, never played Merc, but I've been meaning to revisit Murder and PYP having last played them around 2003? Don't remember too much about them besides a weird habit back then where I'd force myself to complete entire campaigns in one sitting. That never faired well, I specifically remember getting lost in Murder trying to rush through later levels and then getting tired of it, so giving releases I put in that situation a proper chance is way overdue.

Thanks for the comment. I have never played any of those TCs before but I have read their reviews on MSDN over the years and I hope they are decent at least. And also apparently PYP was re-released in 2000 (originally was released in 1999 as a demo and featured three levels), then later it was re-released for EDuke32, though I'm not sure if by original authors or by someone who wanted to make a version compatible for source ports. I think there was even an user map made for the TC, will have to do some more research because when comes to many older TCs, there are many versions floating around. Also I don't really like rushing through a map/mod/game but sometimes I do that when I am tired of that particular map/mod/game in question or when I come back to the playthrough after a long time and just rushing through it to complete it.

Anyway, here is the long awaited FM3X: Anarchy Village review and the vote for the next month. I might make a separate "bonus" review for the DM episode and the bonus map FM1X00, probably tomorrow. But for now, it's time to wrap up the main three episodes that were the main attraction of this topic.

Before I begin, I forgot to mention earlier that the demo loop in FM3X Registered (v1.3D) completes all 3 maps (FM2X05, FM1X01, FM3X08), unlike most other recordings which end with player's death. The third demo is especially necessary to watch in order to learn the solution to access the second secret level in the third episode. So if you have the original DOS Duke3D v1.3D, give it a go. :D

ANARCHY VILLAGE

Durango Club

Kills: 192
Secrets: 8

The start of the third episode is quite tough. You have to fall down and then you will see two Commanders waiting you already. You don't have to fight them immediately and they are quite easy to avoid, so don't forget to find the box of Pipebombs underwater before you enter the club.

On this DIG playthrough with Everything Respawning, the beginning was nearly impossible (yes even with health/ammo respawning) because I missed those Pipebombs and even though I got lucky with a Chaingun dropped by an Enforcer, I had none of the later weapons to get rid of corpses and eventually died from a Pig Cop, which was quite frustrating when I got surrounded by many enemies and stuck with low health (don't think I had any armor either).

Then I restarted the level and found that box of Pipebombs, which was much needed to destroy those corpses until I found Shrinker and things started getting better. Shame that I lost that early Chaingun, had to wait until much later to get it back. Outside of this, the level isn't too difficult but it has its moments. Such as the early Devastator secret.

Secrets:
1) In the same room you find the Yellow Card guarded by pig cops, press on the shelf to reveal an 3x Trip Mine (weapon) and an Atomic Health.
2) After entering the building requiring Yellow Card, just in the room with two troopers and a Chaingun, press on the picture until you lower the shelf into the ground and reveal an Atomic Health.
3) After entering the building requiring Yellow Card, go upstairs until you notice a corner with a gap. Throw a pipebomb into the gap and then back off before detonating. Wait until the explosions are finished, so you will reach the ledge containing Freezethrower, Large Medkit and Shrinker Ammo. However, two nearby Troopers will spawn and immediately attack you.
4) After entering the building requiring Yellow Card, go upstairs until the large area leading to KTIT door. Throw a pipebomb through those windows, stand back and detonate it to access a room containing Holoduke and 2x Pistol ammo. However, this will spawn two nearby Troopers that immediately attack you.
5) When going through the vents and lowering into a control room guarded by many Pig Cops and Enforcers, there is a shelf you can move. Inside, you can find a Water Fountain and Shotgun ammo.
6) Use the Jetpack to fly until you reach a hole near the DURANGO CLUB, so you can collect 2x Pipebombs, Atomic Health and Armor. However, three Sentry Drones will spawn.
7) When navigating underwater, you should resurface to find a secret room containing a Devastator guarded by many Slimer Eggs and Octabrains. However, a bunch of explosions will be activated, so don't stay there and jump into water immediately!
8) On the rooftop, there is a bar. Check those windows in the corner to find a hidden Freezethrower.
Attached Image: FM3X01_1.pngAttached Image: FM3X01_2.pngAttached Image: FM3X01_3.pngpng]

Helecopt Road

Kills: 201
Secrets: 5

An interesting map, though not much to say about it other than two Jetpacks can be found at the bottom of the pits for those wishing to explore. And one secret can be reached by simply jumping down (near the pit) and hopefully making into that secret room.

Secrets:
1) When at the other side of the pit, jump into a corner and you will land into a cave guarded by two Troopers and one Octabrain. You can find a Shotgun and Atomic Health inside. Then take the elevator, collect the box of Pipebombs and blow up the crack to reach the room you found the Blue Card earlier.
2) After using the Blue Card and entering the factory, go upstairs near the control room. There is a door you can open which contains an Atomic Health.
3) When taking down an elevator and getting attacked by a Commander in a small corridor, there is a crack on the wall. Destroy it to collect a Portable Medkit.
4) When you reach a room with a brown LUNAR APOCALYPSE poster, look for a brown Cola Machine and press on it, then go back near that poster and look for a revealed Devastator on your right.
5) When you reach the room with the switch that unlocks the gate leading to the Helicopter and the Nuke Button, press on a panel and jump inside to get a Devastator. However, this will spawn two nearby Troopers that immediately attack you.
Attached Image: FM3X02_1.pngAttached Image: FM3X02_2.pngAttached Image: FM3X02_3.pngpng]

Boiler Cliff

Kills: 119
Secrets: 5

Another creative level centered around a canyon filled with lava but also a bit frustrating at times, especially if you happen to run out of Jetpack fuel at the worst possible time (like it happened to me...at the bottom of a lava pit). The level is generous with the Jetpacks, since you can find some of them at the bottom of various pits.

There are also some shrinking puzzles involved, though you only have to shrink once if I remember correctly. The only complaint I have besides some annoying explosions is that the pig cops spawning at the very end are unnecessary, why even have that single pig cop spawn in a previous room? If it weren't for backtracking for missing secrets and/or restocking on supplies, then most players wouldn't even know where he spawned. Oh and there is a secret you can only reach once, so be careful!

Secrets:
1) Before you insert the Blue Card to open the gate, look for a nearby ledge where you collect Armor and Atomic Health.
2) When you jump down into lava and press a button to raise lava level to get Yellow Card, there is a small room you can access that contains an Atomic Health, Portable Medkit and 4x Slimer Eggs. This will also cause two Enforcers to spawn into the lava. However, this secret must be accessed BEFORE you shoot that switch to raise the lava level or else this secret is unreachable afterwards!
3) When dealing with two Mini Battlelords in a cave, go behind the tree to collect NVGs and a box of Pipebombs.
4) Around the area you get the Red Card, fall down into lava and go to small place to collect Small Medkit, Devastator and Jetpack.
5) At the end of the level, use the Jetpack to reach a ledge containing a Freezethrower.
Attached Image: FM3X03_1.pngAttached Image: FM3X03_2.pngAttached Image: FM3X03_3.pngpng]

Summer Beach Condo

Kills: 137
Secrets: 4

Very interesting level that definitely gives Duke Caribbean vibes. I can already imagine how the level would work if it was made as an user map for Duke Caribbean.

Anyway, you must visit the main building to get the Red Card, then the four houses in order to activate four switches which will unlock the gate that leads to the lighthouse. Then the Red Card is inserted inside the lighthouse which will open the exit and spawn a bunch of enemies.

Secrets:
1) After taking the elevator leading to LEVEL 3, there is a wall you can open near the Armor pickup. Inside, you will find a Portable Medkit.
2) Inside one of the houses, break a vase and look for a hidden switch. Go inside the vent which has the Shotgun and shoot that switch to go up to reach Atomic Health and box of Pipebombs, as well as two Troopers. Note that this will spawn three Troopers around the house.
3) At the last parts of the level, there are two ways to get inside the ship (resurface or open the gate and fall down), which has a bunch of slimer eggs, as well as Atomic Health, Steroids, Chaingun ammo and a box of Pipebombs.
4) On top of the LUNAR APOCALYPSE billboard, you can collect 2x Atomic Health and Devastator. However, two Commanders will spawn nearby. Note that this secret can be easily reached with the Jetpack or by blowing up a crack at later parts in the level.

Hint: each house contains a Jetpack, which lets you tackle them in any order you want.
Attached Image: FM3X04_1.pngAttached Image: FM3X04_2.pngAttached Image: FM3X04_3.pngpng]

Jungle Bay

Kills: 149
Secrets: 6

Interesting Jungle themed map, even if it's not as impressive as the one seen in Oblivion TC, it does its job rather well.

On the first half, you have to navigate the jungle and some canyon, then the second half becomes mostly an underwater trip where the Scuba Gear will be an essential tool to your survival. Be sure to fully explore for more hidden goodies and a few places you can resurface for air in case you run out of oxygen.

Secrets:
1) At the large canyon area filled with lava, as soon as you pick up Shrinker and start platforming, go into the corner to find 3x Slimers, 2x Shrinker ammo and a Jetpack. However, this will spawn two Commanders.
2) Shortly afterwards, fall down into lava to find an Octabrain and a secret room containing 2x Small Medkit and Boots. However, this will spawn an Enforcer nearby.
3) After you finish platforming and collect Yellow Card, press on the wall to access a small vent with two slimers, eventually leading to a secret room with Atomic Health, Devastator and Steroids. However, this will spawn three Pig Cops.
4) In the flooded zone where you fight Mini Battlelords, swim and look for some debris, Armor and a path that eventually leads to Devastator ammo and Atomic Health upon surfacing. However, this will spawn two Octabrains waiting on your way back.
5) In the last part of the map with the shelters, jump on top of the wall and go through the wall. Get rid of those Troopers and if you completed the puzzle earlier, secret exit is also accessible.
6) Secret exit path is revealed inside the secret above after throwing pipebombs inside the trees.

Secret Exit: You have to destroy some bushes covering some trees, then throw Pipebombs into the small holes inside trees. Afterwards, when you are in the last area with the normal exit, jump on top of the well and go through the wall. Eventually it will lead to the Secret Exit.
Attached Image: FM3X05_1.pngAttached Image: FM3X05_2.pngAttached Image: FM3X05_3.pngpng]

Loopy Shelter

Kills: 121
Secrets: 2

Interesting secret level filled with many puzzles, including four rooms (each with a shrinking puzzle) that have four teleporters leading to different challenges, ranging from a tiny/giant house to a Tier Drops inspired room.

Only thing I'm not a fan of is hiding that one switch in the medieval area, I remember having to look up Mapster a few years ago when playing through this mapset first time. The falling part with shooting at four switches can be easily done with the Jetpack but if trying to complete the intended way (especially with keyboard only controls), it can take a couple tries and you get to hear Duke screaming. Luckily, Duke won't die upon falling since he falls into water and the whole thing just loops anyway, hence the name of the map.

Secrets:
1) At the beginning, upon reaching the main room, there is a ledge with a Devastator that you can only get before dropping down! However, if you have acquired a Jetpack in the previous levels, you can use it to quickly reach the Devastator. Note that this will spawn an Enforcer nearby.
2) After completing all the four challenges/shrinking puzzles and reaching the exit, blow up a crack and you will be able to access a secret area. Carefully walk along the ledge (watch out for a Mini Battlelord) and you will reach a room with a Chaingun and a hanged monk. In the right, smash the stained glass, kill the Red Trooper and collect Portable Medkit. Note that entering the hanging monk room will spawn four Troopers. Alternatively, the ledge leading to secret can also be reached by shrinking and going through one of those tiny vents located in between BETA and GAMMA rooms.
Attached Image: FM3X10_1.pngAttached Image: FM3X10_2.pngAttached Image: FM3X10_3.pngpng]

Ghost House

Kills: 120
Secrets: 2

Very cool horror style map, I can definitely feel the influence from the RED series in this map. Has a few jumpscares but also plenty of cool stuff and good action. Definitely a highlight to me.

Secrets:
1) Inside the bathroom, there is a broken mirror you can go through. At the other end, you will find a Freezethrower. However, three Pig Cops will spawn into the main bathroom.
2) At the other end of the pool, there is a tree you can open and enter inside to collect Armor, Portable Medkit, Shotgun ammo and Devastator ammo. However, two Enforcers will spawn nearby.
Attached Image: FM3X06_1.pngAttached Image: FM3X06_2.pngAttached Image: FM3X06_3.pngpng]

Crescent Inn

Kills: 140
Secrets: 9

Another memorable level, this time taking place at a hotel. Sort of a Hotel Hell on Steroids if you will. Plenty of action and fun to be had. ;)

Secrets:
1) When you enter the hotel, in the reception room, jump above the plants to collect 2x Pistol Ammo, Devastator Ammo, Freezer Ammo.
2) Inside one of the bathrooms on the second floor, go to the third stall and then a door will open nearby, containing an Atomic Health and Pipebombs.
3) In the room where you pick up the Yellow Card, blow up the crack to access a Portable Medkit.
4) Near the Portable Medkit secret, go inside the bar and press on one of the shelves to access the Devastator.
5) On the floor with the room 2B, blow up a crack to access RPG + Devastator Ammo. You will also find an Atomic Health nearby, behind the TV.
6) Near the room 1A, jump on the fridge and then press on the wall to access 2x Shotgun ammo.
7) Press on the blue line of the book shelf to access an Atomic Health and Chaingun. Note that it also spawns three Pig Cops nearby.
8) Press on the vending machine to access 2x Pipebombs and Shrinker.
9) In the small room located near the pool on the last floor, near the switch that spawns a Mini Battlelord and reveals a switch inside the reception room, open the door to reveal a Portable Medkit.
Attached Image: FM3X07_1.pngAttached Image: FM3X07_2.pngAttached Image: FM3X07_3.pngpng]

Knock-Out Factory

Kills: 139 (143 if going for normal exit)
Secrets: 10

A complex, yet impressive level taking place at a factory. The way to reach the secret exit is also pretty creative. However if you are pistol starting and intending to go for the maximum amount of kills (though the slimer eggs will help offset the missed enemies anyway), then just like FM1X04, go to the normal exit where you get captured by Pig Cops.

For those who need help in completing the level, the solution is right here:

Modular Switch - Puzzle Solution (Normal Exit)

Use the multi-switch to reveal the switches.

1) Don't press anything on the first row of switches.
2) On the second row of switches, press switch #4 only. Wait until the shrink ray hits the barrels to explode something.
3) On the third row of switches, press switches #2 and #3. Wait until the shrink ray hits the barrels to explode something.

Once done, press the revealed switch to open the exit doors, leading to the warehouse.

Modular Switch - Puzzle Solution (Secret Exit)

After unlocking the normal exit, go back to the switch puzzle and press the multi-switch:

1) On the first row, press switches #1 and #2. Wait until the shrink ray hits the barrels to explode something.
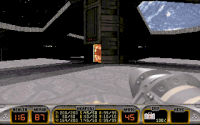
2) On the second row, press switches #1 and #2. Wait until the shrink ray hits the barrels to explode something.
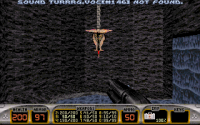
Don't mess with the switches pressed earlier, just leave everything like before and once you pressed all of them, there should be a way opened inside a vent that leads to the secret exit.

If you did everything correctly, then congratulations, you have solved the puzzle!

The solution of the puzzle was taken from the Demo Loop. Thanks to Fernando for providing the solution right at the demo loop. :P

Secrets:
1) At the very beginning, go through the acid and eventually you will come across a Portable Medkit.
2) After using the Blue Card and entering the factory, jump on those crates until you find an Atomic Health and a switch that you must press.
3) Near the place you find the Scuba Gear, there is a room with two Enforcers. Press on the brighter wall to access a Shrinker. However, this will spawn one Trooper.
4) In the large room with the rotating gears, you will eventually unlock SECURED AREA door. Press on the bloody wall to stretch the wall and reveal two Boxes of Pipebombs.
5) In the room where you see a couple flashing red buttons, there is one button that doesn't flash at all. Press on it and drop down the hatch that opens, then at the bottom, get rid of the three Slimer eggs and collect the Jetpack and Portable Medkit. However, this will spawn two Pig Cops waiting for you in the room above.
6) In the same room you collect the Red Card, press on the red picture to reveal a Freezethrower.
7) At the corridor filled with crushers, go near the second one and push to temporary open the secret containing 3x Trip Mine (weapon). Be quick and time it correctly! Do the same to escape and continue your mission.
8) After you got picked up by crane and you are on the conveyor, you will eventually come across some pipes. Open the wall to access a secret RPG.
9) In the last room with the crates, there is a vent you can go through that contains Devastator. However, this will spawn three Octabrains into the main room.
10) After completing the puzzle and reaching the secret exit room, you will confront a Mini Battlelord and two Sentry Drones. Before you leave, collect the Atomic Health on the ledge.
Attached Image: FM3X08_1.pngAttached Image: FM3X08_2.pngAttached Image: FM3X08_3.pngpng]

University

Kills: 166
Secrets: 7

Cool secret level taking place at the University, there is even that unused Force Sphere effect at the very end. Only thing I don't like is the point of no return at the last room.

Secrets:
1) At the very beginning, go around the train at the other end and jump on it to collect Shrinker. However, two Enforcers will spawn nearby.
2) Inside the bathroom near beginning, press on the hand dryer to open a vent containing 2x Devastator ammo.
3) Inside the library, jump on the middle bookshelf to temporary open a cache containing a box of Pipebombs, Chaingun and NVGs.
4) Indide the arcade room, where you find the Yellow Card and take out a bunch of aliens, press on the DUKE NUKEM II machine to temporary open the PRICES door. You will find 2x Pipebombs and Steroids.
5) Inside the computer lab, go through the LUNAR APOCALYPSE poster to collect a box of Pipebombs and three more. However, this will spawn two Enforcers into the room.
6) Inside the office with the LUNAR APOCALYPSE poster, press on the shelf to access a hidden room containing Devastator and Atomic Health. However, this will spawn two Enforcers into the main room.
7) At the very end, inside the control room guarded by a Mini Battlelord, two Pig Cops and one Commander, press on the map in the right side to collect 2x Atomic Health and Jetpack.

Hints:
-Once dropping down into the last couple rooms and solving that three door puzzle, you can still backtrack with the Jetpack, which you will find in a secret place near the end.
-Once you open the last door and enter that room with the two Mini Battlelords, as well as spawning Sentry Drones and Turrets, there is no way back to the previous areas of the level! Have a backup save just in case!
-Don't stay too close to those forcefields, as the shrink ray shooters can hit you and shrink you. There is no need to shrink in this level anyway.
-If playing continuously, it is recommended to finish the level with as much health as possible, since the health is the only thing carried in the next level, as you will find out shortly.
Attached Image: FM3X11_1.pngAttached Image: FM3X11_2.pngAttached Image: FM3X11_3.pngpng]

Coliseum

Kills: 109
Secrets: 3

Oh no! Duke has been captured and all of his stuff has been confiscated. For continuous players, I strongly recommend to start the level with 200 health, as the beginning is quite tough and the map isn't going to take it easy on you. In fact, I died three times by falling into pit (or stuck in lava pit with no way out) but it wasn't as bad as past playthroughs where I got my ass kicked quite a bit. Having the respawning stuff this time also helped.

To progress, once you exit the alien ship, you have to throw pipebombs into the X marked spots. Then you have to complete two challenges. When at the part with that alien mouth that shoots lasers and contains many annoying enemies (including TWO Mini Battlelords), you have to go inside that flashing wall and press a switch. Be careful to not fall down or else you die!

After you complete the two challenges, you unlock the last area. Destroy the turrets and shoot the switches to unlock the arena where the Cycloid Emperor can be found. Various troopers guard him, killing the Cheerleaders will also summon more commanders and drones into the battle. Kill the Cycloid Emperor to finish the episode and enjoy watching the original Duke Nukem 3D ending all over again. ;)

Secrets:
1) At the very beginning inside the alien ship, as soon as you pick up the Pistol, there is a wall you can open to find a Portable Medkit guarded by an Enforcer.
2) In the large area with the alien mouth, there is a spot you can reach but you need the Jetpack (see Secret #3) to reach it because otherwise you will fall to your death. The secret contains five Slimer Eggs and one Red Trooper, as well as RPG ammo and Shrinker ammo. The teleporter will send you back up. However, one Pig Cop and two Enforcers will spawn and wait for you.
3) At the very end, look carefully for a ledge and walk on it. Eventually, you will press on a Dead Face to call an elevator for you. Wait for a while until it reaches you, get on it, then press on the face to descend it. At the bottom, there is a teleporter that will lead you into a secret room with a RPG and Jetpack, as well as a teleporter to send you back to the last area. The jetpack will be useful in reaching Secret #2, as well as fighting the Emperor.
Attached Image: FM3X09_1.pngAttached Image: FM3X09_2.pngAttached Image: FM3X09_3.pngpng]

Overall, FM3X: Anarchy Village is a very cool episode that isn't directly influenced by the original levels, at least most of the time. Those who were disappointed on playing rehashed versions of L.A. Meltdown (with a bit of Shrapnel City thrown in) and Lunar Apocalypse, they will be delighted when they play Anarchy Village and don't expect it to be a rehash of Shrapnel City.

Sure, the early parts of the episode (and the final level) can be a bit frustrating but once you get to the second half of the episode, you will have tons of fun. I actually think that the second half of the episode is much stronger in terms of creativity and design but I also enjoyed the first half a lot.

In the end, Anarchy Village is definitely a worthy successor to the FM1X/FM2X series and is absolutely worth your time if you just wanted more levels similar to the original game, as the episode has the "Official Expansion" vibes all over the place.

I will write the overall conclusion another time, which also includes other aspects such as presentation and soundtrack. In the meantime, here is the vote and deciding the winner for the next month, as today it is the last day of the month and the winner needs to be announced until tomorrow.

Merc 2 + Murder: The EDF Conspiracy + Pray Your Prayers 2000 +

Thanks everyone for participating and I will see you on the next edition of the Duke Map/Mod of the Month Club! :D
2

Share this topic:


  • 2 Pages +
  • 1
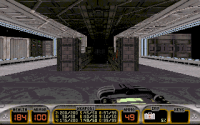
  • 2
  • You cannot start a new topic
  • You cannot reply to this topic


All copyrights and trademarks not owned by Voidpoint, LLC are the sole property of their respective owners. Play Ion Fury! ;) © Voidpoint, LLC

Enter your sign in name and password


Sign in options