Duke4.net Forums: Duke Map/Mod of the Month Club - June 2023 - Duke4.net Forums

Jump to content

  • 3 Pages +
  • 1
  • 2
  • 3
  • You cannot start a new topic
  • You cannot reply to this topic

Duke Map/Mod of the Month Club - June 2023  "ENTER AT YOUR OWN RISK!"

#31

I'm sorry if this issue has been adressed already but something has ALWAYS been puzzling me about E1L2 of that mod, and I'm sure you guys are seeing me coming.


There is a secret area, which is even advertised in a surveilance camera, beyond the ending room, which ends with a StarGate reference. How the hell do you reach that place O_o !?

I did find the secret vent in the penultimate room but it doesn't lead to anything concrete :/
1

User is offline   Aleks 

#32

View Postck3D, on 11 June 2023 - 05:21 AM, said:

I saw the hints in the video but couldn't process how cryptic they were fast enough. So when Radar eventually ran into the big fault to leap over felt like there still was something to solve about that part but no, 'guess I'll strafe jump' (and it worked). Soon enough Radar will be scripting TAS!

I think it's just an invisible bridge all over the chasm, so you don't even need a jump. Anyway, the other similar puzzle in original Duke 3D I can think of is the ending of Fusion Station where, if not having the jetpack from previous levels, you have to make a "leap of faith" to fall down a bit and grab the jetpack and atomics. Also there was one level based on Indiana Jones with similar puzzle back in the 1990s. As for the 2nd puzzle, there's a nursery rhyme thing written on the wall with "One two and five will keep you alive".

View Postquakis, on 11 June 2023 - 09:27 AM, said:

I've never played The Gate before, but to be fair I can say the same for many classics and older campaigns out there despite all these years with Duke3D. Have been in the mood for something a little more old school so gave the first episode a session today using the EAC version. Was considering trying the original release as it was using Rednukem but the improvements made to the final boss amongst other fixes sounded far more tempting overall. Settled on CGS difficulty intending to dial back if things felt too unbalanced, but didn't have to in the end even with so many close calls and on low health. Here's some brief, unedited thoughts for each level.

Now that was quite unexpected, but glad you've joined the club and are also playing it now, it's always a pleasure to read your comments on the maps and good to see people playing this mod without the nostalgia bias!

View PostTheDragonLiner, on 12 June 2023 - 07:16 AM, said:

I'm sorry if this issue has been adressed already but something has ALWAYS been puzzling me about E1L2 of that mod, and I'm sure you guys are seeing me coming.

There is a secret area, which is even advertised in a surveilance camera, beyond the ending room, which ends with a StarGate reference. How the hell do you reach that place O_o !?

I did find the secret vent in the penultimate room but it doesn't lead to anything concrete :/

There's the switch at the "lintel" of the small room in the vents where you climb the ladder - it opens the "red alert" room at the other end of the vents. Then there's a stupidly hidden button inside one of the phased corners of this room - opposite the entrance and to the left - where IIRC you also open a small door to reveal it. This one opens the secret place with the alternate exit.

Started episode 3 - Red Planet Blues - which is where this TC really starts with its uniqueness. The first level is HOSPITALity by Demian Holmberg and Preston Packard (who didn't contribute with any other maps, although Preston Packard is one hell of a cool name for some reason). Although I agree with Quacken that the reason why they'd put HOSPITAL in caps is beyond me (I just assume they were first trying for some play on words hospitality and hostility, but ended up with this...), I don't agree with the rest of his write-up about this map. It's a really hostile and mean level that isn't scary per se, but just feels punishing to the player - which I think is a good way to start this episode. There's the bold decision to just give the player a jetpack right in the very first room (even sooner than in Los Angeles), then there are caves of red with pretty decent terrain shaping and shading to keep you entertained, that soon turn into red and green alienish corridors. The colours schemes and texturing in this map really work well. There's also plenty of stuff to explore in the caves - you can usually slip beneath the rock where the lava flows and explore entirely new caves, which I like a lot. There's a large amount of turrets and sentry drones, but in such environment, they are surprisingly fitting - along with the ominous music. Playing this map is far from being fun or a pleasure, but it's for some weird reason very satisfying, especially considering what's next to come.

Rating: 7.5/10

The next level is Martian Red Light District by Jonathan Cacy, who absolutely nailed it with his two levels done for this TC. It's one of my favourite levels of the time with such memorable visuals, that when I watched Total Recall with Schwarzenegger like 15 years after playing this map, I immediately connected the dots and saw how the strip club and finale were as literal Build takes on the locales from this movie as possible (too bad there wasn't the 3-titted alien chick). The concept of a town full of adult entertainment on Mars alone is really cool, but the way it's done in this map is also fantastic. The balconies where the blue keycard is found are picturesque as hell, there's plenty of tiny details like the shape of the windows to the strip club, the gameplay offers a nice variety of enemies (including the new scorpion tanks, which use a rapid-firing machine gun that can be quite deadly) and some challenging encounters, there's alternate routes... And finally, there's the conceptual grandness that starts after traversing the secret base (also from Total Recall) that ends up sucking you into the surface of Mars - the effects at the end of this map are just brilliant and still managed to impress me today! Easily one of the best levels from this TC and one of the best ones of its era. Also, a cool, upbeat and catchy midi!

Rating: 9/10
3

#33

_Aleks. Wow thanks man ! Though yeah, that switch has to be THE most stupidly hidden switch in the entire TC >_<

BTW, IIRC, that FlagShip secret level can only be accessed via the UseMap menu right ? ... right ?
1

User is offline   Aleks 

#34

View PostTheDragonLiner, on 12 June 2023 - 08:16 AM, said:

BTW, IIRC, that FlagShip secret level can only be accessed via the UseMap menu right ? ... right ?

Nah, it's accessible from Secured Pleasures, IIRC somewhere around the middle part of the level (although pretty sure with a way back from the final part). Anyway, I wonder who's the author of the secret level, as it's not mentioned in the text file - though there are Neil Munday, Brady Cox and Jim Semkiw mentioned as "level designers" with no levels credited to them, so maybe one/all of these guys? We could try to MetHy the author here!
1

User is offline   Aleks 

#35

Finished 2 more levels, which were both very strong (once again, especially for the time being!).

Ancients: Halls of Man is made by Matthew "MattCake" Harris, who is also known for making maps for Shadow Warrior expansions and the famous space level for DN3D, 2009 - A Space Oddity, but I'd say this is an even stronger position. The level is remarkably memorable, in particular for its intense, evil atmosphere and a lot of classic level design "tricks" (notice the presentation of the RPG to the right before entering the "mouth" portal at the beginning or the secret place hidden around the corner in the lava at the central "castle", which can be spotted on viewscreen), which together result in something like Doom on steroids. The texturing and design style is very consistent and tasteful, shadows are exactly where they're supposed to be and the thunderstorms add a lot to the atmosphere, while being somehow restricted to smaller areas and thus not as annoying as in e.g. E1L2. The architecture is monumental and fits the narrative very well - and the layout is something ck3d should appreciate a lot, with areas having plan shapes of pentagrams. There're are also what might be the first "sector-made demon faces", a practice also used in such classic maps as Quest or Mike Beaulieu's Legends. The central castle boasts an impressive and complex amount of SOS, which adds a lot to its three-dimensional feeling. There's some particularly tricky fights, especially the battlelord accompanied with some troopers guarding the first keycard in the pentagram room is an excellent ambush, also I liked the large fight with dozens of troops and 2 predators early on. The progression is quite clear (only took me some time to notice the elevator in the throneroom - BTW, I love how these transport elevators are done in this map, with the parallax sky at the top nicely blending in and creating a more immersive feeling), but not necessarily super linear, there's also some more creative techniques like the crack that "blows" one of the glass panels. After traversing the ancient structures, we arrive at hi-tech facility located deep within, which is vast and kinda ominous (also due to the sounds of bulbs flying around), making great use of verticality. There's plenty of secrets to find, which leaves a lot to explore. Great level!

Rating: 9/10

The next level might not be as memorable or having such strong, striking visuals as the two previous ones, but it might also be the best in purely technical terms of level design yet. DNA Strand by Cho-Yan Wong (also known for his work for SW and SOTA TC) is remarkable for its beautiful, layered and strong shadows. If I was complementing Paul Jury for them, I think he tried to copy this guy, because here they are used quite flawlessly and on a level that would still be impressive today - even the first open area, with the thunderstorm and raining blood, is quite a show! Furthermore, the map has quite open and non-linear progression - you can collect all the 3 keycards first before having to insert them, there's plenty of routes, but due to nice signage, it's usually quite clear which button open what door (and without the "primitive" viewscreens). The layout loops in and out on itself, with shortcuts and traps along the way. There's only about 70 enemies, but this level has some of the fights I've enjoyed the most so far - the single battlelord encounter with some octabrains is nice, but the peak is the use of predators in the red key part, with the mortar one being particularly nasty and fun to tackle with the sentry drone and troopers around. The other mortar/RPG predator combo was also pretty entertaining. The architecture is kinda "early BobSP, but it's all ancient", which works here fair enough. The map is pretty short, but very action packed and full of neat surprises.

Rating: 9/10

This post has been edited by Aleks: 13 June 2023 - 12:35 PM

2

User is offline   Quacken 

#36

Back again!

Ancients: Halls of Man
Matthew "MattCake" Harris

There's a lot to like about Ancients: Halls of Man, and it turns out to be quite an interesting mixed bag. I think the opening's pretty frustrating. Matthew Harris put super lava in this opening section with red brick walls and lightning, but also forces you to jump over to the side platforms to get out of here causing you to suffer chip damage. It's not great, and if you fall on the wrong side of the bridge at the right side you might as well just restart the map. The optional secret areas in this map are also pretty dumb. The RPG cage is fine, but I got really confused by the secret with the lava wall that closes in on you, and the Shrinker secret blindsides you with like four random explosions that don't need to be there. There's some good stuff though. The Doomcute sector skull is really pleasing to look at and its fun to tiptoe around its outskirts and then breach with explosives. The combat's also pretty alright. I don't quite remember what most of the Predators were like in this map, but I can say that I didn't like any of them being where they were, which is definitely something. Something about the way the simple fights flow is very satisfying to me and I don't really know why. About the only fight I didn't like was the pop-up Battlelord. I don't really like it and I only got it first try because I think I honestly kind of got lucky. I switched to the Shrinker in time and domed him before he could kill me. This map can also drag a little towards the end because you have to walk along a big transparent tunnel to first get to a cache of supplies, and then you have to go the other way to find a cracked wall. And to get to this tunnel I had to fumble around in the dark a lot past the yellow door until I found the one space I could slip through. Matthew Harris' ambition for his expansive castle map somehow manages to pay off and translate to a pretty solid map.

7/10.

DNA Strand
Cho-Yan "Tempest" Wong

Cho-Yan Wong makes their grand appearance in The Gate with DNA Strand, and there's a lot to talk about here. DNA Strand is short and a little confusingly named, but it happens to probably be the best map in the set so far due to its visuals and gameplay. Cho-Yan Wong's shadows and lighting stand out heavily compared to their peers. Like Hung Lo's Fortress, which seems to take quite heavy inspiration from this map, DNA Strand is dimly lit, but not in a way that's frustrating to the player. I usually don't like pitch black areas in Duke 3D because the muzzle flash from the Chaingun and Pistol cause the room to strobe and it hurts my eyes, but here the rooms are built in a way where shooting into dark rooms actually causes them to light up appropriately. I also like the use of the CD Thrower in this map. There's a lot of Protector Drones, and you have about 130 CDs from a Pistol start, which is good to take out at least half a dozen of them. Cho-Yan Wong always puts CDs near where groups of Protectors are. It sounds really simple but it's the most intelligent I've seen someone use this gun in this set. Its also made me realise that there's a single magenta pixel on the CD Thrower's pickup sprite. The MIDI is another great feature about this map. It's both weirdly calming and also quite mysterious. I think some more teleport traps and monster closets would have been nice. The one Battlelord down in the water area is a nice surprise, but imagine one spawning in nearby when you pick up a key? The map also kind of just ends when you press the button to open the exit teleporter. It feels a little deflating. I also think there's a few too many lifts in this map that blend in too well with the surrounding geometry, and in general this map goes pretty heavy on Doom textures. Aside from these setbacks, DNA Strand is a genuinely well put together map that holds up well even today.

8.5/10.
2

User is offline   Quacken 

#37

Only one map tonight, but I'll finish Episode 3 probably tomorrow, I hope.

Star Chamber
Cho-Yan "Tempest" Wong

Have you ever stopped and thought: "Man, DNA Strand was really good. What if there was a DNA Strand 2?" Well, you're in luck, because Star Chamber is more or less just that. Star Chamber is definitely a fun map, but that's more due to Cho-Yan Wong's skill as a map maker than the map itself, which is mainly just a rehash of DNA Strand. I'd argue the map looks a little more dynamic than DNA Strand. This space base has a surprising amount of variety in its flat textures, and Cho-Yan Wong's impeccable lighting makes areas that would have been dull otherwise turn into crowd pleasers. You can finish this map without needing the red key, so I don't really know what the point of it is besides hiding some monsters and probably some resources you don't need. And the blue key leads to a safe with the yellow key in it, so that says to me that there's been some padding in play here. At least the MIDI is good. It's fast, energetic and has a good rhythm to it. This map is also not particularly challenging, even with two Mine Predators and one Rocket Predator. I figured out from last map that the RPG is also a good answer to Predators, you just need to aim at their feet to take advantage of the blast radius instead of aiming directly at them. I dislike them less now for that reason. Star Chamber may be more of the same, but yet again maybe that's not such a bad thing.

7/10.
1

User is offline   FistMarine 

#38

Quote

Nah, I stop and start recording at exact save points, that's why you don't see me dying or saving. I've gotten pretty good at it and some cuts are unnoticeable to me even. I disable the level name text so that I can record seamlessly from save points. You can do that in any mod by adding the following code to a CON file:

Interesting to know. I was wondering if you were saving because there were a couple points where you stopped for 1-2 seconds but I looked at the timer and everything seemed normal, especially the lack of "GAME SAVED" message that shows up when you save the game. A bit of a trivia: the GAME SAVED message didn't show up in versions of Duke3D up to 1.3D, it was first added in Atomic 1.4 and is present in every source port.

Quote

It's not the crack that can be blocked, but the small sector where you submerge from the water there - the SE7 linking the underwater and water surface sectors doesn't work in EDuke32. BTW, I'm playing a version of the mod from 2005 (Modified for JFDuke3d by ProAsm - December 2005), didn't really notice that earlier :P Probably just some minor fixes though. The bug in the last level never happened to me either back in the DOS days or when replaying under EDuke32, so I think it's really rare to happen. Last level should definitely be played with multiple saves though, as the final boss can make things really difficult for you by following you into one of the teleporters.

Ah, I understand now. Well I should be safe from most game breaking bugs, since I'm playing the mod in DOSBox. And now you reminded me that ProAsm used to host modified versions of 100 or so Duke3D TCs on his website many years ago but for some weird reason, he took them all off (except his own mod called Xartech Invasion) at some point in the past decade or so! I was able to recover all those JFDuke3D TCs with Wayback Machine earlier this year when I found out his Duke3d page hosted those TCs, similar to his shadow warrior page (the SW TCs are still up to download at least). I should share the links someday, in case people are interested in getting those unofficial updated/repacked versions of the addons. At least a few of these can still be found at Dukeworld. I only wish I knew about this sooner. :P

Quote

Yes, they're also called Predators in the story that's written inside the text file. I wonder what's railgun/super railgun on the list - I'm pretty sure I've encountered a predator shooting a chaingun, could it be this? Anyway, I really like the predators and how fast, agile and aggressive they can be, also the fact you never know which kind you are facing at the moment before they attack you is an extra challenge. Though I agree they might be introduced a little too early inside the first level - although this one is really quite a showcase, so probably that's why it's the first level.

I understand now, I quickly read through the story and forgot about that when posting the previous message. I was also thinking the Railgun ones could be the Chaingun ones, as I'm sure I've also encountered a few like these that were shooting the chaingun quickly, most likely doing the same damage as the Duke's chaingun and I'm not fully convinced if the shotgun one is dealing the same damage as Duke's shotgun, seeing as the RPG one deals as much damage as a commander's rocket, thankfully. Also, I agree they add to the challenge and I enjoy having some fast moving opponents but I found a few variants to be a bit overpowered, IMO.

And judging by the comments in this topic, I am not the only one to complain about some of the Predator variants. If more people complain about something, then I'm pretty sure there is a reason why.

As for the first level, maybe there were plans for this level to be the "Demo" level of the TC if The Gate was released as a demo previously but I can't find any evidence of the TC being first released as a demo. Kinda like how some TCs were initially released as a short one level demo and often had a couple changes compared to the final product.

Quote

I'd gamble there was some texture used that got scrapped from the mod at the last moment, maybe even for e.g. copyright issues or a fear thereof. Wouldn't blame it on the mapper and perhaps not even on the testers.


You're right. I shouldn't sound so harsh at times but I just found the HOMs glaring and that they weren't noticed earlier (one of the HOMs shows up at the start of the level, inside the submarine). They could have just put a random Duke3D texture instead of leaving a HOM in those places. Also it's not the only level with HOMs, as you will find out shortly.

Also thanks for joining in Quakis! Definitely agree with you on the E1L4 review with the predators, as I also felt like other variants could have been used instead of the shotgunners in that level.

BTW one correction from earlier: As I may have mentioned and players may have noticed, you can sometimes find Expander weapon pickups. Picking it up for first time (assuming you don't have Shrinker already) will ONLY give you the Expander and you can't switch to the Shrinker! This is an attempt to separate the weapons, though I'm sure picking up the Shrinker still allows you to use Expander ammo if you have it available, like you'd normally do in Atomic.

Anyway, here is the E2 review! I also watched Radar's video after I was done with the episode, as I didn't want to spoil in advance, considering it's my first time playing the mod. Good job as always! :)

E2 is shorter when compared to E1, considering it has only 5 levels and they are shorter overall.

TOURIST TRAP

Bermuda Triangle
by Tyler Matthews & Paul "Talon" Jury

A much better starting level compared to the first episode's opener. Bermuda Triangle is pretty well designed, reminding me of a mix between Penthouse Paradise and Death Row (only the last parts with the submarine in the latter case). The map is also well balanced, giving you all the tools you will ever need, although I admit I got very lucky with the first Enforcer dropping a Chaingun for me (Radar also got an early Chaingun in his video). You mostly fight against troopers and enforcers, as well as a few other regular Duke3D enemies but there's also a few Predators that I didn't mind being used, since most weren't the dangerous variants I complained about earlier. Though there was a shotgun predator that took half of my health and a quarter of my armor but at least I survived. I'm okay with encountering one of these once in a while, as long as I've got plenty of health and armor.

The map isn't difficult to figure out what to do and it's not too short, neither too long. It took me about 30 mins to finish because at least five minutes I spent looking for the Yellow Card. Then I realized that door was unlocked earlier with those four switches, where I've fought the shotgun guy. Interestingly, there's two secrets you can find in that room with the switches. One secret room is interesting, as it's located inside a secret and it showcases the developers/mappers involved in the project. It also references/pokes fun at WizardWorks, who were the publishers of various unofficial Duke3D addons, including Duke DC, Caribbean and Nuclear Winter.

My theory is that The Gate was meant to be commercially released and published by WizardWorks at some point but the deal fell through or the Gate team rejected the offer or something similar. I can't find any evidence if this ever happened, though. But I won't be surprised if it did at one point in 1997. All I know is that Duke, It's Zero Hour addon was supposed to be commercially released and published by WizardWorks at one point. I also know The Gate was included in some pirated version of jfduke3d that I got back in late 2007/early 2008, which was my first introduction to Atomic Edition and various expansions but didn't play too much of it and the simple fact it was included in the package made me believe it was an official expansion or something similar.

Anyway, back to the map review, I found the Yellow Card and was able to reach the exit. I found all the secrets easily but the two Atomic Healths I only collected at the end, so I can start the next map with 200 hp, full armor, etc.

Unfortunately, the HOMs show up once again in a few spots. Too bad because the map was otherwise pretty good and it's a shame the quality got dragged a bit thanks to those HOMs. I really didn't expect another map with HOMs soon after the E1 finale.

There are FOUR secrets to find:
1) Enter inside one of the submarines to find a Scuba Gear, CD Thrower + 2x ammo, Armor and Atomic Health.
2) Climb on the hills to find a crack. Blow it up to access a Shrinker, Expander ammo and Small Medkit.
3) In the room with the Predator and four switches, press on the shelf and collect Portable Medkit and Holoduke.
4) Inside the third secret, press on the wall to find a super secret developer room.

Overall, despite the minor issues, this is a huge improvement over E1L1 in almost every way and actually feels like the first level of the episode. This makes me wonder why wasn't E2 in the first episode slot? The episode doesn't even feel Space themed (at least not until much later). Either way, I hope the quality remains consistent throughout this episode.
Attached Image: GATE_E2L1_1.pngAttached Image: GATE_E2L1_2.pngAttached Image: GATE_E2L1_8.png

Himalayan Hell
by Jonathan "Lizard King" Cacy

Well, this was certainly an interesting level. It's quite challenging at times, as you will be fighting groups of assorted aliens but it's also generous with resources and feels like an epic adventure. I don't mind that I died a few times.

It is important to know that this level has a point of no return, so completionists want to get the first secret before the point of no return. The point of no return is at the crashed airplane where you collect the first Devastator of the episode. Then you are supposed to fall into a hole. The point before that where you slide over the slope can still be backtracked by continuously jumping. But after dropping down and fighting two annoying predators (that killed me once or twice), there is no way back!

Anyway, this is probably the highlight of the mod so far and contains signs of an epic adventure right ahead.

There are TWO secrets to find:
1) Near the blue card switch, look in a corner behind some alien corpse and go through the wall to find RPG + ammo and 3x tripmine (weapon).
2) When approaching the "invisible" bridge, go to left side and press on the wall to reveal a secret room filled with various goodies (health, armor, weapons, ammo).

Overall, I liked this level, as it felt unique enough, as well as quite challenging in a good way. Hope that the episode keeps up the quality.
Attached Image: GATE_E2L2_4.pngAttached Image: GATE_E2L2_7.pngAttached Image: GATE_E2L2_10.png

Lower Planes
by Ryan Isenberg

An interesting level that seems divided into two parts. The first part seems to be inspired by the lava canyon parts of E1L5: The Abyss, though it also gave me vibes from some parts of the third level from Last Reaction (yes, LR&WB was released two years later but my point still stands). The second part is sort of an underground base.

There is a point of no return halfway through the level! Before dropping down the hole, you might want to grab everything, considering there is no Jetpack until later in the episode inside a secret area. As such, the secrets are also nicely divided with one half found in the first part and the other half found in the second part.

The first part is relatively straightforward. You should look for a hidden cave that contains an Enforcer and a pair of Boots. It doesn't count as a secret but you might as well do a visit. You should also get a pair of Boots before navigating through the lava.

The second part is a bit tricky at times, due to more dangerous enemy placement but nothing too difficult. Besides the standard Duke aliens, you've got the Predators, who are the laser variants, thankfully. There are also a few traps like some trip mines in one section and some automatic shooters that launch Octabrain Blasts and Mortars but after avoiding them during the level progression, then I figured out the switch in the ceiling shuts off the traps. So keep in mind to hit the switch in the ceiling. You don't often get the option to shut off automatic shooters, so you might as well. And be careful when platforming over the rocks at the end. It seemed like there is a pit you can fall into, although I got to the exit safely first try, so I didn't fully confirm. It doesn't hurt to save in advance, just in case.

There are SIX secrets to find:
1) Right at beginning, find a panel. Open it up and jump inside to collect a Portable Medkit.
2) Near the beginning, find a crack to blow up. You can find 2x Boots.
3) Before dropping down the fiery hole (leading to the second part of the map, no return), look around to find a cave containing 2x Atomic Health and Boots.
4) Find a room with an enforcer. The window is too small to fit in, so look for a crack to blow up. Then you can access Armor, Shotgun + ammo.
5) In front of an elevator, jump through the fire to collect an Atomic Health.
6) After the room with the four central switches (where you are avoiding the automatic shooters), you should enter a room and see a Predator. After taking him out, go to the orange sector and push the wall to find RPG + ammo.

The level was fine and I'm looking forward to the next one.
Attached Image: GATE_E2L3_1.pngAttached Image: GATE_E2L3_4.pngAttached Image: GATE_E2L3_7.png

Final Entry
by Tyler Matthews

Another somewhat short level. It feels more like a typical Duke3D level, taking place at a launch base. It's slightly challenging, as there are a couple Predators you encounter (alongside typical Duke3D monsters) and the health pickups are somewhat scarce, with most of them being the small ones, so you may spend a couple times with around 50% health remaining. Luckily, there are toilets you can use to recover your health, so there's no shame to retreat to the nearest bathroom after a tense fight, if you don't want to use your Medkit just from fighting weaker enemies. Interestingly, it looks like the armor pickups are very common, so no problem with that either.

I like how the map ends. Duke steps into the rocket and is launched to the Mars. Be sure to grab everything in advance before stepping in the sector or else the door closes behind you. When the nuke button shows up, you can end the level. Also had no problem with the skybox showing up, as I played in DOSBox. Won't be surprised if the mod got a couple bugs/glitches in recent builds of EDuke32. I'm guessing you are using the Addon Compilation version, Quacken?

There are TWO secrets to find:
1) Inside the church, sit on one of the chairs. A nearby compartment should open, containing an Atomic Health.
2) Inside the bathroom, look for a crack hidden behind a toilet. Blow it up and you will access the sewers. Inside, you will find two slimers, Shrinker + expander ammo, an Atomic Health and the Jetpack (the ONLY Jetpack in the entire episode).

Overall, this was a fine level that prepares us for the finale!
Attached Image: GATE_E2L4_1.pngAttached Image: GATE_E2L4_2.pngAttached Image: GATE_E2L4_4.png

Welcome Mat
by Paul "Talon" Jury

Duke is now on Mars! A mars base, that is.

The level design can be a bit confusing at times. It definitely took me a while to figure out this map and the Multi-Switch part had me look into Mapster a bit to see how to progress. It apparently opens the nearby doors. Setting it to 4 should have all four doors opened, I think. Some of the areas are optional if I'm not mistaken and I think I had to swim in acid to get in the train area behind the forcefield, which you can only disable from this room. This is where it leads to the Overlord but you need to activate a door in advance, which can be found in one of those corridors behind the opened doors.

Also to open the doors early on, try to find the switches to disable the forcefields and remember in that room which contains various goodies, press on the HANDPRINT to open the room containing the space suits, armor, an enforcer, etc. This is where you will use the Red Card later on, so remember the location.

When you get to fight the Overlord, be sure to go left first and hope he hasn't seen you. There are a bunch of slimer eggs and a few other goodies if you need. This also includes a CD Thrower!

When fighting the Overlord, you will notice the ammo packs for the CD Thrower. If you keep going, you will find an alternate exit that ends the level but this doesn't finish the episode, you just get sent to the original E2L6: Tiberius Station. So if you don't defeat the Overlord, you don't get the true ending of the episode! I am not sure if the alternate exit was put by mistake or the episode was meant to be longer (6 levels instead of 5) but because they had to rush, they decided to put the Overlord here.

Also you may have noticed in this episode, the Pipebombs and the Devastator ammo have been quite scarce. I only used the Devastator against the Octabrains in the second level, since there were lots of them, otherwise I kept the ammo and by the time I reached the Overlord, I had 62 ammo for the Devastator. This wasn't enough to kill him, so I just switched to the RPG and after 15-20 rockets, he was put down. Also in regards to the ammo for certain weapons being present but not the weapons themselves, remember that back then, pistol starting wasn't a common thing. I took a small look into Mapster right now when writing the message and I noticed a few UNOFFICIAL secrets that contained various goodies. Most likely, the mapper forgot to tag these as secrets. Considering this map has NO official secrets, that seems to be a possibility.

Overall, this level was okay, though kinda bland at times. The design is a bit sloppy in some places (most notably those vents) and it felt confusing at times. I also don't understand exactly why there is an alternate exit to avoid fighting the Overlord, because it doesn't end the episode, it just finishes the current level and sends you to the original E2L6: Tiberius Station. There is also no point to play the original levels with The Gate's stuff loaded in, though I imagine the Addon Compilation fixed this by either removing the alternate exit or ending the episode. As the original version of The Gate, which I'm playing in DOSBox, didn't replace the unused levels, so the original levels can still be loaded, mostly with cheats, as is the case with every mod out there that didn't replace all the game's levels. At least there is a cool new ending screen, even if it's quite creepy and it's most likely teasing E3L1.
Attached Image: GATE_E2L5_1.pngAttached Image: GATE_E2L5_3.pngAttached Image: GATE_E2L5_6.png
Attached Image: GATE_E2L5_10.pngAttached Image: GATE_E2L5_11.pngAttached Image: GATE_E2L5_12.png

The final conclusion of Episode 2 is that on its whole, is pretty good but could have been better. It's definitely better balanced (I only died a few times in E2L2) and slightly more consistent than the first episode but the levels in general don't feel as epic as some from the first episode. Also the soundtrack continues to kick ass! So I don't need to mention the songs in each level, they are all cool.

The Gate E2 is also not entirely space focused and the locations change quickly within the levels. As Quacken pointed out, in Gate E2, Duke begins in Bahamas, then visits Mt. Everest, then goes to a volcano, then to a launch base and then to Mars. The pace changes quickly within the same episode and it feels slightly odd. It doesn't feel consistent. Not to mention the hardcoded stuff to display the Lunar Apocalypse' results screen at end of each level in Episode 2. For an episode that doesn't take place in Space (at least not until the end), the results screen doesn't make sense in those cases.

I don't want to sound negative with my nitpicks so far, especially what I said in my E1 review, as for the most part I enjoyed playing The Gate so far. Currently, I'm halfway through the third episode and yes, things get much more interesting. But the review will have to wait until the next week, to keep my posting schedule every Friday, so our dear readers have time during the weekend to read the review. :D

Have a nice weekend!
2

User is offline   Radar 

  • King of SOVL

#39

Episode 3 video is up.


4

User is offline   Aleks 

#40

Finished episode 3 last night.

Star Chamber is a very competent map from the design and technical point of view, but also feels kinda "basic" - it's basically a typical "Doom" type of map, just very nicely translated into Build logic. After how strong the impression from the two previous maps was, this one falls pale in comparison, but on its own, it's still a decent and pretty fun level. There's more than enough supplies and perhaps not enough enemies (also there's two assault troopers that are, for some reason, placed beyond the sectors inside the void - so, without sharks/eggs or respawning monsters to make up for it, it's impossible to get 100% kills. I ended up with 6 missing enemies for some reason, so perhaps more similar stuff could have happened). I am not sure if the 2 assault troopers outside of the map are just a glitch or if they're placed there for an effect similar to the infamous commanders in Red 3, as they get awaken at one point and will just roam there in the background. The secrets are easier to locate than in DNA Strand, which was done by the same author. The layout of this level loops in and out of itself in so many ways that it's pretty amazing how it still manages to be quite easy to navigate. The final area with the ship, which we can preview from the long corridor that borders it - along with the final teleporter inside a "tree" with these ominous roots - are probably the most memorable aspects of this level.

Rating: 7.5/10

Finally, we reach the titular Tanheuser Gate and the first of two (subsequent) levels made by Aaron Barber, also known for his work on SOTA and some SW addons I think. This level has some technical novelties and nicely used original effects from DN3D - like the rotating lobby of the mess hall (I doubt if shooting the platform to bring it back down is a stock effect, but never really dug into it) and the rotating restaurant with the starry sky - including a planet - floating around. The ending takes the rotate rise bridge effect to even further dimensions, as Duke operates the long-range portal and then takes a "deathtrip to mirage asylum" through an ominous wormhole. Despite being quite an usual space station itself, there's some interesting aspects in the architecture - namely the elaborate ceiling windows in the room where the final battle takes place (and also in the rooms where the forcefield to acquire the yellow key is deactivated). There's a bunch of cool fights, mostly due to particularly nasty use of RPG or mortar predators in pretty tight spaces, but also the battlelords/commanders combos near the yellow key are quite memorable and obviously, the final battle with 3 queens and a cycloid is epic (even if not as dangerous as it sounds, as they can fall into the lower part of the room and either "infight" or have their attacks blocked). The progression in this level is pretty straightforward, but interesting enough to have kept me playing through the night, despite not really planning to complete the whole level at once.

Rating: 9/10

Episode 3 is quite a large improvement over the 2 previous ones, having pretty much all of the maps at quite a marvelous level for the time being. Episode 4 is also well worth playing and I'd say similarly good, although quite vastly different - with more emphasis on weird, abstract themes and the grandeur of some levels, particularly the Crista Forest ones and the grand finale.

Quote

As Quacken pointed out, in Gate E2, Duke begins in Bahamas, then visits Mt. Everest, then goes to a volcano, then to a launch base and then to Mars. The pace changes quickly within the same episode and it feels slightly odd. It doesn't feel consistent. Not to mention the hardcoded stuff to display the Lunar Apocalypse' results screen at end of each level in Episode 2. For an episode that doesn't take place in Space (at least not until the end), the results screen doesn't make sense in those cases.


Considering how The Gate's story is literally about these portals that teleport you from place to place, I think it makes a lot of sense really and is quite well explained in the text file (again - it seems that 3 episodes were planned at first, at least as per the narrative in the text file, with the first one set on different locations around the Earth (I would assume levels E1L1-E2L3 or perhaps E2L4), second one on Mars (E2L4 or E2L5 to E3L6) and the final one on the alien planet of Antirra (E4L1-E4L6)).

Curious thing, but after finishing the 3rd episode, Rednukem started playing demo from Duke-Burger (at least I would assume so), but with E4L2 from The Gate (Into the City). Of course it was just the player running around the initial area and shooting walls, but still pretty funny :D
1

User is offline   Quacken 

#41

The finale of Episode 3!

Tanheuser Gate
Aaron Barber

The finale of Episode 3 is quite something. Tanheuser Gate may be a space base, but it has quite a bit to distinguish itself from Star Chamber, including a variety of technical fancies. The outer space lunch room with the planet in the background is a simple but engaging room, and the rotating sectors that spin around when you interact with a button first and then shoot the lift to lower second is cool but seems like more trouble than it's worth. This map can get a little confusing to navigate occasionally owing to its donut-shaped main hub and a lot of door textures are just slapped onto walls in pretty amateurish ways. This is still a good map though. Tanheuser Gate's combat is unexpectedly engaging. The Mine Predators are used quite well by putting them in spaces with only just enough room to move around in. The two arenas with the double Battlelord guards may be copy and pasted and easy to cheese with the Shrinker, but you have to be pretty decently precise to not make it past this section without taking at least 100 damage. The final fight is definitely the highlight. A Mini Cycloid with three red Alien Queens who can hurt you with their psychic attack through walls. I don't know what it is with Build games and psychic attacks that hit through walls when you've got the original Alien Queen, the Sumo Demon and Tchernobog. Oh well. Ironically enough, the Queens are your key to beating this fight. The Protector Drones they spawn can shoot Shrinker rays to shrink both their mothers as well as the Cycloid, allowing you to easily kill them. I hope that Mini Cycloids and Mini Queens come back, because this would be a pretty funny way for their one day in the sun if this it it. Tanheuser Gate's aggressive and punchy action combined with some good technical effects outweighs its less than average visuals.

7.5/10.
2

User is offline   Aleks 

#42

View PostQuacken, on 16 June 2023 - 09:15 PM, said:

Ironically enough, the Queens are your key to beating this fight. The Protector Drones they spawn can shoot Shrinker rays to shrink both their mothers as well as the Cycloid, allowing you to easily kill them.

That's the most elaborate strategy I would imagine for this fight, love it! :D

Anyway, started episode 4. Most levels here are quite lengthy, so I'll just go one by one for a change.

Wilderness Receiver Facility by Aaron Barber is something I'd expect Maarten van Oostrum to make if we'd just squeeze his career between The Big City, Maarten Desert and Alien Planet X64-2. Needless to say, it's a very good level and strong opener to the episode, despite the progression being a bit confusing at parts. There's also a notable increase of difficulty in these 2 Aaron Barber levels from the rest, which I really like and I think it fits the narrative very well - after all, we're attacking the aliens on their own turf. The design is on a similar level to Tanheuser Gate, which I should just put on Barber's style - there's a lot of tricky technical effects (in this case, the lowering level of the acid river and opening of the gates to the castle), some nice architecture (I really love the giant satellite dish at the end) and terrain (the visuals at the beginning are memorable as hell and sell the theme of alien planet perfectly, but in the end it's all done with very simple means), the mine has a cool layout and some very nice details (like the ride of the cable car which sounds like it's about to fall down). On the other hand, some areas are a bit rough around the edges, so it seems like he's more interested into selling the theme rather than being super meticulous about it. The map is fairly long - took me almost 40 minutes - and packed with great combat, despite there being no battlelords. The fight with 2 mortar predators and a bunch of new beasts after the red key was probably a highlight, I also had a lot of fun fighting the commanders and enforcers on the dish because of the clever use of slopes. Also, the placing of octabrains is really masterful here - kind of bringing their most dangerous and scary version out at all times. Maybe the lack of devastator also helps, but the ones around the conveyor belts in the mines or the ones around the rotating machinery where the blue key is are quite a challenge, not to mention that pitch-black dark corridor after the blue key door which I would normally hate, but here it is kinda fitting and the fact all there is to lead your way are sounds of octabrains made it equally cool as scary. The map ends with a smart use of maze that leads us to the next one - here we encounter the blue troopers once again, which I believe are the shapeshifting ones that change into octabrains after a while (killed them too soon to find out here, but the 2 blue troopers at the beginning of DNA Strand did transform).

Rating: 8.5/10

This post has been edited by Aleks: 17 June 2023 - 02:24 AM

1

User is offline   Quacken 

#43

Seeing Aaron Barber's favouring of impressive technical effects and spectacles both in Tanheuser Gate and this next map makes me think he was responsible for Redneck Rampage's E1L1, E1L2 and E2L1 (Taylor Town, Lumberland and Downtown Hickston). Complex moving geometry like the Taylor Town ute or the forklift in Lumberland, as well as ballistic explosions like the exploding gas station in Downtown Hickston seem very Barber-like to me in retrospect. Also, here's the next map. I'll take these one at a time now like Aleks is doing because they are starting to get pretty long. It only took me 20 minutes though instead of 40 - I wasn't hunting for all of the secrets but I did get over 120 kills.

Wilderness Receiver Facility
Aaron Barber

Well hot damn, The Gate's on a roll. Aaron Barber's second of two maps is a genuinely great map with a lot to like about it and not a lot to dislike. The visuals are definitely a high point. The arid highlands in the opener are fun to traverse, as is the underwater section down below. Parts of this map remind me of Xen such as the factory, the fortress' grass and trees, and the underwater caves. Fascinating, as The Gate predates Half-Life 1 by over a year. I also like the plethora of new props introduced. The alien flora is both on theme and deliciously amateur. You'll have to get creative in this map if you want to get a move on, but Barber always makes it so you can use your instincts and the Automap to find the way forward. This is the second time that squelching sound from E1L2 appears, but this time it actually makes sense to be attached to a train car and it's not as loud since you're going away from the source sound. There's parts of this map that are less than good though - I think the Octabrain washing machine is very janky to fight in and isn't fun at all, and Barber's texturing and geometry can be pretty basic and repetitive, sometimes relying on Doom textures to pick up the slack. There's literally a maze towards the final fight, so I blame Beaudry Mansion for that one. The final fight is quite fun though. It's fun to move around on all of the cool sloped geometry. A Battlelord or even a Mini Cycloid or Mini Queen would have been a killer inclusion here. Imagine one of those guys coming up over the hill and skiing down to deliver you pain! I have to say, Aaron Barber has a good head on his shoulders. His texturing can occasionally be utilitarian, but his maps have much more variety in gameplay and visuals than Wong's, are less cryptic than Cacy and Harris' maps and are not as aggravating as Matthews, Jury and Parde's submissions. Wilderness Receiver Facility takes the top spot on my list so far.

9/10.

This post has been edited by Quacken: 17 June 2023 - 04:28 AM

2

User is offline   Radar 

  • King of SOVL

#44

Is the final level of the last episode completely broken? Is there any way to play it so that it works in EDuke32 or is it categorically unplayable?
1

#45

View PostRadar, on 17 June 2023 - 07:46 PM, said:

Is the final level of the last episode completely broken? Is there any way to play it so that it works in EDuke32 or is it categorically unplayable?


When you destroy a Brain, you then go through a Teleporter that brings you back in the Main Arena. You HAVE to make sure that the Boss SEES YOU BEFORE going into another area. The message about the remaining brains HAS to appear otherwise they're not counted, and thus the level is broken by the Invincible Boss.

Of course, gotta make sure the Boss doesn't enter an Area with you otherwise it's much tougher ...


A clue that is worked is also the fact your Inventory screen will change to the Protective Boots with 0% on them whenever the Boss sees you. It's a sign the brain was counted.


In the end, unless you have a save where you didn't destroy any brain, you might have to start over :/

This post has been edited by TheDragonLiner: 17 June 2023 - 11:15 PM

3

User is offline   Quacken 

#46

Back again.

Into the City
Crista "CD Warrior" Forest

Man... where did Crista Forest go so wrong? After a nerve-wracking swim through an underwater tunnel with nowhere to submerge, you're made to fight through a dark cave filled with Spectre Troopers and a Spectre Protector, and then thrust into whatever ungodly thing this map is. I despise this map. Everything about it is just so amateurish and not fun in the slightest. This map has a ton of copy-pasting. Whole halves of it are built on one end, mirrored and slapped on the other, like the Predator prisons. The worst offender is the "apartment" "blocks" in the "city" square. It's the same room copy-pasted twelve times on both sides! Sometimes there's an item in the storage closet, sometimes there's a monster in there, and none of the time there's actually an important item. The red key isn't even in this area, it's behind a Spectre Enforcer in a different area stashed away in the maze. The maze is obviously awful, being just as claustrophobic while being very time consuming to explore. It's even worse in this map than in Wilderness Receiver Facility because Crista Forest decided to put random deathtraps everywhere to slash your health away. Why is there just a random pit in the middle I have to jump over, also? What are all these doors doing here? I have pages of questions about the implications of this place, and no one's hear to listen to me scream. This map can go to hell.

1/10.
1

User is offline   Radar 

  • King of SOVL

#47

View PostTheDragonLiner, on 17 June 2023 - 11:13 PM, said:

When you destroy a Brain, you then go through a Teleporter that brings you back in the Main Arena. You HAVE to make sure that the Boss SEES YOU BEFORE going into another area. The message about the remaining brains HAS to appear otherwise they're not counted, and thus the level is broken by the Invincible Boss.

Of course, gotta make sure the Boss doesn't enter an Area with you otherwise it's much tougher ...


A clue that is worked is also the fact your Inventory screen will change to the Protective Boots with 0% on them whenever the Boss sees you. It's a sign the brain was counted.


In the end, unless you have a save where you didn't destroy any brain, you might have to start over :/


This worked perfectly. So what's the difference between this and how it used to perform in DOS?
1

User is offline   Aleks 

#48

View PostRadar, on 18 June 2023 - 12:38 PM, said:

This worked perfectly. So what's the difference between this and how it used to perform in DOS?

It's pretty much the same.

Finished Into the City of which I've had very fond memories (which is why Quacken's post about it really surprised me!) and once again, I'm overwhelmed by this level! Crista Forest certainly knows how to do conceptual grandness - this level is huge and epic, both in terms of its architecture, but also in how it tackles the topic of an alien city, which is strongly based on ancient Egypt (or perhaps should we say it the other way around - that ancient Egypt was based on Antirran cities?) but with a lot of hi-tech stuff around (I love the orbiting part where the blue key is). And by "city" she damn really means it - we start on the outskirts and make our way in through the elaborate sewage system. The gate to the city is, design-wise, probably my favourite part of the whole TC - it just looks so monumental and beautiful, together with the structure that teleports us to the orbit. I also love the room inside the maze with the golden statue around a pond, and of course the throneroom at the end. The maze itself is quite complex and full of traps, but nothing that seems unfair. I assume this is lower-class living quarters, hence all the doors. The market, with central garden, would probably be designed for a higher class and the palace at the end, of course, to the noble battlelord. There are some interesting fights here - the predators at the gate can get nasty, but my favourite fight is the one when approaching the palace, with 2 commanders and a bunch of enforcers and protector drones. The supplies are aplenty, so nothing to worry about. There's another new monster here, namely an enforcer hatching from an egg. This map definitely uses the new textures and props in the best way, which together with its complex layout, good use of verticality and some elegant use of SOS make it one of the best levels in this TC.

Rating: 9/10
1

User is offline   Quacken 

#49

Good evening.

Secured Pleasures
Nick Parde

Hi, Nick Parde! Thankfully, his second time around in The Gate is a pretty okay map. Secured Pleasures is dark, moody and maybe a little too barren. The visuals and MIDI are mostly on point. Nick Parde nails the spooky atmosphere that his Level Infinity alumni have been putting forward, but a lot of his room geometries are basically just boxes. A lot of boxes. And a lot of switch sequences too. There's switch sequences into back to back switch sequences in some sections of the map and it greatly pads out the runtime. There's some nice sections too, though - the superlava tight rope that spawns monsters and weapons in your face is intriguingly abstract, and the hunt for numbered switches in some kind of storage closet is probably the most enjoyable time waster in the map. The combat's so and so. You get like three Shrinkers in this map, so you can't really miss getting any of them. That makes the only fight worth mentioning, the Overlord jumpscare, a breeze. Secured Pleasures is a mixed bag. Some decent stuff, some bad stuff, but I can't really say it's boring in any way. It's overall pretty average.

5/10.
1

User is offline   Aleks 

#50

Completed two more levels finished, which were pretty short (compared to the first two maps of episode 4), so here goes a double write-up:

Secured Pleasures is a Nick Parde level, so it's the weakest map in E4, even if better than Aztech. I do appreciate the lighting and shading in the first part, but as Quacken mentioned, this one is button combinations upon button combinations. Today at work we received new sensors and you have to calibrate each single probe according to its resistance by a 12 very small button combination inside the data acquisition module as the software shows you - and this level felt pretty much the same. It's also an alien BDSM-prison kind of place guarded by a surprisingly high amount of pig cops and all it comes to is probably making a nasty fellatio to the overlord which we face at the end. The labrenthine layout doesn't help to make it all more interesting, though one thing this level does good is selling the theme. Combat is OK too I guess, nothing too unfair (besides some bullshit placements of sentry drones and the octabrains that become "invincible" under the hanging wooden bridge towards the end. I also appreciate there's no place of no return here, so you can backtrack to the secret exit after going through the whole level.

Rating: 6.5/10

The Flagship is the only secret level in the episode and since it's not mentioned in the text file, the author is unknown - although the names Brady Cox, Jim Semkiw and Neil Munday do appear in the credits as level designers without any levels credited to their name, so I assume it might be a collaborative work between these three, especially considering this level does feel like it's done by more than a single author. It seems to take place on a starship that's being boarded by an alien vessel. After watching Star Trek, I appreciate this level more - the holodecks that are completely optional and allow us to revisit parts of original E1L2 and E1L3 are neat little easter eggs and definitely a better way of reusing the original levels than the abominable reverse-tracking from Nuclear Winter, especially the holodeck going directly underwater was a fun one. The combat is very good here - chaingun and shrinker predators make a come back in style like that gum you like and the alien vessel is just fighting against protector drones with some turrets, slimers and a pair of battlelords. The Duke's vessel looks a bit like a patchwork and despite the nice layout, the texturing is lazy at places - the whole wall made with 1.4 wooden crate textures is probably the most obvious offender. Alien vessel is much better designed, both in terms of quite unique looks and the complex but functional, multi-layered layout. The level has a fairly open layout in general, with many interconnections and alternate paths, including a pretty straightforward vents system. There's enough supplies to make it through, but the lack of chaingun ammo makes fighting all the protector drones a bit more challenging than usual, which I appreciate. This level felt better than I remembered it, although I can see why it became a secret level in the end, considering it doesn't really fit within the narrative too well.

Rating: 7/10

This post has been edited by Aleks: 20 June 2023 - 11:40 AM

1

User is offline   Quacken 

#51

Good evening. I missed the secret exit in E4L3 so I warped to the secret level. Do I care I didn't find the secret exit? Not really.

The Flagship
Neil Munday, Brady Cox, Jim "Ironman" Semkiw (?)

What surprises will we find in The Gate's only secret level? What feels like an Episode 3 reject, mainly. The Flagship is sort of an enigma in this map set. Not only because we don't know who the author(s) are, but also because a majority of it feels pretty stilted and weird. Most of this map just feels like work. You don't get a lot of ammo, you get the RPG far too late for what the map expects you to clear with just the Shotgun and Pipe Bombs, and you don't get a guaranteed Chaingun. The only way to get a Chaingun is if you manage to take one from a Chaingun Predator or an Enforcer, and good luck with that. Without the Chaingun the latter half of this map really drags. It's room after room of pretty much nothing but Protector Drones you can't shrink down and occasionally Rocket Predators. The room with a Rocket and Mine Predator accompanied by one random Pig Cop in the corner can suck an egg, and having to take a lift up to meet two Protector Drones when the only good weapon I had left was the Expander. I also realised in this map that Shrinker Predators can royally piss off. There's only one in this map, but if they manage to shrink you with their gun it's game over. A Shrinker Predator will literally keep standing on you and wait for you to grow up so they can shrinkfrag you. It's not like Protector Drones where they screw around and walk away from you, giving you a chance to recover. And Shrinker Predators have no wind up for their attack at all, so that's nice. This map's visuals are also generally speaking pretty generic. The only sections that really stand out to me is the square room with a raising bridge and the many underwater sections, like the weird transition from the hall to the Death Row sub or the Shrinker room. The Flagship is overall a pretty weird map that I don't really enjoy and I could have probably gone without playing. I can see why it was made a secret level, but I think it couldn't have hurt to actually credit the map author(s) for this map.

4/10.
1

User is offline   Aleks 

#52

The Hive by Ryan Isenberg is one of the maps that got a separate release as a user map and even a review on MSDN, scoring a whooping 92. It's definitely a competent level with a non-linear progression over a layout that looks like it was planned before and not just made on the go, although the design is a bit uneven - there are some locations with impressive sector details or shading (even the cave where we start has this neat long shadow behind a rock), while some corridors are just completely plain and empty, a striking contrast with the next rooms that have dynamic cycler lighting and nice trimming. There are a lot of stuff to blow up in this map - particularly, cracked walls, many of which are either necessary for progression, hide a secret or are just a convenient shortcut. You'll still be doing a lot of legwork playing this map, but then it's also very intuitional and fast-paced. The combat is probably my favourite aspect - there're plenty of supplies at the beginning of the map, including shrinker and expander guns and ammo, but also a notable number of enemies (even if many of these are just slimers or eggs), with the final fight against a bunch of laser predators and protector drones being the ultimate highlight and one of the funnier setups in the whole TC. There's also a 6 button combination that is completely optional, but hides some more goodies, including an atomic health. One of the secrets around the red key area is quite complex as well, holding like 3 more secrets inside of it. It's still a pretty good map, however I have to confess I remembered it as a stronger level and in the end it seems Ryan's Lower Planes aged better. Now only two more levels to go!

Rating: 7.5/10
1

User is offline   Quacken 

#53

Nearly there! I might be able to wrap up everything before the 25th...

The Hive
Ryan Isenberg

The Hive is an interesting map for sure. Bizarrely, it has no music assigned to it. I don't know if that was intentional or not, but regardless I played my own MIDI anyway. This map has some cool setpieces, and its lighting is also generally great, but the big centre room with the Atomic Health is gated off, presumably until you solve the six button combination next to it. You can also break the windows but can't move through them, and the amount of explodable walls especially in the optional secret area kind of bothers me. Without lone Pipe Bombs next to most of them, I had to spend my own explosives on all but the first one I found. Couldn't have most of the shortcuts been one-way doors? Anyway... this map's pretty short, which I like too. It's only 10 minutes, but it ends in a bit of a weird way. You need to walk through a green wall which triggers the map exit, which confused me when I accidentally stumbled into it. Another thing I like about this map is the only Predator variety is the Firelaser Predator, which is a good break from there being tons of Rocket Predators last map. The Hive is a map of ups and downs, but I think it happens to be a fine enough map. One of the better ones in the set for sure.

6.5/10.
1

User is offline   Quacken 

#54

The penultimate map! And a chance for Crista Forest to redeem herself...

Drone Chambers
Crista "CD Warrior" Forest

The Gate's penultimate map takes place in what I can only say is some kind of fusion reactor that has Protector Drone incubators on the side. This map is quite ambitious. The main gimmick of this map is you need to take elevators up to sections higher in the map while exploring the side rooms in each area. Forest makes it so you can press buttons to open the windows to see how far you've traversed, which is a nice touch and helps to make the map feel more connected. The combat is unexpectedly treacherous. Predators are everywhere and there isn't a lot of health to help against them, and the re-introduction of more mini bosses are a welcome surprise. The Overlord gets stomped by the Shrinker, but the two Alien Queens (I'm going to call them Alien Princesses from now on) are both quite harrowing and will take a good amount of your supplies to kill. Unless a Protector Drone shrinks them. Then it's easy. This map has a pretty big flaw though - most of the map is copy-pasted ad infinitum. Having to play through the same sections of maps twice with not even a variation in the monsters you need to kill is both really lazy and heavily pads out the run time. This map took me nearly 30 minutes to beat, and most of that was stumbling around trying to find the yellow key and also going in and out of each of the Protector Drone incubators and checking for ones that were moving. Some Protectors are even placed inside of the Protector object as if Forest forgot to remove the object, which really says something. Despite this pretty huge setback, Drone Chambers' ambition and atmosphere combined with Forest's willingness to throw mini bosses at you makes this a great improvement over Into the City.

7/10.

By the way: The final map Overlords bricked my game as I tried to load in. I wasn't even in a position where I was softlocked within the map, it just crashed outright. I'm aware you have to follow a set of instructions to finish the final map, but I would have thought that you'd have to follow the instructions within the map. It seems like warping directly to E4L6 works though, so that's what I'll go with for now.

This post has been edited by Quacken: 23 June 2023 - 12:36 AM

1

User is offline   FistMarine 

#55

Quote

Considering how The Gate's story is literally about these portals that teleport you from place to place, I think it makes a lot of sense really and is quite well explained in the text file (again - it seems that 3 episodes were planned at first, at least as per the narrative in the text file, with the first one set on different locations around the Earth (I would assume levels E1L1-E2L3 or perhaps E2L4), second one on Mars (E2L4 or E2L5 to E3L6) and the final one on the alien planet of Antirra (E4L1-E4L6)).

Interesting. I keep forgetting about the story included in the text file and instead think at the usual pace per episode. I think it would have been more interesting if there were four different places, one different per each episode, to keep things a bit more consistent. Either way, I don't mind how The Gate deals with the story, as it makes it more interesting and unpredictable and I have to appreciate the ambition behind all of this.

Quote

Curious thing, but after finishing the 3rd episode, Rednukem started playing demo from Duke-Burger (at least I would assume so), but with E4L2 from The Gate (Into the City). Of course it was just the player running around the initial area and shooting walls, but still pretty funny

That's funny. Did you install the demos properly? Are you using the addon compilation version?

Quote

This worked perfectly. So what's the difference between this and how it used to perform in DOS?

I'm guessing it works the same, I just need to get there first to confirm how it works. I read a while ago that the Addon Compilation version made a workaround with making the inventory behavior modify the Scuba Gear instead of the Boots, so stepping on acid won't break the boss anymore. I guess there aren't any parts you can swim in the last part of the boss, otherwise it might break again.

Either way, thanks everyone for the comments and especially thanks for TheDragonLiner for the hints offered! I will certainly keep this in mind when reaching the final level. I'm currently on E4L3 and I'm hoping to finish the episode and get the E4 review by the end of the month! :D

Anyway, here is the long awaited review of the third episode!

RED PLANET BLUES

Hospitality
by Demian "Wolfgang" Holmberg & Preston "Sluggboy" Packard

Yes I know the map is written as HOSPITALity in the readme file but I prefer to write as Hospitality.

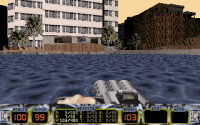
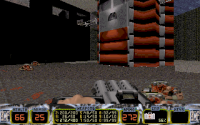
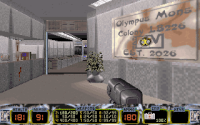
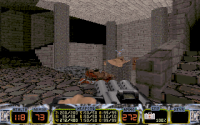
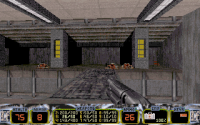
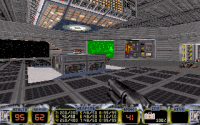
This is certainly an unique starting map. Design wise, it's pretty good. Gameplay wise, it's a bit miserable, as Quacken put it, I feel like this level does not give you enough health to compensate for the damage you are going to take. But whereas E1L1 was a painful starting map with LOTS of health available, Hospitality feels like E1L4 in that it has limited health in comparison to how much damage you are going to take from the enemies/hazards. Sure, there's two Portable Medkits inside secrets and the two Atomic Healths you are given in some spots but most of the time you are spending with like 30 hp or less.

It's not fun dying over and over again because damage is nearly impossible to avoid from a few enemies. As such, I had to save scum a lot in the last couple areas because all I had was 8 health left and I keep getting one shot by turrets, sentry drones and the fucking Predator at the very end. Then I found the Portable Medkit secrets and the other secret I missed also had a Large Medkit in it. Seriously, couldn't the mapper put more regular health pickups (small/large medkits) throughout the whole level? Why be stingy and have many rooms without a single health pickup? It's complete bullshit because it ruins an otherwise good map. Sure, the boots are also found inside secrets for the most part but I can forgive that because you can avoid the lava, usually. I also had deaths caused by getting squished (either trying to jump into tiny lava holes or out of sector glitch when submerging into lava in a certain area) or by lava or from killing myself by RPG but still, it really wouldn't have hurt to put more health in this map.

The map itself is not very confusing to navigate, even if I had to run in circles at some point when not finding a door. So why ruin it with the lack of health? It's impossible to avoid the damage completely. Also fuck that Shotgun predator at the very end. As soon as I manage to hit him with a perfectly aimed RPG shot (after giving up on the Shotgun/Chaingun usage), he immediately shoots and kills me. Took me about 5 or more tries to get rid of him, though there were a few times he was firing lasers at me? Are there variants with multiple attacks or what? It's not the first time I've noticed same predators sometimes using different weapons.

There are EIGHT secrets to find and I'm not going to make a guide for this one. Just look up cracks to blow up or whatever to find the secrets. It's difficult to describe the exact locations. Sorry about that.

Overall, this was a level that could have been really good, as the atmosphere is great and design is interesting. But the health starvation dragged it down a lot in gameplay department and turned it into a frustrating mess of a level that I just wanted to be over and find the secrets that hide the health in them when I reached the end, to start the next level with full health and armor. And no, there weren't any water fountains to compensate for all that either, though it's understandable you wouldn't find any water fountains on Mars but my point still stands about the annoyingly scarce health pickups. Maybe the next level will be a better experience?
Attached Image: GATE_E3L1_3.pngAttached Image: GATE_E3L1_7.pngAttached Image: GATE_E3L1_8.png

Martian Red Light District
by Jon "Lizard King" Cacy

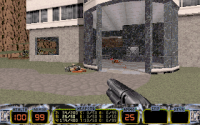
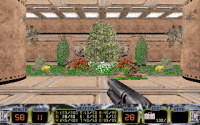
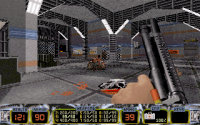
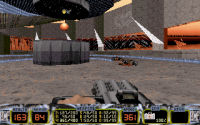
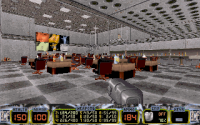
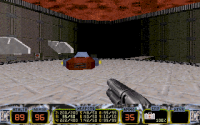
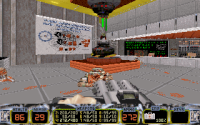
Well, that was a surprise. Definitely one of the best maps from the entire TC. This map felt very good all around and nailed the classic Duke3D feeling and it actually reminded me a bit of that Mars Donalds map by Jolteon released back in 2016. Yes, I know it was released nearly two decades later but just like how Lower Planes (E2L3) reminded me of the third level of Last Reaction (despite releasing later), I can only say the comparison seems fitting. :P

I died about 3-5 times in total but the deaths felt a lot more justified this time, like when initially fighting those Scorpion Tanks, it was a bit painful, due to how much damage their machineguns can do. I also like how once again you can consume popcorn to refill health like in E1L2 but also the Beer cans around that you can find, it seems you can infinitely use them, as long as you don't break them, although there's also toilets in this map if you want to recover your health for "free". But on the bright side, the health pickups are common enough to keep you alive, since this is quite a challenging level and it will take a while to complete. It falls into the "tough but fair" category, not into the "frustrating" category like some earlier maps did. :P

I won't spoil the surprises that await in this map, as you need to see for yourself. However, I will mention that there are THREE secrets to find:
1) On the train tracks, go at the other end (where there is a window with a nice view) and look for a darkened portion of the wall. Press on it to access a secret room filled with many goodies: RPG + 2x ammo, 2x Atomic Health, Armor and a Portable Medkit!
2) Inside the bedroom marked with the number "2", jump through the TV showing the dancing lady to collect a Chaingun.
3) Inside the book store, jump through the bookshelf to collect an Expander + ammo and an Atomic Health.

Overall, this was a fantastic map. I'm hoping the rest of the episode continues to be good.
Attached Image: GATE_E3L2_1.pngAttached Image: GATE_E3L2_5.pngAttached Image: GATE_E3L2_9.png

Ancients: Halls of Man
by Matt "MattCake" Harris

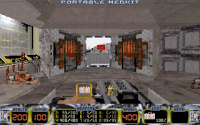
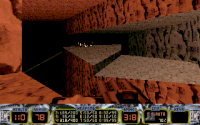
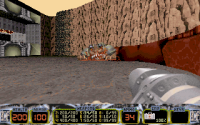
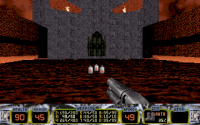
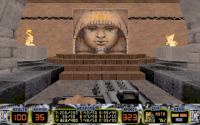
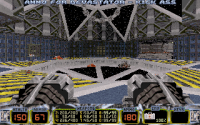
Honestly, this was a really epic map. Design wise, it's pretty interesting and certainly one of the highlights so far. It's very challenging, as it's got plenty of ambushes and insta kill traps but it's also giving you lots of health to compensate. It does have a few confusing parts that can take a bit to figure out, like blowing up the plank to access the sewers (had to look into Mapster for this one). Also died plenty of times and was getting a bit frustrated at some points halfway in the level (like the Blue Card trap that spawned a nearby Mini Battlelord that killed me almost instantly, though got it the second try, the spawned troopers didn't do much) but there were some funny bits, like when me and the Predator both shrunk each other at the same time. (LOL). Technically, the first time he shrunk me but then I ran to hide until the effect wore off. Then afterwards, we both did at same time, as mentioned previously. Then after returning to normal, I managed to shrink him in time and get rid of him. Then I loaded save to do it perfectly.

Unfortunately, there are a couple points of no return. You can still backtrack from the exit to the very beginning but only if you bring your own Jetpack from E3L1 with about 65% fuel remaining! I used as little as I could and still had about 30% fuel at the end of the level, hoping the rest will be useful for the later levels. Seeing as the Jetpack is rare in both E2 & E3 so far. This means if playing continuously, then take care of it, as it will be useful in the later levels, like the case here (and maybe for the upcoming levels too). Pistol starters have no choice but to find the secrets before the points of no return. And you will most likely miss at least 2-3 secrets on your first run. This is why I care about backtracking because going through the same map twice in same session because of a missed secret somewhere isn't much fun. But I appreciate that it is still possible to backtrack WITH the Jetpack, at least. It would have been worse if there was absolutely no way to go back. :P

Which reminds me, there are the SEVEN secrets you can find:
1) At the very beginning, go to the left side and look for a crack. Blow it up, kill a bunch of slimer eggs and eventually you will reach a container that contains 2x Large Medkit, Shotgun shells + Boots.
2) In the next room filled with lightning strikes, after teleporting and fighting against a Commander and a few predators, find a switch on the pillars, which opens a nearby pillar that contains Devastator + 3x ammo.
3) In the same room as the second secret, look up near the throne, to find a crack. Blow it up to access a Chaingun.
4) In the area filled with toxic lava, before going through the beast's mouth, go to the right side and look for a crack. Destroy it and then quickly run through lava to get the secret room that contains a bunch of inventory items (medkit, boots, steroids, NVGs), atomic health, armor.
5) In the area filled with toxic lava, before going through the beast's mouth, go to the left side to enter a teleporter. You will arrive in a secret room that contains a Shrinker + 3x ammo and Portable Medkit at the end of the room. But be CAREFUL when approaching, as there is a nasty explosion trap that will mostly kill you instantly. Step in the room, quickly retreat and wait for the explosions to finish. THEN you can collect the goodies!
6) In the same area as secrets 4 & 5, when you fight with an annoying commander in a circular room and press a switch behind the generator, look for a darkened wall you can open. Inside, you can find a Portable Medkit.
7) In the room with the Shrinker Predator (before the part where you must insert the yellow card), jump behind the fire and press the switch behind the mini cycloid statue. This will register the secret but also lower a nearby pillar containing a box of Pipebombs and an Atomic Health.

Overall, this map was quite epic and incredibly well designed. But it was also really annoying at times, with plenty of points with no return and plenty of enemies and/or traps ready to kill Duke instantly or at least make him lose large amounts of health. I don't regret saving often at all. But that doesn't take too many points away from the map, it's still an epic adventure at the end of the day. :P
Attached Image: GATE_E3L3_4.pngAttached Image: GATE_E3L3_7.pngAttached Image: GATE_E3L3_10.png

DNA Strand
by Cho-Yan Wong

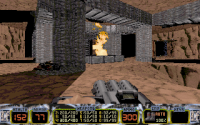
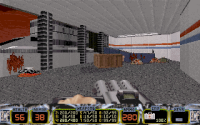
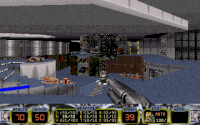
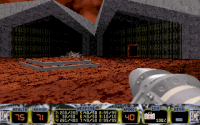
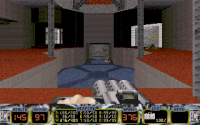
I don't really have a lot of things to say about this map. Design wise, it's alright, reminding me a lot of some of the levels from Secrets of the Acropolis, although the Doom textures looked a bit out of place. There were a few annoying parts, like the part where you fight the Rocket Predator and Mortar Predator in the same corridor. Got killed a couple times, mostly because I had about 60 hp left and keep taking missiles directly to the face, even when trying to dodge the missiles, they seem to predict where I'm going and inevitably eat the rocket and die, while they seem to survive 2 direct RPG hits, if I can hit them. Eventually, I managed to clear the room.

Honestly, the map isn't too difficult since you mostly fight standard Duke3D aliens most of the time and they won't cause much trouble (the predators are still bullshit sometimes) but thankfully, the map's health supplies are given in decent amounts, especially if you find the two Portable Medkits (one in an official secret, the other in an unofficial secret) which I didn't actually get to use. Plus there are some epic fights, like the five or so protectors you fight at once. Then I started to use the Shrinker on some predators later in the map and felt so satisfying to give them the boot! :D Though take into account they have a habit to easily dodge the projectiles, so if the RPG didn't work and sometimes I blew myself up instead, then getting near them and shrinking them while stopping to fight you, will get rid of them immediately.

Oh yeah, speaking of which, there's a few unofficial secrets where you blow up a crack and find some hidden goodies, so be sure to explore.
The TWO official secrets can be found here:
1) In the room with many pillars, press on one of them to reveal a Portable Medkit.
2) In the control room near the end of the level, press on a panel to reveal a Large Medkit and a box of Pipebombs.

The map had a few parts I was confused, like when I started to find the access cards but didn't know where to place them. Then later, after getting all three cards and going through a small water tunnel, I eventually found a room I didn't explore earlier, as well as a surprise Mini Battlelord that was easy to take with the Shrinker for once. Considering how difficult is to get the exact angle around the corners on the DOS version. No need to further explain but people playing in source ports have the advantage of better controls and ability to turn off autoaim. Afterwards, once I put the cards, I just needed to clear about two rooms and the map was pretty much done.

Overall, this was an interesting map that didn't give me as strong feelings as the rest E3 maps did. However, at the end of the day, I think this is a fine map. It just didn't feel different/unique enough, at least compared to some of the previous maps in the TC. Maybe I would appreciate it more on future replays.
Attached Image: GATE_E3L4_1.pngAttached Image: GATE_E3L4_4.pngAttached Image: GATE_E3L4_8.png

Star Chamber
by Cho-Yan Wong

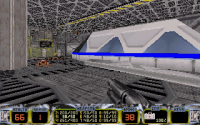
Same as the previous map, it's made by the same author and it's fine, I don't have strong feelings about this map either. It will be over before you know it. Though there's a couple things to admire, like the mini spaceship at the end.

Despite what Quacken suggests with aiming rockets at Predators' feet, I don't think this strategy works at all when playing the original DOS version, especially since the autoaim is enabled all the time. For a game that lacks rocket jumping and allows blowing yourself up easily, then you are better off just aiming directly at the Predator when they stop (Shotgun, Chaingun, RPG and Shrinker seem to be the best choices to me). If you are lucky, you lose little to no health and get the ammo you used back (or end up with a surplus of ammo). Otherwise, you may need to rely on luck to get a good outcome.

However, I can say the first Predator didn't do much, as he was down there lobbing mines that couldn't reach me, so he could be easily killed by just standing still. I just needed to adjust my aim. There are four predators in total but while one with the RPG did cause quite a bit of pain, what ALMOST killed me was some sudden explosion trap. A wall exploded near me and left me with 28 hp left. I proceed to use the Medkit without noticing there is a health pickup nearby, though at least.

Unfortunately, there seemed to be five enemies missed somewhere, despite the fact I killed everyone, I got 75/80 kills. My guess are the ORGANIC turrets that don't count as kills and watching Radar's video didn't confirm initially, seeing as he doesn't get 100% completion and skipped killing the turrets. I rewatched the part from his E1 video where he kills them in E1L5 and I can confirm they don't add to kills. But the problem is that there were FOUR of them, so theoretically I should have gotten 76 kills. That means one enemy disappeared into walls or whatever. Too bad about that.

At least I beat this level without dying, which is something at least. And also finished with 150 health, since both the previous and this map only contain ONE atomic health, which is better than nothing, obviously. Too bad about the missing/non-existent enemies. I was wondering when is coming the map that's impossible to 100% complete.

Speaking of completion, here are the THREE secrets you can find:
1) After passing through a blue gate, you should find yourself in a room with a few enforcers, an octabrain and a few canisters. Look up to find a vent you can break and then jump to reach the secret, which contains a pair of Boots, a box of Pipebombs and an RPG.
2) In the sewers, where you encountered the organic turrets, press on the wall in the middle to reveal a tripmine (weapon), CD ammo, Portable Medkit and Armor.
3) In the corridor leading up to the last areas, where you are fighting with troopers, there is a wall you can jump through. The secret contains a Shotgun and a Jetpack!

Fine map overall. Let's see how the E3 finale holds up.
Attached Image: GATE_E3L5_2.pngAttached Image: GATE_E3L5_4.pngAttached Image: GATE_E3L5_6.png

Tanheuser Gate
by Aaron Barber

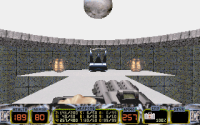
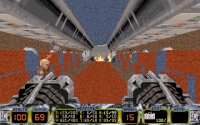
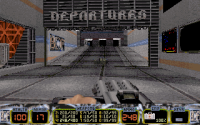
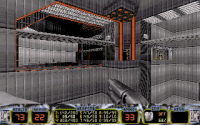
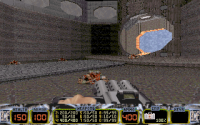
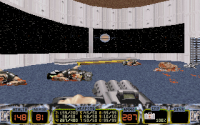
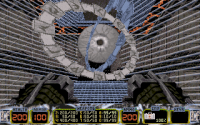
An epic finale that mostly takes place on a space station. There are plenty of interesting things in this map. Besides the engaging gameplay, there are a couple inventive puzzles, like the one where you had to shoot the tile to reach a switch up there and there is even a shrinking puzzle that awaits later in the map. Then there are some enemies that are transforming into other enemies (e.g. a blue trooper into enforcer and into an octabrain or some weird shit like that). Brilliant ideas. I admit I had to look up at Radar's video to see one or two parts I was stuck, like shooting a switch through those doors early on. And maybe that part with the teleporter surrounded by forcefield, you can just step in the front of it, as that side isn't covered in forcefield, which made me think initially I missed a switch to disable the forcefield.

Quote

Ironically enough, the Queens are your key to beating this fight. The Protector Drones they spawn can shoot Shrinker rays to shrink both their mothers as well as the Cycloid, allowing you to easily kill them. I hope that Mini Cycloids and Mini Queens come back, because this would be a pretty funny way for their one day in the sun if this it it.

WTF? Shrinking the Mini Queens didn't work for me and getting near them resulted in an instant death!

Speaking of which, the only times I died in this map was at the very last battle because of touching the Alien Queens or killing myself with RPG/Devastator when Protectors got near me. But my issue is that the tricks you mentioned didn't work for me. I won't be surprised if something weird happened in EDuke32 and/or the compilation version or whatever. Although I found a way to "cheese" the mini Emperor by making him kill himself with his own rockets. That reminds me, the boss this time wasn't a full sized Cycloid as I expected but instead was a Mini Cycloid assisted by TWO Commanders and THREE Mini Alien Queens that could still spawn full sized Protectors and could still squish you. At least you are given shitloads of supplies to defeat them, especially Devastator ammo.

Unfortunately, I ended up with two enemies missed somewhere, despite killing everybody in the whole map, I got 113/115 kills in total. Two maps in a row that couldn't be 100%'ed. What a shame. And the lack of new E3 graphics was also slightly disappointing, it was just the original Duke Nukem 3D ending. At least the map itself was really nice, so it's not losing points over that. Instead, it loses a bit for those two enemies missed. Though I suspect maybe the new shapeshifting trooper variants may have been the culprit of messing up the kill count. :P

There is only ONE secret to find: In the large room with the green crates, jump on one of the crates to register the secret. Then find a way to get inside the crate, where there is a small maze where you can collect a Portable Medkit, an Armor and an Atomic Health.
There are also some unofficial secrets, like in the control room where you find the Red Card, there is a nearby panel where you can find an Armor and a Portable Medkit.

I don't want to spoil too much about the other parts of the map. This map is excellent and well worth your time!
Attached Image: GATE_E3L6_3.pngAttached Image: GATE_E3L6_6.pngAttached Image: GATE_E3L6_11.png
Attached Image: GATE_E3L6_14.pngAttached Image: GATE_E3L6_19.pngAttached Image: GATE_E3L6_21.png

Overall, Episode 3 was a massive improvement over the previous two episodes. Each map was at least good, although the first one was very annoying with its bullshit lack of health, just like E1L1 and E1L4 where I was usually low on health and getting killed many times. And there are plenty of signs of improvements in terms of design, making Episode 3 superior to both E1 & E2 combined. I'm optimistic that E4 gets even better, though I'm going to keep my expectations to moderate, so I don't end up being disappointed. Though from what I played so far from E4 at the moment of writing, things are pretty interesting.

I know today is the 23rd but as a small exception, I'm going to start the nominations/voting for the next month, giving you a FULL WEEK to vote!

2000 TC + Age of Evil
One Unit Whole Blood (Part 1)

The first choice is about two TCs that were released in early 2000s:
-2000 TC was made by Curtis Tuckfield and was released on July 2000. It was previously released in 1999 as a short one level demo (1999 TC Demo), then released with the entire first episode (1999 TC Full) and later re-released as 2000 TC (contains the entire first episode and one level demo in the second), with 7 levels in total. To this day, the second episode remains unfinished. While the TC is mostly inspired by Duke3D (though it also contains plenty of new art), it's also inspired by Redneck Rampage (and a bit of Blood, I guess), so keep that in mind when thinking at what the levels will be like.
-Age of Evil was made by the legendary Ben "Yahtzee" Croshaw, who needs no introduction (if I must, then a description will be added in the topic for those who don't know who he is, if this gets chosen). The TC was released on July 2003 and contains two episodes, with 15 levels in total. There are also a bunch of new ART, new con changes and other cool things (the main character is also no longer Duke anymore). There were plans to replace the third and fourth episode as well but unfortunately, it didn't happen. But what we got is still good enough.

The second choice is the legendary Blood (1997), the updated version that includes all 5 episodes (4 original + Plasma Pak), as well as the Cryptic Passage addon. And I guess a separate DM episode as well that people may choose to play/talk about if they want. However, the choice mentioned above only includes the FIRST THREE EPISODES! There is too much content for a single month, so it will be split into two parts. If this gets chosen, then next time I can nominate the second part which includes episode 4 and the expansion episodes.

I wasn't fully decided what to nominate for July but I eventually settled up with nominating Blood (One Unit Whole Blood v1.21, released on 15th July 1998) and two TCs, both released in July in early 2000s. I'm not voting yet, as I want to see the public voting first. ;)

Have a nice weekend!

This post has been edited by FistMarine: 23 June 2023 - 02:25 AM

1

User is offline   Quacken 

#56

You need to get the Protector Drones specifically to shrink the Alien Princesses with their projectiles, as that works somehow. You could see me alluding to this in my E4L5 review, where specifically against the second Princess I was able to cheese it with a Protector Drone accidentally hitting them with their Shrinker attack. But using the Shrinker weapon doesn't work, which makes me think that when coding the Princess BDP forgot to make it immune to the Protector Drone's projectile but made it immune to the Shrinker's projectile. They must be two different projectiles in the game's code and you need to set two different flags, one to make it immune to the Shrinker weapon and another to make it immune to the other Shrinker projectiles (the ones the Protector Drones fire as well as the entity that continuously fires Shrinker projectiles, as seen in Toxic Dump). I don't know anything about Duke 3D's source code but that would be my guess. As for my vote:

2000 TC + Age of Evil
One Unit Whole Blood (Part 1) +

There ain't a day in the week where I wouldn't vote to play Blood. Splitting up Episode 1, 2 and 3 into their own month was something I didn't actually think about, but it makes sense to me. I actually conveniently enough wrapped up playing Blood Fresh Supply very recently, which marks the first time I've fully beaten every map in the remaster (all 53 retail maps). On Well Done in single segment, but still. If Blood was chosen for next month I'd do a similar thing to what I did for Redneck Rampage, where I'd keep a spoiler'd walkthrough of the map on Extra Crispy with a Pitchfork start and then my review of the map below.

This post has been edited by Quacken: 23 June 2023 - 02:39 AM

1

User is offline   Aleks 

#57

View PostFistMarine, on 23 June 2023 - 02:20 AM, said:

That's funny. Did you install the demos properly? Are you using the addon compilation version?

The demo for E4L2 plays regularly instead of the Duke-Burger demo - it seems the other demos aren't replaced as there is no E3L11 or E4L11 in The Gate. It's still the same demo from original game, just the map is swapped for the one that's in the GRP.

Quote

I'm guessing it works the same, I just need to get there first to confirm how it works. I read a while ago that the Addon Compilation version made a workaround with making the inventory behavior modify the Scuba Gear instead of the Boots, so stepping on acid won't break the boss anymore. I guess there aren't any parts you can swim in the last part of the boss, otherwise it might break again.

Again, I don't think stepping into slime breaks anything, there's plenty of protozoid slimers around, but I've never had problem with the boss. The only trick really is to overplay him, so he doesn't follow you into one of the teleporters - it would still be possible to pass like that, but just a lot harder I imagine.

Quote

Unfortunately, there seemed to be five enemies missed somewhere, despite the fact I killed everyone, I got 75/80 kills. My guess are the ORGANIC turrets that don't count as kills and watching Radar's video didn't confirm initially, seeing as he doesn't get 100% completion and skipped killing the turrets. I rewatched the part from his E1 video where he kills them in E1L5 and I can confirm they don't add to kills. But the problem is that there were FOUR of them, so theoretically I should have gotten 76 kills. That means one enemy disappeared into walls or whatever. Too bad about that.

Not sure if organtics mess up the killcount somehow, but might be. However, Star Chamber has specifically two troopers placed outside of the level boundaries, for some reason, so you are going to miss 2 kills anyway. Also using the CD thrower awards kills only on some enemies.

Quote

Then there are some enemies that are transforming into other enemies (e.g. a blue trooper into enforcer and into an octabrain or some weird shit like that). Brilliant ideas.

The two first troopers in DNA Strand are also shapeshifters like this, but they are easy to kill before they start changing. I didn't notice any shapeshifters in E3L6 though I think and got all the kills in this one.

View PostQuacken, on 23 June 2023 - 02:37 AM, said:

You need to get the Protector Drones specifically to shrink the Alien Princesses with their projectiles, as that works somehow. You could see me alluding to this in my E4L5 review, where specifically against the second Princess I was able to cheese it with a Protector Drone accidentally hitting them with their Shrinker attack. But using the Shrinker weapon doesn't work, which makes me think that when coding the Princess BDP forgot to make it immune to the Protector Drone's projectile but made it immune to the Shrinker's projectile. They must be two different projectiles in the game's code and you need to set two different flags, one to make it immune to the Shrinker weapon and another to make it immune to the other Shrinker projectiles (the ones the Protector Drones fire as well as the entity that continuously fires Shrinker projectiles, as seen in Toxic Dump).

The final battle can be really easily cheesed by luring all the bosses into the "floor window" where they will get stuck, then letting the Cycloid help you killing the Queens :D

Anyway, got to the final level last night - here's the write-up for the penultimate one, Drone Chambers. This is once again a Crista Forest level and she certainly has a prominent style - which can be described by words like "huge" or "conceptual grandness". Playing this map, I was sure Quacken is going to hate it, so I was surprised by his review. It's a good level with a very unique style and vibe, I absolutely dig the use of parallaxed sky and floor at the beginning resulting in "a fortress hidden in the clouds" effect. The fact that you can open the windows and see the whole majestic structure instantly is great as well. I don't even mind the copy-pasted rooms (which are, probably, all hand-made anyway, as not many people knew about the joys of copy-pasting back in the DOS Build days), in this case they work fine as a mean to show the immense size of the whole structure (I also like the detail of there seemingly being more incubators behind the steel gates at each level). While the design is great, with creative use of space, verticality and a strong idea for the progression, the combat is so-so, mostly because it gets repetitive as hell. All the monsters here are just bullet sponges - enforcers coming in great numbers could pose a threat, but even in the last room where there're 10 of them, you are packed with explosives to make a quick work of them. Protector drones in the incubators will just eat through your ammo and shrinker makes a short work of any boss monster or commanders at the end. The only challenging part is at the beginning, with purple lava and a lot of predators, but it's not exactly my favourite kind of challenging. Oh, there's also a room with RPG, expander and chaingun predator, which was quite fun to take on, and some mortar predators in narrow rooms which I also liked. Despite the shortcomings in the combat department, it's still a really good level, with a unique and memorable design that deserves its place as the penultimate map - but Into the City was much better IMO.

Rating: 7.5/10

As for the voting - I wanted to nominate maps/episodes by Steph Lessa for July, there aren't too many, but could be a nice break from the heats outside. Will think on what to vote - Blood is tempting to finally try out, but not sure how much time I will end up having.

This post has been edited by Aleks: 23 June 2023 - 03:58 AM

2

User is offline   Radar 

  • King of SOVL

#58

Episode 4 video is up. This includes accessing the secret level and beating the final boss in the original unpatched version.


2

User is offline   Aleks 

#59

And done! Finished the mighty Overlords, which is the final and one of the most memorable/impressive maps of the whole TC - and managed to age really well! This is a monumental finale that's kind of consisting of 5 levels on its own, connected with a central hub on a pentagram plan - and you are given quite some freedom on the order in which to approach these tasks. At first, the two red gates will lower, then the two blue ones are to be opened in one of these red gates and the yellow gate is once again accessible from one of the blue gates - there's a neat small map pointing you to their directions next to the switch as well as a viewscreen showing the gate that's opening on camera. The level starts with a nice scripted sequence where the tiles and letters fall off one by one, before you are let to the arena where you'll fight the invincible Elder. It's a smaller version of cycloid emperor that seems to be quite faster and more aggressive/keen to follow you around. His attacks produce slow heat seeking missiles that will follow you for some time before blowing up mid-air, unless destroyed before. Unfortunately, they are coded as new enemies, so it's pretty much impossible to 100% kills in this map, as no matter however these missiles are destroyed, they won't add new kills. This is really the main gimmick of the level though - outmaneuvering the boss not to follow you into any of the teleporters, as this would make progressing really difficult, which requires some strategic thinking in terms of which door to access at which point and how to best lure the boss away from them. The central arena looks pretty impressive too, with it's "gothic" architecture and a nice special sky.

The places where each gates will teleport you to are quite distinctive as well. The red gates take us either to a place with a small vents maze and a larger hi-tech/industrial area or a kind of hi-tech environment. The blue doors lead to either a kind of multi-leveled circuit area or a castle, and the final yellow gate takes us to some vast hi-tech alien space. While the texturing is quite humble and a bit in vein of Doom, I think the eerines of these locations as being where the powerful brains of the alien elders hivemind are places is sold in each one of them. The combat is though and a bit reminiscent of WG's maps from the early 2000-2005s, especially had that impression in the castle section with two mean battlelords guarding the entrance. There are notably no predators, pig cops or DN Atomic monsters, but the battlelord sentries are pretty common, same as commanders and sentry drones. Luckily, we are given plenty of ammo, including particularly good stock of explosives, to deal with all that pest. The level design uses a lot of clever tricks and moving sectors over quite huge scale to make each of the areas stand out - I particularly liked the use of mirror at the beginning of one of the red gate parts. The layout of each section seems to be carefully planned too, with lots of neat SOS and spriteworks adding a lot of verticality. Monster closets and respawn ambushes make the combat a lot more dynamic than you'd normally expect too. Finally, the set-ups for each of the brain are always good as well and end up in a larger battle most of the time.

This map is extremely fun to play, challenging and demanding on the player in just the perfect way and done in such a competent manner that even its rather regular visuals (forgot to mention, but the ominous music is also amongst the absolute best in the TC) can just fly past most of the players.

As for the potential softlock with brains not getting properly counted - I doubt this is really possible, at least as designed originally. Destroying a brain will inflate your boots up to 175% and seeing the boss after this will drop it back to 0%, but that doesn't mean you cannot step into slime, just you will get hurt as your boots will be at 0%. I assume a softlock could maybe happen in case of stepping into slime after killing a brain and while having 175% on boots, but since the teleporter exits are usually located right next to the brain, it seems like quite an unlikely scenario.

Rating: 9.5/10, and it's my favourite level in the whole TC.

Overal thoughts:
The Gate is one of the most famous (and rightfully so) and most important/influential TCs in Duke's history, of which my fond memories have only been immersed by another replay. Released as soon as in 1997, it dared to do stuff that barely anyone else tried since, which is a feat of itself. While not all of the levels have aged well, the TC definitely picks up in the 3rd and 4th episodes. The music and care taken even to add new cutscenes/endgame screens is commendable. The TC is also just fun to play, with just the right amount of challenge. The story/narrative is mostly covered in the text file, but what we get in the maps is enough to keep the immersion and indulge the player into it. Personally, I value this TC much above stuff like LRWB.
1

User is offline   Quacken 

#60

The final map of The Gate!

Overlords
Matthew "MattCake" Harris

Well, here it is. After 23 maps, hopefully it will have been worth the wait. And thankfully it is - Overlords is intense, exciting and a wholly unique challenge. The main gimmick of this map is negotiating the Elder. The Elder is a Cycloid Emperor with the zoomies, much more health, and he fires homing missiles at you like a Fast Revenant does. Said homing missiles were also used by some of the Predators in the previous Episode 4 maps, too. The Elder is immortal at first. You'll have to head into each of the five sections and hunt down five different brains that are giving the Elder his power. Blow them up with rockets, watch your Protective Boots go to 175%, find an exit teleporter out to the central area and get the Elder to notice you for your brain to count. The process could definitely be a lot more streamlined if this map idea were to be attempted today, but it was 1997. What were you going to do? They didn't even know how to copy-paste rooms back then so they had to manually draw all the rooms as if they were copy-pasted. Another bother I have with the Elder is that he can follow you through the teleporters if you aren't being careful, which will basically just kill you depending on when and where he shows up at unexpectedly. Besides the Elder though, the combat is great. There's a lot of surprises, and Matthew Harris puts a big emphasis on Battlelords in this map. Without a Shrinker I was able to bring from E4L5, I had to fight all of the Battlelords the fair way with the RPG, which made sections like the red key cat and mouse game very stressful. I would have liked an Overlord Drone or two, though. Or at least an Alien Princess.

The visuals are also good. Even the most visually weak area in my opinion, the castle area, still has some respectable lighting, shadows and ceiling ornaments, and the other areas are about as on par as the rest of the map set. The MIDI is also really good. It's distressing, intimidating and always gets my blood pressure up as I teleport into a new area and hope that the Elder manages to go back to being idle. I also like the spinning wall in the area where the blue switch is and how it dynamically changes the map, and also how Enforcers crash out of the walls here. Once all of the shields are down, you need to kill the Elder himself. It's still pretty simple despite the fact he has homing missiles. Just keep circle strafing and he won't be able to get too many hits on you. Unload the Devastator, then keep shooting rockets until he dies. Once you get treated to an admittedly pretty cool ending cinematic, you're done! Overlords is a fantastic map that would be a worthy conclusion to any map set, but is even moreso in a fairly mediocre map set like The Gate. Kudos to Matthew Harris for this one.

9/10.

Closing Thoughts

So: What once appeared to be another mediocre pre-2000s mapset from a primitive time ago turned out to be one of the most interesting mapsets I've ever played for Duke 3D. The Gate has a long list of positives. Its eclectic, auspicious and generally fun, and the extra care put towards the many new textures, the unique MIDIs for each map and even the new monsters can shore up the weaker maps to not make them completely terrible. But while Wong, Harris, Cacy and Barber can all show signs of hidden genius, the rest of the team either delivers highly uneven results, only contributed one map or are Matthews and Jury. Additionally, the incredibly janky Predators, copy-pasted and repetitive geometry (if it was done by hand, that makes it worse in my opinion) and occasionally subpar visuals speaks to a mapset that is a product of its time. The Gate is overall a mixed bag with depressing lows and only occasional highs, with a good chunk of the maps evening out to being either average or forgettable. My final rating for it is a 6.5/10.
2

Share this topic:


  • 3 Pages +
  • 1
  • 2
  • 3
  • You cannot start a new topic
  • You cannot reply to this topic


All copyrights and trademarks not owned by Voidpoint, LLC are the sole property of their respective owners. Play Ion Fury! ;) © Voidpoint, LLC

Enter your sign in name and password


Sign in options