Hello everyone! Thank you very much for the participation in this month! I have yet to watch all the videos posted but I will be sure to watch all of them soon! I will also try to reply to a couple posts but since it is a lot to be said and this post will be long, I may make a separate post another time. In fact, this post will only be about E4 for now because I didn't finish writing about E5 yet!
Anyway, earlier this month, I went ahead and played through Duke Nukem 3D Megaton Edition 1.4.9 (all 4 episodes) and Duke Nukem 3D 20th Anniversary World Tour Edition (all 5 episodes) on CGS skill, 100% everything. I revisited the 3 episodes as an extra bonus and beat whole thing without dying. I wasn't able to save pictures because pressing F12 did nothing and after pressing Print Screen button, pasting the pictures in Paint didn't work.
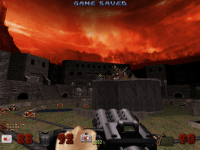
Last Friday (on 21st October, which coincides with the date of Duke3D v1.4), I also replayed The Birth in DOS version 1.4, which seemed to work fine this time around, after mounting a CD image to play the game without bothering with CD and cracks, I also no longer experienced random save/load crashes (at least not during gameplay). The only side effect is hearing the E1L1 music in every E4 level excepting the first one, as I decided to save and then exit at beginning of each level, which helped to take short breaks between the levels and to prevent the memory corruption bug, meaning all my saved games worked fine. I didn't mind hearing "Stalker" in most E4 levels but it was quite unusual and a bit similar to hearing "Dethtoll" in many user maps played.
Oh, I did have the game randomly glitching and quitting a few times but this only happened at the end after I defeated the Queen and loaded my saved game just to take screenshots of every ending screen. My saved games were thankfully, unaffected.
As for Alien World Order, I replayed using EDuke32 World Tour Stopgap (2020 build) just to take pictures of each level and see if I can get 100% kills, though as of writing, I didn't finish the episode yet in this playthrough, so the Episode 5 review will come later this week. I might also replay the entire WT edition on DIG skill as a bonus in near future. Same goes to doing Duke3D v1.5 pistol start each level on CGS skill while recording demo and uploading them here (they should be compatable with BuildGDX and RedNukem). Though this will be most likely done during December.
Anyway, I should mention a couple things before I start with the review:
First, if you want to play the original DOS version and have difficulty installing Plutonium Pak, make sure you do the following:
1) Install a clean copy of your original Duke Nukem 3D Full Version 1.3D. Either copy the DN3DINST folder from the CD or install the game as usual. By default, it should install into C:\DUKE3D\
2) Insert your Plutonium Pak CD. Copy the contents of the PLUTINST folder into your DUKE3D folder, overwriting the TEN folder if asked.
3) Execute the patch. If it fails for various reasons (most common being the date of files not matching the expected date, despite the original DUKE3D being dated 19/04/1996 13:30, though the hour may be different, depending on timezone), then your copy of DUKE3D is now corrupted. Reinstall the game with the two steps above before applying the patch.
4a) If having a 32-bit system (e.g. Windows 7 32-bit), then go to start menu and run cmd.exe. Then use "cd .." command (without quotes) until you get to the main C drive directory. Now press cd DUKE3D and write the FOLLOWING line:
patch.exe patch1.rtp -notimezonecheck
Now the patch should work and the files will be quickly patched, converting Duke Nukem 3D Full Version v1.3D into Duke Nukem 3D v1.4 - Atomic Edition! The files will now have a date (DD/MM/YYYY format) of 21/10/1996 13:40. If you install the Atomic Edition v1.5 (original install or patch v1.4 to v1.5), then the files will be dated 11/12/1996 13:50!
4b) If having a 64-bit system (e.g. Windows 10 64-bit), then you MUST use DOSBox (or a fork such as DOSBox-X) to run the patch, although the patching process will be rather slow, taking around 10-20 minutes to complete the patch.
DOSBox X is especially recommended if you prefer the installation process to preserve the original modified date of the files.
Unfortunately, not even DOSBox-X will preserve the date of files in case of patching files from one version to another. Installing a DOS game in DOSBox-X will usually preserve the original timestamp of files. But in case of patching a file (and installation of certain games), it will NOT preserve the original date and modify the timestamps to present time.
In this case, I just recommend getting Duke Nukem 3D v1.5 - Atomic Edition and not bothering with any of the patches!
To play Atomic v1.4 or v1.5 without CD, you must have CD inserted/mounted (or EXE cracked or whatever) and ALSO have a CDROM.INI file present in the folder. The file should automatically get created upon installing Duke Nukem 3D Atomic Edition. If that file is not present, then create a text file, save it as ini, modify the ini file and write the following line in it:
d:\support\
Replace the letter d with whatever is your CD/DVD driver letter. Enjoy playing!
Second, here is the changelog between versions v1.4 and v1.5:
Quote
NOTE:
Save games and configuration files from older versions of Duke 3D
will be deleted if they exist. They are not compatible with the
new version of the game, and you will need to reconfigure after
installation.
-----------------------------------
December 11, 1996
Here is a quick list of the changes from v1.4 to v1.5.
1. The major bug was fixing a memory corruption error that definitely
caused the 'slowdown' bug. This bug probably fixed various other
things like some random crashes, and save/load problems. While it
might not fix everything, memory corruption is the worst possible
bug, and this one was fixed and the slowdown/massive caching
seemed to go away. If you still experience lots of disk caching
when playing the game, load SmartDrv at DOS before you play the
game. Typing "smartdrv 4000" works well.
NOTE: You will need more than 8 megs to do this.
2. Fixed a bug where the game would pop up the "Mighty Foot" weapon,
when other weapons were available. Really annoying.
3. Fixed the bug where if you save a game, exit to DOS and reload
from the main menu, you got E1L1 music, no matter what level
it was.
Thanks to many people online that tested special versions for us,
or helped provide more information very quickly. It enabled us to
get this patch done as fast as we did.
--The Duke Nukem Team
Third, there are a lot of interesting changes that were done between v1.3D and v1.4/v1.5. I don't think there is a full list of changes anywhere and I plan to create a similar topic one day about differences between ALL DOS Duke3D versions, at least the commercial ones (v1.3D, v1.4 and v1.5).
For now, I will say that the demos recorded in the Atomic Edition are different between v1.4 and v1.5, which I don't think many people know about. We all know that the demos showcased are Freeway (E3L11), Area 51 (E4L11) and Duke-Burger (E4L2). I don't know why they chose an E3 map for first demo when they could have only showcased three E4 maps instead but I suspect it is because E3L11 was secretly updated in the Atomic Edition. Yes, a few maps from the original 3 episodes were changed in the Atomic Edition. Those being E1L1, E1L2, E1L8 and E3L11. I believe I was the guy who asked years ago on the Miscellaneous Knowledge Topic about the updated maps in the Atomic Edition, after reading a post from someone who mentioned these levels being changed, I guess I asked what was changed in them.
Back to the demos, they aren't as good as the ones from v1.3D, since these new Atomic ones end abruptly or Player dies in them after a short period of time.
In the first demo (E3L11), in v1.4, the player seems to be playing on CGS skill because there are more Octabrains present. He also seems to have the Medkit bound on the attack button, which causes the medkit to get used as soon as taking a hit and attacking at same time. This is a common tactic for Dukematch and I guess the demo player forgot to rebind the controls. It's not unusual because the original v1.3D demos had the medkit button bound on crouch button. Anyway, in this v1.4 demo, the player dies by getting closer to the Battlelord. In v1.5, the demo is recorded on LR (I guess) due to less enemies present and the demo ends abruptly when fighting the Mini Battlelord, despite still having over 100 health left.
In the second demo (E4L11), in v1.4, the demo is recorded on an easier skill (POC or LR) because there are few enemies present. Demo ends abruptly when falling down the vent. In v1.5, it is most likely recorded on CGS skill to make it more action packed and player eventually dies upon blowing up a pig cop tank.
In the third demo (E4L11), it is probably recorded on LR skill in both cases. In v1.4, due to the player's binds, it often brings up the "HOLODUKE NOT FOUND YET" message on the screen, suggesting the player is trying to activate a Holoduke that he doesn't have (another common tactic in Dukematch, much like with the Medkit). The demo eventually ends upon entering the restaurant, despite having around 40 or so health, the player seemingly dies, most likely a pig cop got lucky and inflicted full 49 damage. In v1.5, the demo ends upon shrinking and stepping on pig cops and then collecting a dropped shotgun.
We can reach the conclusion that v1.5 has the better demos compared to v1.4 but I still think that they could have been improved. Like maybe v1.4 could have showcased E4 demos and v1.5 could have showcased one demo for each episode and hopefully in order, much like The Ultimate Doom did.

Fourth, here is the walkthrough/secrets guide for Duke Nukem 3D (all 4 episodes)
http://legacy.3dreal...ough/index.html
https://infosuite.du...ge=game_secrets
Youtube Walkthroughs by BigMacDavis, BringMeLight and LightningBoltForever:
https://www.youtube....HNM32BrfK9nfpPJ
https://www.youtube....UUeI15CHnpiQXqe
https://www.youtube....7O8q_75l9FJqAB5
The playthrough by BigMacDavis only covers the first 4 episodes, not the 5th episode for some reason but if you want to watch it for first four episodes, then feel free, as his commentary will be helpful at times.
I recommend watching the playthrough by BringMeLight, which is the playthrough I've watched in 2020 for getting all secrets in Episode 5, because it shows the timestamps and the contents of each secret, as well as the location of access cards and where to use them.
For more details regarding Plutonium Pak, consult the following pages:
https://legacy.3drea...ke3d/index.html
https://legacy.3drea...tomicfixes.html
https://kb.speeddemo...ch_Installation
Fifth, to talk a bit about myself and share some of my Duke3D experiences and how I came across the Atomic Edition. I initially grew up with Duke Nukem 3D v1.3D (though it wasn't an original CD copy, it was present on a compilation CD with games called 3D Action Games) and then sometime in 2006-2007, I was watching YouTube videos about Duke3D. This was around the time I discovered YouTube and the modding communities for many games. Many of those Duke3D videos on YT were running in source ports like JFDuke3D and EDuke32, sometimes with HRP loaded and often it showed 4 episodes (or 5 if you count USER MAP) in main menu and made me interested in searching for Duke3D episode 4.
In fact, one day I was bored and googled "duke nukem 3d episode 4". Then I looked at the search results and was happy to hear there exists Episode 4 and I came across various speedrun videos by Fernando Calvo (aka Fernito). I don't think those speedrun videos were uploaded on YouTube at that time but instead they were on the Google Videos website (does anyone remember this? I remember the last time I came across those Duke3d speedrun videos on Google Videos was in summer 2012, then a year later the website was gone).
I watched an E4 speedrun and was impressed with the level design and the new aliens and wished I would play this episode one day!
At one point in my search for this "new" version of Duke3D, I came across the original 3D Realms website and read about the Atomic Edition but even after trying to find the download button or downloading the 1.5 patch or googling "duke nukem 3d atomic edition free download", I was unsuccessful at that time, leaving me with memories of those speedrun videos and various Duke3D dreams I've had at that time.
One year later (sometime during late 2007), I managed to find and download Atomic Edition uploaded somewhere for free. It was running on an outdated/pirated jfduke3d executable (with NETWORK GAME option in main menu, running in OpenGL mode with glitchy/loud sounds) and having all expansions included but also some weird stuff going on, like ammo was changed for all weapons (example 222 max ammo for pistol, 68 max ammo for shotgun, 444 max ammo for chaingun, etc), 50 starting armor and the episode order was changed, something like first episode being DUKE IT OUT IN D.C., the second was L.A. MELTDOWN and the rest were the same (including USER MAP option) but LUNAR APOCALYPSE was no longer in the main menu? WTF was going on? Turns out I had to start the shortcut "Play Atomic Edition" instead of main DUKE3D.EXE. Oh and that DUKE3D.GRP file was modified because EDuke32 wouldn't accept it. I really wanted to play DukePlus mod at that time, as I had discovered the modding community!
Another year later (sometime during mid/late 2008 or early 2009), I came across another pirated jfduke3d version, this one was probably the latest (2005) build of JFDuke and containing only the main Atomic Edition (DUKE3D.GRP) but also two random user maps. Anyway, this version no longer had weird stuff in it and its DUKE3D.GRP could be used normally for source ports. Around this time is when I started to get familiarized with the modding community, despite not joining Duke4.net until 2014, as I was only registered on a few Doom forums at that time.
A few years later (around time Megaton came out), I managed to get original CD copies of Duke Nukem 3D and all its expansion packs from eBay. I even used to have the GOG version and Megaton Edition around the same time but after that, I no longer have them due to no longer having those GOG/Steam accounts. Too bad about that, since it is no longer possible to acquire them legally...
Without further ado, let's start reviewing! I won't repeat what people have already said, so I will mostly talk about hints, tips and tricks for most levels, as well as offer a bit of a "strategy guide" and hidden surprises (such as hidden non-secret atomic health pickups) at times.
THE BIRTH
The first thing you will notice when starting Episode 4 is a new cutscene with General Graves showing Duke Nukem some footage recorded by an undercover operative. It is revealed that the new aliens (Protector Drones) have captured a woman in order to give birth to their new leader (The Queen), who is capable of spawning even more aliens! You will see that later on. For now, let's go to the levels themselves!
It's Impossible
by
Randy Pitchford
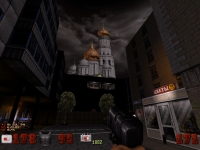
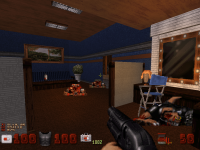
Get ready for Randy's first map and the introduction to The Birth episode! The first thing you will notice is that there is now rain and thunderstorm outside. Don't stay too long or you may get struck by lightning! Thankfully it's not an instant death but it still takes away about 10-20 of your health if it strikes near/on top of you.
You will also deal with 3 turrets (two in front of the main door and one inside a secret area you can reach by climbing the ledge). You will already access two secrets in just the starting room, though I recommend saving two atomic healths (one from the mentioned secret area and one from the kitchen) for a much later part in the level. I used to collect the atomic health early on but saving them for the end will be essential to survive a nasty trap!
For now, approach the rooms carefully. You will find a few pistol pickups, so that means pistol will be your main weapon for a while. Pressing on the tape will cause it to self-destruct, so DON'T STAND near it when it happens! There is also a crack to blow up the pillar in the middle of the room, which rewards you with THREE Large Medkits, though they should be grabbed carefully to prevent accidentally grabbing others when not needed.
You have the choice between going left and right. I recommend going right to kill those enforcers and grab the shotgun and an armor inside the locker. If you are lucky, you may get an early chaingun dropped! Though you should find it in the bathroom anyway. At this point, I recommend going back to the main room and clearing the corridors and solving some easy switch puzzles.
Once you have cleared the following corridors, now approach the kitchen, clear the enemies, access a few more secret areas (the second armor pickup should be saved for later) and then the barracks. Be careful of those pig cops and enforcers hidden in that room, as there's about 8 of them in total. Be sure to also grab the secret jetpack from the barracks or else you won't be able to backtrack to the earlier parts of the level once you drop the vent (after using the red card).
After you use the blue card to deactivate the forcefields, clear the following room but also watch out for a few monsters (enforcers) spawning. Collect the red card and access the RPG secret (it contains a pig cop inside as well). Clear the room that you reach by taking the elevators (each elevator also has an enforcer waiting for you) and then take out the three sentry drones. When you are done, insert the red card. You may also want to check around the room, a hidden cache with two ammo packs for Expander and two small medkits. Once done, grab the pipebombs, enter the vent and throw a pipebomb BUT DON'T DETONATE IT YET! Go back to the previous room and then detonate it! The explosion will reach until the door and you don't want to get caught in the nasty explosion! Now, before dropping down, make sure you grab EVERYTHING! Armor, Atomic Health (if you saved the two atomic healths, you should have 200 health now), ammo, secrets (you should have 6/7 secrets found and all weapons except Devastator which is found in last secret in the level), etc.
Once you are ready, switch to the Shrinker or if you don't have it/no more ammo, then chaingun or whatever strong weapon you have but no explosives that can't be used at close range! The reason for that is that there is a really dickish trap that slowly reveals a corner containing one trooper, pig cop, enforcer, which all depends on the difficulty settings (POC will have just one trooper, LR will add a pig cop as well, CGS and DIG will add an enforcer as well). And you must kill them quickly or back in a corner and hope you don't get overwhelmed or else you die! This is why it's important to have the extra health and a full (or almost) armor. Sure you can also avoid the trap by using the jetpack secret but where's the fun in that? You should kill all those 101 enemies anyway!
Once you are done, use the pistol to shoot the switches and unlock the door. After taking out the next couple of enemies, go to the next room with those opening doors but before going forward, go to the nearby vent. You will find a couple more monsters and eventually access another atomic health and more monsters guarding the Devastator. If you can trick the commanders to get squished by the door, you should save some ammo/health for later.
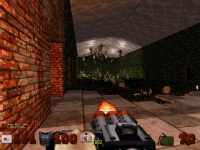
Now, go back to the main room and take the elevator. You will see a single pipebomb in front of a cracked door. You know what to do. Before detonating the pipebomb, I recommend taking the elevator up, getting some distance and then detonating it, just to be on the safe side. You will eventually have to fight about three PROTECTOR DRONES! These new aliens (if this is your first time playing Duke Nukem 3D Atomic Edition) have 300 health and have both a melee and ranged attack. They are somewhat similar to the Revenants from Doom 2 in terms of stats, obviously both having their own tricks up sleeve. The protector drones may be easier to handle due to not being that dangerous once you learn how to deal with them and you can often kill them without taking damage. Although their shrink ray attack may get you sometimes, so it's recommended to have the Steroids ready just in case. Their scratch does 22 damage and can be deadly if you get cornered by multiple drones at once. And finally, once they die, they drop toxic acid on the floor, so it may hurt you a bit but at least that v1.3D bug was fixed, so the boots (if available) are now protecting you against the acid dropped on floor (barrels, slimers, protectors). After clearing the rooms and doing everything correctly, you should still have plenty of health and armor and the whole arsenal for the next level!
Overall, not bad!
It's Impossible is a decent starting map which is quite challenging at times but while it suffers from oversizing (or at least some doors/rooms having weird proportions) and some rooms being rather bland, I think this was a fine level overall. I only wish there was continuity to the next level.

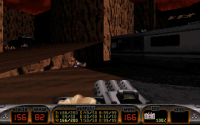
 Duke-Burger
by
Allen Blum
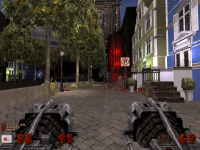
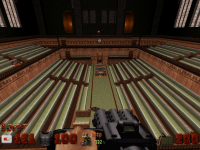
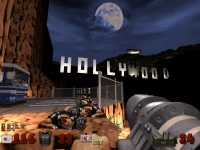
Ah, Duke Burger! A true classic map and one of the most memorable and best maps in the whole Duke Nukem 3D! It oozes with atmosphere and features plenty of funny Easter Eggs and it's also quite challenging at times!
The first thing you want is either ignore the RPVs or shoot them down with your pistol. The trash can at the beginning, contains another pistol, so it should help with giving you extra pistol ammo if you need, though if pistol starting, you may want to ignore the RPVs for now and only focus on the pig cops and...THE PIG COP TANK! These are the other new enemies, having 500 health and taking a lot of punishment, they also have three methods of attacks: machineguns, lasers and mortars. The first attack is mostly done at close range, while the others are done at long range.
To get rid of pig tanks quickly, there is a neat little trick: Get behind them and spam the USE button (default SPACE or E for source ports/Megaton/World Tour). The tank will explode (the explosion is quite large and does about 20 damage) and the pig cop will survive sometimes. This is tricky to do because the tanks have a habit to turn around and fill you with bullets while you are trying to get behind them. I found that jumping over them or even taking cover when they start shooting, should work most of the time. Doing this will save you a lot of ammo (about 3 rockets) and if done correctly, even health will be saved.
After taking them out, check that dumpster. You may want to immediately jump out of the dumpster because it will activate a nearby explosion, which reveals a large medkit.
To get the blue card and Shrinker/Expander, press on the ORDER HERE button. You will hear a voice saying "Go away, we're like...closed!". It opens the nearby compartment containing the stuff mentioned earlier. I imagine this may have gotten the people stuck back in the day but if they watched the third demo, then they wouldn't have been stuck! Enter the restaurant, clear the enemies (check the vents, bathrooms, etc) and throw some pipebombs to kill those troopers behind the forcefields. This will be useful for later when you get to this particular room.
Now go to the bathroom and take out those enemies (be careful at the door exploding). I recommend to save before doing this. Notice the message that says "Think Smaller" if you look carefully in the mirror? What you are supposed to do now is to shrink yourself and go through the nearby tiny vent. Don't worry if the mirror broke, it still reflects the shrink ray somehow. However, you don't actually need to shrink yourself to access the kitchen. If you know where a secret is found, you can enter the secret and bypass the shrink puzzle, saving you trouble from getting stomped by enemies if there is any still around.
That particular secret is found near the drive thru window (where an atomic health is found). You just need to jump from that ledge to the center of the wall or use the secret jetpack from the previous map if you have it, then that secret leads you directly into the kitchen and allows you to deactivate the forcefield to return to main hall.
Speaking of atomic healths, there's THREE of them in this map. Two of them are contained inside that "D" meal box. I like to call them Dukemeal boxes and it's an interesting coincidence because there is actually an user map called "Dukemeal Restaurant" that is inspired by Duke-Burger but hey, I'm getting a bit ahead of myself here, I suppose I could have a random map pack nominated one day and played for the Map/Mod club because there's a lot of gems waiting to be played.
Now where was I? Those "Dukemeal" boxes are quite rare and only appear in this level but are also found in various user maps. The trick here is that breaking them will spawn an ATOMIC HEALTH! And yeah, all 3 atomic healths are found nearby each other, so if you are a resourceful player and want to finish the level with 200 health on a continuous playthrough, you should keep two of them for later. Armor can also be found inside kitchen and near the switch that unlocks the door leading to the exit. Not to mention with the levels containing many pig cops, chances to get extra armor pickups are quite high.
Anyway, go to the next room, take the slimer eggs and enforcers, look for more enforcers spawning, grab the red card, clear the next room and detonate the trip mines. To grab the Devastator from those mini crushers, just stand near the entrance. You don't need to go through the crushers, it's enough to stand nearby and Duke will grab it!
For the rest of the level, you will fight pig cops, enforcers and protector drones and two pig tanks spawned outside. You will also come across a live dog that you can...kill! This dog resembles the character "Scrappy Doo" from the good old Scooby Doo cartoons. There is even a message "Scrappy Due" that references that little dog, so this pretty much confirms it.
And yeah you need to blow up those cages in order to access the last secret area. And speaking of secrets, there is another secret in the previous room that contains RPG. You just have to be careful with going to the direction the door rotates or else you may get crushed!
And although there isn't as much of a continuity as in original 3 episodes, there exists a small continuity between this level and the next one. If you check the monitor near the Nuke Button, you will notice the starting area of Shop-N-Bag. This will soon explode while you start the next level, so I gotta give them credits for offering some continuity, unlike Randy who doesn't have continuity in any of his levels!
Overall,
Duke-Burger is a classic and still worth revisiting nowadays. One of the best levels in the original Duke Nukem 3D!
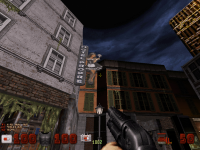
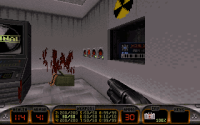
 Shop-N-Bag
by
Richard Gray and George Broussard
While I wish we got to play Levelord's original vision of this level (aka the original version of this map, which used to be called Shop-N-Drop which sounds a bit better than the name we got), I am not disappointed by playing this version of the map. I thought it's fairly good overall but it could have been better, that's for sure.
First, you get attacked by troopers immediately as soon as the level starts but most/all should die from the explosion and you shouldn't take any damage or very little (usually one trooper survives). After that, clear the starting area. Just like with the previous two maps, there are three atomic healths available in the level, as well as two armor pickups. If playing on a pistol start, it is recommended to find the armor secret as early as possible or else you will have quite a way to go until you get to the second armor pickup, unless you get lucky with the armor drops from pig cops.
Anyway, for the enemy placement, there seems to be many turrets around (pistol's autoaim and RPG are the fastest ways to take them out) and some awkward pig cop tanks, like the one placed in the narrow corridor after using the blue card. This one is also difficult to get behind its back to press on the button, unless you get lucky or end up getting shot or in a funny situation of pressing on the monitor. Oh yeah and that Protector Drone behind that window will get crushed from those crushers, which is what will give you the "SQUISH!" message on screen.
After clearing the next couple parts, there's a few interesting puzzles involved:
1) To get the yellow card, only two buttons are correct (left and middle)
2) Next, unlock the yellow door, take out the commander behind the bars (you can shrink him, provided he is close to the bars so you can stomp him in time) and SHOOT the switch at the ceiling. This will open all the bars in the level.
3) In the other room, you will come across four switches. Press on the last two to unlock the door behind you.
4) In the next room, there is the timed puzzle to shoot the switch behind you while looking up which opens the nearby safe revealing the red card. This puzzle is easy to do with the mouse (source ports, Megaton, World Tour) but somewhat challenging to do with keyboard only controls (DOS version). I got lucky I got it in first try. Just keep in mind the pistol has a random spread when shooting at switches, it's not perfectly accurate like when sniping enemies from miles away.
After getting the red card, taking out the hiding commanders and protectors, get ready for the last room which contains the last two secrets and a hidden atomic health behind one of the crates.
After pressing the switch and opening the last door, take out the protector and the trooper, then take a look at the crushers. You obviously don't want risk going through them. Instead, approach the wall and a switch gets revealed temporary. Shoot it to access a Multi Switch. This switch turns off the crushers one by one, removing the difficulty of the crushers and only leaving the acid as the main hazard. You still need to time the switches or else you may end up stopping a crusher at worst time, forcing you to press the Multi Switch again until you get it right. This puzzle I usually complete in first attempt but in my last DOS playthrough, I had to press the switch several times because there would be one crusher stopped at the worst possible time.
And finally, don't forget to get to the nearby Snake Plissken Easter Egg, which also rewards you with various goodies, including Boots, Medkit and ammo and a way to backtrack to earlier parts of the map.
Once you found/grabbed everything, navigate through the acid and stopped crushers to exit the level.
Overall, this level was fine and certainly memorable (on my first The Birth playthrough, I got stuck here first time because I didn't see the ceiling button after) but after reading about the story behind Plutonium Pak and Levelord quitting during the production of the expansion, I feel sorry for what happened and wished that Levelord had finished the levels himself before leaving, then maybe this one would have been much better, though I got to say I always get enjoyment from approaching that computer running Duke3D (near the place with the red card button puzzle) and hearing Duke say "Get back to work, you slacker!". I always loved attention to detail and funny jokes like these. It reminded me a bit of how Duke comes across that Duke Nukem II arcade machine in Hollywood Holocaust!
BTW for those who don't know about the story behind Levelord not getting credited in Plutonium Pak, I managed to save the following links (archived)
https://web.archive....com/inter17.htm
https://web.archive....dex1997-03.html
Thanks to Jimmy for posting them on the forums many years ago!
 Babe Land
by
Allen Blum
This is quite an interesting and controversial level. It seems people have a "Love or Hate" relationship with this level. I personally think it is one of the most interesting levels in the game but also annoying (mostly if the enemies get lucky with their attacks) and a bit confusing, like the infamous shooting gallery section that I will talk about shortly.
There is a bit of continuity from the previous level, by starting near the acid sector (not on top or that would have resulted in starting the level without any weapons/inventory/armor, due to the game's hardcoded behavior). After that, take out the pig cop, turn off the forcefield and take a look at that annoying robot mouse. He is supposed to be a robotic version of Mickey Mouse, which further proves that this level is Disneyland-inspired (though it could have been better). Destroying the robot mouse will make Duke say "Damn, that was annoying!". There's only like two or three in the whole level but there's also many robotic versions of pirates and even a dog! I wish they all got the full interactive treatment, I am sure it would have been a lot funnier if you could shrink the mouse robot and step on him, although this also conflicts with the fact that mechanical enemies are immune to shrinking. Still, the dog and the pirates could have been interactive instead of being made of glass, apparently...
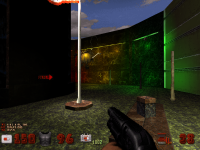
As for the actual level, clear the starting areas, jump on the boxes, then on the pillar to collect the atomic health (if playing continuously and your health is above 150, then it is strongly recommended to save that atomic health for later, so instead just fly with the jetpack to reach the room that had two pig cops in it and complete the switch puzzle), clear the underwater areas of slimer eggs and octabrains (a combination of Pipebombs and Devastator will do the work for you, Expander also works wonderfully against groups of eggs). Then go to the room with troopers and spinning cups. You must either shoot the 3 switches or jump up them and then it will unlock blue card. Go back to the main opening, go towards the area where you insert blue card and prepare for the part with the shooting gallery!
Before shooting the targets, blow up the crack, take out the two protectors and register the secret, QUICKLY collect the two atomic healths on the water currents because if not collected in time in first couple of minutes you entered this room, then later on they will become inactive and unreachable. Sure, you can do the crouch jump glitch or somehow shrink yourself (lure a protector drone?) to access those tiny areas but it is the best you grab them now before you move on with the red card.
Ah yes, speaking of which, use the pistol to shoot the targets 2 and 4 to access the secret prized room and get the red card which is guarded by two pig cops and yes this room is counted as an actual secret place (E1L2 and E3L7 also did similar things with secrets intended for progression, E3L7 having similarly a red card in a room that wasn't really a secret but had the secret tag anyway) and yes the red card is placed behind the armor pickup, which makes it hard to avoid grabbing the armor by accident (once again it depends if playing continuously or pistol starting), though chances are you already got an used armor earlier from a pig cop, thus doesn't make much sense to waste an armor for nothing. At least there's another armor pickup later (yes, the armor is far more useful than most people think!)
I admit this puzzle could have easily get me stuck back in 2007-2008 but watching those speedruns in advance helped me memorize the solution that all you have to do is shoot the targets 2 and 4! You are even given about 3-4 pistol pickups which allows you to shoot freely and it's nothing more than a different version of the switch puzzle, except this time you have 5
switches targets!
Once done, insert the red card and move on to the next part. At the end of the corridor, when you step on the sector, quickly turn around and take out the spawned protector drone! There is also a spawned pig cop that can be found all the way back to the previous area, not sure if he spawns upon inserting the red card or touching that sector. All I know is I wasn't aware of that extra pig cop spawned until the last few years/playthroughs! Yeah, there's still new things people find in the original Duke Nukem 3D even after all these years! And there is another thing in a later level I found recently too or at least I don't remember finding before!
Going back to the corridors with pig cops and protector drones, you should watch out for many pig cop ambushes that will happen. I recommend getting closer to the window and kill those two pig cops! Don't step near the Please Wait sign or else it will reveal a couple nearby pig cops. First take out those RPVs with your pistol/shotgun/chaingun and once done, have your RPG ready. A single rocket will take most/all of those pig cops that will ambush you! That area also contains a few goodies up there, including another armor pickup and pipebombs! You may also get additional shotguns/used armors if you wish.
After taking them out, take one of those moving boats (each contains a different weapon) and wait until you reach the next destination, where you will see a pig cop in a cage and also a robotic dog with the robotic pirate. But be careful as you will get ambushed by more pig cops nearby. Just take them out with your RPG and inspect the dropped supplies (shotgun/armor) if you need. And of course blow up the crack to get extra RPG ammo.
At the next intersection, take those troopers and more ambushing pig cops. Collect the stuff and even a new pair of boots if you need any (if you still have those boots from the previous level, then save the new ones for later). Now carefully approach the next area from the RIGHT SIDE, as you will have a better angle to take out the Mini Battlelord but also watch out for any leftover RPVs, flying troopers (they tend to mess up with your autoaim) or those cannons that apparently count as enemies (in World Tour, they probably no longer count as enemies, I forgot to check but they should be destroyed anyway). The cannons fire at you when you hit them and while their projectiles deal little damage, they are quite obnoxious and the explosion range seems to be pretty high. Nothing more annoying than seeing the screen turning red at times, though once again they do low damage, so don't fear if you suddenly lose like 5 or 10 health.
After clearing the mini battlelord on the pirate ship, swim in the acid (the acid is only harmful when standing on surface, otherwise it acts like water and changes the tint to green), take out those slimer eggs and octabrains with explosives, blow up the crack to access an optional area, kill those pesky sharks, surface once in a while to not drown and finally, find out the first scuba gear in this episode! After that, surface by going towards the pirate ship, kill more Octabrains and eggs to access a teleporter to the pirate ship (there is another teleporter that sends you on an earlier part of the level, right before those moving wooden boats).
Destroy the cannons, press the switch to lower the barrier, eliminate another Mini Battlelord and some more troopers, then approach the unlocked the area (watch for those two hiding troopers in the corners). Climb on the box, take out a spawned protector, then kill about 5 more protectors all waiting in the last rooms. If you feel like you need more health, grab the atomic health you saved earlier or from the secret place near the pirate ship (requires a jetpack to reach it, which is given right there near exit corridor). You will eventually reach the penultimate room with the annoying laser trap, after you solved the switch puzzle. I kinda wish this trap was firing shrink rays instead but then either it would have been more annoying (the protectors are immune to shrinking anyway) or the projectiles could be dodged by just crouching. Considering that the automatic shooters actually aim certain attacks at you (such as lasers and rockets) but the shrinker projectiles are only fired in a straight line.
Avoid the lasers and reach the exit room but DON'T EXIT YET! There is a protector drone waiting right behind the door, ready to fuck you up during the ending animation. If you die during the exiting animation, then you still advance to next level with 100 health and all the stuff you had before intact, you will just lose your armor as a side effect. This is somewhat of a cheap tactic and a bit similar to what happens in custom Doom levels if you die during exiting a level (with the major difference being that in Doom you lost the entire stuff you had, although your health was also reset to 100) and I just recommend to backtrack if you are low on health, preferably before getting hit by those damn lasers (it's nearly impossible to avoid the lasers unless you get lucky). Otherwise you may end the level in a poor low hp state and it will make the beginning of next level incredibly difficult. That's why I recommend saving those two atomic healths and an armor pickup to start the next map with (almost) 200 health and 100 armor. In my previous DOSBox Duke3D 1.4 playthrough (from 2020), I remember this is where I died first time in the episode (the second death and last one was towards the end of episode), right at end because I was low on health and got killed by last protector drone and I no longer had any medkit in inventory but this time around in all 3 playthroughs I've done as of lately, I came prepared with higher health and finished the level perfectly. In Megaton, I was lucky to not get hit by lasers at end but in WT and Duke3D v1.4, I got hit by two lasers in back when running and finished the level with 184 health (and around 90 armor). It's not that big of a difference but still worth pointing out if you want to finish the level perfectly.
Also in the screenshot I took, there seems to be a minor glitching regarding picking up multiple Expander Ammo at same time. The number on HUD doesn't fully update until after the message disappears. On the screenshot I may have 32 ammo but in reality I had 50 ammo. This glitch seems to exist in every Build Engine game with different items depending on the game. I just had to point this out. Though at least in the original executable, the Expander Ammo appears correctly on HUD, while in World Tour, the ammo for slots 7 and 10 doesn't show up if you are holding Expander/Incinerator, it always shows the Shrinker and Freezer ammo.
Overall, I guess the level is fine and quite interesting but it's also quite annoying. I just appreciate the level a lot more in last years compared to a decade ago, to say at least.
 Pigsty
by
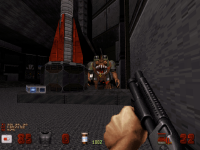
Richard Gray and Randy Pitchford
Another interesting level made by the legendary Levelord and probably much shorter than the previous levels but at same time I also wish it was entirely finished by Levelord. According to what Levelord said, the level was actually called Pig Sty and those hanging juries in the normal exit room were actually hanging monks (those ROTT monks, like the one you see hanged in Death Row). I don't think Randy made other edits in the level. Though the level continuity could have been better because there isn't any continuity between Babe Land and PigSty.
With that said, when you start the level, you will hear a few sounds: a car crash followed by some pig cops shooting and dying. It turns out the whole place is infested with pig cops (hence the name of the level) and of course some extra pig tanks as well. As usual, get behind their back and push the button! If you need any armor, there is one available right at beginning inside the entrance of the building (or you can save it for later). I don't feel like offering a walkthrough, as the progression is fairly straightforward but I will still point out some interesting stuff:
In the area with the monitors, you may notice a monitor showing a DUCK sprite and an exclamation mark! This is obviously related to the commander that spawns behind you upon stepping on that tiny sector, the message is telling you to avoid the attack but most players won't realize that and this spawned commander may get a cheap shot behind you. And since he isn't spawned initially in the level, not only he isn't affected by difficulty settings but can also be avoided entirely by not stepping on that sector, which means the enemy won't influence the amount of kills count at the end of the level. If you wish to go for all kills, then go ahead, make my day!

(sorry, I couldn't resist)
Oh yeah and speaking of more funny Duke Nukem quotes, there is indeed that bleeped/censored Duke quote "Yippee Ki-Yay, Motherfucker!" as DNSKILL has stated in an early post. While I don't really understand the reason behind why this line was censored in first place, I think back in 1996-1997, according to a website I have read not too long ago (I wish I could find that source again!), commercial games weren't allowed back then to contain the word "fuck" in them, which explains why Duke can say words like "Bitch" and "Shit" but no words like "Fuck". Don't ask me why but I think this is a bit similar to the Cuss Pack from Redneck Rampage, which replaced the original lines spoken by player and enemies with many swear words. That cuss pack wasn't available in the initial release of the game but it had to be ordered separately online and eventually it was included in compilations/re-releases of that game. I think it could have also been due to the age/rating of the games, though I'm sure they got rated for 18+ years anyway. I don't know any more of this story, so if anyone knows any more details, please feel free to correct me!
Back to the actual level, there are about four atomic health pickups in the level, three of which are inside secret places and one is somewhat hidden in the final room where you fight the Mini Battlelord. Just as soon as you step on that floor that reveals two more pig cop tanks, if you look behind the broken chair, there is actually an atomic health sitting here, very easy to miss due to blending with the broken chair sprite. This is obviously a great benefit for continous players! I didn't know about this atomic health until a couple years ago. And speaking of more hidden atomic healths, there's another one I didn't know until recently but that one is found in a level we will talk about soon.
The secret exit is right there behind the portrait. Just open it and you will find a room with a large secret nuke button leading to the only secret level of this episode, Area 51! But before ending, make sure you grab everything (including that secret at the beginning of the level, requiring a jetpack which is thankfully present in this level) and also visit the normal exit room with the hanging juries. Too bad that destroying them will not make them drop anything. While it would have been nice to have them all drop atomic healths, I feel like this level already has plenty of atomic healths.
Overall, this was an interesting level and found it pretty good overall. Just a shame that Levelord didn't finish the level himself and the same applies to his rest levels. I can already imagine what E4 would have been like if it was only made by Allen Blum and Levelord...
 Area 51
by
Randy Pitchford
And now time for the secret level of this episode! As you may have guessed, this level is made by Randy Pitchford and IMO, this is probably his best and most interesting level of his all three contributions.
Anyway, when you start this level, you begin in a separate part from the rest of map. This beginning part cannot be visited again at a later time, so grab EVERYTHING you need, though if played continuously, you probably have a full arsenal anyway, so it's not like there is anything to be gained. You have to fight two or three troopers, blow up the nearby crate, press a button and reach a teleporter. If you are pistol starting, you might want to grab EVERYTHING because once you step into teleporter, there is no way back and at same time, depending on the difficulty setting, you will end up in a largely populated part of the map where you will be ambushed by many pig cops (regular, RPVs and tanks) and a few troopers and turrets too.
My advice is to immediately rush to the left side and then attack! Don't stand in the middle of the area (heh) or at the other end (near the blue card switch) because there are stray pipebombs around the place. There is a high chance one/multiple will detonate from the attacks/destroyed pig tank and you don't want to be caught near a bunch of pipebombs!
After clearing the starting area, you must drop down the vent. There is a rotating thing and some crushers/pistons, be careful here as it is possible (although I can't confirm myself) to get pushed from that thing into one of those crushers and die or just get pushed directly into the sector and die. I don't think this ever happened to me but I just recommend sprinting past and getting to the next room. There is an armor pickup below you, you have to break the vent to get it but if you already have armor, then save this one for another time.
On the following room, kill a bunch of pig cops and collect the blue card. Doing so will unleash a bunch more enemies (troopers, pig cops and enforcers) in left and right side, so be prepared! One compartment contains a teleporter leading to a Shotgun and 1-2 troopers, the other contains a few items but also an atomic health secret that requires jetpack. I would recommend using the teleporter and dropping down to insert the blue card. Just be careful with the surprise pig tank waiting you.
Once inside the facility, kill the bastards, find a bunch of secrets (including an unofficial one containing a Portable Medkit). At this point, you are supposed to fall and land on a platform (nearby you will find another Portable Medkit) or else, if you miss it, you will die upon landing at the bottom. Having the jetpack from previous map(s) will greatly help, just be careful to not activate the jetpack at worst time possible or else you will get trapped between the sectors with no way out! This is a problem that exists in other levels as well, so I recommend activating the jetpack before hitting ground to minimize/remove the falling damage and also save precious jetpack fuel. If not, then I suppose you could place a trip mine near the bottom to delay the falling and minimize/remove the falling damage. In fact, the E4 speedrun I watched back then as my first exposure to The Birth, the speedrunner did exactly that at this point in this map.
Anyway, once down, grab the devastator, press the two functional switches to deactivate forcefields and then prepare for fighting against many protector drones. There is one in a hanging position and few others simply lying around. Kill them all, grab the red card and prepare to fight three more protectors! Once done, move to the next room with the crates and octabrains.
Optional: Underwater, after taking out the three more octabrains, you can blow up the mini UFO/ship with RPG/Devastator. You don't have to do that to progress the level but I find it amusing to do.
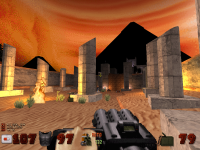
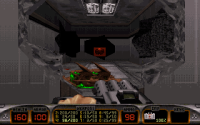
The next area has the return of BARRELS AND CRANES! I missed this cool stuff since Toxic Dump (and Top Secret from DukeDC, I guess). Oddly, the barrels are a lot larger than usual (64x64 vs the usual 40x40 size) but that's to be expected given that this level is made by the only one Randy Pitchford, so expect the rooms and objects being oversized for no reason at all. Even back in 2008, I found this weird to have such large barrels that are bigger than the crane itself. And yeah I don't like when some rooms and objects are oversized because it brings the amateurish 1996 user maps vibe.
Anyway, a few more protector drones are awaiting you. What you need next is inserting the red card and access a teleporter leading to a room you may have seen earlier. Deactivate the forcefields, press a switch to unlock the windows to previous room, grab some stuff but DON'T GRAB THE YELLOW CARD YET! If you care about getting ALL KILLS in this map, then it's time to SAVE and make a backup save slot as well! What happens is that the enemies that are supposed to spawn, some of them get bugged inside walls or never show up for whatever reason. From my latest 3 playthroughs earlier this month (Megaton, World Tour, DOS Duke3D v1.4) and even an older Duke Nukem 64 run I had done last year using RedNukem port (yes, Area 51 is a secret level in DN64!), I have finally discovered how to kill all 5 spawned enemies, though the method doesn't always work and may require multiple attempts! It's up to you to experiment and get lucky with how the enemies spawn.
First, grabbing the yellow card will spawn TWO commanders nearby and THREE protectors in the previous room. One commander will spawn nearby and can be taken out with Shrinker but another will spawn inside walls immediately. It also seems to glitch that wall and cause projectiles to go through the wall and then pass through teleporter (???). I don't know why that happens but your only hope is to kill that commander quickly through the wall, either with hitting him with rockets (eventually the splash damage will get him) or somehow shrinking and stepping him through the wall. The former sometimes works (if you see gibs flying through the wall and hear Duke say something, then you have successfully taken him out), while the latter only works if the commander is close enough to the wall, otherwise he will get stuck and never shrink but he is still able to melee you through the wall!
Second, once you take care of the commander, you will need to kill the three protector drones. One of them is already spawned and awaiting you near the teleporter. Use the chaingun or freezer to take him out and then hope that the two other protectors will appear jumping through the wall. If this happened and you killed them, then congratulations, you got all the kills! If they didn't show up, then reload the save and try again, hoping they will show up. If not, then load the other backup save before grabbing the yellow card and retry the steps above too!
Oh and after killing them, be sure to also kill the spawned enforcer too near the slope! After that, insert yellow card, take out the protector waiting you inside the elevator and look out for that Mini Battlelord that just spawned upon inserting the yellow card. The Mini Battlelord has a tendency to run to the left and not immediately face you upon taking the elevator. Now it's your chance to use the Shrinker around the corner and get rid of him easily!
After that, you must insert the Launch Code. If you looked around the level, there are a few hints provided at around 3-4 different places but the most noticeable/obvious solution is the one panel shown in front of yellow card (yes, near the glitched commander in the wall), the others aren't as obvious because you don't know which color represents the solution, you'd think that green one is the correct but turns out, the red is the solution. This got me stuck back in the day as well but after watching an YT video, I then understood which is the correct solution. I have also memorized the launch code over the years.
The Launch Code is: In left, press the switches 1, 2 and 4 and in the right side, switches 3 and 4. If you did everything correctly, you should have two switches revealed, press them to launch the rockets, look at the monitor to see a view of Duke Burger and the Independence Day Easter Egg, then in meantime while you were looking, the exit will finally be revealed.
Funnily enough, the first time I watched that The Birth speedrun, I got the impression that shrinking the Mini Battlelord at end of level automatically causes the level to end but didn't know that apparently you can activate the nuke button THROUGH the wall without needing to insert the launch code. I didn't try this in last few years to see if this still works, it might have been a bug in those older JFDuke3D builds? Not sure about that!
Overall, I like Area 51. It's quite challenging at times, design is interesting and I don't mind the launch code puzzle at the end. It's also my favorite map from Pitchford. And yes, he has another map created in The Birth, you will see much later in the episode...
 Going Postal
by
Allen Blum
Another highlight of the episode, this is another one of those memorable maps in the episode. And it's not just the big fights at the end but the design is quite good, too. But once again, I wish there was a continuity between these levels, in this case this map doesn't seem to be related to either one of the previous two maps (whether you found the secret exit or not) or even the next map. What's with the lack of continuity anyway? The more I revisit The Birth, the more I miss the continuity that was present in first three episodes! And unfortunately I feel like the lack of continuity does hurt the episode a little bit...
Now for the map, I'd say it's quite action packed. There are plenty of enemies that are ready to ambush you, most enemies you face in this level are pig cops, protector drones and slimers. I won't offer a walkthrough like with the previous maps (I'm quite exhausted from all that writing), so I will say that only recently I managed to discover a hidden cache containing ammo for RPG and an atomic health. Inside one of the secret rooms (where you fight two protector drones), shoot at the target placed on the dog poster and eventually you will access that cache nearby. I suppose the pistol and the clips lying around were hinting at that but I never thought about that until recently. At least I don't remember finding this on the previous playthroughs. There is another well hidden atomic health inside the crashed van (near where the exit is located). As for the health and armor pickups, health and armor seems plentiful in this level. I also highly recommend grabbing the stuff that will appear on conveyor belts at some points during the level.
And a helpful hint: When you reached the point where those horde of aliens spawn at end, notice those two buttons and those two panels in the middle of the street. Pressing on the buttons will spawn explosions from those panels, that will clear those aliens for you. Time the attack correctly to make use of these "free" attacks or else you will get overwhelmed! Just note that you can do this just once. Pressing the switch again will do nothing. If you get surrounded, it is recommended to jump on their heads and use steroids and run as fast as you can! Just be careful to not run into any of those two Mini Battlelords. As last resort, just abuse the M button to heal while getting shot! This is one of the few times where you should run away from a fight instead of standing still, unless you are quick enough to clear the horde in time but I guarantee by the time the enforcers will show up, you will get surrounded no matter what.
A funny Easter Egg: In the bathroom, look in the mirror to see the message "Pick Up Bart!", another reference to The Simpsons!
Overall, another fun and memorable level that is also heavily action packed. What about the next map?
 XXX-Stacy
by
Richard Gray and Keith Schuler
I thought this was a fine map overall that gives E3 vibes, although somewhat short compared to most maps in the episode and also think that if Levelord finished the map, it would have been better and maybe longer. The map was previously called Stacy's XXX during the Plutonium Pak development.
I don't have much to say or to give advices for this level, it should be pretty clear what you have to do. Maybe I can only advice to stand some distance when detonating the canisters in the room where you pick up the blue card. The only weird thing I noticed in this level are those shrink rays in the sewers. They are easy to avoid and there isn't much of a purpose for them. Maybe if there was a nearby tiny vent that required you to shrink to access a secret or whatever.
Oh and there's only two atomic healths and one armor present in the map, so if playing continuously, you should save them for the end of the level, though once again you can also get more armor dropped from pig cops if you are lucky. Overall, a nice short map that seemed to fit rather well inside E3 and even though it lacked continuity compared to the previous level, it seems there is some continuity with the next level.
 Critical Mass
by
Richard Gray and Keith Schuler
Another somewhat short level, this one seems quite interesting and filled with many explosions. Because this is a level that is very LINEAR, I need to offer several hints for completionists who want everything:
When you start the level, you have to fight two pig tanks and then a couple enforcers inside the warehouse. Considering this is a very linear level, you should grab everything before proceeding upstairs. Yes this means grabbing the new armor pickup at start and the atomic health on top of the box. It goes without saying that these are essential supplies for pistol starters but for continuous players who can save them for later, this doesn't apply here when there is no return, so grab them anyway.
When you get upstairs, in the orange room, kill the enforcers and stand near the wall while the place is collapsing! You will eventually access the first secret of the level: Homer's workstation! This is yet another Easter Egg/reference to The Simpsons! And while the room seemingly contains just donuts (you can already guess why), check in the corner behind the desk, you will find a hidden atomic health! After you are done, get to teleporter but prepare to fight two protector drones who will immediately attack you in a cramped space!
Once taking them out, break the vents and jump down! Be quick as the walls are collapsing, so IGNORE the Octabrains, swim past them, activate the switch and swim back to the safe place! The octabrains will get squished by the walls, so just wait and continue with your business. The second secret will be found here, which contains a Portable Medkit. In same room you will find a scuba gear and some extra health supplies (including an atomic health) on those tiny windows.
When approaching the next room, be careful as you will get ambushed by two protector drones! I recommend when the corridor gets dark, to quickly run to the previous room, to avoid getting cornered or worse, shrunk and stepped on. The next room has another trap involving two protectors, so step back and note that floor is electrified. Take the elevator, kill the pig cops and then kill the enforcers, eventually you grab the blue card and unlock the green alien room. Take out the Octabrains and Slimer Eggs. In this room you will find the last two secrets of the level. One requires blowing up a crack and another requires flying a JETPACK from the previous levels! Yes really, there is no jetpack in this map, as it has been pointed out before, so pistol starters will not be able to 100% this level unless cheating with a temporary god mode or SPAWN JETPACK into console or as DNSKILL did, modifying the map and placing a jetpack at start of the level! Continuous players should have the previous jetpack collected in earlier levels, assuming you didn't waste the fuel because not every level contained the jetpack (it was only found in a couple levels so far).
Once done, collect the chaingun, jump into slime, activate all 3 switches, grab the yellow card and atomic health, then jump back to the land. Unlock the door and fight more protector drones, grab the red card (funny how all 3 cards are used at short interval from each other), kill the last enforcers and rush to the exit as the place is collapsing, though there doesn't seem to be a time limit, so you can take your time to backtrack (until the middle part of the map) to grab an earlier atomic health that you may have saved for later or an extra pair of boots or ammo or whatever. When you are ready, crouch to fit through the door and then wait until the entire level collapses, the exit will be revealed. It is impossible to avoid the damage but you can minimize and only lose about 20 health, so in best case finishing the level with like 180 or so health. You will need all the help you can get for the next level! Oh and yes, there is some level continuity to the next level as well, so yay for more continuity!
Fun fact: This map was the only map changed/modified/updated in the XBLA (XBox Live Arcade) version of Duke Nukem 3D (Atomic Edition). It modified the vent at beginning if players died halfway in the level, so they wouldn't get hopelessly stuck at beginning.
I am NOT sure if this updated version of the map made its way to the Megaton Edition and World Tour edition of the game. My guess is both releases are based off the PC version and either left it like that or fixed the bug again (at least the WT edition did, which has all maps updated).
Too bad about that missing jetpack, I hope it gets added in a future re-release (I can hope in future for a 30th anniversary Duke3D re-release that includes all expansions, a new expansion and a much better port). I think the best thing would have been to add a jetpack somewhere nearby, either in that dark green room containing the secret or somewhere in the room containing the blue card.
Overall, this level may be messy at times but it's also really fun to play, especially if you do things correctly in order and end up surviving the explosions.
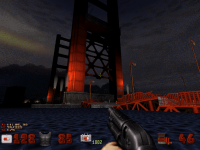
 Derelict
by
Allen Blum
The biggest map in the game (at least until World Tour came out! though still not sure which is the biggest map between Dark Side, Derelict and Golden Carnage), this level will surely take you nearly an hour to complete (in best case possible, it might take about 40 minutes to finish).
This level is HUGE and has over 200 enemies, in fact it is only map in the game that will break the kill count due to the vanilla's 255 kills limit, which will result in scoring about 20 kills overall and about 200+ missed enemies (???). Too bad this wasn't noticed during the development of Atomic Edition, as all DOS versions suffer from this problem. Source ports like JFDuke3D and EDuke32 have fixed this bug and since Megaton is based off JFDuke3D, it doesn't have this problem either. I don't fully know if World Tour fixed this, because the slimer eggs no longer add to kills, so you can end the level with less than 255 kills (perhaps I should have waited until more slimers hatched, just to experiment) and in this case I ended up with around 220 kills in this level. I assume I got around 280 kills in the original DOS executable, though Quacken says there were apparently over 300 enemies in this map. It might also be because I tried to kill them quickly to avoid hatching too many slimers.
As for the actual level, it's simply a masterpiece, EVEN if there are some annoying things about the level. I mean there are so many enemies and hazards that are ready to ruin the day, as well as some parts of progression that can get you stuck. Yet the amount of care and detail that went into this level, it's simply too good and that's what makes it memorable as well.
After reading people's mixed opinions regarding this level, I don't remember how the experience was on my first playthrough in 2008, I think I did get stuck at some points and had to watch YouTube videos to progress. The thing I remember more back then is having fun with cranes picking up barrels and corpses of enemies because this feature is back once more, in case you missed them from Toxic Dump (and Area 51 if you found it). Though I recall in the middle of the room, there was this line that caused sometimes the barrels and monster corpses to get stuck without advancing? If you don't know what I'm talking about, try taking a look at the conveyor and see if something gets stuck in the middle of that central room. It might have been a jfduke3d bug as well. It might also have to do with certain items/objects becoming inactive after a while until it sees the player again. I won't offer a full walkthrough because it will take me all day but I can still talk about some important parts:
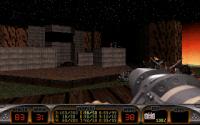
At the beginning, you will fall into water. If you still have the scuba gear from previous level, then you can clear the ocean from sharks and octabrains without worrying about drowning. Don't forget to swim inside the ship, when you surface you will access a hidden room containing two protectors, as well as a chaingun and few more goodies (NVG, Armor, Steroids) at the end of one side. Once clearing this room, go into water and then surface near the boat. If you still have your jetpack from Area 51 or earlier, then I recommend skipping the crane puzzle, simply because standing on the water while lightning possibly strikes you and getting shot by RPVs will not be a wise idea, though pistol starters have no choice but to endure damage.
Once on the boat, kill the troopers, take down the turrets, then the surprise commander and those RPVs. The surviving pig cops can then be killed by jumping down in water. They will be at surface, though their dropped shotguns/armors will fall underwater. Go back on the boat. There are a couple of goodies around, such as Pistol, Medkit and Scuba Gear. If you are playing continuously, I urge you to NOT pick up the scuba gear until you reached the end of the level and the reason is that you will absolutely need it for the next level and you will see why below!
Anyway, jump on the platform, avoid the lightning strikes (hopefully), grab the shotgun and watch out for a spawned protector drone that will jump down to you. Take him out, then jump through those windows where some pesky turrets/troopers are firing at you. You may collect the atomic health if you need it now (there is another one on the other side). Don't worry, this level is generous with the atomic health and armor pickups.
Once you made it inside, you need to clear every floor, this place is filled with many troopers! Oh and the constant opening door sound may get on your nerves, especially since enemies can also open the doors. Some of the enemies may get warped between floors, so if you are looking for 100% kills (good luck doing that in every version of the game!), then I suggest to re-check every floor after clearing the entire level, you might end up with a random trooper or protector that seemingly got lost in the level.
Watch for those pesky turrets, they like to hide in corners or ambush you. You may also get ambushed by protectors that are well hidden.
The part that is accessed by using the red card is probably one of the trickiest in the level. It has a Mini Battlelord and various protectors around the crushers. There is an atomic health surrounded by those crushers. If you are going for a no-death run of the episode and was successful in not dying so far, then DON'T risk getting that atomic health, there are plenty of health pickups anyway. It is difficult to access it, so SAVE before attempting and try running/using steroids. The risk isn't worth that much. Though you can try grabbing the atomic health hidden inside the fire (near those boxes), it is a much better idea! Once you got the yellow card, go back, take care of spawned protectors and unlock the last part of the level. Look out for various enemies that try to ambush you, including protectors that will suddenly jump to you.
After taking them out and reach the parts with the crane, eventually you need to cross the super toxic acid that eats your health/boots like crazy! It is strongly recommended to have at least 150 health, a full medkit, steroids (optionally) and boots at around 90% at least! Armor does NOTHING in this case when getting affected by the acid, so please SAVE before crossing the acid in case you screw up! Alternatively, you can fly with the jetpack to the top of those elevators to skip this dangerous part and what brought my second (and final) death on my last 2020 playthrough of The Birth episode. Pistol starters have no choice but to do the intended way. Thankfully, you can find some helpful supplies (boots, steroids, etc) nearby and also an extra pair of boots if you found that secret inside those crates (though watch out for that commander hiding in it).
When you are ready to go through acid, RUN AS FAST AS YOU CAN! Your boots will probably get consumed when you are surfacing from acid. Problem is you need to be very fast or else you will die here. You have two ways to get out but the main way is blocked by barrels and some troopers, which can lead to delaying you and eventually dying if you don't get fast enough. Under the acid, there's a few octabrains (hope you selected the Devastator if you plan to kill them quickly) and an atomic health. This is quite tricky to do it properly in the DOS version with keyboard only controls, not gonna lie. Once you made it alive, clear the corridors and then check out the other similar area with the oil (don't worry, this one is NOT TOXIC!). Similarly, you will find Octabrains and an Atomic Health underwater (under oil?). Maybe some Devastator ammo as well. To get out, shoot that button to raise the water level or use the jetpack from previous maps to fly back up.
Eventually, you will reach a room filled with many eggs, few more octabrains and a Mini Battlelord. Clear them and then swim to clear a couple more Octabrains, find a green switch to open that wall and allow backtracking to the beginning of the level and collect all the goodies before exiting the level.
Interestingly, in that last room with the Mini Battlelord and those eggs, there seems to be a non-functional crane. There was probably meant to be a functional one and either Allen forgot to make it functional or it may have been done like that due to those enemies, the crane would have trouble navigating past the slimers/eggs. Because the crane can't travel if an alien happens to be below the crane no matter the distance (a bit similar to how in the original version of Doom, the actors are infinitely tall).
Overall, to put it simply, this level is a masterpiece! Regardless of how difficult and frustrating it can be, it is a memorable experience and one of the highlights and best maps in entire Duke Nukem 3D!
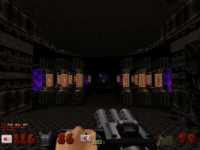
 The Queen
by
Randy Pitchford
And now for the final level of the entire Duke Nukem 3D Atomic Edition (until WT came out) and Randy Pitchford's final contribution to Duke3D! First, it starts with a small room similar to that room you saw in the intro cutscene when you started The Birth. Though once again the continuity doesn't make much sense, it is possible this room may have been intended for the beginning of the episode? As in you start in this room and then take the teleporter to the start of It's Impossible?
Anyway, in this case, you simply teleport to the main area of the level and much like with Area 51, the starting room is no longer possible to revisit later, though in this case, there was nothing to grab from that room. This is an alien themed map split into two identical looking parts. In case you don't know, this is intended as a multiplayer level for the newly introduced Duke-Tag game mode in Atomic Edition.
While the level is quite generous with health, armor and weapons/ammo, you will not find all the weapons in this level. Weapons like Shrinker/Expander, Trip Mines and Freezethrower are completely absent. I believe extra pistol pickups are also absent. So that means the main weapons you should use due to their generous ammo you find in this level are the shotgun, chaingun, RPG, pipebombs and Devastator. Forget everything else and only use these 5 weapons, as well as the pistol occasionally against troopers/eggs/slimers!
To complete the puzzles on both sides, first, go to the pillar in middle of the level and activate the first and third switch. This will unlock the nearby GREEN rooms. Note that stepping near those doors will spawn two enforcers behind you, so be careful! I recommend first clearing the whole parts around the area, to get rid of eggs and other aliens. DON'T GRAB the Scuba Gear if you are on a continuous run, you will NEED it for the final battle! If you don't have a spare one or you are pistol starting, then you have to grab it and hope that whatever remains will be enough for the final battle. This is why I mentioned grabbing the one at end of Derelict, so you can save this one for later!
When dealing with underwater areas, I recommend blowing up the pillars to get rid of the eggs/slimers. For best results, use a combination of pipebombs and Devastator. The RPG is also a good choice but kinda risky because you might end up blowing yourself.
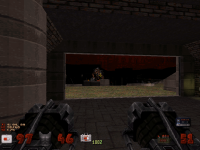
After dealing with underwater parts, clear the central room. Step on the armor platform (If you are playing continuously, DON'T GRAB THE ARMOR because there is another one you will grab anyways later, unless you are pistol starting in which case it's the first armor pickup), kill the enforcer and the protector. Activate the switches to progress through the map. Now surface and go to the armor platform. Jump on the window and immediately step backwards because a MINI BATTLELORD will be revealed in your face, so don't sit here staring at him or you will die!
Take him out with your RPG/Devastator and now go underwater. The first puzzle involves two crushers. Activate ALL those switches by just getting near the crushers, you don't need to risk standing below the crusher, just get near the switches and press them. If you get caught in middle between the two crushers, DON'T MOVE, Duke will just make it out fine, he will not get crushed but moving will possibly lead into Duke getting crushed. Once done, grab the blue card, armor and atomic health! Then return to where you killed the Mini Battlelord, insert the blue card, grab the goodies and activate the switch (first half of puzzle is complete).
Now go back to the pillar in middle of map and activate second and third switches. This will open the nearby BROWN rooms. Apply the SAME strategy as above to clear these rooms, because it's pretty much identical for the most part. I will only point a few differences for each: Near the armor, when you go to swim and activate two switches, you will come across a JETPACK that is a requirement to access 4 secrets in this map. You can grab it later if you play continuously and want to have a full jetpack in your inventory.
You must complete the second puzzle, this time you must get past some rotating gears. As before, you just need to be close to press those switches. If you remember Toxic Dump, you will know what to do to get past these gears, though this time it seems a bit trickier. You may not get squished immediately but timing incorrectly leads to either pushed back or somehow swimming inside the gears and still make it out alive. Anyway, your scuba gear is probably running a bit low at this point, about 20-30% or less. Concentrate, activate the switches, time the gears correctly, grab the red card, armor and atomic health, time the gears again and you will make it out alive, probably in the last few seconds before you start drowning, as the scuba gear will probably run out at this point when you grab the goodies.
Return to where you killed Mini Battlelord, insert the red card, collect the goodies and yellow card, press the switch to complete the second half! Grab everything (secrets and stuff), scuba gear, boots, etc. If you did everything fine, you should have 6/7 secrets found (assuming you are using a source port with level stats enabled, also the last secret is found in the boss room), 150 health and everything else at maximum (assuming continuous playthrough). Insert the yellow card and SAVE! Make one or more backup saves if you want. This is the point of no return. The purple lava you see is as toxic as the toxic acid in Derelict. If you want, you can even use steroids to go faster but I recommend saving it as a protection against getting shrunk by protectors, even if you are given another bottle of steroids in the last room.
Once you are ready, RUN AS FAST AS YOU CAN, DON'T STOP AND DON'T GO BACK! If you do this mistake, you will die or be stuck and unable to cross the purple lava again! Once you made it (probably with like 10% or so boots or a minor health loss), grab the goodies, an extra atomic health (before facing the atomic health, look behind, there is another one to help get to 200 health and save the one in front for later).
Approach and prepare for the boss fight against THE QUEEN! There are about 5-6 protectors, 2 octabrains and the Queen herself. She attacks by either electrifying the water (unavoidable, drains your health quickly, armor doesn't protect you) or spawn more protectors. The easiest way to get rid of groups of protectors is lay down many pipebombs (takes around 20-30 to get rid of them all and hope Queen doesn't spawn more) but hitting them is difficult and sometimes you may get shrunk. Either use steroids or wait until you return to normal. Don't worry, they can't squish you underwater, just stay near the top and swim. If your scuba gear ran out, find a hole to surface periodically. One of holes contains the last secret of the game which contains a few goodies like medkit, atomic health and armor.
Also, don't stand at the feet of the Queen or you will get crushed. Swimming around her head is safe but be careful of those jumping drones that mess with your aiming, so if playing in DOS, I recommend using pipebombs to first clear the protectors (especially when going for 100% kills) and then using fast firing weapons against the boss, like Devastator, Freezethrower, Chaingun, they are much safer to use but if you don't care about deaths and want to kill the Queen quickly (especially since this fight is pretty much against time), empty all the 99 devastator rounds and then switch to RPG and hit her in the head, at least a couple more rockets. The Queen has 6000 health. Good luck!
Once you are done, enjoy watching the new cutscene with Duke executing the Queen, as well as a message about looking for a Duke Nukem 3D sequel SOON (yeah right) and the picture with development team having big heads (for some reason).
Congratulations! You have finished Duke Nukem 3D Atomic Edition! Now it's time to play the expansions and various custom maps/mods by the community! And since 2016, don't forget to also check out the World Tour Edition for playing another official episode!
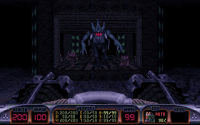


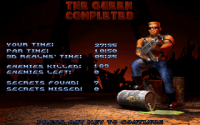
Overall, The Queen is a somewhat okay finale (the level is somewhat bland and disappointing but at least the Queen boss makes up for that!) to the original Duke Nukem 3D Atomic Edition, I only wish the level was more than just a DM styled map turned into a SP map. What's funny is I read that the E3 maps were also DM maps until converted into SP but I had no idea about that until 2020 or so. I always thought that the DM-like maps from original 3 episodes were Faces of Death, User Map (Dukematch Level 1), Spin Cycle, Lunatic Fringe and Tier Drops. And it seems like The Queen is more in style to those maps, especially with the copy-pasted rooms. Then again, this is meant for that Duke-Tag mode, so it's understandable.
Oh and another funny thing I noticed a while ago, Randy seems to have designed the first, the secret and the final level of the episode! He never designed any level from the middle of the episode (unless we count Area 51 as part of the normal progression, which actually falls right in the middle, sixth out of eleven levels). Perhaps, he was hired to finish The Birth after Levelord quit mid-production of Plutonium Pak/Atomic Edition or Randy was working since the beginning of the addon? Feel free to correct me here but I had the impression Randy basically replaced Levelord.
Also while the new cutscene with Duke finishing off the Queen is very nice, I kinda preferred the original v1.3D development team ending picture, which was replaced by the new Atomic one (with the developers having big heads) and it only appears at the end of episode 4.
Fun Fact: The old v1.3D ending with development team seemed to take place in the bathroom of Lunar Reactor, while the new v1.4/v1.5 development team ending seems to take place in Area 51, in the small cave room where you find the shotgun after you teleport.
The Birth Overall: Even though I didn't grew up with playing E4 until the time when I finally acquired a copy of Atomic Edition, I still have some fond memories and nostalgia for episode 4, as well as a couple user maps I played when I first discovered the modding community.
It is easy to look back at the episode 4 and compare it to the first 3 episodes. Those who first had Atomic Edition, they probably consider all 4 episodes as equally good. But there's clearly a couple differences in style between E4 and the first 3 episodes.
As someone who grew up with Duke3D v1.3D, it is easy to see how different E4 feels overall. There seem to be more Easter Eggs, Duke seems to talk a lot more (he was talking a lot less in v1.3D because he also had the SWEARFREQUENCY set to 42 in USER.CON file but in Atomic Edition he has the SWEARFREQUENCY set to 100 in USER.CON file), there are more mappers involved (Randy Pitchford being the obvious example and the other two people who finished up Levelord's maps) thus the style is a bit different, the new textures are a bit more "unique" compared to the v1.3D art, all the code changes between v1.3D and v1.4/v1.5 and so on.
Revisiting the original Duke Nukem 3D and a couple addons/expansions/mods this year, I can easily say that Duke Nukem 3D is still a masterpiece and all the official episodes are still worth revisiting nowadays. Even if you may get disappointed with The Birth and some maps either being difficult, dragging too long or getting too confusing, you can always just choose to play a few maps from the episode. For example, Randy's maps may not be as good as the original classic maps found in first 3 episodes but you've also got true gems like Duke-Burger and Derelict that I can easily see as part of the original release, considering the fact, Derelict was an older map that was even found inside LameDuke.
I can easily see an alternate universe Duke Nukem 3D sequel (standalone) running on Build Engine, where instead of Plutonium Pak (Atomic Edition), we got THREE new episodes, with the first one being obviously The Birth. It is up to your imagination what episodes 5 and 6 could have been back then (the closest thing in my mind right now comes Last Reaction & Water Bases, since many maps from that TC were really amazing and felt like a true Duke3D expansion). This would basically be how DOOM 2 was to first DOOM or rather, how Redneck Rampage Rides Again was for the original RR, a standalone sequel with two new episodes, a couple new additions, etc. IMO this is how should have been a true expansion/sequel to Duke Nukem 3D. But instead, they chose to work on DNF for years and well, you know what happened next. At least, I appreciate Atomic Edition existing.
To wrap things up for now, The Birth is an excellent addition to the original Duke Nukem 3D experience and still worth re-experiencing nowadays.
Because the AWO (E5) review is not finished yet, I will instead vote for the next month's nominations:
JJ Duke Nukem 3D +
Mikko Sandt's Maps + Duke Tournament + MSSP Episode + The Brave New World
WGRealms + WGSpace Episode
As you can see, I have voted for JJDuke. Considering it was released in November 1998 and we just finished revisiting The Birth, I'm sure JJDuke will be logically the next thing to be played on the Map/Mod club event!
I hope to get the E5 review before the end of the week/month. In meantime, you can download the full zip of The Birth screenshots.

 Help
Help Duke4.net
 DNF #1
 Duke 3D #1


 Gotta mention the lightning and shadows as well, they still look very good. I noticed that the level of detail is a tad bit higher compared to the first 3 episodes. For instance there's more 'gradual shading' (where multiple sectors are used to make the shadows look more real. Of course it came out a year later so that makes sense.