Duke4.net Forums: Duke Map/Mod of the Month Club - August 2024 - Duke4.net Forums

Jump to content

  • 2 Pages +
  • 1
  • 2
  • You cannot start a new topic
  • You cannot reply to this topic

Duke Map/Mod of the Month Club - August 2024  "You no mess with Lo Wang!"

#31

2 this time because I don't want to overshoot the end of the month.

Raiders of the Lost Wang :


One of the better levels in the game IMO. I like the more natural and ruined locals. It's also quite fitting given the name and the reference associated with it. I allows for some good usage of pretty much every weapon and item too.

The progression is relatively flexible since there are 2 Key rooms which can be accessed from several doors. Also we get our first appearance of the Snake as a regular enemy. The level got some cool tricks too, like the Collapsing Stairs and the 2 Bassins which you must fill in order to reach the next steps. And some cool encounters like the one near the Collapsing Stairs or just the starting area and the final areas. My favorite room has to be the Penultimate one, not only is it aesthetically cool but it also gives way to 3 different Key Rooms, like a small central hub. And the ending looks charming too.

Gameplay, it's once again on the enemy packed side with yet another very diverse use of the enemies and they're placed in some creative ways like ducking behind a fallen pillar or hiding in the First Key place with small windows to attack from. Armor is a bit too light IMO. Surely there's 2 100 armor and I believe 1 50 which is already on the higher numbers as far as the game goes, but as usual given the amount of enemies you face, and the fact one of the 3 armors is more a Secret Level Reward, it's too light IMO. As for ammo, it's a bit more ballanced than the previous.

I think I'll rank this one higher than the previous.


Shanghai Shipwreck :


That's not a level I usually remember :/ Compared to most levels it feels kinda underdetailed somehow. The beginning is a nice little puzzle and in this playthrough I actually found a way to by-pass the obtaining the Red Key. Surely everybody already knows but basically use a Mine through the small Wooden Window after you emerged, and the enemy triggering it will blow up the wall allowing you in.

The rest of the level is okay in combat and layout. Kinda heavy on the 6th weapon ammo but there are many spots to use the Tactic on. Also there are some sneaky enemy placement here and there. I like the room with the Trees but it's kinda out of place compared to the rest. Also the level is called "Shipwreck" but apart from the starting area, nothing fits the name now that I think about it :/ The Volcano area is a nice little set-piece alongside the Tree area and I like the ending where I basically purposefully fail just so I get 100% kills.
For gameplay, it's a bit softer than usual, kind of a break in a way if it weren't for sneaky enemy placements. Like the one on the Tree in the Volcano area. I used 8th weapon thinking it was okay until a second one popped off his cover to shoot me and you know how these ones just won't ever freaking miss a single shot >_<

One thing I can say is that this level is actually the one I could have gotten the most legit use out of the Guardian Head ever, but unfortunately I didn't >_> At least the Final Room was the one and only time I used its Fire Circle alt-fire in an effective way alongside regular mode.


A relatively forgettable level in my eyes. Kinda feels like a filler. Still better a solution than putting nothing but still. Also, compared to some Duke3D Secret Levels, this one doesn't serve any purpose. Though I guess if you're the guy who doesn't reload saves and lets weapon get lost, then the purpose is to get the 8th weapon earlier for the next level, since the beginning has some good opportunities for it.
2

User is offline   Quacken 

#32

Doing double features from now on.

Shanghai Shipwreck
Randy Pitchford, George Broussard

The terrible twosome of Levelord apers Randy Pitchford and George Broussard bring you this map and the next. Shanghai Shipwreck's layout and combat seems like Pitchford's work, while all of the god awful traps are Broussard's. Not much stands out about Shanghai Shipwreck being a secret level besides said traps. Just getting out of the starting line is work in of itself. You spawn on a broken ship with hitscanners immediately pricking you and no way to defend yourself. If you don't know about the way to skip the Ruby Key, you'll have to dive into the water, cut up a bunch of Tigers and a Ripper with the Katana, then get the Ruby Key and get singed by the extremely disrespectful fire turret. Why is this here? It's just defending a Riot Gun and nothing else. The treetop tangle past the Ruby Door is no fun at all, as both Pitchford and Broussard somehow found it funny enough to deny giving you an Uzi until after the Gold Door. You'll be stuck hacking it with the Katana, a dwindling supply of shotshells, about 30 Shurikens and once in a blue moon a Guardian Head if you manage to gib a Guardian by punching it. Going up the ladder in the next room slaps you with a Coolie, and after a hall of fire traps the door leading back outside throws three more Coolies at you. The only part of this map I actually like is the volcano.

1.5/10.

Sumo Sky Palace
Pitchford, Broussard

Sumo Sky Palace starts out highly unfriendly and stays generally unpleasant for its entire run time. This is another map in which Pitchford and Broussard give you crumbs at the start. No Riot Gun and no Uzis means you have to make pairs of a Tiger and a Brown Ninja, leave the Guardian trying to kill you and then put up with a Coolie behind the door. Then zig zag around some Guardians, Katana the Brown Ninjas up the top of the ramp, and then die anyway because there's a Brown Ninja 100 metres away near the Gold Key. After you get the Gold Key, you'll have to burn all of your missiles on the Guardians you left alive and the Smoke Bomb in the next room as the Serpent Lord will be hugely annoying if you don't use it here. Things just die for no reason in this map. There's so many traps that you will hear Coolies and Female Ninjas die off-screen because they woke up and wandered into deathtraps. I caught a Coolie dying near the spinning chandelier also. Other gems in this map include a ladder into three Guardians and a flame spitter in a shoebox, and the oscillating pillars of rock in the lava lake that somehow damage you (but the border of the island doesn't), followed by the last trap of the map. You either watched the Civvie video where he lowers the panels with the rocket launchers behind them or you'll just die immediately here.

The final fight of the map is against the Sumo Demon. The Sumo Demon has a lot more health than the Serpent God, but he doesn't really do anything either. He can supposedly stomp the ground to do the same attack as the Shadow Ninjas, can throw singleton Accursed Heads at you, and farts a Gas Bomb on death. There's a gimmick here (at least, I think it's a gimmick) where your health slowly dips, putting the fight on a timer. But, you get two Fortune Cookies here and there's a very easy secret behind the portal which also gives you two Fortune Cookies and a Medkit, so you enter at 200 health and can get 100 more. The cutscene sucks afterward also, but then again all of the cutscenes in this game suck. Lo Wang just doesn't really strike me as the type of person to enjoy cannibalism, you know? It works for Caleb because he lives in a horror movie parody world and he's basically a serial killer, but not for a ninja with grenade launchers. More on the cutscenes during the MAP20 review.

There are some merits to this map though - the visuals are the main standout. I've always liked floating castles, or making buildings so tall you can't ever see the bottom. In this case, you can fall off of the map and eventually hit the ground. It takes a really long time though. You can also see the underside of the lava lake where the Sumo Demon resides, which is quite a cool setpiece. The triumphant return of Landwaster, some good lighting variation and shading and the unique sky texture also add to the atmosphere. Sumo Sky Palace is a great idea, but it tries to sabotage itself at every possible angle and is overall not very fun to play.

5/10.
2

#33

Summo Sky Palace :

One of the better levels of Ep2 I'd say. It also tends to feel underdetailed in places, but charmingly detailed in others. The best places IMO are the initial room and then the Middle Section with the spinning spikes, the small portion under the palace and the room with the strange bathtub. These are the charmingly detailed rooms.

Progression is pretty straightforward, you can't get either lost or stuck in this level. Combat is also on the more ballanced side. Given how it's all close range, they didn't use Coolies much and always in places where you got some room to dodge around. Ammo is also in ballanced amounts for once and there are some interesting combat situation. This level is also where Smoke Bomb and Flashes shine most. It makes some encounters kinda trivial. Like, use the Flash in the Jail room with the Apes and Coolie Ghosts and you can basically sword them all no problem. Use the Smoke Bomb in the Dojo and you can kill the Serpent and Rippers no problem. Lastly use the Gas Bomb in the room with the strange bathtub from the secret tunnel and all 3 guardians are gone most of the time.
I like it when levels make these inventory items genuinely factor in the equation. I don't like it when items feel like they're gadgets. And in this level this is quite important now that I realise there ain't no armor in this level ! The #1 negative point here ....

Boss is okay. I'd say it's neither harder nor easier than the Ep1 boss, it's just different. I'm not a fan of the burning walls though I guess it's an element of realism for the location. Really in animated series and video games, people can roam near lava and still breathe and not burn what the heck !? And again you get to start the next level/episode with Full 6th or 5th weapon and 8th which is too much again.


Conclusion :

I'd say ep 2 isn't as consistently strong as Ep1 but it still remains stronger than I remember it being. The only ptoblem being, the levels aren't as inspiring seeing as I struggled to say stuff on some of them. Ranking is gonna be tough .... Also there is the fact that levels don't feel like they continue on from each other like in Ep1.

Maybe, 1_Rising Son because it's the most enjoyable IMO, 2_Zilla's Villa action packed and cosy looking, 3_Harakiri Harbor for cheer gameplay, 4_Raiders Lost Wang because visuals and gameplay, 5_Monastery same reasons but a bit less, 6_Summo Palace, 7_Killing Fields because of inconsitent locations, 8_Shanghai Shipwreck because I don't find the level to be that interesting.
2

User is offline   Quacken 

#34

The Nuclear Warhead does not gib monsters. This is in stark contrast to what a nuclear warhead can do in real life.

Bath House
Keith Schuler

Keith Schuler is back, and bigger than ever. Bath House's low monster count may deceive you, but it's quite a tricky map that is rather fun to get right. One nice thing about Shadow Warrior compared to Duke 3D is that environmental explosions are capable of actually being useful. Case in point, Shurikenning an exploding canister dumpsters the Female Ninjas on the nearby van. Also, Lo Wang just drops Duke Nukem's name in a voiceline. The Apogee shared universe is real. San Nicholas Island from Rise of the Triad is in the skybox of Alien World Order's E5L6, too. We can now connect the Heretic and Hexen games as the latter's trio of villains are known as the Order of the Triad. Thank you, I'll be here all night.

Making it inside the bath house proper, as long as you either get the Uzi outside or the partly obvious secret Riot Gun inside, you'll have enough to defend yourself until you get the first Missile Launcher. Save the ammo for the Shadow Ninja on the first floor and don't pull the trigger on it anymore until you reach the Yellow Door. The fight for the Red Key is probably the trickiest single fight so far that's not completely bullshit. Two Shadow Ninjas, several Guardians, two Female Ninjas in one pool and two potshotting Brown Ninjas are behind the Red Bars. You could just unload your missiles here... but you wouldn't kill the defenseless babe that's also in the water, right? The Shadow Ninjas are also capable of blending in with the skybox, as the actual time of day is pitch black. Lastly, you get an eleventh hour Nuke to clean up the last two Coolies. Using a Nuke you didn't need on exactly one monster always feels very satisfying. The visuals are also very sound, and the music is one of the more chipper Shadow Warrior tracks, adding to the energy. I like the billboard showing off the various poster textures at upscaled size, and the buildings surrounding the map reminds me of Going Down. Bath House is solidly put together and is quite an enjoyable time. All things considered, it seems like Keith Schuler's got Shadow Warrior down.

8.5/10.

Unfriendly Skies
Jim Norwood, Keith Schuler

Unfriendly Skies is... well, I feel like it's pretty obvious. Co-author Jim Norwood had a hand in Apogee's old platformer games, so it's no surprise he'd give you a boot in this map that he started. You get given crumbs in this map and will have to Shuriken a Coolie and cut down more than one Female Ninja with the Katana to get past the start. It's really only once you find the Riot Gun that you can get a handle on this map. Most of this map is Riot Gunning mobs as you have to look in an unexpected place to get the second Uzi, and there's enough shotshells laying around to facilitate. This map looks unexpectedly drab for Shadow Warrior standards. Usually this game's maps look pretty serviceable, but here it's all one light level or inky black darkness, and the room over room honestly looks pretty choppy. Makes me think that this was one of the first maps they worked on and they had to get Keith Schuler to finish it up once Jim Norwood went to do something else. I do like some of the setpieces though. The plane crashing into Blue Brews is pretty cool, and I also like the runway strip you can peer into once you get the Blue Key. Another complaint I have is Norwood and Schuler really overdo it on the mines. They're everywhere in this map, and most of them spit out grenades that instantly kill you. Finally, the huge C4 is neat, but clearly just padding. Unfriendly Skies' added difficulty and room for breaks makes it a step above the usual Shadow Warrior fare.

7/10.
2

#35

Bath House :

A similar level to Ep1's first level, but I'd say it's a more original theme. While I like levels themed around Train Stations and Airports, I must say we don't often see levels based around bath places like that. The surroundings aren't as visually appealing as in E1L1 but they got their own assets. I like the idea of the Secret Area being destroyed actually being mandatory. Tis the reason it took me several playthroughs to realise it existed.

The outside provides some good opportunities to spam the 5th, 6th and 8th weapons which is a plus though the gist of the level is the titular house. The insides are okay though it looks more like a swimming pool than a bath to me. I like the progression, I'd say the Keys are obtained in clever ways compare to the usual means. I like the good opportunity for 7th weapon in the Entrance .... if only the mines didn't explode against the Spawn instead of the enemies <_<
Good place for Gas though. One of my favorite parts is the Red Room because HOT DAMN THE NIGHT VISION IS ACTUALLY USEFULL !. I always found that the enemies here tend to mix in well with the lighting of the room, hence why NVs are so usefull here.
And then the Gold Area is quite the challenge. I remember struggling quite a lot on my first playthrough there. The combination of enemies, the fact you can't use 5th or 6th weapons safely, and the face you're exposed to fire almost everywhere makes it a tough nut to crack. Smoke Bomb works like a charm once again but it doesn't protect against Crouched Ninjas which are the worst enemies in the game IMO, they just don't miss A SINGLE shot even when you Smoke or Flash them, it's ridicuous ! And all that for a Repair Kit in order to destroy a Door while you've already destroyed bigger obstacles with your weapons which don't suffice there ...

I must say, I wish we could use a Nuke to destroy the door and by-pass the level. IT WOULD MAKE SENSE compared to the Tanks you have to use which don't seem any more powerfull than your other weapons.

Anyway, a good episode opener just like the previous ones, and one of the more memorable levels in my book.
2

User is offline   NNC 

#36

I've been in Beijing and Shanghai and granted: their airports are nothing like "Unfriendly Skies". It's not even reminiscent to a small domestic airport. Just some small rooms put together.

Shadow Warrior is the game which had been truly lost because of mediocre level design and the lack of an Allen Blum, John Romero or even Levelord calibre designer. The few times Schuler got it more or less right it's a wonderful game. But even Bath House is not something like Duke Burger or LA Rumble, more like something like Pigsty.
3

#37

Unfriendly Skies :

A level that I like. Surely the Traps can feel kinda bullshitty but you know them ahead of time due to the constant BIP they make, and with one exception, they're all the Grenade Spam which lets you some time to react when triggered. I'm more frustrated by the Crouching Ninjas like I mentioned before.

For progression, I actually accidentally found a better way to tackle the early part of the level. After using the Red Key, I went into the Vent instead of the Elevator for the supplies and I accidentally fell down and I thought I would continue. This was actually a good thing to do not only because it dodged me the Mine at the Elevator exit which is the worst one of the level, but it also dodged me the Turret and it gave me more advantageous positioning for the 2 main rooms. Needless to say I was satisfied. Many opportunities for Gas Bomb, and the level actually gives us several of these, nice ! A bit too much 3rd weapon ammo though, I find myself playing almost the entire level with it :/


I like the Conveyor Belt section. It was a good moment for a Smoke Bomb and Night Vision combo. It also helped spot the Apes which are quite sneaky in this level, always in dark spots. Then comes the climb to the Tower with even more of these guys and not only was Gas Bomb good again but I used up all my NV efficiently up there, holy shit man do these first two level make the NV usefull O_o !
Final Room, I don't like the cramped Summos but we can soften them up nicely with yet another Gas Bomb and a few grenades.

Gameplay wise, I like the level's combat management, and use of enemies. Too bad the Coolies encounters are spoiled by their exploding while you're taking stairs among other instances. Combat situations are diverse and allow for using Inventory Items a lot more than usual. Too much 3rd weapon ammo as I said before, and only 1 armor for the whole level which kinda sucks, better keep it for the end.

In the end a good level I like for its interesting layout and diverse combat encounters, and many good opportunities for Items. Though it has the not enough armor and too much ammo problem ...
2

#38

Auto Maul :


Another likeable level. I always like levels based around shopping centers and I don't recall seeing Car based levels much in Build.

Kinda frustrating beginning as you're cornered by Crouched Ninjas, I hate those .... But then we got a level circling around a central piece with distinct rooms. A concept I like. Central Room is actually repopulated only twice which is a plus. First Area we go through with the restaurants is nice and easy, rendered easier with the easy Explosive Barrels. Second area is good for its 3 secrets and interesting combat situation. Also would you believe that I got 3 Gas Bombs out of it !? The 2 Sumos were no match for my 19 (yes nineteen) Mines and 2 (yes two) Gas Bombs.

Second Area is okay with the Ripper cluster fest, a few Caltrops, another Gas Bomb, another one retrieved. I like how we take a detour towards the Exit in order to get a Key. Last room is yet ANOTHER use of the Gas Bomb for the Guardians. And guess what, when I battled the Shadow Ninjas which repopulated the Central Room I randomly got YET ANOTHER Gas Bomb which I didn't use this time, I used RailGun instead with NV because of the Dark Corridor and distance. Final Fight is good, and enemies somehow came in waves on their own without me coming out to get them ^^

Gameplay wise, this level suffers from the 2 biggest issues I have with SW. As usual, you guessed it, not enough armor (1 or each type) and WAY too much 4th weapon ammo, I practically mained the thing thanks to the ridiculous amount of Gas Bombs I got. Apart from the 7th weapon for the first Sumos, and the 8th for the final fight, I almost never used the others. At least it was generous with Fortue Cookies, I don't remember if I saw 3 or 4 of those alongside 2 MedKits unless there's another one I forgot ...

These 2 typical SW issues don't drag the level down the ranks though, I like this level. A MUCH better secret level IMO than Ep2's.
2

User is offline   FistMarine 

#39

Hey everyone! Thank you for your comments so far! I wasn't able to do a replay of Shadow Warrior before the end of the month, as I had a very busy month, so I will talk a bit about each level based off memory, the comments in the topic and a couple YouTube videos if I feel watching. Also Happy Belated Birthday to Shadow Warrior! The full game turned 27 yesterday! ;)

Before I start reviewing the shareware episode, I will say this post is pretty long, so grab the popcorn and enjoy reading. And here are a couple comments about some earlier posts (mostly those that talk about the first four levels, I will reply to later posts next time if I have more to clarify)

Quote

I can't believe a whole month flew by like this... Damn, I feel bad for unintentionally abandoning last month's thread, but ey, this is Shadow Warrior. I never pass up an opportunity to replay that game. I can go back to July's thread later anyway.

It's all good, don't worry about missing the previous event. I also can't believe the time passes this fast. It almost feels like yesterday we were doing the first couple Map/Mod of the Month Club events. It's hard to believe over THREE years have passed since the first edition of the club! :D

Quote

The Katana one taps Brown Ninjas and that is all it's good for. It's too slow, weak and janky to hit anything else. Thankfully there's a lot of Brown Ninjas in Episode 1, so it's actually quite fun to use. The Fists hit things reliably but have even worse DPS than the Katana, so it's best used to spawn camp Coolie Ghosts, or if you feel like going boxing with a Ripper. That is until you use a Smoke Bomb, in which case the Fists get a special power-up that does more damage per hit. In that case, the Fists become the best weapon to pair with it.

The Katana and Fists are pretty powerful actually, especially when compared to most other FPS games' melee weapons which were mostly crappy and mostly used as last resort. The Fists are especially useful for regenerating health (only on levels containing the training dummies) and fighting even bigger monsters like Guardians and Mini Snake Bosses, because they will stop firing projectiles and resort to melee fighting when Lo Wang has fists selected. This also makes melee enemies like Rippers and the Evil Rabbit much less aggressive when having fists selected.

Also in regards to powered fists upon using Smoke Bomb, from what I have noticed, they aren't necessary more powerful than before when comes to damage output, they instead gain an increased attack range, which means a better comparison than Doom's Berserk Pack would be with Heretic's Gauntlets of the Necromancer when using the Tome of Power, as it turned the lightning red and increased the range of the attack. About the same thing happens here, well minus the life drain effect for obvious reasons.

Quote

Let's talk about Ninjas this time. I've said before I don't really like fighting Pig Cops and Enforcers. Well, I like fighting Ninjas even less so.

Unpopular opinion but I am not a fan of hitscanners in general when comes to Build Engine Games. There are a couple of reasons for that but I will save that for a completely different topic, since I feel it goes a bit off-topic, as I try to explain my thoughts for each important Build game's hitscanners. In short, I think the Build Engine games lack a "zombieman" type of enemy that is very weak and is fun to kill in large groups. The Build games only seem to have basic enemies that are comparable to Shotgunner and Chaingunner from classic Doom games. But unlike the Doom hitscanners that are fun to kill in large groups and they can also infight, the Build hitscanners don't infight, they can deal a lot of damage and are pretty accurate, at least this applies to the Blood and SW hitscanners. The Duke hitscanners are okay for me, as I'm used to them but I still prefer the classic Doom hitscanners.

Quote

Just like in Duke 3D (or Blood or Doom and many other games in the shareware era) the freeware episode is much more polished than the registered one. I especially found the last 2 maps with Master Leep's Temple and Dark Woods to be a really epic journey.

I agree, I really like the shareware episode in SW. It feels like an epic journey that sets up the mood for the game. Too bad the registered episode is a mixed bag by comparison, especially the first half of the episode (which I will review next time), although there are some gems in there, such as the maps you described but they mostly appear in the second half.

Quote

Did you know that there's an unused babe in this game? She has red hair and the only sprite of her that exists is one where she plunges a sword into her stomach. She goes unused in the game but is still present on the portrait of Master Leep and the other babes (what the Medkit secret is behind). It was probably cut because the sprite was too explicit (the other babes "cover" themselves, you know what I mean) and Apogee didn't have enough time to change the sprite.

I know about the unused red hair babe, I read about that on TCRF a couple years ago. I wonder in which place she would have appeared inside the third level. My guess right now is near the crying blue hair babe, who is near Master Leep's corpse. This seems the most logical place where she would have appeared.

Quote

At the end of the day though, it's still a suicide bomb monster, so expect a lot of situations where you round a corner or open a door only to get suddenly eat 40 damage.

40 damage? The Coolie's explosion pretty much instantly kills you at 100 health or so if he blows up in your face (in rare cases you might survive with a few hp left), as an explosion does around 100 or more damage. Not fully sure about the exact damage values but that's what it feels like.

Of course, if you have any amount of armor left, you take reduced damage from the explosion, which is only about 30-40 damage in total if I remember correctly. Yes, due to a bug in the game where the damage isn't properly transferred to health if having little armor left, having a SINGLE point of armor remaining will completely absorb 60% of the damage and the rest 40% goes to the health, which is what can save your life when taking an explosion to the face. That's how powerful the armor is in Shadow Warrior, it is the exact OPPOSITE of how the armor was in Duke3D. Unfortunately, this compensates with the armor being quite rare in SW (except a couple levels that give you about 2-3 armor pickups) and it melts fast too. It's not surprising to spend many levels without any armor, especially in the Wanton Destruction addon.

Quote

The last thing to talk about is the cowardly Serpent God. The Serpent God is the "boss" of Episode 1, but it's basically a non-fight as he escapes once he loses half of his health. Not that the fight would be that much more of a challenge even if he died in this map though, because he hardly puts up a fight.

Fun fact about the Serpent God: in the shareware versions 1.0 and 1.1, he was actually a really hard boss. As far as I remember from the May 2022 playthroughs I have done in DOSBox X (because vanilla DOSBox doesn't run shareware versions 1.0 and 1.1 for some reason), not only you were given less supplies to fight him but he was way more aggressive and had way more health. I remember taking multiple attempts to defeat him and that was on the default Who Wants Wang skill level. He is made so MUCH easier in version 1.2 (shareware & registered) that he has much less health and he is much less aggressive.

Also not fully confirmed but the difficulty settings might ALSO affect the boss health. From what I have seen on YouTube videos years ago with people speedrunning the game and my own experience with the game on WWW and NPNG skills, the boss seems to die a bit faster on WWW than on NPNG. I imagine on first two skills, the boss dies even faster and might also apply to other bosses in the game (Sumo Boss and Master Zilla). But I have no way to confirm this because we don't even know how much health the enemies have in Shadow Warrior. I guess their health is hardcoded into the executable but it's weird no one wrote a guide that shows their health or something. Everyone knows how much health enemies have in Doom, Duke, Quake, etc but no one knows how much health have the enemies in Shadow Warrior.

Quote

What's annoying in this game is how hard the enemies are to kill. Orange rippers, fuck those really, they need like shitloads of rockets and they get fast as they are dying (like Quacken said). The riot gun is really a pea shooter, and the uzi is inaccurate compared to the uzis used by the ninjas. Also fuck those ninjas who shoot rockets and grenades from their bellys (they don't own such weapons), and the shadow ninja too.

It's like Duke Nukem 3D having enforcers as the weakest enemy, enforcers with rockets and pipebombs (or something like shrinkers), newbeasts, big ass newbeasts, sentry drones with instakill explosions, commanders with instakill spreading rockets, pigcop tanks, and all bosses in miniboss forms and in large numbers.


Personally, I am not (usually) as much bothered by how much health enemies have, since Lo Wang's arsenal is powerful enough to kill most enemies quickly, though I agree there are some bullet sponges such as the Orange Rippers. But I have to say I have more of a problem with how much damage the enemies deal in general, nearly every enemy is threatening and can kill the player quickly, regardless of the difficulty chosen. This is something that's true for pretty much every Build Game, from what I have noticed so far when comes to how dangerous enemies are. Not to mention that Duke3D (including games based on it) and SW all lack an Invulnerability type of powerup, which would have helped a lot in harder levels and especially custom maps/mods that love to have rooms full of enemies. :P

Anyway, here is the review of the shareware episode! Last time I finished the original Shadow Warrior was back in August 2022, which was done in DOSBox 0.74-3, all kills and secrets on No Pain No Gain for the first time, as I had finished the game on Who Wants Wang twice before (in mid 2010s) and wanted to do it on the hardest difficulty for the third playthrough, I can say it is very doable but some levels were extremely frustrating, since I had played the game keyboard only and had to save often to progress because of some enemies that would kill me quickly.

For this month, I originally planned to revisit the game using the Classic Redux edition, which I managed to get in two flavors (both are GOG versions): one dated 25th July 2016 and another one dated 17th November 2017. No idea what is different between them but I wanted to share this information for people interested in knowing about versions of the game that exist.

In the end, I ended up just taking the screenshots in DOSBox from the old playthrough I mentioned above, as I still had the saved games stored in a backup folder, one save for the end of each level (and a couple more before points of no return in last map of each episode). I did the same thing for every other Build engine game when comes to posting screenshots in the topic, so it's only natural I kept the tradition.

I will also show the kills and secrets for each level, which will give an idea for how many enemies are in total. Note that kill count can vary if the coolie ghost spawns and if you use the Ripper Heart which fucks up the counter, as Quacken mentioned. Oh yeah and unlike most other Build Games, the DOS version of Shadow Warrior includes an option to enable in-game level stats, although it is not enabled by default. And honestly, while playing the DOS version, I prefer to play with level stats off to make it fair to the other Build Games but that doesn't mean I am not checking level stats while dealing with Serpent Boss and such, to make sure I get all the kills and also when comes to points of no return, etc. And finally, I will not repeat what others have said when describing the levels, so I will only talk about each level's unique things and interesting trivia from the beta version 0.90 (dated 4th April 1997), which is mostly described at TCRF

ENTER THE WANG

Seppuku Station ($BULLET.MAP)
by Randy Pitchford and Stephen Cole

Kills: 74/74
Secrets: 6/6

Zilla sends his regards, Lo Wang!

The first map opens the game pretty nicely, with TWO ninjas jumping through the window and attacking you immediately! Something that I am fine with on the higher skill settings but not a huge fan of this happening on the easier skill settings, even if only one ninja appears on first two skills. I personally prefer to be safe in the first room you start the game on, if you want to mess with the controls and such, especially if you are playing the digital versions of the game, which are poorly configured (at least that's how was the freeware steam version). This also happens in the registered episode and Twin Dragon episode, where you get attacked right at start, though at least Wanton Destruction starts you in a safe room.

Either way this is a pretty unique way to start the game. The map itself is nicely designed, with a spectacular car crash after jumping out of the window, the transparent water, the creative way you get the Silver Key using RC Cars, the functional Pachinko machines and the train appearing at the end. Plenty of cool stuff to be found just in the first map alone, which is what makes the game great.

Speaking of the Pachinko machines, I feel like mentioning again how they work. As long as they aren't broken, when you press on them, there is a small chance to win something, which can be done as many times as you want and even from the same machine but only if an item is not dropped already, otherwise the machine doesn't seem to offer any more items. From what I remember, the prizes were: Fortune Cookie, Gray Armor, Shotgun Ammo, Uzi Ammo, Gas Grenade, Flash Bomb.

Ah yes, I feel like mentioning that even though it's the first map in the game, there are a couple enemy types you encounter as early as the first map. You have the basic ninjas, the coolies and their ghost and even a goddamn Shadow Ninja! A high tier enemy in the first level of the game? What the hell? I don't think he appears on easiest skill but he does appear on the rest skills (there's an extra one on the hardest difficulty too). On top of that, there's a turret at the end for good measure. It can only be destroyed with explosives, so don't waste them on weaker enemies!

After you dealt with all that stuff, be sure to check for more coolies inside the train. When you are ready, press the Yin Yang symbol to finish the level. Remember that it's like Duke3D and Blood, each level's exit has the game's signature symbol, so you know when you have gotten to the exit.

Fun facts:
1) The map was originally called Silver Bullet, hence the name of the map file being $BULLET.MAP.
2) In the beta version 0.90, Lo Wang started inside the dojo where the secret area with the Grenade Launcher is in the final game. As you could tell, the final's starting location in the street is now a secret area with the Grenade Launcher.
3) You can actually "get" on the RC car and drive it upon pressing "use" button, Lo Wang will stand on top of it if looking with the Third Person Camera enabled but it's not possible to get the car back to where it was originally, as Lo Wang doesn't shrink down to enter the car, so he cannot go through that small space. ;)

Outside of some balance issues, I feel like this map opens the game quite nicely. Looking forward to the next one.
Attached Image: SW_L1_1.pngAttached Image: SW_L1_2.pngAttached Image: SW_L1_3.pngpng]

Zilla Construction ($DOZER.MAP)
by Stephen Cole

Kills: 121/121
Secrets: 7/7

Interesting map taking place at a warehouse, it is open ended and features plenty of action. There are many ninjas of various types (the Rocket Ninja gets introduced here if I am not mistaken) but also a couple of the infamous mines that you hear beeping and they get activated when getting closer to them.

Those mines count as enemies and automatically add to kills upon detonating when getting near them or hitting them with an explosion. They do various stuff, ranging from blinding the player to spawning grenades, gas bombs or caltrops. The grenade variant is arguably the worst because it can kill the player pretty much instantly if multiple grenades hit at same time, plus they have a large blast radius, so the player cannot escape unharmed at all.

One of the notable things here is that there is a drivable forklift, which is actually required to access two secrets, one of which ends with the forklift getting destroyed, so make sure to collect them in order, especially if you have already used the Repair Kit on the vehicle. I believe there is also an unofficial secret which contains Red Armor and various other goodies, so don't miss it. It should be located near the secret that you access with using the Forklift to smash the crates.

One thing that doesn't usually get mentioned is that when driving a vehicle, enemies attack much less often and have a harder time hitting/killing you. You can also run over enemies with the vehicles, killing them instantly. There is a catch, you can run over dropped items as well (even those that may have been placed by the level designer in places the vehicles can reach) and if you do that, they will be removed from the game. I don't recommend doing this and you are better off firing a nuke in the open to get rid of all those many spawned enemies at the part where you turn on the power.

Another cool stuff includes the two machines that are creating Gold Key and Uzi. After you collect them, it is possible to create another Uzi, which means that you will not have to worry about running out of ammo in this level, not that ammo was an issue in first place due to the game being very generous with ammo, especially for Shotgun and Uzis. But in this case, you are free to go wild with your Uzi usage in this level.

Oh and I really like those colored sectors in red and blue, I found them much more cooler than the colored sectors in Duke3D. And of course, the drilling effect at the end is very nice, as is the portal underwater that leads to the third level.
Attached Image: SW_L2_1.pngAttached Image: SW_L2_2.pngAttached Image: SW_L2_3.pngpng]

Master Leep's Temple ($SHRINE.MAP)
by Keith Schuler

Kills: 127/125
Secrets: 8/8

Epic map. It's quite long and presents lots of challenges before you get to see Master Leep...in a rather poor condition. You also get to meet the anime girls here for the first time. Just don't disturb them while they are doing their thing or they start shooting you with their hidden Uzi. If you don't want them (at least the bathing one) to bother you while you are fighting enemies and suddenly get attacked by them (no, they don't attack enemies, only you!), you can kill them in advance and face no consequences, as no enemy seems to spawn upon killing them.

The map design is very good and the map is quite difficult overall, will surely keep you on your toes. However it's also one of the few maps in the game which gives you like THREE Armor pickups and I think they are all the Red variety.

As TheDragonLiner mentioned, there is that moving acid floor in the middle of the map, which isn't technically a monster, as it cannot be killed. It's a really cool effect to have a floor moving like that and changing shape, something that you only see in SW, since it uses the most advanced version of Build, at least until Ion Fury came out.

The only thing I don't understand about this map is sometimes you end up with MORE kills than what the total kill count shows. I have noticed this happening on the shareware versions as well when I did them two years ago. Strangely, on shareware 1.1 I have gotten the "correct" amount but on other versions I have gotten an extra kill than the total, while in registered version on hardest difficulty I got TWO extra kills. I know that because earlier this year while clearing my laptop from already finished games from past years, I loaded up older saves to just check something before deleting the whole folders and I wanted to mention this because I found it strange. Does anyone have an explanation for those extra enemies that can inflate the kill count? Could be caused by killing a coolie ghost with melee during its raising animation, I'm not sure.

Back to the level, I am not a huge fan of the platforming (it is easy to fall off, especially when backtracking the level for goodies and there is one platform where you need a long jump to reach it) combined with annoying enemies (bees, ninjas and even a shadow variant or two for good measure) and the fact you can be randomly hit by a lava rock, which does massive damage and if you somehow survive, it has a chance to knock you off the platform and die anyway.

The puzzle at the end is okay I guess, though it can take a while to solve it if you don't know what you are doing. It is much trial and error but at least it doesn't punish you for not solving it. There is another similar puzzle later on, early in the second episode, you will see what I mean when I get around reviewing that map, though that one should be more logical.
Attached Image: SW_L3_1.pngAttached Image: SW_L3_2.pngAttached Image: SW_L3_3.pngpng]

Dark Woods of the Serpent ($WOODS.MAP)
by Randy Pitchford and Keith Schuler

Kills: 259/260
Secrets: 5/5

Notes:
1) The missing kill is because the Serpent Boss CANNOT be killed here, as the screen starts fading when his health gets to around half. Thus the maximum you can achieve is one less than maximum.
2) This level is quite linear. If you care about getting kills and secrets, make sure to check if you found everything before the various points of no return. There are at least THREE points of no return, so keep that in mind if you are a completionist!
3) Unlike the original DOS versions of Duke3D, SW can display more than 255 kills at the level completion screen.

Another epic map! It's time for the last map of the shareware episode and to avenge Master Leep's death! This is a long and linear level, possibly the longest map in the WHOLE GAME, as it can take at least 30-40 or more minutes to finish, so be patient while playing this map!

You first begin in a dojo. Afterwards, you have to explore the woods and make your way until you reach a village. Then use the tank to blow up an obstacle, though from what I remember in the past, that obstacle can also be blown up with regular rockets, it just requires 20 or so of them. However, using the tank is better and it even causes extra enemies to spawn who often don't seem interested in attacking you while riding the tank!

Before taking the teleporter to the ripper valley, you might want to backtrack and make sure you have gotten absolutely everything, as this is the first point of no return. When done, make a save here just in case. You can also fire projectiles through the teleporter, which means using a nuke through the teleporter is a safe way to clear the next room without exposing yourself. It might not kill everyone but it doesn't hurt to try once and then look at the results.

At the next part, make sure to find the secrets before taking the Carpet ride! Yep, you get to ride a carpet here, it's pretty cool. But this is another point of no return, so make another save if you feel like. Then prepare yourself for one of the toughest sections of the game. On WWW skill, it's not too bad but on NPNG, this part is extremely difficult. The nuke didn't seem like the best choice, as while it can (mostly) clear the whole room, it can also kill you instantly and if you survive the blast, you get knocked into the lava. I certainly remember this part giving me a headache and at least five tries to make it. Then before riding the carpet further and dropping down (another point of no return), don't forget to look for the Lara Croft Easter Egg.

And then you have to complete the weird puzzle at the end with those giant platforms, where you remotely control them, just like you did with the RC cars in the first level. Another creative puzzle, though kinda weird. Once you complete this weird puzzle at the end, you are allowed to drop down and enter the arena with the boss! Make sure to get the Nuke super secret while platforming, you just need to make a jump into a specific spot and take falling damage. I recommend saving here because if you fall, you get to hear Lo Wang's scream for a while before you hit the ground. Or just load your save if you prefer to not waste time.

Once ready, drop down to fight the Serpent Boss until his health goes halfway, as the snake boss is a coward and leaves things in a cliffhanger...find out what happens next in the registered version of the game! Also a funny thing that applies to Serpent God (including mini variant) is that they sometimes try to melee you even at long distances. I guess they forgot to give them a check if they are in melee range before attacking with the sword. As it stands currently, it looks silly when he tries to melee you at long range.

Fun facts:
1) In the beta version, the boss wasn't the Serpent God. It was the Sumo Boss, with different sprites and some disgusting attacks! I wonder if they got inspired by Duke's toilet humor or Redneck's toilet humor. Or both?
2) In the beta version, backtracking was possible in first half, at least until the carpet ride. In the final game, there are multiple points of no return in the level, starting with the portal leading to ripper valley. So if you plan on getting all the kills and secrets, make sure you are following a guide carefully. It is also incredibly easy to miss one or more enemies in the woods, so carefully check every corner! It is tedious but it is possible to get (almost) all the kills, so only one enemy is missed (the boss himself).

Points of no return:
1) The teleporter to ripper valley, after using the tank to blow up the obstacle.
2) The carpet ride in the ripper valley.
3) Dropping off the ledge after the final carpet ride, which leads to the large area with the moving columns puzzle.
4) The boss arena.
Attached Image: SW_L4_1.pngAttached Image: SW_L4_2.pngAttached Image: SW_L4_3.pngpng]

Overall, the shareware episode of Shadow Warrior is pretty solid and a great introduction to the game. I also like how there is continuity between each level in this episode. There isn't as much continuity in the registered episode(s), unfortunately, so that's one thing that the shareware episode does better than the registered episode(s). Only thing I want to admit is I am not a fan of the game's difficulty being that high from the get go. I would have preferred a more balanced and progressive difficulty curve, like classic Doom and Duke Nukem 3D.

I just don't think the Shadow Ninja should have appeared in the first damn map of all things (there's actually TWO of them on NPNG!) and would have been better off with that particular enemy only appearing in the registered levels. The game already introduces the Red Ninja since the second level, I feel like the stronger variants (Grenade and Homing Rockets) already get introduced later in the registered game and it just didn't make sense to have a high tier enemy appearing from the very FIRST level of the game. I wonder if it was Randy's idea to have the Shadow Ninja appear that early in the game? :P

I also think the episode length is a bit short with only four levels, although it compensates with levels 3 & 4 being pretty long and adventurous. Still, I wouldn't have minded if there were five or six levels in the shareware episode, like Duke Nukem 3D. Fifth level could have been boss only level (split from the ending of fourth level, probably also include the earlier parts with the carpet ride to not make the boss level too short) and sixth level could have been a short rewarding secret level, this way also makes so each "episode" has a secret level. If the secret level existed in the shareware episode, it would have been most likely accessible from either second or third level. At least that's the way I see it but even then, the final result is still mostly a solid experience, if you don't mind the occasional cheap instant death.

More about Shadow Warrior and the registered episode reviews will be coming later this week. In meantime, here are the nominations for next month:

Pray Your Prayers + The Realms of Grune +

Only one nomination for September, which I'm voting for it. It was suggested before and I have nothing new to nominate for September. The surprises I plan for the following months will be all Duke related, though I am not spoiling what they will be about. Have a nice day everyone. :)
2

User is offline   FistMarine 

#40

Double Post! Before the review, here are a few more comments about earlier posts:

Quote

And because I've got the time, the last element to talk about are two inventory items: The Flash Bomb and the Caltrops! Don't use these. Ever. I don't know what the Flash Bomb is meant to do, but it doesn't do what you think it does. Or if it does do that, it doesn't do it well enough. Caltrops do a pathetic amount of damage for each individual spike and can't even do half of a Coolie's health in damage, if it steps on all nine. They can also hurt you if you step on them, so just don't bother with them.

I believe the Flash Bomb works on monsters by temporary blinding them but you must be near them when using the item and I think it lasts a very short time, so it's not really worth using it. The Shadow Ninja can do the same to you. For obvious reasons, blinding doesn't do any damage but leaves you vulnerable if you get affected by the flash, so the item is much more useful in multiplayer. I also read that the player using the NVGs would have taken damage if got blinded during that time but the feature was cut for some reason. I agree about the Caltrops not being worth using but what's funny is that they can be destroyed by an explosive, which is a way to deal with those spawned by heads/mines in some levels, if they happen to be placed in your way and want to get rid of them. The only exception that I remember was in the Airport map, where those caltrops placed by the level designer cannot be destroyed.

Quote

Accursed Heads are the final nuisance enemy. They aren't really one in the traditional sense, but they do contribute to the kill count for some reason, so I might as well talk about them. Contributing to the kill count actually becomes an issue for the three Serpent God fights as one of their attacks spawns eight in a ring, and if you kill the Serpent God before the ring is spent then the Heads aren't killed, leading to 100% kills becoming impossible. They are also a trap that appears regularly on levels and I hate all of them.

I also agree about the accursed heads, which are basically another type of mines and they can sometimes spawn grenades that pretty much instant kill you. I hate those variants the most but it's funny if the grenades hit other enemies and clear a room for you. Oh yeah and the fact the heads spawned by the Serpent Boss can screw up the kill count if you kill him before all the heads are thrown. This wasn't fixed in the remaster either, same with the friendly clone spawned by Ripper Heart. I also never really understood why the Katana can't hit the Koi, I don't think the fists can either if I remember correctly. But what I clearly remember is being able to kill the Koi with Katana in those water levels, if I could hit the glass while they are near it, the Katana "puff" is hitting and killing them through glass somehow. Weird logic.

Quote

The Baby Ripper: It's like a Ripper, but it can cling to walls, throw projectiles and biologically has nothing to do with the "grown-up" Ripper. Later on these guys get their own Orange variant with more health, so I'll call this and their Orange variant Tigers from now on. Tigers are pretty much moderately fast Imps. They don't actually have much health, which makes this another monster the Katana can handle in one swing.

Interestingly, their attack is based off the coolie ghost's projectile (hence the same damage, sound and sprite used), only it is colored to green...until it hits the wall and shows the red impact sprite. This is a small oversight but still, it's another bug that could get fixed one day in a newer remaster of Shadow Warrior. Unless the source ports have already fixed this bug and the baby ripper projectile decal shows up green as intended.

Another thing I want to point out is the Shadow Ninja's main projectile (the one which spawns projectile sideways as long as the projectile is still in air) does NO damage at all if it hits you in the face. On the other hand, the side projectiles hurt a lot even if just one projectile hits you. Not to mention the goddamn carpet bomb attack, which more often than not instantly kills you, unless you've got armor and/or a lot of health, only then you can survive. I have no idea how this enemy got past QA testing because it's unbalanced as hell. Oh yeah and I also hate crouching ninjas in general. They autoaim at you and they ignore invisibility too. The only positive side is it forces the stronger ninja variants to only use their uzis against you when crouched, if I am not mistaken.

Quote

Oh good, we're able to talk about the Episode 2 elements now.

The Railgun is good for hitting targets from far away but it is slow and it is possible to hurt yourself from splash damage if fired near a wall or even near an enemy (not sure about the latter). The first time this happened many years ago, I was quite shocked, as I was used to the railguns in the later Quake games that I never thought you can hurt yourself with it. I don't think it would have hurt (heh) if the weapon did slightly more damage or at the very least increased the ammo capacity to 30 instead of 20 to compensate for the lower damage. It was quite strange when in some maps, you were offered a railgun and TWO or more ammo packs but can only hold 20 ammo in total. And what's funny is the weapon was stronger in the beta versions, not sure why it was nerfed so much in the final game. I guess they balanced more the weapon for multiplayer?

The Guardian Head is also decent but again suffers from not having enough ammo if you want to go crazy with it, due to how fast it gets consumed. It holds a maximum of 80 ammo and you get 30 per each head acquired. Couldn't have they made 90 max ammo instead? I don't think it would have been too much to ask, not to mention the number would have been divisible by 30, so acquiring three heads would have been full ammo. As it stands, acquiring the third head without using any ammo would result in a loss of 10 ammo.

The Ripper Heart should only be used in extreme cases and only if you don't care about 100% kills, for everyone else just collect the weapon and never use it. If you use it, wait until the current Lo Wang clone disappears, as the new spawned clone cancels the old one, plus you only get to hold five hearts in total. Oh and what doesn't seem to get mentioned is how the friendly clone fails against Shadow Ninjas, as it CANNOT see them. I remember doing this experiment a decade ago on my first playthrough when I actually used the Ripper Heart sometimes (back then I had no idea the kill count gets screwed and instead I actually thought many levels have bugged kill counts) and noticed the clone wouldn't even attack the Shadow Ninjas.

Also in the 1996 prototypes, the Ripper Heart worked completely different: it held more ammo (20 I think) and when hit an enemy, it got infected and caused them to explode into Baby Rippers. Also another thing about the Guardian Head and Ripper Heart, they are random drops ONLY if they are killed with explosives and Railgun. If you kill them with melee weapons, despite sometimes gibbing them, the Guardian and Ripper will NEVER drop the weapons. I don't know if it's an oversight but I wanted to point this out as well, as there seems to be plenty of oversights like these.

And now, here is the first half of E2 review. Unlike the previous review, this is going to be a bit shorter, as there isn't much to say about many of these levels. I will also upload less screenshots for the registered episodes, to not clog the topic.

CODE OF HONOR (PART 1)

Rising Son ($WHIRL.MAP)
by Keith Schuler

Kills: 120/120
Secrets: 7/7

The second episode opens up quite nicely. Lo Wang is riding a boat, which starts exploding after a while, so make sure to jump when the boat starts sinking. Be careful of the ninjas that attack you through the windows! After making your way through the buildings, you will get to a turret that is fun to use. I haven't mentioned before (though it might have been mentioned and I think everyone knows already) but the vehicles/turrets have infinite ammo, so fire away!

The rest of the level does have some good fights, although from what I remember, there are a couple of annoying ambushes and traps that can drain your health quickly or even kill you. I noticed while loading my older saves (one was made before Serpent boss), I had a nearly empty medkit in inventory, so I must have taken serious damage in this level but still ended up with full health & armor in the end.

At the end, before entering the boss arena, make sure to grab everything and save, as this is a point of no return! I also believe one secret early on can be accessed just once, though I don't remember the exact details, maybe once you discover the secret you can't visit it again.

When you are ready, step into the arena to begin the rematch with the Serpent God boss from the end of first episode! He is much harder now and joined by two Orange Rippers on NPNG, although you get plenty of goodies to fight all these guys. Make no mistake as it is easy to lose health/armor if you are not careful.

Once you finish off the boss, collect whatever you can and press the button to finish the level. Be careful of the lava balls flying around! Make sure to also grab the cookies and armor to start next map with maximum health and armor!

Not a bad way to start the second episode. Shame that it is downhill from now on...
Attached Image: SW_L5_1.pngAttached Image: SW_L5_2.png

Killing Fields ($TANK.MAP)
by Stephen Cole

Kills: 85/85
Secrets: 5/5

A bit of a bland map to be honest. It's not a really bad map but is not a good one either. This is where I often lost interest in continuing Shadow Warrior and it sometimes takes months or even a full year to go back to the old playthrough when I feel like playing more SW, like I admit doing in past couple years (either the playthroughs from a decade ago or the most recent one from 2021-2022 or both).

The map isn't too difficult outside of some parts such as the lava area and getting all kills can be tricky due to one or two enemies that can be hiding in some caves. I certainly remember going through the whole map just to find the last enemy.

I don't have much to say other than this map was kinda meh and one of the weaker E2 maps. It also loses a point for not even matching the map's filename. As in there is no tank in this map, so the map filename is misleading and one of the things I really dislike about SW, when comes to the way the maps are internally named, which makes it difficult to figure out which map is which unless you carefully peek into a map editor and inspect each map. I don't know why they couldn't have used the same map naming system as most other games of the era, such as E1L1, MAP01, LEVEL1, etc.
Attached Image: SW_L6_1.pngAttached Image: SW_L6_2.png

Hara-Kiri Harbor ($BOAT.MAP)
by Stephen Cole

Kills: 98/98
Secrets: 5/5

A "sea" themed map. It's okay I guess and it packs quite a punch, as there are plenty of different ninja variants that can easily kick your ass.

Be also careful when going underwater to get one of the keys. You need to get it quickly or you get locked inside and then all you can do is watch Lo Wang drown and quickly realize that armor also protects from drowning until it gets consumed. Yeah, I know, this was also a thing in Quake 1 where armor absorbed drowning damage but I still had to point out because you rarely see this happening in games, armor shouldn't protect from drowning. Kinda strange how many games have bugs relating to the armor...

Speaking of which, I appreciate the "free" armors you get every now and then. If playing continuously, I recommend saving that red armor for the end, as TheDragonLiner said. I find it more useful to start each level with full health and armor and if the armor runs out completely, you then rely on the regular gray armor that gives 50 points, until that one runs out too, hopefully not too early in the level.

Other than that, I don't have much to say about this map. I think it's okay but can be forgettable.
Attached Image: SW_L7_1.pngAttached Image: SW_L7_2.png

Zilla's Villa ($GARDEN.MAP)
by Stephen Cole

Kills: 75/75
Secrets: 6/6

Another okay map and somewhat on the shorter side. There aren't many difficult fights, outside of the ones located on the rooftop, I think.

A bit strange how you get armor literally at the end of the map, which is the weaker gray type and mostly benefits the continuous players. If you want to hunt down the red one, it is hidden inside the training room. To reach it, you need to jump on the training dummy and then you will reach it. Worth it, since most levels often contain exactly two armor pickups (one red and one gray).

Also I like how the map's title rhymes. Other than that, there isn't much to say about this map beyond being another okay-ish map.
Attached Image: SW_L8_1.pngAttached Image: SW_L8_2.png

Monastery ($OUTPOST.MAP)
by Stephen Cole

Kills: 86/86
Secrets: 5/5

Although this is another okay-ish map, I must say I find the opening pretty cool and funny, with the ninjas slaughtered by that rotating spike trap, usually happening just as soon as the level has started.

Other than that and the progression being weird at times, I really don't have much else to say about this map.
Attached Image: SW_L9_1.pngAttached Image: SW_L9_2.png

Raider of the Lost Wang ($HIDTEMP.MAP)
by Stephen Cole

Kills: 113/113
Secrets: 6/6

Pretty decent map. I like the introduction of the Serpent Lord, which is the mini version of the Serpent God. As I mentioned in previous post, he has a habit to just try to melee you at longer ranges, which gives you some extra time to attack him. Or if you feel brave enough, just select the fists and he will stop firing the green projectiles at you. The same tactic you'd use against guardians, who also try to melee you at long range, which I find funny, I admit.

Getting to the secret exit requires you to find some hidden switches, so be sure to look around. Outside of that, I don't have much to say. Maybe the secret level will have more things going on?
Attached Image: SW_L10_1.pngAttached Image: SW_L10_2.png

Shanghai Shipwreck ($SHORE.MAP)
by Randy Pitchford and George Broussard

Kills: 49/49
Secrets: 5/5

Honestly, this secret level is quite bland. It also features a rather tiny enemy count compared to pretty much every other map in the game, with less than 50 enemies present. The start is definitely memorable and maybe the last part with the volcano, plus the fake exits with the guardians, everything else is pretty forgettable.

When reaching the part with the three exits, I'd recommend selecting the fists in advance and pressing either the left or middle symbol (the right one is the actual exit) to reveal the guardians. The reason why I suggest selecting the fists is because they will stop firing their projectiles and only attack with the sword. Their sword doesn't hurt much compared to their fire attack and they sometimes swing it in the air even if you aren't in the melee range.

After you have cleared the whole map, you are free to press the real exit button. And if you feel like using the training dummies to refill your health, feel free to do that. Just pay attention to the random lava rocks falling, so you don't get a surprise hit. And make sure to stock up on armor as well, you will need it! You will find out soon why.
Attached Image: SW_L21_1.pngAttached Image: SW_L21_2.png

Sumo Sky Palace ($PLAX1.MAP)
by Randy Pitchford and George Broussard

Kills: 77/77
Secrets: 5/5

The final level of this half of the episode is okay, I guess. But it has one flaw which is mentioned by the fellow Dragon in his review: this map has no armor at all! Luckily, there seems to be plenty of health around but I still recommend to be careful because there are plenty of traps featured inside the whole palace, alongside platforming bits and more. I am not going to talk about the whole level, so I will skip to the last parts, which are the most important.

When platforming over lava, keep in mind the platforms actually hurt this time. You only lose 1 or 2 hp per second though. And then...watch out for those rocket traps when pulling the lever! I definitely remember them from watching old YouTube playthroughs of the game when I was playing the game for the first time. Though the BEWARE sign should tell you in advance there is a trap waiting in that room. Still, the solution is to close those two pockets and the rockets will explode inside, allowing you to safely pull the lever.

Before taking the teleporter to the final arena, make sure to grab everything, as there's no way back and make a save here just in case. Be also sure to go around the ledge to find a big secret. Oh and the items inside the secret are oversized for some reason. When ready, step into the teleporter and prepare yourself!

You will get to fight against the Sumo Demon! He is the second boss of the game and was originally meant to be the FIRST boss but for various reasons, the Serpent and Sumo bosses were swapped out in the final game.

To me, this fight is easier than the Serpent Boss, at least it seems that way to me and I am using the Rising Son's Serpent Boss as the comparison. However, this fight is on a timer. Due to the whole fight taking place near lava, you are slowly losing health. You get more health and ammo in this arena, so don't worry if you lose some, it is impossible to avoid the damage anyway.

After you took care of the sumo, be sure to not stand near his stinky farts, so you don't lose even more health. Wait until the screen fades away and then you will stop losing health altogether. Afterwards, you get to enjoy a nice cutscene.

The Sumo Cutscene is funny as hell and seems to be the best of all three cutscenes in the game. It is the best animated, feels smooth and it is the funniest at same time, with Lo Wang eating Sumo's eye. Yes, I know it's weird to see Lo Wang eating Sumo's eye but still, a silly cutscene like that doesn't hurt anyone. I wish the rest cutscenes were as well animated as this one.

Overall, this map was okay I guess and the boss fight was also okay, nothing really amazing and wraps up the second episode nicely.
Attached Image: SW_L11_1.pngAttached Image: SW_L11_2.png

Episode 2 so far has been a mixed bag. The levels are mostly okay but they aren't very memorable, besides a couple ones and they indeed blend together. There's some sections of maps that I confuse with ones from another map. I just wish the levels were more polished overall, though at least most levels aren't that bad honestly, just quite forgettable.

One thing I liked so far at this episode is that many levels offer rewarding secrets, they are usually generous with armor pickups (at least the two armor pickups, some maps give you more and others nothing at all) and the training dummies being present, allowing for health refills if needed. Of course if you accidentally destroyed them with explosives, you don't get access to free health refills anymore but hopefully if you didn't spam explosives all over the place, you are free to use them when needed.

Oh and something that I felt missing is the continuity between the levels. The shareware episode had continuity between each level. The first half of the registered episode had only a few maps with some kind of continuity, at least from what I can remember. Either way it's pretty disappointing for a Build Engine Game to lack continuity between many of its levels. I mean how does Lo Wang go from fifth level (which ends in a lava area) to the sixth level (which starts in a watery area)? And how does he suddenly go from the hidden secret exit in Level 10 to the first secret level (Level 21) and then to Level 11? I mean I can excuse the lack of the transition between the secret map but even if we ignore the secret exit, many levels lack the proper transition. At least that's the way I see it.

Here's hope the third episode picks things up. :)
2

#41

Double again, don't want to overshoot.

Crude Oil :

A level I often don't remember until I play it.

While I like the idea of using the small Tank at the beginning to dispatch the enemies, I find more stimulating and satisfying to use the 5th weapon willy-nilly. Especially useful when you hate Heat Seeking enabled. It's also another one of those areas where Nukes work quite well though I used it in the more confined place with the 2 Big Rippers instead. The exteriors are pretty bland though, the interiors are more interesting.

I especially like the 2 main places which are the Blue Key one with its more administrative design and the Pumps you can actually destroy, I didn't know that until played a second time long ago. Though you can kinda cheese this place by spamming 6th weapon through the windows outside. And the Blue Key one which is the main gist of the level IMO. It's got the more packed action in tight spaces.
This is where the Gas Bomb is quite usefull again. Used it to cheese the Office. Corridor leading to the Yellow Key is one of the rare instances where 0th weapon's 3rd Mode is genuinely usefull, that's worth noting. Lastly this area is one of the extremely rare ones in the game where I feel I can use 7th weapon similarly to how I use Duke's 9th. Since enemies tend to be standing at the far side of the corridors, you have somewhat time to use Mines, and then the Coolies in the Yellow Key Room are also easily dispatched with them with a refund.

Rest is kinda unremarkable save for the explosive set-piece at the end.

Not too inspired by that level though. Kinda basic though I like the fighting in the Blue Key area.


Coolie Mine :

A level I remember more. While aesthetics aren't the best, I like the ideas and how the level is built.

Beginning assaulted by Hornets and then 2 sneaky Turrets isn't ideal, at least you got 1k times enough explosives to deal with them. I like how the Ground breaks and forms a mini-volcano and all the Rippers come out of the titular Mine. Worst secret though, not only is it VERY easy to miss but you can find yourself getting out of it with less health than you had coming in >_>

I like the drilling area, and some severe 3rd weapon alt-fire stuff. Snake with the elevator was a nice surprise to spice things up, especially since explosives aren't best used here. A clever secret behind a Drill and an interesting fight with Coolies near the Crazy Drill. And finally a nice little Double Snake to finish things up.

Not saying much about this level because it's short and more gimmicky in a way. The idea/concept taking more space than the rest. Neatly laid out, interesting combat encounters, poosibility to approach the various encounters in different ways thanks to the diverse ammo. And some neat ideas here and there like the crazy driller and the Ventilation at the end.

This post has been edited by TheDragonLiner: 27 August 2024 - 09:46 AM

2

User is offline   Quacken 

#42

One of the greatest tragedies of our time: There is a cut monster in the June 11th 1996 prototype known as the Lava Boss. It's a huge fire golem that shoots the molten rock projectiles you see in MAP03. It was a really cool concept with a great sprite that would have fit right in with the rest of the bestiary, if its main weakness (it can't hurt you if you stand right next to it) was patched. The Lava Boss still makes an appearance on a movie poster texture though, where it's called the Earth-Eater.

Auto Maul
Keith Schuler

Finally, a secret map that actually earns its title. Auto Maul is what happens when Keith Schuler figures out how to do spinning sectors in Build. This map has barely any monsters in it but is still quite pleasant to play through, owing to the special attention placed on its visuals. I've always liked when mappers use sky textures for things that are not the sky. Case in point, the showroom after the Blue Door is both a collection of the finest slabs of textures that money can call a car, but it also uses three of the sky textures as backdrops. Auto Maul also has a unique babe that only appears in this map. She looks and sounds suspiciously young though, I'm not sure why she's in a leotard, why she was hired to sell people cars, nor why Lo Wang wants to give her a "test drive". This map begins with a hot start and ends with two Sumos who will beg you to not close the door on them, but aside from that, things move pretty sluggishly. I often ran into weapons in this map and I didn't realise I had them. I noticed there were a heap of Uzi clips and Gas Bombs in this map, but aside from the ending stand-off there's not really a lot of good places to use the latter. It kinda feels like this was meant to be a bigger map that was unfinished and shipped as it was. Comparing the detail on the food court to the spoke hub also further points to this. Auto Maul's unique texture composition and theme make this sales pitch worth the money, and having an easy secret exit to get to this map certainly helps.

6.5/10.

Crude Oil
Eric Reuter, Stephen Cole

Stephen Cole is back and more unremarkable than ever. This time he brought on newcomer Eric Reuter, but I can't really tell what he would have worked on. This map has a ton of Cole-isms. It's sparsely populated, contains an overpowered yet clunky vehicle that is the only viable way to clear the early combat, features Coolies behind doors and around corners on tight bridges surrounded by 20 damage hurt floors, coloured doors that lead straight to keys which are right next to said doors, and the indoor sections are all one light level. This map is pretty whatever. The only real kick I get out of it is blowing up Zilla's oil drillers with explosives. You need to destroy one to finish the map, and there's a second one the authors hand you a Missile Launcher so you can blow it up just for fun. You can barely see it though. I feel the same way about this map that I do about the fact you can run over ammo pickups with the vehicle in the middle of the map: I'm mildly annoyed, but I don't care.

Because it helps pad the length of this segment, let's go through the Sumo quickly. The Sumo is the mini version of the Sumo Demon. It has less health and like the Serpent Lord, loses one attack when demoted to a standard enemy. In this case, it lost the Shadow Ninja attack. Now its main attack is to ignite you from behind walls with a psychic attack. Archvile, this is not. Mainly because Archviles actually give you a second to get out of the way while you run for your life. The Sumo just has to look at you and then you eat the damage. He can also throw singleton Accursed Heads at you like the boss counterpart and still passes a Gas Bomb upon death. Sumos are not immune to gas, so pairs of them can get damaged if one dies. Which is actually a pretty silly oversight. I killed a Sumo in MAP13 and its gas killed the other one for me. I still died on that attempt while looking for the last kills though because I face-exploded myself.

5/10.

This post has been edited by Quacken: 28 August 2024 - 03:34 AM

2

#43

SubPen 7 :

A similar level, as in a relatively short but challenging level based around an idea, here being a Submarine Harbor. Just like the previous level, it gets points for originality and diversity.

Aesthetically, this isn't the most inspiring level, it's on the lower end. Again it's a level packed with enemies, and I noticed the surprisingly high amount of Orange, Grey and Shadow Ninjas in this level. Also that level must be having the single biggest amount of 8th weapon ammo in the game save for Boss Arenas (20). Though to be honest, it has its fair use on the Dock with all the Crates and perhaps on the Cylinders if you shoot from farther.

Sumo Trap happens to be the single easiest trap to disarm in the whole game, even if you don't know it before hand. Just jump in the water and you're home free ! 2 Gas Bomb and 3 RailGun shots later the final room is a good opportunity for the Smoke/Flash combo alongside 3rd, 4th and 9th weapons.
For supplies, I'd say while the level is overly stocked on 4th and 8th ammo, it was surprisingly okay. As for Armor we have the usual issue of 1 of each types against 75 or so enemies who can melt them faster than you can imagine if you're not carefull ...


I like the level for its theme and good gameplay, but after the previous one it's not too inspiring. Alongside Crude Oil and Coolie Mine, this level ends trilogy of weaker level. IMO


The Great Escape :


A level I like. I always liked the idea of levels where you escape from capture.

I like the way you can approach the Central Bridge room first time. Personally I always spam some Grenades in the alcoves since I'm never sure wether or not there are enemies there. The first set of rooms is okay, and enemies are placed inteligently. I didn't use Smoke and I should have I think. The secret behind the first Mirror ... how is it possible to make a Mirror Curtain like that IRL O_o ?
Filled up alcoves I think is the big challenge here. The 2 Coolies on the side being problematic, several crouched Ninjas who never miss a shot AND a bunch of Orange ones that can decide to delete you. Made good use of a Gas Bomb and even a quick 7th weapon throw which worked perfectly for once. Though I guess using 6th would have spared everything.

I like visiting the neighbouring cells and coming back to yours. Also like the Furnace even though it basically spares you 2/4 easy enemies only to make a 100 Armor harder to get unharmed ... and harder to spot it as well. Like the Surprise Ghost attack. Was nice erasing them one by one with the 8th weapon + NV combo. Damn Ep3 sees the most use out of NV Goggles in any Build game it's unreal o_O ! And a double Snake at the end to expend all those Rocket you just keep getting dumped on you.

A bit too much 5th weapon ammo and not many occasions to use it, but apart from that the level doesn't suffer much from the typical problem. Armor still though, ALWAYS only 1 of each ...
2

User is offline   Quacken 

#44

Remember how I said earlier you can't use the Ripper Heart while underwater? You can't use it while standing in water either. This game is great.

Coolie Mines
Reuter, Schuler

Coolie Mines substitutes its very low monster count with ammo starvation and being generally highly frustrating. Right away you have to not get stung by Hornets and then burn four grenades on blowing up the turrets as they guard the Red Key and a crucial Guardian Head, which is one of your few sources of damage for the upcoming section. Either Eric Reuter didn't playtest his map or he always started by playing MAP14 and bringing guns over, because everything in the mines before the Red Door is all Rippers. That singular Guardian Head will not help you for long. Neither will your single Uzi, so you either have to rely on Ripper Hearts or use your Grenade Launcher with surgical precision. Soon enough, you'll run out of the latter and will have to start punching Rippers. The lift to take you deeper into the mines is a Serpent Lord jumpscare that basically forces you to use a Ripper Heart, and the Riot Gun borders on being a secret. The last fight is an unremarkable Serpent Lord double team that you can skip by just ignoring them. I don't like Coolie Mines at all, but there's no hitscanners, I think the drills look very neat and it has my favourite song in the entire soundtrack, so it's not entirely awful.

2.5/10.

Subpen 7
Reuter, Cole

This map goes hard on explosives but lacks the necessary meat per square inch to back it up. This is where your auto aim not targeting explosives really blows. There are piles of explosives in this map enough to level a small village and are easy pickings for the Shurikens, but you'll target the dumbasses standing above them instead. To actually hit the barrels, you either have to remember to turn auto aim off, or you have to look down at really awful angles just to shoot at the things you want to. That's also not to say there's a Shadow Ninja at the start, and not even the huge submarine in the middle of the water will save you from dying if you decide to hide behind it. After that, the map loses nearly all of its momentum. 73 monsters is just way too low on the highest difficulty for a map like this. Making five monsters largely all do the same thing and not even using half of them you have available in most of these Episode 3 maps makes fights blend together. It feels like Redneck Rampage where some maps have the two hitscanners plus a bonus monster, but the problem is exacerbated. Even something objectively not good like Nut House can coast on its unique visuals and atmosphere and the hitscanners actually die in one shot from your workhorse weapons, like they're supposed to. So, yeah...

2/10.
1

User is offline   NNC 

#45

I don't remember Coolie Mines being ammo starving, probably because I played on No Fear (HMP/Let's rock level) skill setting and continuous. I thought it's a bit like Critical Mass, a change of pace, but it ended too fast I guess. It's still the better experiences for me in the game.

I'm wondering the review of the last four levels, they should be rated higher (at least the last three).
2

#46

Maybe he was playing "Sword Start" ? In which case I guess there can be shortages ...


Floating Fortress :


Probably one of my favorites.

I like the small build-up to the Ship, though starting with lots of Ninjas out to get you isn't ideal. At least none of them were crouched. 8th weapon gets a lot of use around and under the Ship. The interior from below aren't too thrilling apart from some cool little puzzles. Hangar part sees good use of both Smoke and NVGoggles. Though the double Ambush I'm not a fan.

The Ship itself is the best part of the level. I like the deck and fighting there as well as the interiors. The middle floor being the best with cool and intense encounters. Also I just can't help but giggle when a Coolie explodes and you hear tons of breaking glass sound. And there are some funny rooms like the Medical part and the Toilets even though I'm not into that. Another bunch of intense encounters on the way back and at the bottom. The ending I'm not a fan due to how tight your Air is to the exit.

In the end I didn't say much about the level but that's because I find you need not say much when a level is good. I really like the idea of climbing onto a ship and exploring, and it is the overall best part of the level from A to Z.


Water Torture :


Another level I like.

Tight Corridor action with minimal Shadow Ninjas to delete you is good. Also nice to be able to start chipping away the Ripper cluster fest early with the 5th weapon early. I like the small Sub patrolling outside, though I don't like how an invisible wall prevents you from just going up to the Exit, they could have placed a barrier or Mines or something.

I like the Sub Hangar and how the level revolves around it. I also like the Room with The Best Vehicle Ever, and it even kinda works since it removes the rocks which I suppose are here to play as dust clutters ? Flooding it all with Water is also the treat, and it's good they made a fail-safe in case you destroy the Cannister before exposing the Window. This is where I wish I hadn't used up all my 7th weapon in the previous level, and all my 5th at the beginning. Using the 7th weapon on the Glass to damage the enemies with no retaliation is the single best use of these ever !
The final stretch has a strange cluster of Coolies and Shadow Ninjas. Quite the jumpscare coming out of an elevator, though either Gas or 9th weapon work fine there. Cool little Mini-Tank to open the way and 2 easily dispatched Snakes with the full 3rd weapon ammo, with a partial refund.

Once again Armor isn't enough for the high amount of enemies we face, ammo was okay however, not too much. I guess the only complain I could have is how, when Discovering the level back then, I had missed the easily missable Blue Key, inside an inconspicuous Piston despite it standing out by being immobile.

This post has been edited by TheDragonLiner: 29 August 2024 - 10:55 AM

3

User is offline   NNC 

#47

These two really saved the game for me. Floating Fortress in a Derelict style experience, probably not as good, but it has lots of points of interest. Other than the ship I actually liked those teleporting baby rippers and serpent lord and the forklift stuff. The sticky bombs of the female ninjas crashed the game back then a few times so I always used savescumming there, I hope it's not an issue in the remastered versions.

Water Torture is something I would have loved to see in Duke's Birth episode. It would have been perfect between Derelict and Queen. It's the least asian level in SW, but that's not a problem I guess.

This post has been edited by NNC: 29 August 2024 - 10:36 PM

3

User is offline   Quacken 

#48

I have played each of these maps on a Katana Start, on No Pain No Gain. Just like I play Duke and Doom maps on Pistol Starts, and Blood maps on Pitchfork Starts.

The Great Escape
Reuter, Schuler

Out of all the cells to teleport Lo Wang into, why would you pick the one that has a grate he can easily slide away? It seems like Zilla didn't do his research on taking guns away, also. The Great Escape feels like another map that was started early by Eric Reuter and cobbled together at the last minute by Keith Schuler. It's way too dark and rather one-note, consisting of almost entirely the same red brick texture and a couple of extra large tapestries. This is another map that gives you not much to work with. You get an early Grenade Launcher and a reasonable amount of ammo for it, but only one Uzi and a couple of clips to hack it together for a while. You'll have to hit grenades on monsters dead on until at least the Red Key, which blows chunks. You're either really good at corner peeking in this map with mostly right corners, or you'll have to take self damage from your grenades each time you want to kill something. This is still a better map than the previous two though. Reuter and Schuler do a pretty okay job getting the prison aesthetic down. The cells have good lighting and there's even an execution furnace you can turn on. Which you can't turn off after you char grill everything, so you'll have to brave 30 damage fire to get the items that are also inside. The secrets are also fairly easy to find and do a lot to help with the ammo issue, and the Nuke in one of the furnaces makes the final fight of two Serpent Lords quick and painless. Finally, the Fortune Cookie in the exit room is clearly intended for MAP18, but for me it's useless.

6.5/10.

Floating Fortress
Norwood, Schuler

Well, it's the big one. Floating Fortress is the second-longest and second-most involved map in all of Shadow Warrior, taking place on a battleship that is way smaller than the contents inside. The start is another Schuler Dumbass TrapTM. He wants you to use the speedboat to kill the Ninjas. Don't. Immediately submerge and swim to the underside of the battleship to get an Uzi, then take on the Ninjas with it. You'll still have to use the speedboat to kill everything, but now you won't get totally decimated. Then get a crucial secret Fortune Cookie by turning on the door and climbing on top of it to jump to the cave. Now that you're minimally armed, wake up the monsters on the ship and use the speedboat to kill them. Don't use your ammo here because you won't have anything to get past the engine room, which throws hitscanners in a sickening strobing light room. After you kill the Serpent Lord and get the Red Key, as long as you got the Nuke in that secret from earlier and remember to get the Missile Launcher, it's pretty easy pickings from here on out. That Nuke is very useful in the second wave of the Riot Gun turret room, and you'll be swimming in grenades now. You can also get a Smoke Bomb before the kitchen fight, which makes that fight easy too.

Now in the battleship's halls, not much can really stand in your way. All of these rooms are claustrophobic and packed with monsters that get mowed down by grenades. If you remember she exists, you can also meet Sailor Moon in one of the secrets. Sailor Moon is an interesting map object. She won't shoot you on sight and will instead give you exactly one item if you bother her enough. If you get unlucky, she'll give you an Uzi clip, but if fortune favours the horny, you'll get a Nuclear Warhead, which is pretty good for MAP19. Not so much here, though. It's way too cramped to use it and the Grenade Launcher is usually a better option. This map is one of the better lookers in the set. It's dark for sure, but there's plenty of rooms you can turn the lights on in, and with the return of Love Field in the background, it makes for some pretty good atmosphere. This is also a great demonstration of room over room in the Build Engine. This is actually one of the first things I think of when I think of it. Just don't touch the walls wrong or you'll break the laws of gravity. If you watched Pro Wang #3, you'd know. Floating Fortress' ambition, length, challenge and visuals make it one of the hallmark maps of Shadow Warrior. You might even say it's one of the two hallmark maps.

8.5/10.
2

#49

Stone Rain :

Initial area I like for the best usages ever of the 8th weapon and Heat Seekers in the whole game. And once again, NV works well to help spot enemies beyond the fog, making SW THE BuildEngine game that made NV Goggle actually, genuinely usefull.

However once the Ninjas have been taken care of, you're pretty much home free since the rest are nothing but Coolies and Guardians who can be dodged and cheesed thanks to the very open areas. Sumo Boss is even easier than before not only because the arena isn't harmfull, but also if you hide in the Secret behind the Painting, he won't see you and thus NEVER attack. And you're given several full charges of 8th and 7th weapon, almost full 6th and a fair bunch of 5th.
The upper part of the Volcano is trickier because AutoAim seems kinda twitchy with the 8th weapon here. Sometimes it wouldn't hit the Guardian due to elevation change ... I still like the idea of climbing a flaming volcano.

Snake Boss is actually the main difficulty I faced. The Arena is cramped, making his attacks more effective and your best weapons less practical to use. Though 7th and 6th are good bets. 9th especially among other things. And the Center is harmfull so yeah it took me several attempts. Also I don't like having a Skull head bomb me THROUGH the wall <_<

Final part is regular stuff. Hate the traps here, barely dodgeable even whe you know ahead of time. Secret isn't worth the trouble since you loose in more than you gain out of it. Zilla Boss is easy. Smoke, 8th and 0th weapon is the best combo IMO. 8th weapon because it won't accidentally kill your Clone.

In the end, not the best level aesthetically, and difficulty is on the easier side except for Snake fight. Level is VERY generous on Health but NO ARMOR, unless there was one in the 2 Secrets I missed ... Ammo was okay though a bit too much 8th ammo.


Conclusion :

In the end I find SW to be a better game than Duke overall although less ballanced with ammo and armor. Duke didn't often give you too much ammo and it ALWAYS gave you enough armor as far as I can remember. However, like I said at the beginning, this over ammo problem in SW is actually the source of it having more gamefeel due to it enabling us to just fire all over the place and still pull through.

Regarding Ep3, I find it to be a more even experience than Ep2 even though it also gots a few low ends of its own. Ranking will be tough but let's say ....

1_Auto Maul, 2_Bath House, 3_Great Escape, 4_Unfriendly Skies, 5_Coolie Mines, 6_Floating Fortress, 7_SubPen 7, 8_Water Torture, 9_Stone Rain, 10_Crude Oil

Putting Crude Oil last because it feels like the least creative level in design and aesthetics, but it still plays mighty fine. Like I said, Ep3 is a more stable experience than Ep2.
2

User is offline   Quacken 

#50

And one final bug for the road: Killing either of the mini bosses restarts the music. Or at least killing the Sumo does.

Water Torture
Keith Schuler

Spoiler


Stone Rain
Norwood, Schuler

Spoiler


Closing Thoughts

Spoiler

2

User is offline   NNC 

#51

Unpopular opinion but I still enjoy this game vastly more than Blood. I've never clicked with Blood's gameplay (especially those hideous cultists with their accurate hitscan and annoying voice, and never truly managed to master the dynamite) and I found the level design very boring save a few levels like Dark Carnival or Overlook Hotel. It's all flat and grey and brown. For me, a good environmental design and sense of progression is necessary to get involved with a game. Shadow Warrior at least had that at some levels. Things like the ninja's, especially the coloured and shadowed versions and the brutes like the orange ripper are painful, but at least the game's progression and style is interesting somewhat. Schuler isn't Blum or Levelord but he is much superior to Blood's designers IMHO.
3

User is offline   FistMarine 

#52

Hey everyone! Hope you had a nice weekend and sorry for being so late but I have been sick since last week, so I needed some time to recover. I am doing better now and I am wrapping up the review for the Single Player episode. I will review the multiplayer maps tomorrow and give the game's overall thoughts. I hope my review doesn't turn out a bit boring and uninspired this time but I had to rush it because I had a hard time finding the exact words for some of the levels. But first, some responses:

Quote

Also, Lo Wang just drops Duke Nukem's name in a voiceline. The Apogee shared universe is real. San Nicholas Island from Rise of the Triad is in the skybox of Alien World Order's E5L6, too. We can now connect the Heretic and Hexen games as the latter's trio of villains are known as the Order of the Triad. Thank you, I'll be here all night.

Hell yeah. Duke Nukem references exist in Blood, Shadow Warrior and Ion Fury, so these Build Games take place in the same universe as Duke3D, although each game takes place in a different time period, so the whole situation is quite complicated if you think about it. ROTT (and DOOM) already existed as Easter Eggs in Duke3D in same level (E1L3: Death Row) at short time from one another. ;)

We also know that the id games take place in the same universe too and Duke includes both Doom & Quake references. And since Heretic & Hexen are also connected to ROTT according to a Twitter post by Romero, then we can also conclude that these games take place in the same universe. I will stop here to not confuse the readers even more and to not derail the topic.

Quote

Too much 3rd weapon ammo as I said before, and only 1 armor for the whole level which kinda sucks, better keep it for the end.

I have a feeling that at some point during the development, the Shotgun ammo pickups gave far less ammo than in the final game, which explains why there are clusters of shells in some maps. I suppose you can just spam the Shotgun altfire for the strongest enemies if you want to make some good use of the extra shells.
Also I agree about the armor not being enough in some levels, plus in some cases it's usually hidden inside secrets or non-obvious places or given right at the end (useful for continuous players) but in this level's case, it's not too bad as you can get more armor from the pachinko machines if you are lucky with the win. It's not a guaranteed armor prize but it's worth trying to win.

I still think that the armor could have been better balanced in this game, with it absorbing 50% damage instead of 60% damage and also let the gray armor stack with another one (or with a partially used red one) up to 100 points in total. Or maybe doubling the armor durability (100 points for gray, 200 points for red). As it stands, not only the armor is rare and melts so fast but also it needs to be consumed with care. Some players also pick armor randomly and they just throw away a half-used armor for nothing. Though that may be partially because they are playing with the mini HUD enabled which only shows health, ammo and inventory. A bit shame that the armor gets so much neglected in some Build games. :(

Quote

Sumos are not immune to gas, so pairs of them can get damaged if one dies. Which is actually a pretty silly oversight. I killed a Sumo in MAP13 and its gas killed the other one for me.

Funnily enough, I had this happen to me once, though it was in Twin Dragon's fortress map, which has two sumos in a tiny training room.

Quote

The sticky bombs of the female ninjas crashed the game back then a few times so I always used savescumming there, I hope it's not an issue in the remastered versions.

I don't recall this crash ever happening in the DOS version but I noticed this always happening in JFSW (at least when playing the fixed/updated grp versions of the addons by ProAsm) when a sticky bomb blows you up. I am not surprised if Classic Redux has the bug inherited, since it is based off JFSW. In fact, watching Civvie's PRO WANG 3 video confirms this happening in Redux port as well. It's during the beginning while he reviews bath house.

CODE OF HONOR (PART 2)

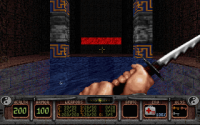
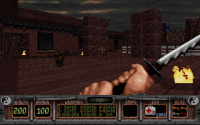
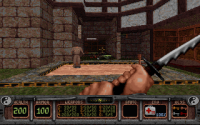
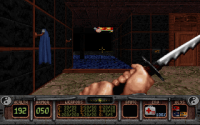
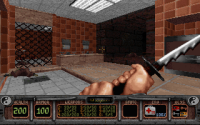
Bath House ($BATH.MAP)
by Keith Schuler

Kills: 71/71
Secrets: 5/5

Great way to start "Episode 3" (aka Episode 2 Part 2). Nice explosions in a background, complete with a reference to Duke Nukem! Oh and since this is part of the same episode (despite feeling like you started another episode), you get to keep everything you had so far. ;)

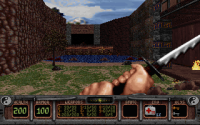
I will say this is one of the best and most memorable levels in the game. It feels like a classic Duke3D city style map. It's action packed with some tough sections but it also feels rewarding when conquering all those challenges the map throws at you.

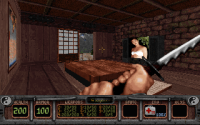
The bathing anime lady returns and appears on the rooftops. She should be killed if you don't want to get randomly shot by her while already dealing with other monsters in the room. I do find pretty stupid that if she gets hurt by an enemy, then you get punished for it. But then again, what can you expect from a game that doesn't have infighting? It's everyone vs Lo Wang! Seriously, it would have been funny if she shot back at the monsters who hurt her.

The only complaint I have about this map is that there is one secret that can only be accessed as long as you don't blow up the canisters. If you do, then you can no longer get that secret. If you realized that late in the map, well you are out of luck. Unless you have an earlier save before blowing up those canisters or just restart the level from beginning (hopefully from a save at end of previous map/episode/part/whatever). But note that the enemies can also blow up the canisters even if by accident! So keep an eye for those canisters.

Overall, this was a great map. Gets extra points for having level continuity. Honestly, I wish more maps like these were in the game. And I also wish this episode was separately shown in the main menu, so you could warp directly to it. More on that when giving the final thoughts for the game. Now for the next map...
Attached Image: SW_L12_1.pngAttached Image: SW_L12_2.png

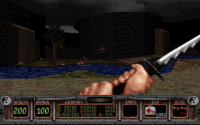
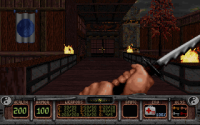
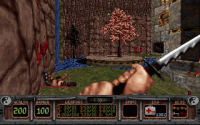
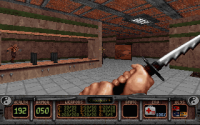
Unfriendly Skies ($AIRPORT.MAP)
by Jim Norwood and Keith Schuler

Kills: 76/76
Secrets: 7/7

An airport styled map. Not bad at all. It's another strong map with some great stuff going on, such as that wonderful C4 explosion, complete with a countdown, so it doesn't happen in your face.

The Pachinko Machines are back and let you win more goodies if you are lucky. In fact, winning extra armor/health is encouraged to have a chance at surviving the tricky challenges.

Secret exit should be easier to find than the normal exit. It involves getting on top of the elevator and this time it has an exit teleporter that sends you to the secret level! So the level continuity actually makes more sense.

Oh and don't forget to look for the hidden red armor before leaving! Great map overall!
Attached Image: SW_L13_1.pngAttached Image: SW_L13_2.png

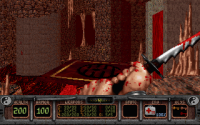
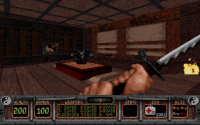
Auto Maul ($AUTO.MAP)
by Keith Schuler

Kills: 64/64
Secrets: 6/6

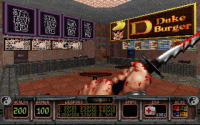
The second secret level is thankfully way better than the first secret level and it's also one of the best levels in the game, at least to me. It even has another Duke Nukem reference, with the Duke Burger being featured. Yes, it's a reminder that DUKE3D and SW take place in the same universe. ;)

Oh and as soon as you start the map, you get attacked by crouching ninjas, so be quick when clearing the room! Afterwards, explore the kitchen and take a look at the various Duke Burger advertisments. I wonder if at some point there was going to be a Duke Burger themed map for SW?

Either way, this is a map that takes place at a car showroom and has a couple interesting locations to visit. There is also a nice new babe who will shoot at you as expected, so you want to have the Fists/Sword ready when talking to her. Otherwise, don't bother with her.

The last part of the map features two mini sumo bosses (I think only one on easier skills) and they are easy to dispatch.

Overall, this map was nice.
Attached Image: SW_L22_1.pngAttached Image: SW_L22_2.png

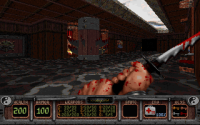
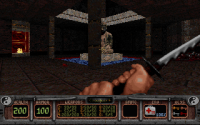
Crude Oil ($REFINER.MAP)
by Eric Reuter and Stephen Cole

Kills: 81/81
Secrets: 3/3

I found this map okay. It's not as remarkable as the previous ones but still a decent experience. It reminds me a bit of the second level of the shareware episode, at least some parts and some interiors.

At start, after clearing the initial attack, you get the choice to use a tank, which is fun to use but I don't recommend moving around because it can run over dropped ammo and since I am a resourceful player, I don't want that to happen. It's best to just slowly move and take out the monsters with its rocket turret.

I don't remember too much from the level, other than a Shadow Ninja towards the end giving me problems and killing me a couple times because I kept insisting to kill him with the Katana but he always one shot me at 100 health (I had exhausted the armor and extra health that I started the level with). Absolute bullshit.

The explosions at the end are pretty nice, though. In the end, the map is okay.
Attached Image: SW_L14_1.pngAttached Image: SW_L14_2.png

Coolie Mines ($NEWMINE.MAP)
by Eric Reuter and Keith Schuler

Kills: 52/52
Secrets: 5/5

Another level with a low enemy count and not a whole lot of stuff going on. I just start to realize these levels with such low count probably have little difference between skill settings, so maybe each difficulty adds like five extra enemies and that's it. Then again, this level is cramped, so I can't imagine stuffing the level with too many enemies.

At the start, you are greeted by TURRETS and WASPS! That's a deadly combo but other than that, most of the level contains Coolies and Rippers. There are NO ninjas for once and the Mini Snake Bosses appear afterwards, one halfway and another one or two at the end of the level, depending on the difficulty chosen.

I like the drillers that are present in the map, especially the moving one towards the end, that's one of the memorable parts of the map. And I guess the fan at end that makes Lo Wang scream and throws him into water, so he doesn't take falling damage. Outside of that, the level feels alright, though somewhat bland at times. Caution is also advised if backtracking (yes, it is possible to go back to the beginning) by choosing the correct path, so you don't fall on the hard surface.

I don't have a strong opinion on this level, it was okay, felt a bit closer to an E2 map. Let's see how the next level holds up.
Attached Image: SW_L15_1.pngAttached Image: SW_L15_2.png

Subpen 7 ($SUBBASE.MAP)
by Eric Reuter and Stephen Cole

Kills: 74/74
Secrets: 5/5

Interesting map with some really amazing explosions at start but also tons of ninjas. And the level isn't afraid to throw some tough enemies at you, though the two mini sumos won't pose much of a problem. I like the theme of the level as well. Though some parts looked a bit eh. I will only describe some important parts.

There is a moving light that if you step on it, a rocket is fired at you, so AVOID stepping on that moving light! And although backtracking is possible from the last room, make sure to not approach the exit yet if you haven't finished fully exploring! The exit is fake, as you will find out upon approaching it, you will get teleported to a room with no way out. The explanation is that Lo Wang gets ambushed and gets thrown into prison. And then, the level ends upon taking a step forward.
Attached Image: SW_L16_1.pngAttached Image: SW_L16_2.png

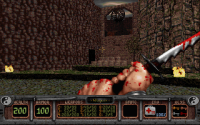
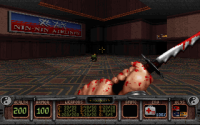
The Great Escape ($ROCK.MAP)
by Eric Reuter and Keith Schuler

Kills: 75/75
Secrets: 6/6

After getting captured, Lo Wang has to escape, hence the name of the level. However, unlike Duke, Wang gets to retain all his stuff upon getting captured. Transition between the last level is seamless because it ended right where this level started.

There isn't a lot to say about this map other than the existence of a furnace you can turn on which cooks some coolies and a battle against two more Snake Bosses at the end, which once again I am sure there is only one on WWW. It's interesting how you always fight Mini Bosses in pairs on NPNG. Meanwhile in Duke3D, Mini Battlelords were encountered in pairs even on Piece of Cake skill.

The Armor in the furnace is possible to grab without getting hurt but it can be tricky. I recommend saving in advance if wanting to have 100 armor for the next level. Rest of the level isn't too difficult, apart from maybe clearing those cells with ninjas in them, if one happens to get a lucky shot to you. Oh and I appreciate the fortune cookie at the end of the level, which actually went unused due to generous amounts of health pickups. I would have rather preferred Railgun rounds because I used all 20 in this level and only got back 10, as you can tell from the screenshots.
Attached Image: SW_L17_1.pngAttached Image: SW_L17_2.png

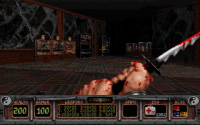
Floating Fortress ($YAMATO.MAP)
by Jim Norwood and Keith Schuler

Kills: 155/155
Secrets: 6/6

Pretty interesting water themed map with a hot start where you get attacked by lots of ninjas. You can use the boat's machineguns to kill them quickly or use your own weapons. It is up to you.

There are some very creative and interesting things going on in this map (such as the secret wall that gets deformed when shot with many rockets), teleporting ambushes, plus some spicy battles as well.

And of course, the best and most memorable part includes an Easter Egg where Lo Wang meets Sailor Moon! She has the chance to give you a powerful item (ammo, nuke, medkit) or a tiny rabbit (useless reward) or nothing at all. This usually only works up to three times from my own experience, afterwards she will not give you anything anymore, so I recommend saving before talking to her and then saving after receiving a good reward, so you can get the most benefit. She is also the only Anime Girl who will NOT shoot Lo Wang, so it's nice that there is an anime girl who wants to help, although the conversations between the characters can be a bit awkward.

Not a huge fan of some ambushes and the fact gray/orange ninjas appear in cramped locations. You basically have to get lucky with them only using uzis because if one of them fires an explosive at you, you are pretty much dead. I think one time (not fully sure if this level or another one) I remember how I got killed by a Grenade Ninja because despite dodging the grenade, it just bounced in my back and killed me. Or the explosion just removed me from meters away. And even if I survived, I was low on health, no armor and medkit almost used. Made some parts really frustrating.

The water tunnel at the end is a point of no return, so make sure to get everything before leaving. When running through the tunnel, make sure to surface as soon as possible.

I believe there is another point inside the submarine that can no longer get accessed but I could be wrong about this. Nice level overall.
Attached Image: SW_L18_1.pngAttached Image: SW_L18_2.png

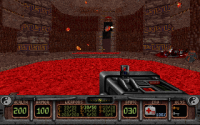
Water Torture ($SEABASE.MAP)
by Keith Schuler

Kills: 95/95
Secrets: 6/6

Another very nice water themed map that feels very similar to a map you'd see in Duke3D Atomic, it's as it would have fit right at the end of the fourth episode. In fact, this map gives Derelict vibes and even uses some of its textures, although unlike the ones in Duke3D, the ones in SW can be "destroyed".

It also has a lot of cool stuff going on, like "driving" a vacuum cleaner (I had no idea about this until the latest playthrough), flooding a room, having to use a RC Tank to blow up a wall and more.

I also mentioned in a previous post that you can hit/kill enemies through glass, which even lets you melee the Koi that way. While watching Civvie's Pro Wang 3 video, I noticed he showcased this trick being done, so I thought I'd mention this again. I do find pretty hilarious how you can kill ninjas through the glass. Then again, I remembered you can press the self-destruct button on a Pig Cop Tank through glass in Duke3D, so why I should be so surprised?

I don't want to spoil further from this map, so I will say this map was really nice. I wish more maps like these were in the final game.
Attached Image: SW_L19_1.pngAttached Image: SW_L19_2.png

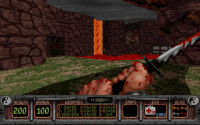
Stone Rain ($VOLCANO.MAP)
by Jim Norwood and Keith Schuler

Kills: 95/96
Secrets: 5/5

Time to the final level of Shadow Warrior! Before you can reach Master Zilla, you have to prove yourself worthy by defeating the Sumo Boss and the Serpent Boss again! Interesting how you fight first the Sumo and then the Serpent, further proving that you originally fought the Sumo in the first episode and the Serpent in the second episode.

Which reminds me that the original development plan of the Serpent boss being fought in that Level 11 arena which is located near lava, starts to make a lot more sense now. I mean you'd think the Sumo would have burned to death from all the waiting until Lo Wang arrived. Right?

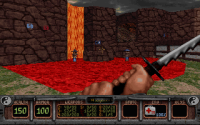
And despite what fellow Dragon said, there IS armor in this level but it is only located in a secret place and only one armor pickup available (technically there is a secondary armor pickup on the volcano but it most likely only appears on multiplayer for some bullshit reason because I never saw that armor pickup appearing in SP before). Note that the secret place containing Armor before the Sumo boss fight is bugged. If you get locked inside, there is NO WAY OUT! Make sure you save before jumping in to get the secret and do it fast to avoid the softlock!

The Sumo boss is easy to defeat and you can hide behind the picture for a secret with extra goodies (THREE FORTUNE COOKIES), plus he will NOT EVEN SEE YOU! This trivializes the boss fight completely and almost feels like cheating. You can achieve the same thing with a Smoke Bomb but I recommend saving the smoke bomb for a better time.

The Serpent boss feels quite challenging and it can be difficult to avoid the damage during the fight. Especially when throws those heads at you. And speaking of which, if you are going for 100% completion (or at least as many kills as possible), make sure he throws all the heads before finishing him off!

But how can I forget to also mention the random cheap instant death bullshit? The volcano spits lava balls, which are guaranteed to one shot you if you have no armor (or suffer a massive health loss if you are in the 150-200 health range). Not to mention those freaking hidden heads/mines in the ground that randomly spawn grenades. And there's more waiting down inside the volcano. Oh and one spot in the volcano hurts you EVEN IN AIR! But at same time some lava spots don't hurt you at all.

Speaking of which, once you defeat the bosses and open a safe way to enter deep down in the volcano, there is NO WAY BACK! Make sure to grab everything before dropping down. And also make sure to activate all those hidden heads because they count as enemies and it is likely you will miss a few of them. Even then the kill count in this level seems bugged (see below for more info).

After dropping down, you are not safe from bullshit because of those mines. I got killed a LOT of times by those bullshit grenades. The coolies and guardians are the least of your worries. But I also don't remember these mines existing on easier skills, so maybe they appear only on NPNG?

If you want, you can explore further to find an Easter Egg featuring the deceased TMNT (Teenage Mutant Ninja Turtles) and the return of the Killer Rabits! Sadly, you have to endure walking into lava to get there and you don't get a worthy reward for your effort. Well unless you enjoy punching those killer rabbits with the fists, which feels satisfying. Because having fists selected makes them much less aggressive and allows you to get closer to them (but not too close) without getting hurt.

On your way back (hopefully you have enough health to make your way back through the lava), notice the big door and FOUR Fortune Cookies! Don't worry if you are low on health, these four guarantee you will have 200% health when entering the final boss arena. No armor unfortunately but at least you've got maximum health. Prepare yourself for the long awaited moment!

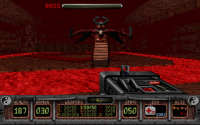
Master Zilla is the FINAL BOSS of the game and he can either be easy or hard, depending on what you do and which attacks he uses. He seems to fire machineguns at you which do little damage but he can also fire rockets (both homing and non homing types) and the worst of all is the surprise Railgun attack, which guarantees a major health loss or possibly an instant death.

Funnily enough, Zilla can also kill himself with his own homing rockets if you manage to run around him and get him to hit with his own missiles when he is low on health. I actually did that once and it was funny to see him taste his own medicine.

However, I have no idea where is the last enemy. Upon loading my 2022 saves with three missed kills, I have found two more mines that weren't detonated when climbing the volcano. I have no idea about the other glitched enemy, could have been caused by the accursed heads spawned either by the Sumo Boss or the Snake Boss.

If anyone is able to get all kills in this level, please let me know, so I can replay the level at a later time. Until that time, it seems that getting all the kills is impossible in this level, which is also true for last level of the shareware episode, funnily enough. And no, I have NOT used the Ripper Heart at all, so I have no idea if either the Sumo's rare throwing head attack or the Snake Boss glitched the kill count!

Oh and when finishing Zilla, be sure to STAND AWAY from the explosion or you get knocked into lava and die or killed directly by the explosion. At this point, you can patiently wait and the level will finish with the player dead or press N when the game asks to load last save, restart the level and the game will still skip to the ending, due to a weird feature explained below.

What happens is when the player dies and level restarts, for a split second, Lo Wang is seen respawning at the start of the level like in multiplayer with the default equipment (100 health, 30 shurikens and melee weapons) but then in next second, level is restarted from the beginning. In this case, the level doesn't fully restart, it just spawns a new player entity and skips directly to the ending.

There is also the possibility to softlock yourself if you save with Zilla already dead. Ending will play the first time as usual (it will even play if you load an earlier save just after defeating Zilla) but if you load the save again, nothing will happen afterwards. Thus, you have a softlocked save right here.

Anyway the cutscene shows Master Zilla's robot destroyed and flying away, claiming to rebuild the robot and fight again. To be continued in Wanton Destruction...

While the cutscene is more or less okay, it is more like the shareware episode cutscene with the snake boss, which feels laggy and isn't fit to the whole screen. I liked the sumo cutscene the best, it felt the smoothest and best animated. Once the cutscene ends, look at the level stats and press a key.
Attached Image: SW_L20_1.pngAttached Image: SW_L20_2.png

Lo Wang: After all that work, Lo Wang feel like a song! Hehe! *Lo Wang Rap Plays*

If soundtrack or CD is not present, then Lo Wang will say after the line above: "Oh, you don't like the music?" and skips immediately to the main menu. I admit the Lo Wang Rap is kinda cringy but it's nice that there is an option to skip the song entirely. I think it's worth listening to it once, after that skip it. :P

Episode 3 Thoughts. A huge improvement over the second episode (or the first half of the second episode). Levels have better design, more consistency, continuity is also done much better now (still not perfect but many levels actually make more sense now, continuity wise), though the difficulty is still bullshit at times.

With all that said, I personally wish this was a separate episode to select instead of being the second part of the Code of Honor episode. That way if people dislike the first half of the episode, they can just jump directly to Bath House and enjoy the last part of the game. It's not perfect but the third episode is a definitive improvement over the second episode of the game.

Overall thoughts about Shadow Warrior are coming soon because I still have to review the multiplayer levels and I want to save that for another day. Plus this post is already getting really long, so it's only fair that I am saving the rest for later.

In the meantime, the topic is more or less wrapped. Thanks everyone for participation and see you tomorrow for September 2024 Edition of the Duke map/mod club! Though there wasn't any competition this time, the winners with a single vote are: Pray Your Prayers 2000 and The Realms of Grune! Expect the new topic to be up tomorrow. Have a nice day everyone.
2

User is offline   NNC 

#53

A tad bit offtopic but I'm wondering which of the levels were nerfed significantly from previous betas. I only recall Unfriendly Skies which had an APC end which would have been like 1000 times better than what we got and Zilla's Villa, which had a different layout back then but with the same narrative.

This post has been edited by NNC: 03 September 2024 - 12:48 AM

2

User is offline   FistMarine 

#54

Quote

One of the greatest tragedies of our time: There is a cut monster in the June 11th 1996 prototype known as the Lava Boss. It's a huge fire golem that shoots the molten rock projectiles you see in MAP03. It was a really cool concept with a great sprite that would have fit right in with the rest of the bestiary, if its main weakness (it can't hurt you if you stand right next to it) was patched. The Lava Boss still makes an appearance on a movie poster texture though, where it's called the Earth-Eater.


Quote

A tad bit offtopic but I'm wondering which of the levels were nerfed significantly from previous betas. I only recall Unfriendly Skies which had an APC end which would have been like 1000 times better than what we got and Zilla's Villa, which had a different layout back then but with the same narrative.


I've always wondered how the game would have been if they kept some beta elements in the final game. Such as some of the cut monsters, weapons and items. I also think they should have finished some older maps that had plenty of progress done to them in the 1996 builds but were ultimately removed from the game.

Also two things to clarify from earlier:
-In November 1996 Build, the Ripper Heart caused ONE Baby Ripper to spawn from the infected enemy instead of two of them (they spawned two in August 1996 prototypes and earlier)
-The Mechanic Woman in Water Torture can probably attack the player if you bother her too many times. I don't remember exactly if this happens but she won't do it immediately like the other anime girls in the game, that's for sure. Not sure how I forgot to mention her in my E3 review. Kinda feel sorry I rushed that review in previous post, I didn't even notice how I missed to highlight the authors below map titles, only the Bath House review has the author written in italic text.

Fun fact about the shareware version! It includes MIDI music for the four levels, which means they play by default. Why they were taken out in favor of CD Music in Registered Version, I have no idea. As currently stands, if you don't have the CD mounted, then you hear no music in the game. And I admit I played SW like that since 2015 (on first playthrough in 2013-2014 I played either using shitty steam free version or using some custom DOSBox launcher, both cases had music playing by default) and back then I had no idea how to mount a CD image in DOSBox myself, only found that since a few years ago. Well at least I listened to the CD Music while loading my 2022 saves and taking screenshots from each level, so I redeemed myself. :P

To be honest, I preferred more the way Hexen II (and few others) did it by including the option for BOTH CD Music and MIDI Music. That way you can listen to MIDI Music without having to bother with inserting the CD or mounting a CD image. I wish they kept the shareware MIDI songs at the very minimum.

For now, here is the long awaited review with the lesser known multiplayer levels, as well as overall thoughts about SHADOW WARRIOR!

MULTIPLAYER LEVELS

There are SIX hidden multiplayer levels, only accessed with command line parameters. They are placed on levels 23-28. First four maps are for DM, while the last two are for CTF.

Note that while the multiplayer levels can be explored in SP mode, they have no exit in them. To access them in SP, you have to use the parameters:

SW.EXE -LEVEL23 -S4

In this example, this warps you to Level 23 on No Pain No Gain difficulty. Not specifying any skill parameter will warp you to the specified level on default Who Wants Wang difficulty.

Heavy Metal (DM Only) (TANK.MAP)

Kills: 146/146

This map sucks ass in Single Player. You have to fight not one but TWO Snake Bosses with very limited health and ammo in a very cramped place, at least if you are playing on NPNG. On WWW there should be only ONE Snake Boss to fight, with the second one teleporting in after the first one is defeated on NPNG.

This map requires massive amounts of save-scumming to be able to beat it, alongside having fists selected at most times. The snake will stop attacking you with its ranged fireball attack but will still summon the heads and throw them at you, plus its melee attack hurts like hell (doing 75 damage).

The reason why I got so many kills is due to the spawned accursed heads. To get all kills, finish off the snake boss at same time he throws the last accursed head, which will avoid a glitched kill count. I recommend having Level Stats option enabled here, even if playing the original DOS version.

Upon defeating these two assholes, there is NO reward or exit or anything like that. Lo Wang gets stuck here in this empty room.

On Deathmatch mode, this map is apparently much larger. I have no idea why they decided to restrict the better part of the map from SP mode. I guess they wanted to punish cheaters if they somehow warped here. They were quite smart in putting this on the 23rd slot, immediately after the second secret level.

Overall, this map sucks in SP mode. Don't bother with it unless you are playing on multiplayer.
Attached Image: SW_L23.png

Ripper Valley (DM Only) ($DMWOODS.MAP)

This map appears to be a cut section of Dark Woods of the Serpent. As you can tell from the title, it features the Ripper Valley portion of the map.
Attached Image: SW_L24.png

House of Wang (DM Only) ($DMSHRIN.MAP)

This appears to be a new map, or maybe some parts borrowed from some SP maps such as Zilla's Villa. To me, it doesn't seem to be connected to any SP map, though I could be wrong.

While design wise is good, I can't imagine the map would be that great in DM due to cramped spaces. Still worth checking out once.
Attached Image: SW_L25.png

Lo Wang Rally (DM Only) ($RUSH.MAP)

This map appears to be quite unique, with Lo Wang always moving when standing on that street sector. I can imagine the multiplayer battles to be quite hectic and fun.

Map appears to be slightly inspired by Seppuku Station, though much larger and with different textures used this time.
Attached Image: SW_L26.png

Ruins of the Ronin (CTF) (SHOTGUN.MAP)

Kills: 0/1

The first of the two CTF maps. This map appears to be an original map or based off some parts from Raider of the Lost Wang.

As you can imagine, the map has two flags, red and blue. You can pick them up even in SP mode but then you will hear a beeping sound, which means they each explode after a while, injuring or even outright killing the player, depending how much health and armor they have.

After picking up the flags and tanking the explosions, there isn't much of a reason to explore further. There is no exit and there appears to be a separate boss arena with a boss fight against a transparent Zilla, that I have no idea how it can be reached and if it's reachable at all in both SP and MP modes.

I am also not sure why the map's filename is SHOTGUN.MAP. Was this map intended to be shaped like a shotgun or the only weapon usable in this map to be the shotgun? I guess we will never know.

Perhaps, they just reused a random map that didn't make it to the final game and forgot to change the filename to something more logical. That's one thing I really dislike about SW, the absurd map naming. It also makes more difficult to find the exact map when looking in Mapster.
Attached Image: SW_L27.png

Killing Fields (CTF) ($DMDROP.MAP)

Kills: 0/1

As you can tell from the title, this is a CTF conversion of Killing Fields. Though there are a couple differences in the map design.

This time you have the two flags. One is located in the room with arrows trap, the other is placed on a rock above lava, so be careful when getting that flag!

As with the previous CTF map, there is one hidden enemy, most likely a super secret boss fight against the Sumo. No idea how to get there, though. At least I couldn't find a way.

My theory is in both CTF maps, they intended for the player to spawn into the arena in SP mode, like was the case with Level 23. But for some reason, this doesn't happen at all.

Anyway, the same rules apply as before. Grabbing the flag will cause it to explode in the player's hands. Grabbing both flags at same time or one after another, make sure you have enough health and armor to survive the explosion! Afterwards, well there isn't much else to do.
Attached Image: SW_L28.png

Overall, the Multiplayer levels seem more or less okay, though nothing remarkable. Some of them seem to be original, others are portions of some SP maps suited for multiplayer. There really isn't much of a reason to check them in single player, other than to explore them if you have no one with to play Shadow Warrior multiplayer. I don't know if SW has support for bots but if it doesn't, then you are out of luck and have no way to enjoy the multiplayer maps.

Overall Thoughts

Shadow Warrior is a criminally underrated FPS game. It was released way too late in August 1997, back when sprite based FPS games were fading away. Hexen 2 came out in early September 1997 and both SW and H2 got overshadowed by Quake 2 when it came in late November 1997/early December 1997.

In an alternate universe, Shadow Warrior (Shareware) was released in late January 1997 (about one year after the original Duke3D Shareware) and the full game was finished and released on 4th April 1997, which is basically the date of the Beta Version 0.90, funnily enough. And it's also the date when DOOM 64 came out, apparently.

In this alternate universe, SW, RR and Blood would have all been released in same month (April is the Build Games month after all) and all would have competed with each other. Shadow Warrior would become somewhat successful, still not quite on the level of Duke's success but comparable to how successful Redneck Rampage ended up back then.

This success to SW would result in having the three expansions released commercially and would eventually have a sequel in development: Shadow Warrior Forever! It is not possible to predict what would have happened afterwards. The imagination is left to the reader. :P

Bottom line, I wish Shadow Warrior was more successful than Redneck Rampage ended up being. I'd even go ahead and say that Redneck Rampage was quite overrated when it came out back in April 1997. It got good reviews and good sales, plus it managed to overshadow both Blood and SW and at same time compete directly with Duke3D, Quake and other popular games from around that time. I'd say it also helped that RR had a strong publisher and strong marketing, as the RR ads were everywhere during that time!

When Shadow Warrior came out, it got decent reviews but poor sales, the game also didn't get nowhere as much marketing as RR did, so people mostly forgot about it when it released. And it was forgotten for many years until it got revived in 2013. Although I think that making the original full game free to play was just unnecessary (IMO) and the shareware version should have been instead made free to play. The expansions were already freeware since many years, thus there was no need to also make the main game freeware. This one should be blamed on Devolver Digital, they didn't know how to handle the situation properly when they were promoting the SW reboot in 2013. Just my two cents about that.

Speaking of which, I have no opinion on those Shadow Warrior reboots as I have never played any of them, though the videos on YouTube that I have watched over the years, the reboots are more or less okay. The Classic Redux port, aka the remaster, is more or less okay, though it was far better back in mid 2010s when there weren't any decent source ports available for SW. But nowadays with better source ports available and for free, it is hard to recommend that port in 2024. From my own experience, it is okay and includes the expansions with further bug fixes (the game breaking bugs in the expansions are fixed), which makes for a great package, although I suggest to wait for a sale before picking it up. Still, you will be probably better off using a source port to play SW.

All I want to say is that Shadow Warrior deserved better. Here's hoping one day we get a better remaster than the one that currently exists and it will resurrect the game, bring new people to the game, maybe more people will make maps/mods for it. Because there aren't a lot available, at least when compared to Duke3D and Blood.

I almost forgot to mention that Deadly Kiss is still unreleased to this day. Hopefully when it releases one day, it will bring more interest to the game. I also hope one day to see a NightDive remaster for Shadow Warrior with not only all expansions included (and maybe a brand new one as well) but also fixing all bugs in the game and expansions, making it the ultimate way to experience Shadow Warrior.

In the end, Shadow Warrior is a good game, although flawed, suffering from the bullshit difficulty at times and the level design being a mixed bag, despite being the most advanced Build Engine Game. One thing for certain, Shadow Warrior is much better than Redneck Rampage, even if the level design in RR was more interesting overall, the gameplay feels so much better in SW and is far more polished than even Duke3D's gameplay, especially the melee weapons (Katana and Fists) are much more fun and satisfying to use than Duke's Mighty Foot.

But despite SW having superior technology, Duke ends up being the better game overall because it is much more fun to play and the game is much more memorable, as in the protagonist, the enemies, the weapons, everything is better and more iconic. Though SW also has its moments and Lo Wang can be really funny at times. The soundtrack is decent with some great songs but it's not very memorable. I wish MIDI playback was a thing in the full game, maybe that would have helped more.

Funnily enough, I wasn't bothered by the controversies surrounding the game. I can understand the game was controversial since it came out and nowadays the game is apparently considered racist by some people but as someone who is from Eastern Europe, I haven't found the game offensive at all. I am not even a fan of Lo Wang's Rap and the conversations with Anime Girls can be awkward at times but that doesn't mean I dislike the game. You can find plenty of fun in this game if you get over the insensitive content and the unbalanced combat. Therefore, don't listen to those people stomping on this game with impunity, SW is a much better game than you think it is and rightfully belongs in the Big Three of the Classic Build Games (Duke3D, Blood and SW).

I am not sure of the exact rating I will give to Shadow Warrior and without nostalgia to its name (besides seeing some advertisments in a gaming magazine back in early 2000s), I think I will give SW a solid 7 out of 10. It's very fun most of the time but other times it is frustrating as hell, regardless of the difficulty chosen. Plus some of the maps can be really boring at times. And finally, R.I.P. John Galt! You will be missed!

Thanks everyone for participating in the topic and for reading my posts. Hope people had fun revisiting Shadow Warrior. I would have revisited it sooner if I wasn't so busy and getting sick at end of August, though thankfully I'm better now.

Have a nice day and see you soon on the September Edition. ;)
2

Share this topic:


  • 2 Pages +
  • 1
  • 2
  • You cannot start a new topic
  • You cannot reply to this topic


All copyrights and trademarks not owned by Voidpoint, LLC are the sole property of their respective owners. Play Ion Fury! ;) © Voidpoint, LLC

Enter your sign in name and password


Sign in options