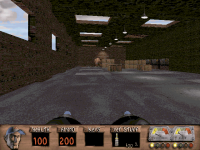
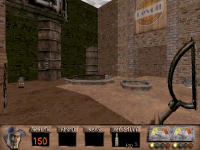
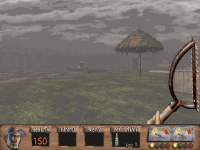
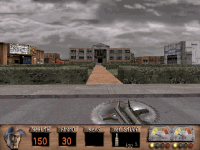
Duke4.net Forums: Duke Map/Mod of the Month Club - March 2024 - Duke4.net Forums

Jump to content

  • 2 Pages +
  • 1
  • 2
  • You cannot start a new topic
  • You cannot reply to this topic

Duke Map/Mod of the Month Club - March 2024  "Redneck Rampage VS Shadow Warrior"

User is offline   Quacken 

#31

Here's two vehicle-based tips for you: Tip 1 is that even while you're drunk (your Alcohol meter is in orange or red), your controls won't be messed up while you're driving a vehicle. And Tip 2 is that the Moonshine can speed you up while you're driving. You're required to do this in Moto Madness while you're riding the Motorcycle, but it works with the Airboat too.

Sunny Shores

Walkthrough:
Spoiler


Review:
Spoiler


Gamblin' Boat
Walkthrough:
Spoiler


Review:
Spoiler

1

User is offline   FistMarine 

#32

Thanks guys for voting. Looks like FMX trilogy is easily winning the next month's choice.

Quote

Here's two vehicle-based tips for you: Tip 1 is that even while you're drunk (your Alcohol meter is in orange or red), your controls won't be messed up while you're driving a vehicle. And Tip 2 is that the Moonshine can speed you up while you're driving. You're required to do this in Moto Madness while you're riding the Motorcycle, but it works with the Airboat too.


Great tips. I actually knew about both of these. In fact, yesterday while playing E2L1, I did drink into the orange zone at one point while driving the boat and noticed the boat was handing normally.

Also forgot to mention that when you finish a level in Rides Again, it will show a map with the location where you are currently, which is similar to the map screens in Doom and Heretic. Those portraits from the original RR are still inside REDNECK.GRP but they are all unused with exception of one portrait that still shows up when you defeat the final boss (and when playing user maps I guess), which I'm guessing is a glitch that may have been fixed in source ports.

Anyway, today is the long awaited day. Happy Birthday to LakiSoft (one of the frequent contributors in past editions of Map/Mod of the Month Club) and Redneck Rampage Rides Again! Both have turned 26 today! :D

I didn't post in previous message but here is more cool stuff that I want to share:

Redneck Rampage Rides Again Official Trailer (1998)

A couple differences with the final game can be seen.

Redneck Rampage Rides Again Intro (upscaled by Phredreeke)

Fun fact: Video has 666 views!

Rhett Baldwin's blog: https://rhettdbaldwi...ge-rides-again/
He created a couple maps for RR:RA. You can see in the screenshots he was probably the author behind those maps showcased.

And finally, RIP Mojo Nixon! You will be missed!

And now for the reviews for E1L4-E1L7!

Jack O'Lope Farm

Kills: 92 (7 missed)
Secrets: 1
Deaths: 0

This is probably one of the shortest and most straightforward levels in the game. It is also pretty well designed and offers good gameplay, helped by being generous with the Rifle ammo and health placement being decent, though interestingly, while there's no beer pickups, there are a few whiskey bottles.

The main highlight is the battle against many Jackalopes inside the barn, which I actually managed to do it without taking any damage this time! Oh and much like E1L2, do NOT turn on the Jackalope machine if you don't want to "miss" even more enemies. No, I don't understand why that killing machine is bugged, you should get credited for those kills but you don't. At least that machine is not required for progression.

Whenever you will come across those dark toxic barrels, be sure to stand far away when you are blowing them up! They have a large blast radius and much like with those explosive weapon pickups (Chicken ammo, TNT crates, Powder Kegs), they always deal 100 damage, which is instant death if you don't have above 100 health, as even having meters in green zone won't save you due to the armor glitch inherited from Duke3D.

On the bright side, there is actually a health boost item (the first one in this game), which is part of the only secret in the whole map, merely requiring you to jump on top of some wheels. Whether you save it for the end of level or grab it now, it's up to you.

Unfortunately, it seems like you cannot get all the kills in this map, even if you don't turn on the machine, as some of the jackalopes at beginning will get run over by the two tractors. If they get smashed by the vehicles, you do not get credited for kills. Not that it matters much because the kill count is fucked up already but still, it's worth pointing out if you bothered to snipe them with the pistol.

Oh yeah and you get to fight the first Mama Jackalope in the game, who has 2000 HP. Once you deal with her, you will be able to reach Bubba. You don't have to whack him to finish the level, just walk past him and level will end on its own.

In the end, this map was fine. It's not too difficult, doesn't overstay its welcome and has some good fights. Looking forward to the next map!
Attached Image: RIDES_E1L4_1.pngAttached Image: RIDES_E1L4_2.pngAttached Image: RIDES_E1L4_3.png

Wako

Kills: 28 (5 missed)
Secrets: 2
Deaths: 5

Ignoring the controversial references, this level is pretty bland and forgettable. The beginning is pretty cool with the explosions and those scripted sheriffs getting blown up, so be sure to press that switch. There are plenty of red cacti that will temporary give you the drug effect. The chances are you finished the last level with 150 hp, so this extra health will get wasted but it's fine, the level does provide you with some health pickups at various points if you are running short on health. Oh and note that there are points of no return, such as the starting area where it's no longer possible to revisit but I think the rest of the map can be revisited if you want to backtrack for more health supplies.

I don't know what else to suggest in this level other than being careful where you step, as it's pretty dark and you might end up falling into pits. You should also try to use your health items wisely, as there's plenty of annoying-ass bikers in this level. A few parts may get a bit confusing but you should find your way around.

Most deaths here were caused by the bikers and one random death where a wall crushed me. Not gonna lie, those three bikers at the end frustrated me a bit (mostly the last one). Once you kill those fuckers, shortly afterwards, you will see the useless buffoon standing there and not doing anything to help you. Fuck you Bubba, you useless piece of shit! There aren't enough rotten things I can say about this waste of oxygen! :dukerage:

Overall, this level was kinda lame, regardless of the controversial references at beginning, it's quite annoying to play and feels like a filler map. At least it's quite short, so you don't have to suffer much.
Attached Image: RIDES_E1L5_1.pngAttached Image: RIDES_E1L5_2.pngAttached Image: RIDES_E1L5_3.png

El Peso' Again

Kills: 56 (5 missed)
Secrets: 4
Deaths: 4

The original El Peso was so good that it had to be recycled, right?
Note: I wrote this phrase in a text file before Quacken started reviewing RR:RA, so this time I did not get influenced by an existing review but I will mention again that his E1L6 review was really funny.

Interestingly, I read on pagb666's playthrough of Rides Again, in the comment section of E1L6, that the level designer (Rhett Baldwin) planned this level to take place immediately after El Peso and I think this actually made more sense, progression wise. Too bad the idea was scrapped during development. E1L4 and E1L5 already tie nicely one into another but E1L6 should have been in the E1L4 slot.

After the miserable start with the enemies inside the church (that one goddamn vixen), this is certainly one of the most interesting levels in the game, due to fighting ghost versions of existing enemies and unlike the main game, their death animations were entirely removed, with the only exception being the single Ghost Sheriff you encounter that still has his regular death animation.

Unfortunately, the first half of the map with the ruins can be a bit miserable and I remember getting stuck in the past at those switch puzzles having to consult a walkthrough but this time I didn't get stuck, all you want is to flick those multi-switches until it is in the correct position, so that one door gets opened, which leads into another multi-switch and eventually to a way out. If you flick a multi-switch too many enemies, an enemy will spawn in the main room, though this happens only once, so thankfully you don't get infinitely spawning enemies.

Don't forget that there are points of no return and first half of the map with the ruins also contain the four secrets (three of them are located in same place and mostly contain ghosts and the ripsaw), then after you drop down (see second screenshot for the exact location I refer), there is another point of no return!

After you dropped down and solved the switch puzzles, you will teleport to the weird rotating room, then carefully make it to a teleporter (another point of no return), you will get to revisit the town at night and populated by ghosts. This is the best part of the level, even if having to revisit an earlier level is seen as lazy design, I like seeing different versions of an existing level. It shows that they had some good ideas. Then after clearing the town of ghosts and entering the jail, you will find Bubba exactly in the place where you originally started El Peso. I don't know if he is in exactly the same cell but if not, it seems close enough.

Overall, this was an interesting, yet quite annoying and confusing level. The original level is still better for obvious reasons but the second half of this one isn't too bad. I only wish they were played one after another, especially since you can see the start of El Peso Again connects very well with the ending of the original El Peso. For more information, read the comments in the El Peso Again video from the pagb666's playthrough which was done in the GDX port.
Attached Image: RIDES_E1L6_1.pngAttached Image: RIDES_E1L6_2.pngAttached Image: RIDES_E1L6_3.png

Refinery

Kills: 97 (4 missed)
Secrets: 3
Deaths: 7

Perhaps one of the highlights in the entire game, this is a level that's epic and exceptionally well done! It is comparable to Smeltin' Plant from the original game (it also shares the E1L7 slot) but it is much better in almost every way, including better gameplay, better progression, better visuals and so on.

Gameplay wise, it can be quite difficult and frustrating at times, not only due to abundance of bikers (including one of those riders) but also you get to fight the high tier enemies from original RR, which includes one Alien Hulk (defeating him will complete your arsenal), one Sheriff and TWO Vixens (one green and one red).

Sure, I got my ass kicked quite a bit in this level and was getting a bit frustrated (mostly at beginning because of that Biker Rider that kept hitscanning me to death) but you can tell this level had a lot of work put into it. The only disappointing thing is that there is NO BOSS or anything but you could say that Red Vixen at the end alongside the Three Bikers act as mini bosses or whatever.

And that makes me wonder if the Red Vixen is actually a new separate variant or they just had fun giving the regular blue vixens some different palettes in these levels? I'm not surprised if they actually made the vixens less spongier in the sequel than the main game but they had a bit of fun giving the enemies more palettes to give them more variety, as you have noticed so far.

But yeah, there is no actual boss, so finishing the level will send you directly to the second episode. No cutscene or anything. However, I appreciate that there is one health boost item towards the end of the level (in the large circular area), it's not in a secret place this time and can be easily seen.

Oh and there are two points of no return. One is at the very beginning, once you drive the bike over the ramp, you cannot go back to the start, so kill those shotgunners and grab all the supplies before doing the jump. The second and last point of no return is literally at the end. Upon dropping down the pipe, you cannot go back, all you can do is kill a few poop minions and then you will find Bubba, who doesn't need to be smacked by your melee weapon.

Overall, this was a good level and it was basically a much better version of Smeltin' Plant from the original Redneck Rampage. Too bad there was no actual boss.
Attached Image: RIDES_E1L7_1.pngAttached Image: RIDES_E1L7_2.pngAttached Image: RIDES_E1L7_3.png

This post has been edited by FistMarine: 26 March 2024 - 07:13 AM

2

User is offline   Quacken 

#33

R.I.P. Mojo Nixon. You truly were not an asshole like Metallica.

That blog Rhett Baldwin made is very interesting, since it seems to soft confirm the credits for every map - unless both Baldwin and Barber co-authored a map or two together. From the blog, it seems like Baldwin made everything in E1 as well as Back to Hickston, while Barber made all of the other E2 maps. That seems like it tracks to me, and from now on, I'll be providing the "credits" to each author in the reviews.

Lummockston
Aaron Barber

Walkthrough:
Spoiler


Review:
Spoiler


Disgraceland
Aaron Barber

Walkthrough:
Spoiler


Review:
Spoiler

2

User is offline   FistMarine 

#34

I finished my Rides Again playthrough yesterday (including exploring the E3 maps). Now it's time for reviewing the first three E2 maps (E2L1-E2L3).

HOMEWARD BOUND

Sunny Shores

Kills: 92 (1 missed)
Secrets: 3
Deaths: 2

This map is shown in the first demo when game starts, so you will instantly recognize it. But is it any good? Let's find out.

In terms of atmosphere, the map is interesting. It is swamp themed and reminds me a lot of the Darkmere map from Hexen. Even the cricket and frog sounds are identical to the ones from Hexen, although they play much more frequently here that it starts getting annoying after the first few minutes.

Another fun fact, this is the ONLY map in entire Rides Again that contains a Scuba Gear item. It is found inside the crashed airplane which is where you will find the first key. The item will be consumed around the time you reach E2L3, assuming you are playing continuously and you picked up the item shortly after you finished exploring underwater.

Unfortunately, this map isn't that great in terms of design. It is quite mazey (use the automap to help navigating) and looks pretty bland. The fog is much more extensive in the DOS version compared to the various videos I have watched on YouTube where people played in a source port. In DOS version, the fog is so strong it even obstructs a bit of the view when navigating the main menu and the save/load menus.

Gameplay is also quite a mixed bag to me. The airboat controls acceptable (I haven't played Half Life 2 yet so I can't compare to that game) but hitting the targets with the mortars is a pain in the ass, as sometimes it flies above their heads. The UFOs are also quite annoying and can get some cheap shots on you if you don't destroy them quickly. In fact, they were the cause to one of my deaths (the other death was caused by another enemy that fires the same projectile, you can already guess who is the culprit).

Not only that but the Boat Gun's mortars are quite weak and might require 2-3 shots just to kill a shotgun guy. The good thing is that most of the hitscanners have trouble hitting you but the UFOs with their projectiles have no problem hitting you and removing about 30 HP from you per each projectile, which is an issue aggravated by not being able to dodge/strafe while on a vehicle.

Oh yeah, besides the obligatory reskinned minions which are called Swamp Minions, you get THREE new enemies that are also riding their own boat. Quacken already described them, so I'm just looking into the CON files and say how much health they have:
Boat Cheerleader -> 200 HP
Boat Hulk -> 300 HP
Boat Minion -> 150 HP

Besides the three official secrets (two are actually in same room where you find the Tit Gun guarded by a vixen), there is one unofficial secret to find that contains two TNT boxes and a health pickup. It requires you to surface while swimming to reach it and it is located near the house which is near the last gate you activate with the last key. And of course, there is a point of no return when opening the last gate, so when falling down to reach Bubba, you can't go back up. Make sure to save in advance if you want to go back and further explore the level for various goodies or just finding the secrets. Once you are done, drop down and hit Fart Breath with a melee weapon.

Overall, this level was meh and this is coming from someone who enjoyed the swamp themed maps in Hexen. Hopefully the next level will be better.
Attached Image: RIDES_E2L1_1.pngAttached Image: RIDES_E2L1_2.pngAttached Image: RIDES_E2L1_3.png

Gamblin' Boat

Kills: 57 (6 missed)
Secrets: 1
Deaths: 0

Good news! This is one of the highlights of the entire game. It's definitely a visual masterpiece and gameplay is quite good too. The level progression is good for the most part and in most cases the hidden switches aren't too difficult to find. Due to the action taking place on a boat, you will notice the bobbing feels a bit different. It doesn't have any effect on the gameplay but it was quite noticeable on the first playthrough. I guess the bobbing is caused because the boat is on top of a liquid surface, so it acts like you are on the water.

The best thing about the map is the area towards the end when you come across the Slot Machines that come in two varieties, though they are only different in terms of visuals. Taking a hint from Shadow Warrior's Pachinko Machines, these Slot Machines have a chance to drop one item.

The reward is predefined and you can get: Ammo for Rifle, Dynamite Stick, Large Pork Rinds and Delicious Clusters. The reward is only given if you get THREE of same type. If not, then keep trying.

Although you can use the slot machines as many times as you want, there are two catches:
-The slot machine can be broken with gunfire, just like in Shadow Warrior, so be careful to not shoot them during a gunfight
-There is a very rare chance the slot machine will explode on its own. I have only seen this happen once or twice in my past playthroughs and I don't know what exactly causes this, probably if you use it too many times

Because of the machine randomly blowing up, I recommend pressing on it and then take a few steps back until it finishes the animation, just to be on the safe side. If the machine explodes, it can't be used again.

The only official secret contains the map's only health boosting item but if you are lucky, you can get more from the Slot Machines. I didn't get in this playthrough, sadly, at least when comes to this map.

Oh yeah and don't forget those balloons you can pop, which is another new thing introduced in RR:RA. Hit them with your melee weapon or just shoot them with the pistol to make them spawn some goodies. In the original levels, you just get a few health/ammo pickups but in user maps, you can even get enemies spawned from those tiny balloons!

The ending is interesting when blowing up the boat and things start shaking, including your screen. At which point you have to escape the crashing boat, hopefully not drowning in the process. Sadly, upon pressing that destructive switch, you have no option to go back, so make sure to grab everything in advance, whatever health and ammo you need, before pressing that switch. After you get out of the crashed boat, you should find Bubba waiting for you.

Overall, this map was quite epic and another highlight of the entire game/series.
Attached Image: RIDES_E2L2_1.pngAttached Image: RIDES_E2L2_2.pngAttached Image: RIDES_E2L2_3.png

Lummockston

Kills: 55 (2 missed)
Secrets: 0
Deaths: 4

This map is a better and shorter version of Sunny Shores. It's still not great by any means but it is an improvement in my book. Though the enemies were much more frustrating this time around, especially that damn biker inside the restaurant (he was the case behind two of my deaths) and some cheerleaders in the swamp that kept hitting me with their fire projectiles. Which sometimes turned into ripsaw projectiles, not sure if it was a visual glitch but I have seen similar oddities before, like the turd minions temporary glitching into UFOs when they were underwater, though this usually happened in user maps. This glitch happens rarely and may have been fixed in source ports.

With that said, this map can be a bit confusing at times and you will have to spend some time underwater to find various goodies. The map itself has NO official secrets but there is an unofficial secret where you can get one health boost item inside a flooded garage. And there is yet another health boosting item if you explore underwater to find various more goodies such as extra shotgun shells.

And of course, not only is the Mama Jackalope back but also the slot machines are back and this time I got rewarded with a health boost item! While it was great to have some extra health in one section where some enemies spawned, I would have preferred to get rewarded with a health boost on a map that only contains one of these items. Such as in E2L2 and E2L4. Because this map already had two, so I could already get 200 health by the end. Nonetheless, I appreciate the reward, as it helped a lot.

And yes, this map also has a point of no return at the end. When you press the underwater switch to open the last gate that leads to Bubba, the entrance door gets closed. I found in this playthrough that pressing on the switch again will do the opposite and let you backtrack as if you didn't press the switch, so this is giving you another chance to backtrack for health and ammo if you need them. Press the switch again once you are done with backtracking. Upon dropping down to reach the buffoon, there is NO way back!

I find it pretty interesting how many maps in a row have points of no return, even if it's right at the end and there's even more maps that do that. More on that tomorrow when I review the rest maps of the second episode, though the third episode (DM episode) and conclusion will have to wait until next week.

Overall, this map was meh. Even if both E2L1 and E2L3 turned out to be annoying swamp maps, I would take E2L3 over E2L1 any day, as it was much shorter and less confusing, there was no fog obstructing the view, plus some areas looked really good.
Attached Image: RIDES_E2L3_1.pngAttached Image: RIDES_E2L3_2.pngAttached Image: RIDES_E2L3_3.png

This post has been edited by FistMarine: 27 March 2024 - 07:27 AM

2

User is offline   FistMarine 

#35

Double Post! Let's get the rest of Episode 2 reviewed (E2L4-E2L7). Note that the post can be a bit long, so grab the popcorn and enjoy reading. ;)

Disgraceland

Kills: 91 (4 missed)
Secrets: 3
Deaths: 4

Another highlight of the entire series and the only map to contain a funny Easter Egg at the very end. Design is memorable and nice. Gameplay is good for the most part but there are some frustrating parts since this map is populated by many bikers and the hidden switches inside the house drag the action down.

I don't think I had a problem with that one shootable switch on my first playthrough, since it almost asks the player to shoot it. I think I had more problems with the hidden switches inside the house that even if you managed to find them, it wouldn't be obvious what door they opened.

As for the enemy placement, it is mostly good but as I mentioned, the abundance of bikers can lead to frustrating moments where you are taken down from 100 hp to zero almost instantly. And that's starting the level with 200 health! Which will be useful for the continuous players because there is a new enemy at the start that can dish out tons of damage if not taken care immediately.

You will face the upgraded Biker Rider who has a cheerleader riding behind and throwing firecrackers towards you. I had a look at the CON file and I think this incredibly rare variant has 300 HP and the previous one had 200 HP but I'm not fully sure about that. Or maybe this one has 150 HP at first, then once you remove the cheerleader from the bike, it goes back to the regular biker rider variant that has 200 or 300 HP. I recommend using the Rifle against them. After taking care of these fuckers, you should carefully proceed around the house, killing the enemies on the way to finding the keys that may or may not be well hidden.

As usual, I got killed by the bikers, which was quite annoying when at one point a biker was sniping me from far away and dealing tons of damage while a dog just showed up to eat Leonard's corpse without going into details what the biker did when approaching Leonard's corpse.

And then at one point inside the house, there was one biker hidden around the corner in the living room that started firing and as soon as I stepped in the room, after I have already cleared the room of enemies ahead of me, I didn't see him and I had all my 80 health or so immediately taken out...twice. Bullshit.

Leaving aside these frustrations, I had some good fun in this map and the visuals were really good. Gets bonus points for having Slot Machines again, even if I wasn't rewarded with another Delicious Cluster, though there is one found inside a secret place in the kitchen, so there is the possibility to end map with 150 health if you want.

However, there is one thing I need to mention. There is another point of no return at the end. You drop down, kill a few poop minions before meeting up with your brother. So before doing that, grab everything in advance.

Once you are ready and took care of those enemies, you will meet up with Bubba, who for once wears different clothes. He has turned into Bubba Elvis! This is a neat Easter Egg and although I REALLY dislike Bubba as a character, I had a good laugh the first time I got to the end of this level and saw Bubba disguised as Elvis Presley. However, you will still need to whack him to finish the level.

Overall, this was another great level but I am somewhat disappointed how many maps in a row feature points of no return. Not that it matters much for most people but it's worth pointing out if you are a completionist and want to grab everything before leaving.
Attached Image: RIDES_E2L4_1.pngAttached Image: RIDES_E2L4_2.pngAttached Image: RIDES_E2L4_3.png

Moto Madness

Kills: 98 (56 missed)
Secrets: 3
Deaths: 4

Notes:
1) For some reason, when you begin this level, the Moonshine is removed from your inventory. The rest inventory remains untouched, so don't worry much about it.
2) Kill count seems fucked up. It must be the cause of turning on one of the machines earlier, which I mentioned earlier in E1L2 and E1L4 reviews. This kill count is what you'd get in those levels if you turned on the machine.
3) There is an unofficial secret that contains a Tit Gun. It is right inside the Hot Dog restaurant, where you are turning on the Pig Killing Machine. You need to jump over the grill, which does lava damage.

Anyway, this is another highlight of this game and the entire series. There are plenty of good looking areas that I am constantly impressed at the level design, even if the gameplay doesn't hold up that well. As you can tell from the title, it is a map involving motorcycles, at least in later parts of the map you will have to do quite a lot of bike traveling. Even if it can be irritating at times due to the bike's controls.

The level is very generous with health pickups but mostly with the food items (Large Pork Rinds), so once again, it is very difficult to maintain both meters in the green zone. Sure, you get an occasional whiskey bottle but you will also be taking lots of damage that you want to consume those health items quickly while balancing both meters. If the gut meter is in the orange/red zone, you should take a trip to the toilet near beginning and empty the meter.

There are some parts you need to be careful, since this level is filled with Bikers, even the riding variants appear a couple times, though that one that spawns directly behind you on the race track is bullshit. I didn't notice him until I got shot in the back and died. Okay, I realized he isn't spawned but he will wait on the ledge and drop down behind you if you are passing him. I'm sure most players had the same experience.

But other than some annoying parts that don't give you much health (such as the tracks where you need to take falling damage to progress but you aren't given health before these sections), there are also some very good parts, like the Death Battle towards the end with the many Bikers. You also get TWO clusters to make sure you are fully prepared to deal with them.

In fact, there is a THIRD cluster as well, which is located on top of microwave around the place you find the third key. However, that health pickup is only available if you are playing on Killbilly and Psychobilly difficulty. I wasn't kidding when I said that you get more health pickups on higher difficulty levels. This also guarantees you will finish this level with 200 health.

Oh yeah and as Quacken hinted earlier, you NEED to use a Moonshine to make the long jump with the motorcycle. The moonshine pickups are spawned near the big door upon trying and failing the jump the first time. Afterwards, use the Moonshine to get there, kill an Alien Hulk and get the last key to unlock the exit.

At the end, you don't need to whack Bubba, just jump on the train to finish. Don't worry if you miss or wait too much, the train comes back along with Bubba. Funny how this train section was glitched in Nametag's playthrough, as it never happened to me. But I'm not surprised if weird ass glitches like those can happen to random people.

The level gets bonus points for allowing backtracking, even though you can't go back with your motorcycle, you can still go on foot. Might as well take advantage of that because besides the final level, this is the only level in the second episode that allows backtracking throughout the whole level.

However, I will still nitpick about some annoying parts where you have to drive the motorcycle through mud, doing the long jumps while you may be low on health, such as the section where the health pickups get spawned AFTER the fall damage section, not BEFORE, which means you can be screwed at low health (I certainly died once or twice from fall damage!), unless you still have some health pickups in inventory. And some switches in one or two parts that may be hidden or not be obvious what they do.

Overall, this was a great level that had some flawed parts. It ended up being a memorable experience.
Attached Image: RIDES_E2L5_1.pngAttached Image: RIDES_E2L5_2.pngAttached Image: RIDES_E2L5_3.png

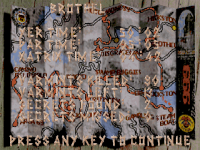
Brothel

Kills: 90 (13 missed)
Secrets: 2
Deaths: 2

Although the map has some good parts, I feel like this map is a bit of a mess. Initially, the map is swamp themed and then the last part seems to be about an alien cloning facility. At least that's the impression I got.

I don't have much to say about this map other than the titular brothel being annoying, as it's filled with many annoying enemies and has gotten me killed many times in the past. I still died twice this time around (one from suicide and one was from a shotgunner around the corner) but it wasn't as bad as past playthroughs.

Afterwards, you will have to find a few well hidden switches to progress from one part to another. Including having to stand on that plank at the pool to progress and visiting those houses to find hidden switches.

Once you discovered the path hidden behind the bed, take note that this is a point of no return. Go back and grab everything before moving on, including the two secrets early in the swamp areas. There aren't any extra health items, so be sure to have 100 health before proceeding.

In the last part of the map, you have to deal with one more biker and THREE hulks! Before facing the last two hulks, there are four FAKE Bubbas waiting to get melee'd but watch out for the enemies that will spawn afterwards. The following enemies will spawn upon killing the fake Bubbas: Pig, Minion, Cheerleader, Vixen.

Once taking them out, prepare to fight against Two Alien Hulks! One of them is blue colored and a bit smaller for some reason but I don't know if there is any difference compared to the regular alien hulk, as in if he has different health or whatever. They could have made that blue hulk boss sized and have deadlier attacks if they wanted to have a new boss. Otherwise, I'm not sure what is with this blue hulk that appears once in the entirety of Rides Again. Maybe at this point they realized you can give palette to alien hulks as well?

Anyway, once you are done clearing the mess, grab everything and jump into one of the giant tubes, which means this is another point of no return. That useless buffoon is down there waiting for you. I wish I could say something bad about him right now but I will refrain myself this time because I'm a nice guy.

Overall, this map was okay, better than the rest swamp themed maps I guess but also quite messy at times. Hopefully the final level doesn't disappoint.
Attached Image: RIDES_E2L6_1.pngAttached Image: RIDES_E2L6_2.pngAttached Image: RIDES_E2L6_3.png

Back to Hickston

Kills: 22 (3 missed)
Secrets: 0
Deaths: 0

A short finale. You are back to your hometown. People are celebrating but something tells you that it's not over yet.

All you have to do is to find THREE Big Jackalopes (the third one inside the building is the final boss) and kill them. That's all and once you kill the last one, the game ends after waiting a couple seconds.

Just be careful to not get softlocked if you try to explore. There is a place you can get in but can't get out. It is located near the big red truck. Oh and this map has no difficulty settings implemented, considering the monsters are spawned into the map and not present at the map start. Therefore, the map plays out exactly the same on all skills.

Anyway, take out the damn Mama Jackalopes to finish this madness! The bigger one probably has more health than all the others (3000 I think?), as it takes about 150 Tit Gun ammo to kill the monster. After you took care of the monster, wait until the results screen appears.

Funnily enough, the results screen shows the pig portrait from E1L7 from original RR (the E1L1 portrait with Leonard shows up when you finish an User Map). I guess they didn't bother making another animation for the RA's intermission map. Afterwards, press any key to start the ending, which is a short cutscene.
Attached Image: RIDES_E2L7_1.pngAttached Image: RIDES_E2L7_2.pngAttached Image: RIDES_E2L7_3.png

C:\>_

Leonard: Hey, where's the big fancy ending y'all talked about? Hehe, just kidding. THE END.

That's it? No proper ending? Just a short shitty cutscene? Awful ending. Just awful. They still haven't learned their damn lesson from the main game's ending. Instead of giving us a proper conclusion and finding out what the fuck happened to the stupid pig Bessie that never got mentioned in this game, you get this fake DOS prompt and that's it. Trash.

Overall, the last map was a bit disappointing and suffers from being rushed, especially the ending seems like it was added as a last minute effort because they couldn't think of anything else.

To be fair, the cutscenes in main game were also half assed but they could have at the bare minimum show Leonard executing the Final Boss like you'd see in other Build Engine Games. Unfortunately, either they ran out of time or lacked ideas or were just lazy. Or a combination of all these. I shouldn't expect much but they did put effort into that Rides Again opening cutscene, which was quite good, so why they couldn't do an ending cutscene as well? Maybe they were running out of budget or time or both.

Also this part Quacken mentioned:

Quote

That's another reason why I think Leonard is the villain in this game and the aliens and clones are acting in self-defence - if the aliens were truly as hostile as the game claims them to be, then Bubba would have been a smouldering corpse the second he left Taylor Town. Either Bubba is an expert in espionage, or the aliens are simply just friendly chaps by letting him into Elvis' coffin, then closing the door behind him because he asked to.

Although I find this theory interesting, I'd like to think that Bubba isn't attacked by any enemy because he is unarmed and Leonard is always seen having a weapon, so the aliens see him as an actual threat. But yeah, I know back in the day the games weren't very story focused and there remains some unexplained stuff even after all these years. It's just these plot holes are one of the reasons why I dislike Bubba a lot (probably my most disliked video game character of all time) and wish he was a developed character who actually helped Leonard instead of just being there not doing anything and serving as the level exit in the levels he appears. He could have joined Leonard at some points in the levels and fight together but no, he'd rather prefer to be a coward who hides and leaves Leonard doing all the work by himself.

Without dragging it further, I will review the third episode and the overall conclusion in next few days. Have a nice day. :)

This post has been edited by FistMarine: 28 March 2024 - 04:30 AM

2

User is offline   Quacken 

#36

Only one map tonight, Brothel and Back to Hickston in their own post. Happy Easter! (If you celebrate it.)

Moto Madness
Aaron Barber

Walkthrough:
Spoiler


The acclaimed Moto Madness earns its notoriety, this is definitely the best map in the set. Map author Aaron Barber makes a far more convincing argument for the motorcycle in this map than Rhett Baldwin did in Camino Del Diablo; his two race courses form full circuits, have plenty of jumps to bound over and are entirely devoid of Fiery Turd Minions, or Turd Minions at all for that matter. You know how in Ion Fury there's that section in one of the E1 maps where you get timed for shooting down 30 test dummies and you get a best time saved for it? That's what this map needed, a timer for both of the race tracks to allow people to conveniently grind for best times with the Motorcycle. Then there's the demolition derby, which probably has the most chaos per capita in all of Redneck Rampage. You'll need those two Goo Goo Clusters you get handed at the door, the Motorfranks will quickly chip off your health if you're not constantly moving and finding something to shoot at. I think Barber got the idea to stuff Sunny Shores with Moonshines after playing around with it in this map. The idea to combine the Motorcycle with the Moonshine isn't particularly well explained, but you do have six of them, so you can at least experiment a little. I only really have minor complaints with this map - the 56 missing kills is definitely extremely interesting and makes me think that there was possibly a teleport trap or four gone wrong rather than a conveyor belt continuously spawning things, since Pigs don't contribute to the kill count unlike Jackalopes. The mining colony required to access the second race course could have been placed better since it's likely that an unsuspecting player could just vault over the pit, and also when there's another pit on the second track that actually kills you. There could have also definitely been some Sheriffs here. Imagine if you were riding along the track and several Sheriffs driving cop cars ambush you? That would have been pretty cool. Moto Madness shows that there might just have been a point to releasing RRRA after all. With more time and perhaps the Quake 2 engine, we could have had more maps that played this creatively.

9/10.
1

User is offline   Merlijn 

#37

Just wanted to add some quick 2 cents on Redneck Rampage Rides Again. I replayed a few years ago and I remembered it being a pretty big improvement over the first game. My perspective may shift again with the next replay though. But I musyt say 'Homeward bound' is easily my favorite RR episode. Not only does it have the best RR maps, but I just really like the way the episode flows. It really feels like a traveling adventure, which is helped by the fact that each map ends with a different mode of transporation. IIRC one ends with jumping on a moving train, another ends with a car next to a highway etc. And then of course there's the moving boat. You can also tell the mappers tried to squeeze everything out of the engine to make it look like 'true' 3D, there's some very impressive mapping and great visuals on display throughout the game.

Really the final boss map is the only downside, it looks fine but somewhat rushed and unfinished. And it's unfortunate we don't get a new boss.

I think the game was in a tough spot, the passion that went into the mapping is obvious but the devs must have realised that the build engine was rapidly becoming obsolete tech at that point. So it's no wonder the game ended up being rushed. But IMO Homeward Bound is a must play for Build-engine fanatics.

I can also point to the influences this game had on Red series, Red4 obviously took some inspiration from Gamble Boat, down to the boat being destroyed at the end (of course my twist was to turn the boat upside down). Even Red3 has some elements from El Peso. And unfurtunately my younger self thought it was a good idea to copy the 'button in the fridge' puzzle as well :D
3

User is offline   Quacken 

#38

Frankly, I think Leonard and Bubba just forgot about Bessie as soon as they entered Nut House.

Brothel
Aaron Barber

Walkthrough:
Spoiler


Review:
Spoiler


Back to Hickston
Rhett Baldwin

Walkthrough:
Spoiler


Review:
Spoiler


Closing Thoughts

Spoiler


This post has been edited by Quacken: 30 March 2024 - 04:53 AM

1

User is offline   FistMarine 

#39

NOTE: This is NOT an April Fools post!

Happy Easter to those who celebrate it since yesterday! Also thanks for joining in Merlijn! I agree that E2 is a high point in Rides Again and has some of the best maps, even though I wasn't that much impressed with the swamp maps in terms of gameplay, they definitely had some cool visuals and there was some fun to be had with them.

It's interesting to know how the Red series were heavily influenced by Redneck Rampage games, as we have discussed last year when we played through the Red series. Personally, I would have liked more to see someone converting the RR/RA maps into Duke3D. Even better if we got to fight the RR enemies as Duke, I kinda want to see how would Duke fare against the overpowered RR enemies, especially since Duke has the Shrinker and can one shot those annoying enemies. ;)

Also I forgot to mention earlier another interesting thing. We already discussed how unlike the main game, we have extra enemies present on harder difficulties such as Psychobilly. But there are also a few things tagged for "Skill 5", which doesn't exist in RA, though I suppose it is possible to set to Skill 5 with command line parameters, not sure as I haven't tried before. This means there are a few "unused" extra enemies and items in some maps that would have appeared on Psychobilly difficulty if it was the original Redneck Rampage game. I guess during development, the skill levels were changed and the mappers forgot to adjust those "Skill 5" entities to appear in-game on the existing skill levels.

As discussed previously:
1) Redneck Rampage (including Route 66) uses difficulties from 1 to 5. Skill 0 is unused and it features even less enemies than Wuss.
2) Redneck Rampage Rides Again uses difficulties from 0 to 4. Skill 5 is unused and it features even more enemies than Psychobilly.

Anyway, here is the E3 review and the overall conclusion. In source ports, the episode should already be selectable at main menu.
But to access E3 in the original DOS version, you need to write the following parameters:

Quote

RA.EXE /V3 /L1 /S3

This will warp you on E3L1 on Killbilly difficulty.

Another note is that there are no enemies in the DM episode (except a special case in one map) but also, just like the original RR, each level has an exit switch that advances to next level and the switch in last level just restarts the episode. Oh and when each level finishes, it shows a portrait from the original RR, which earlier I mentioned it happens in two special cases but now I reminded it also happens during the DM maps. :P

PISSIN' CONTEST

Pipe Dreams

Appears to be an original level. There are some toxic barrels that can kill you if you get caught in the explosion when destroying them. Be also careful to not drown, as there is one deep pit that contains nothing, just a message telling the player is "so dead". Exit can be tricky to find.

There is one secret: climb on a staircase to reach Shotgun and 2x shotgun shells.
Attached Image: RIDES_E3L1.png

Swamp Buggies

Appears to be a cut down version of E2L1: Sunny Shores.
Attached Image: RIDES_E3L2.png

Square Dancin'

Appears to be a cut down version of E2L7: Back to Hickston with a different sky and the final boss spawn can still be activated. If you don't want to fight the boss again, just don't bother entering the building containing the AK-47 and instead go flick the switch to advance to the next map. If you manage to kill the boss, the whole game/episode ends!
Attached Image: RIDES_E3L3.png

Hog Wild

Appears to be a cut down version of E2L5: Moto Madness with only the Death Battle section from the end of the level included. The secret is also included here and can be reached in same way you'd get the secret in E2L5.
Attached Image: RIDES_E3L4.png

Road Rage

Appears to be a cut down version of E1L2: Camino del Diablo with more motorcycles. The secret is also included and can be reached in same way you'd get the secret in E1L2. Just be careful to not fall into the pit.
Attached Image: RIDES_E3L5.png

Snake Canyon

Appears to be a cut down version of E1L7: Refinery. Only the initial section of the level is included and modified.
Attached Image: RIDES_E3L6.png

Luck Sore

Appears to be an original level. It might be inspired by a Hexen 2 deathmatch level but I am NOT fully sure about that, it is my only guess at the moment. The slot machines are also back, as well as both vehicles can be used in this map. Pressing the exit switch will restart the episode from beginning, as was the case in the original RR, so there is no proper ending.
Attached Image: RIDES_E3L7.png

I have never died in the DM episode but according to my stats listed in the text file from the two main episodes, I have died 37 times in total in Rides Again. Honestly, before I started playing, I was aiming for 20-30 deaths at most in this playthrough but considering almost 20 deaths were caused by those fucking Bikers with their high damage output, I will let you be the judge. Though it's much less deaths than the main game, that's for sure. :P

FINAL THOUGHTS

Overall, despite having many improvements, Redneck Rampage Rides Again is a mediocre game, a mixed bag in my opinion. Just like the original game, there are some really good looking levels, some of them pushing the Build Engine to their limits and are much better than many of the main game's maps. But at the same time, there's some really crappy maps that dragged down the overall quality, with some levels being less memorable than the ones from the main game.

And unfortunately, the game inherits almost all of the original game's issues, as if they were too lazy to fix the existing issues that plagued the original game, such as the keys being tiny and identical. How couldn't they fix this? On the bright side, most keys are easier to find this time around but some levels still suffer from being confusing at times, mostly because they are filled with hidden switches. It also doesn't help that many levels in a row have points of no return. And the final level isn't necessary bad but it's definitely disappointing. And the less said about the "ending", the better.

The game's balance is generally better with more generous health placement for the most part but unfortunately a couple of enemies still deal a shit ton of damage, which is something that you cannot fix with any difficulty setting and the health boosting items are even rarer when compared to the main game for some dumb reason.

Not to mention there are some noticeable balance issues, like why do Cheerleaders have even more health than the Biker? It doesn't make any sense and both enemies are a bit too spongy where they shouldn't have had more than 125 health. But hey at least you aren't fighting tons of alien hulks and alien vixens compared to the main game and Route 66. You still fight them occasionally and they have the decency to use the weaker vixen variants in most cases instead of the default blue one all over again.

And although Leonard is still a decent protagonist, I can't say the same about Bubba, who is the most useless and even the worst video game character of all time. There aren't enough rotten things I can say about this waste of oxygen. Though to give the devs some credit, the Bubba Elvis variant is cool and would have liked to see more variants of Bubba appearing in some maps but outside of that, it's a character that is just "there" and only exists to serve as the level exit in most cases. The simple fact you have to do all the hard work to get to him, just makes it more frustrating when getting to the end and find him sitting there.

The soundtrack included is still good but it's not as memorable as the one from the main game. Still, it adds to the game's atmosphere when loaded, so I definitely recommend to play Rides Again with the soundtrack.

I'm giving Redneck Rampage Rides Again a 6/10, even though I also rated the original game a 6/10 and RA is somewhat better. I would have given RA a 6.5 because there are a couple improvements compared to the base game that justifies a slightly higher score but they kinda blew it with some poor design choices, such as the difficulty settings not changing much in some levels (at least there was a significant difference in enemy placement between first three skills in original RR), points of no return are too frequent starting with the second half of the first episode and the kill count is glitchier than it was in the base game. I still had plenty of fun with the game but some parts also frustrated me, so the rating is pretty justified.

If we are rating the game based on the period it came out, then the game is a 5/10 because it was released far too late and feels like a cash-grab. 1998 was the year of Quake 2 Mission Packs (funny that the first one was actually made by Xatrix themselves and was pretty good), Unreal and Half-Life, even though they weren't released until much later the year but Quake 2 was already out since late 1997 and was an all around solid game (at least to me), so Redneck Rampage: Rides Again had no chance to shine.

It's still surprising how well the main game sold one year after both Duke3D and Quake came out, while other more advanced games were coming out later in 1997 and they fell into obscurity. I feel that both Blood and Shadow Warrior were much better, more deserving the success and it's somewhat unfair that Redneck Rampage managed to overshadow both of them back then.

If Redneck Rampage gets remastered one day, then I hope that not only it includes all existing content with some exclusive new content but also fixes most/all of its issues. It's pretty clear the RR games were rushed to the market in a beta state just to beat its competitors. The games are playable from beginning to the end and you can complete them but you can see signs of certain parts being rushed/unfinished. Sure, other games had their own rushed parts too but I feel like RR is a worse offender.

In the end, the Redneck Rampage series as a whole is a mixed bag. I applaud the developers, Xatrix Entertainment, for trying a lot of cool stuff and pushing the Build Engine to its limits (specifically a version of Duke Nukem 3D in-between 1.3D and 1.4). I can't say they fully succeeded but at least they had a lot of good ideas. Just a shame they weren't all well executed properly and they never bothered to release even a patch that fixes some of the issues, unlike most other games of the era that had one or more patches released.

They could have also merged RR and RA into one game, kinda like how Duke Nukem 3D: Atomic Edition did it, since RA is pretty much the same as RR. It is more of a Doom (Ultimate) VS Doom 2 situation right here. Same game and engine with different levels and additional resources in the sequel. I don't know if having a combined full game or two separate standalone products is better but in this case, they could have followed the approach from Duke Atomic, in having the new content merged with the base game, while fixing various bugs. In an alternate universe, Redneck Rampage and Rides Again were released in 1997 as a single game with four episodes (and two extra DM episodes?) and would be much better remembered. :D

Although Quacken said a lot of things I wanted to say (including the same rating for the game), I will say half of these level reviews and final thoughts were written in advance since last year or so in a separate text file because I wanted to be prepared and not have to spend hours writing all these walls of texts, though I still ended up taking hours to write these texts and some parts were also a bit influenced by Quacken's reviews anyway. Plus I appreciate how he provided his walkthroughs, so I don't have to write mine. :P

Anyway, thanks everyone for participating and see you on the next edition of the Map/Mod of the Month club! Looks like the FM3X Trilogy has easily won the voting for April, so the new topic will be up shortly. :)
2

Share this topic:


  • 2 Pages +
  • 1
  • 2
  • You cannot start a new topic
  • You cannot reply to this topic


All copyrights and trademarks not owned by Voidpoint, LLC are the sole property of their respective owners. Play Ion Fury! ;) © Voidpoint, LLC

Enter your sign in name and password


Sign in options