Help
Help
 Duke4.net
 DNF #1
 Duke 3D #1


THE MISSION
A short two-level episode that is labeled as a DEMO, which is why it feels unfinished at times. Despite what Quacken said, there are some things to clarify about the mod, such as the levels themselves actually having some names instead of just being known as Mission 1 and Mission 2.
To play the mod as intended, you need to rename miuser.con to user.con. Backup your existing USER.CON file before doing that or better yet, just make a copy of your DUKE3D atomic directory in advance, paste the mod's contents into the new/renamed directory (MI1DEMO in this case) and replace the USER.CON file with the renamed file.
The new user.con file will make a couple changes to the gameplay, such as letting you play the mini episode as an E1 replacement, as well as change the strength of some enemies and weapons. For those curious, here are the episode/level names, as well as the overall changes:
Quote
Episode 1 is called THE MISSION
mission1.map is called TO THE PAST
mission2.map is called FIRST CONTACT
mission3.map is called KILL THE ALIEN BASTARDS
mission4.map is called BACK TO THE FUTURE
mission5.map is called CARMEN LAND
mission6.map is called COMPLEX
mission1.map is called TO THE PAST
mission2.map is called FIRST CONTACT
mission3.map is called KILL THE ALIEN BASTARDS
mission4.map is called BACK TO THE FUTURE
mission5.map is called CARMEN LAND
mission6.map is called COMPLEX
Notes:
-Only first two maps exist. When finishing second level, the game will quit with message saying mission3.map was not found.
-Pistol and Chaingun do more damage per hit. The former deals 20 dmg instead of 6, while the latter deals 12 dmg instead of 9. As a result of the pistol's increased strength, the hitscanners (except pig cops) become a LOT deadlier. However, only two Mini Battlelords are encountered at end of first level, so you don't have to worry too much about deadlier hitscanners, as the enforcers and pig cop tanks are completely absent from the episode.
-Assault Troopers now have 50 health, while Pig Cops now have 400 health! This makes Pig Cops a LOT stronger, as you need to spend FIVE shells or THREE rockets to kill one. The Pistol also becomes a lot more useful to take down even some of the stronger enemies.
-Trip Mines have their laser invisible, unless you have the NVGs turned on, in which case the laser will be visible. So be careful with the Tripmine traps near the end of first level and inside a secret place in second level!
-The new values for weapons/enemies make the gameplay a little bit closer to Redneck Rampage's type of balance. I don't think there were any other changes besides the ones mentioned above.
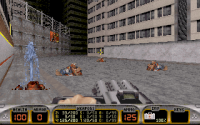
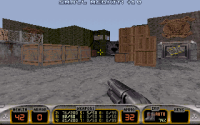
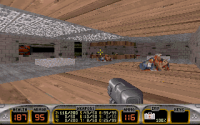
To The Past
First map has a bad start because you get ambushed right away by THREE Protector Drones! You may not realize immediately that your pistol's damage is upgraded to about three times more than usual, so you can actually kill the aliens instead of running away from them.
Of course, I was left with low health afterwards and then while fighting the hordes of troopers, I was down to just 3 HP. It's only a miracle I managed to survive and get some armor, then some health pack and finally a much needed Portable Medkit!
It's a good thing I left the bathroom with the two Pig Cops for later because this was the moment I realized the Pig Cops have an ABSURD amount of health when they took five shotgun blasts to die. Yes, as I said above, the Pig Cops have 4x times as much health. Why? I don't understand why Turpuli thought this is a good idea, as they are now stronger than the Assault Commanders. And they appear quite frequently too.
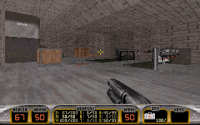
The Bathroom appears to have missing textures, despite the new art file being correctly installed. But this was the only place in the mod where I noticed missing textures. Oh yeah and inside the headquarters, where you get Blue key and find a secret place, I decided to take advantage of the door and squish the Pig Cops. This way some tedium will be eliminated.
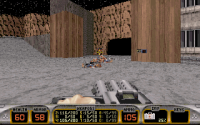
Be careful with the ambushes lurking in the tunnel. You've got a bunch of Invisible Tripmines, so use the Devastator to detonate them. And then there are also TWO Mini Battlelords just before you pick up the Atomic Health in front of the exit sector. I was lucky I spotted them in advance, then I carefully shrunk both of them before stepping on them. It is recommended to fire around corners and shrink unaware mini bosses by aiming at their feet. If done correctly, it will save you a lot of trouble. Otherwise, if you haven't spotted them, with the increased pistol damage that also affects most hitscanners, most likely it would have resulted in an instant death.
Killing those pig cops on the towers was difficult, as the autoaim wasn't always helpful but if you go secret hunting, there is an easier way to kill/reach them. Speaking of which, there are five secrets, some being found at relatively short distances from another:
1) Inside the headquarters, where you find the Blue Card, press on the panel in left side of the room. Inside, you can find Chaingun, Expander ammo, Large Medkit.
2) On the roof, before you go to collect the Yellow Card, there is a window you can jump through. You can find a room that contains a box of Pipebombs, Devastator ammo and Freezethrower.
3) Behind the clock tower, you can find two pistol clips and a large medkit. Open the door to find Small Medkit, Shotgun and a box of Pipebombs.
4) Go to the left side of the canyon (located near the blue access switch that lowers the barrier in front of the tunnel leading to the end), then find a portion of the wall you can open. Inside, you can find: Chaingun, RPG, Devastator ammo and Portable Medkit.
5) Inside the tunnel at the end of the level, just when entering it and destroying tripmines, look for a small space you can enter on the right side. This leads to where one of the Pig Cops is situated on the tower, which makes killing them much easier. You can also find Atomic Health, Armor, Devastator ammo and a RPG.
In the end, this map was quite amateurish and suffers from a bunch of issues. Maybe the next one will be better?
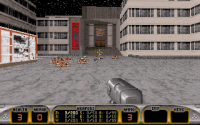
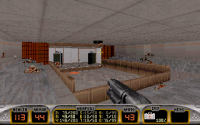
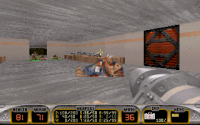
First Contact
Second map is both better and worse. There are some interesting fights in some places but the only enemies you face are the Troopers, Pig Cops and Protectors. And honestly, there are some boring fights that are dragged due to the increased health of the pig cops or just rooms randomly filled with enemies.
Unfortunately, I died once in the area where you get Yellow card and get ambushed by THREE Protectors. I got shrunk and quickly ran to the elevator, then just before it reaches the bottom floor, a protector clipped through and squashed me. Speaking of which, just like with previous map, I decided to take advantage of some doors to squish Protectors, which eliminated some tedium.
Besides the bland design, I have indeed noticed that in his early maps, Turpuli preferred to place directly the weapon pickups instead of ammo pickups. This isn't necessary a bad thing because in most cases, the ammo and weapon pickups provide the same amount of ammo, the only exceptions being Pistol and Shrinker whose ammo pickups will provide less than the weapon pickup does (Expander is not counted because you can only collect ammo for it, it's not a separate weapon pickup), whereas the Pipebombs and Tripmines don't count because they are only "weapon pickup" and the former has two pickups (HEAVYBOMB and HBOMBAMMO) that give different "ammo" amounts.
Secrets:
1) After dealing with the Protector Drones on the roof with those fans, there is a slope you can walk on. Go up and jump through the window. You will access a room containing 2x Chainguns, Armor and Steroids.
2) After dealing with the Protector Drones on the ground, go near the slope and you will find a window you can open. You will find two piles of shit but then go further until you will approach the secret room guarded by THREE Pig Cops. Be careful at the invisible tripmines. I recommend just waiting for the Pig Cop to come closer while getting a safe distance from explosions, he will detonate the tripmines and possibly die in the process. Then take out the two remaining pig cops yourself and get rewarded with 2x Chainguns, 2x Boxes of Pipebombs, Atomic Health and Armor.
3) After using the Yellow Card and arriving in some corridors filled with troopers, there is a control room where you activate a switch. Press on the left monitor to temporary open a wall in the outside corridor. Inside, you can collect 2x Devastators.
Overall, this map was also quite amateurish. Design is nothing special, combat is repetitive (though I enjoyed taking on the hordes of protector drones with the RPG) and the map ends abruptly after going through the door in the room filled with weapons.
Conclusion to The Mission DEMO: this mini-mod was nothing special. To me it felt just like another one of those mediocre Duke3d TCs from the 90s.
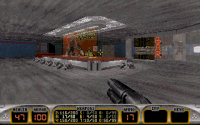
Mission 2: The Rescue
I don't think this user map is related to The Mission Demo reviewed above. I think it was meant to be part of another episode/TC known as Mission 2, which could have been the sequel to the first Mission Demo/TC. The text files don't seem to include any useful information other than being the fifth level of Mission 2 (hence the filename of the map), so this is all we can speculate at the moment.
The level seems like a major improvement compared to the author's previous works. I'm not counting Invaders here, as that one was released afterwards, I just needed to find a good pair to review that map in the previous post.

I died twice in the infamous room that contains the Red key, after you drop down the vent. One time I got cornered by the protectors, the other time I got shrunk while surrounded by a couple monsters. Seriously though, this section is brutal, simply because you've got many Commanders, Protectors, Troopers, Pig Cops and Enforcers, all stuffed into this tiny room. You can even take rockets to the face through the gate and if the rocket hits a nearby enemy, the rocket's damage is doubled, so you will take even more damage.
And as if there wasn't enough suffering, right when I cleared this room and I was about to save, Duke3D crashed with a weird granular error. Luckily, my saves were fine, so I just had to redo this room. The map is not quite over afterwards, because you need to go back to climb the stairs, use the red card and get ready for two Commanders waiting you in a tiny room alongside a Pig Cop, FOUR turrets and FOUR switches (just activate them all to progress).
Then at the very end, you will have to fight FOUR Enforcers in a tiny room in front of the exit, which doesn't sound that bad, at least compared to the earlier brutal room. You can do it the hard way by just holding the Chaingun fire button until they die (you will be left with about 60 HP left) or you can use the Shrinker (if you still have ammo left) and shrink all four of them with a single blast! However you need to aim well while crouching, then step on them, save (in case you aren't sure if you got everything) and then exit.
Here is a small tip: If you found yourself at the top of the staircase without the red card and need to go back to get it, I found that falling on the stairs will NOT hurt Duke if he lands on them, only if he lands on the hard surface. I still recommend slowly descending on the stairs to minimize the falling damage.
Secrets:
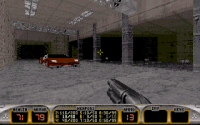
1) Near the beginning, when arriving in the parking lot filled with aliens, push on the EXOTICA poster to reveal Steroids.
2) When reaching the streets, climb on the ledge near the stairs and jump through the windows to collect Shrinker, as well as 2x ammo for Shrinker and Expander.
3) Inside the bar, break all those bottles and open a door that leads to the secret room containing 2x pistol ammo and a RPG.
4) Inside the infamous room filled with monsters and the Red Card, jump on the COLA vending machine to reveal 2x RPG ammo. Be careful to not get stuck inside!
Hint: Inside the Duke Burger restaurant, you can find a Dukemeal box that spawns an Atomic Health. This is the only atomic health you can find in the entire map.
In the end, this was actually a decent map that shows some promise and I find it a large improvement over the author's earliest works. Some interiors were nicely done as well. Unfortunately, the parts towards the end dragged down the experience, especially the one random crash. That's why I recommend playing with saves, so you don't lose too much progress because of a random death or crash towards the end.