Duke4.net Forums: Duke Map/Mod of the Month Club - July 2023 - Duke4.net Forums

Jump to content

  • 2 Pages +
  • 1
  • 2
  • You cannot start a new topic
  • You cannot reply to this topic

Duke Map/Mod of the Month Club - July 2023  "I LIVE AGAIN!!!"

User is offline   Quacken 

#31

I was busy enjoying a little break from posting maps, but the air raid siren in this map whipped me into shape.

The Siege
Hubbard, Hamel

EC Pitchfork
Spoiler


This is a really cool-looking map. The carpet bombing scene at the start is very impressive for the time. It really hammers in the Blitzkrieg allegory I used in the E3M1 review. The air raid siren you hear throughout the map can definitely be irritating, but I think it's still an important part of the map's identity. It's a war zone! You're not always going to have heavy metal or ambient horror playing in your life. There's gunfire, there's war crimes and there's explosions. Hubbard and Hamel do a great job with lighting and texturing in this map. I like how the building near the water tower looks. The stained tile flooring and the subtle difference between light and dark areas make this place feel a lot bigger than it actually is. Feinman Meats looks a little too much like E3M5 for my liking, but it definitely uses those meat props from Episode 1 well, and it has some good verticality. Episode 3 is generally speaking pretty good with verticality, honestly. E3M2, the final area in E3M3, the big shootout in E3M5 where you get the Tommy Gun and both the start and the dam in E3M6 play with large and open spaces with lots of things to jump and swim over well, and they have a good enough scale to them.

This map also introduces the Tesla Cannon, and oh boy is it a fun weapon. It's essentially a Plasma Rifle. Hold the button down and you shoot it. I like how quite a few monsters (including one boss, Cerberus) have sprites which show their skeletons. You don't even really want to use the Tesla on Zombies, but there's a sprite for it! It's most useful for killing Gargoyles, Hellhounds and the bosses. It would have been great for Phantasms too, if they weren't immune to Spirit damage... the Hellhounds in this map aren't too threatening either. You get the Tesla right before fighting three of them so they won't really touch you. There's definitely threatening Hellhounds though. You'll see. The Siege is one of my favourite maps in Episode 3. It looks great, has high levels of mapping wizardry and is suitably eerie like a war zone should be.

9/10.
1

#32

Ep4 : Now I would say, as shocking as it may sound, that Ep4 has the smomother beginning of the bunch IMO. You're given much right off the bat after the first room. However, the only problem with the 1st level is how there are several ways to tackle it, and it's hard to find one that doesn't put you in a uneasy situation. But once that's done it's already okay. Gotta mention the good satisfaction of throwing the Spray Can onto the Table in the middle of all the Cultists while using the Invisibility.
First 2 levels are okay, though not trenscending. Lacking in aesthetics IMO. Though gotta like the Aquarium design of the second level. Charnel House I don't like. I don't know why, I think it's the progression that doesn't cling to me. Also I'm not a fan of the music with the singing children.
However, the next set of levels is much better. Crystal Lake is my favorite level IMO. Good ambiance and visuals, been a while since we've seen both. And some good encounters within the Barns. Secret Level had good combat in it despite having no ambiance at all. Gotta like the Corridor with tons o f enemies in it. Then the Brimstone level is my 2nd favorite for the same reasons as Crystal Lake but with more interesting gameplay. Temple is next for similar reasons but less aesthetics IMO. The only thing that drags it down a bit is that it's tiresome. You can't spend 20s without seeing an enemy during 90% of it :/
Flesh level I'm not a fan for how it's laid out, even though it's quite creative and original.

Gameplay wise, like I said you're good to go once you've passed the first level, but then the rest of the episode is quite hard due to there being many encounters with lots of enemies and a bunch of cheap ones too. Is it harder than Ep1 .... kinda, since the levels themselves are trickier to navigate.


As for a final ranking, I would rank Ep2 in last place, because too much Ice, then Ep3 in 3rd because of a few levels lacking in aesthetics passed the urban ones. Then it's a very tough choice between 1 and 4 for first place as they all have their advantages outweighing the other's cons ... I guess I'll give it a tie in at first place just because I can't be arsed.
2

User is offline   Quacken 

#33

Sewers! I think James Wilson's mapping shtick is he does all of the filler maps and the other four mappers participate in the maps you care about.

Raw Sewage
James Wilson

EC Pitchfork
Spoiler


Well, it's a sewer map. I don't know what you want me to say. It's less annoying than the one from Redneck Rampage, but that's because this map doesn't have 30 ladders in it you have to mash jump to climb, nor does it have a puzzle which requires you to understand binary. This is the first map where a Gillbeast can probably kill you. There's a lot of them in this map, you don't have a Shotgun and they tend to be in tight spaces. This map reprises E1M2's MIDI but I don't think it fits at all. It works well for E1M2 as well as E2M6 due to the large chasm, but this map doesn't really have the scale nor visuals to justify its song choice. I suppose there's not much you can do with a grey sewer map, but then again I don't know why you'd make a sewer map in the first place. Was there not another location in the city that could be turned into a map instead of this? There can't be a shopping mall because E4M9 exists, but surely some kind of financial district or industrial area would have been a cool location. Imagine a world where The Sick Ward is E3M3, an above ground industrial area or a mining settlement is E3M4 and then Spare Parts is E3M5. Wouldn't that have been nice? Oh well. As it stands, Raw Sewage is an uninspired filler map that doesn't join the maps I dislike due to the early Napalm Launcher.

4/10.
1

User is offline   FistMarine 

#34

Hey everyone! Thanks for keeping the topic alive. Was quite busy this month with life related stuff and had other games/mods to finish before it was the time to revisit ONE UNIT WHOLE BLOOD after nearly a year since I finished it on Lightly Broiled, though with a few levels I had enemies and secrets missed! And speaking of which, this was a good excuse to start a new playthrough of OUWB 1.21, this time on Well Done, still playing in DOSBox 0.74-3 with keyboard only controls, as I'm a masochist but I'm also playing continuously and abusing the shit out of saving. I'm also trying to get the maximum possible kills and secrets. At the moment of writing, I have done the first three episodes required for this month, so I might as well go ahead and review each episode per post before the month ends. But first before reviewing, a few clarifications and replies to some earlier posts. Be sure to grab the popcorn as this post is quite long!

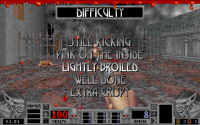
Based on my current playthrough, I noticed that maybe there is a very slight damage reduction at Well Done as well thanks to the infamous difficulty bug, despite that GOG post I linked in the OP. When I got hit by a zombie with no body armor remaining, it did 15 damage instead of 22. This is the same damage you should take on the Pink on the Inside difficulty. And I noticed I was also taking slightly less damage from cultists and such. Make no mistake as the game is still damn hard at times but I think this should give you a bit of an edge to make the game a bit more fair. Just a heads up to people playing on Well Done in DOSBox and happen to read this post. This means the correct damage table is the following:

Quote

The zombie will hit you for (the number in brackets is after the load game):
11 hp (36 hp) - Still Kicking
15 hp (27 hp) - Pink On The Inside
18 hp (18 hp) - Lightly Broiled
22 hp (15 hp) - Well Done
26 hp (12 hp) - Extra Crispy


Thanks for the tips, Quacken! They are all good! But allow me to clarify just a few of them:
1) It's important to note that the armor system in this game is a bit complex and quite clever. There are three armor types, like you said. The more armor you have, the more damage you absorb. This seems a bit similar to the Hexen armor system, although not quite like that system but the more armor you have, the better protection you get, unlike other games of the era where the armor usually protected the same amount.
2) The armor pickups are divided between Basic Armor (50 each type, up to 100 maximum), Body Armor (100 blue armor, up to 100 maximum), Fire Armor (100 red armor, up to 100 maximum), Spiritual Armor (100 green armor, up to 100 maximum) and Super Armor (200 each type, basically maximum armor).
3) It's important to note that armor should be picked up carefully and in some cases the armor is picked up EVEN AT FULL or having above that limit (e.g. picking up Body Armor at 100 or more). Not sure what causes this armor glitch (it only happens sometimes) but it is recommended to collect the armor pickups carefully, preferably when it's running out and you need a replacement quickly. You also shouldn't pick up a super armor just because you have no more body armor left. It's not worth to throw the Fire Armor and Spiritual Armor away like that. Just find a basic/body armor pickup, as they are usually common.
4) If you are playing continuously, save the Super Armor (at least in most levels present, some levels even have multiple pickups) to pick it up before exiting. Couple it with a Life Seed and having the Doctor's Bag at 100 to start the next level with maximum health and armor for best results!
5) Armor does NOT protect from falling damage, drowning, choking hands and the Blood Beast's stomp attack! The Beast mentioned is exclusive to Plasma Pak!
6) The Flare Gun is indeed a good sniping tool. But half of the time the autoaim and the projectile collision is a bit wonky, as it seems to not register the hit, especially when firing around the corners and I was clearly pointing at the enemy. Furthermore, it has a nasty habit to target the same enemy that already got hit with a flare instead of the other closer healthy enemy (e.g. I'm fighting 2-3 zombies but the same zombie gets hit by multiple projectiles). About half of the time I used the weapon it always did this sort of shit and made me waste ammo. But if it works, it works great and kills the cultists in one hit, while zombies survive and need about two hits from the pitchfork to be put down (on well done at least). I recommend saving the weapon for weaker enemies, as the stronger ones (Gargoyles and Butchers) are better handled with other weapons. I rarely used the altfire, as it uses 10 ammo and outside of maybe groups of cultists, you are better off just sticking to the primary fire.
7) I wouldn't say Tommy Gun is the most important weapon but it's definitely a great one. Never really understood the point of the altfire mode. The primary is accurate and strong enough to deal with groups of cultists (smaller groups at least). The secondary fire seems to just spread the bullets around, making this mode rather ineffective.
8) The Napalm Launcher is definitely great but I haven't used much because I tend to just hoard the ammo and I only used the primary fire to clear some problematic spots, to deal with groups of cultists or to just kill an enemy quickly. The secondary seems to be similar to Flare Gun's altfire, in that it wastes a bit more ammo and it's not as efficient as the primary fire.
9) Dynamite is excellent and very satisfying. I didn't get much use of the altfire, opting instead to throw it directly against hordes of zombies or cultists around the corners. I don't think I've ever used the Detonator and Proximity Mines, they are great alternatives but you aren't given as many as the main dynamites, so I just kept them in inventory to see how many I could collect by the end of the episode.
10) The Aerosol Can is a great weapon against Butchers, as it kills them in like 6-7 ammo like you said, making it the primary weapon to use against them. I didn't bother hitting tiny enemies with it, just using dynamite against them was enough. And I also haven't used much the altfire of the Aerosol Can, I found it a bit too ammo costly for the amount of damage it did, as I tried it against a group of zombies and some of them survived. It's not worth the 48 ammo to throw away like this, though the levels seem to contain plenty of it.
11) I almost never used the Life Leech in past playthrough and it's found late in the game (first pickup somewhere in first E4 maps if I remember correctly), plus it was nerfed in later patches. I am sure in first couple versions of Blood, it did the life stealing effect as the weapon is called, so it was far more useful. Talking about the primary fire of course. I don't know if the secondary fire uses ammo in turret mode or if it even steals life.
12) I agree, the primary fire of Voodoo Doll is very good. The secondary fire just uses all the ammo and doesn't do as much damage as you'd expect. I also think this weapon was nerfed in later versions because I'm pretty sure in earlier versions of Blood the primary fire always used one ammo instead of a chance to use more, while the altfire used 20 ammo instead of all of it. Or maybe I'm just basing on the behavior I've seen in certain ZDoom mods that implemented the Blood weapons (e.g. a mod called Aeons of Death).
13) In the original DOS version, due to the save/load bug, the Extra Crispy difficulty may not be as unfair if the enemies deal little damage instead of insanely high damage, although the cultists will be still painful to fight. I don't plan to replay Blood on Extra Crispy until next year when I decide to replay One Unit Whole Blood, so I don't know if it's going to be insanely difficult as everyone says, especially with the reduced damage. Until then, I have the option to check out many custom mapsets and even play older versions of Blood (sticking to either Lightly Broiled or Well Done), so I can do a bit more "training" until I feel ready to tackle that Extra Crispy difficulty. Of course I will be doing continuously with saves, I'm NOT going to do Pitchfork start saveless, as I'm not insane! :D

Quote

I replayed the first episode a couple of years ago and this may not be a popular opinion - but the cultists are some of the most annoying hitscan enemies ever. Granted the enemy placement may be part of this, it gets really obnoxious in the later levels. But with Duke's hitscanners you at least get a decent window to react once you hear their recognition sound. The Cultists immediately start blasting at you when you enter their line of sight, and their shotguns deal a ton of damage. Combine that with some 'fuck you' placement in hidden corners and you're garuanteed to take damage unless you memorized every enemy in the level.

I'm bringing it up because this game somehow gets a pass on the hitscan BS while DN3D gets crap for it. It doesn't mean I hate the game btw, I love the overall feel and design. The enemies, weapons and maps are all very memorable. But I would still place it a tad below DN3D when it comes to build games.

I fully agree here, Merlijn. I always thought that the Cultists are getting away with too much bullshit (the cultists even became memes in the gaming communities), while the Pig Cops and Enforcers get too much hate, though even other Build games hitscanners get a lot of hate under certain circumstances. Personally, I am usually fine with the Duke3D hitscanners in most cases if the level is generous with health, while I dislike the Redneck Rampage hitscanners the most but only because of their high damage output (19 dmg per hit if you don't have any meters in green zone) while they are firing quickly, making the encounters luck based if you are getting hit or not. Otherwise, the Blood cultists would be at the top in terms of most annoying/worst hitscanners of Build games because of their accuracy and high damage output.

TheDragonLiner, I appreciate your write-ups but keep in mind E4 and the expansions will be covered at a later time. ;)

Back to Blood (heh), I will only talk a bit about each level and some game mechanics, since Quacken has already covered the levels. Whatever other comments I didn't reply, I will try to reply next time. The post is already getting a bit long and I need to focus on reviewing the levels without boring the readers.

I will link to a few walkthroughs on YouTube for secrets guide and such, to help everyone to find the secrets, though I will still mention a few Easter Eggs and the Super Secrets, since they are counted separately. I will also give a few more tips/tricks and my thoughts about BLOOD in general.
Blood playthroughs by pagb666:
https://www.youtube....Vnb8lCojhW_Cs1U
https://www.youtube....M0SBBXtoGkNNhXL

Presentation
Attached Image: BLOOD_1.pngAttached Image: BLOOD_2.png
Attached Image: BLOOD_3.pngAttached Image: BLOOD_4.png
Attached Image: BLOOD_5.pngAttached Image: BLOOD_6.png

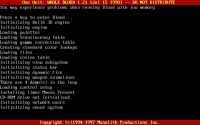
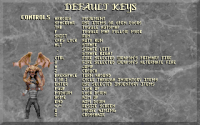
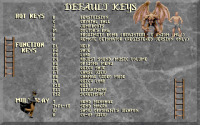
I don't need to explain once again what is Blood but I'm going to say that the original versions of the game, as well as the shareware versions, had intro logos displayed when game is starting but OUWB 1.21 doesn't show any logos when the game is starting. It just starts the demos directly. Also gotta love the animations and references that play while viewing the HELP/CREDITS screens.

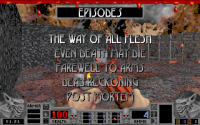
Blood's maps use the E#M# structure like Doom but in terms of length, the episodes are structured a bit like Quake and Duke3D, with different amount of levels per episode. E2, E4 and E6 have 9 maps each, while E1 and E3 have 8 maps each. E5 (the BloodBath episode) had 8 maps (BB1-BB8) initially but three more (DM1-DM3) were added in Plasma Pak. Cryptic Passage has 10 SP maps and 4 DM maps.

Demo Loop

The demos in One Unit Whole Blood are taken in the following levels: E1M1, E3M2, E6M1 and E2M1. All of them end with the player's death. They seem to be recorded on the Lightly Broiled difficulty, as far as I can tell from enemy placement and the cultists throwing sticks of dynamite. The first and third demo even desync towards the end, with the E6M1 demo being rather boring when the second half of the demo is just the player dead and nothing happening in the background. The demos used to be better in earlier versions, as is the case with pretty much every 90s FPS game that has demos shown in the background, they are usually more action packed in earlier versions but rushed in later versions, in some cases even desyncing. I don't have any footage of the older demos and the YouTube channel that had Blood demo loops for each version of the game (every shareware and retail) has disappeared in past few years, so there's no way to watch the original demos unless you have the rare Blood registered 1.00 CD. :(

Anyway, let's get this out of the way: Blood is an excellent game. I can see why it is praised and indeed, it delivers on so many levels, with excellent level design, great gameplay, great protagonist, good graphics and good soundtrack. But I also think it has a couple annoying bugs/flaws/glitches in it that drag down the experience. For instance, even the latest official DOS version of BLOOD v1.21 is quite buggy at times. The game seemed a lot buggier when it released and even had game breaking bugs, with certain sources telling me one level in the later episodes lacked a key to complete the level. But the latest 1.21 release is quite stable and the whole game can be completed without cheats, if you don't mind dealing with a few bugs once in a while. Sure, there's also source ports that fix certain bugs and offer a smoother experience.

But as a general rule I apply to most old games, I rather stick to the original version for the intended experience, especially when reviewing an actual product. In this case, I don't have older registered versions of Blood (though you can download CD images of original Blood registered 1.00 release if you know where to look, same applies to Cryptic Passage and Plasma Pak), only the latest 1.21 release, which is what was the most common version available before the source ports and the remaster existed, plus it's the most complete version, so most people should use the original DOS version 1.21.

Don't get me wrong, the source ports are all great but I only save them for mods that require them. As for Fresh Supply, I don't have it and while it got several patches that fixed many issues at launch, it was abandoned for years...until recently. Yes, it appears to be still worked on. I just noticed a while ago on 15th July, which was the 25th anniversary of One Unit Whole Blood (happy birthday OUWB!), I looked up for Blood related news but there wasn't anything new. Then checked the SteamDB website and saw a private branch was updated on 15th July (it was updated again since then). That's great news and most likely a patch is in the works that should go live soon. I don't know anything more than that but I hope they not only fix all the remaining bugs but also make Death Wish (and other high quality community content) added as an official addon! Seriously, more games need to have curated community addons, like how the recent ports of Doom and Quake have occasional updates that add community content as official addons! This is an opportunity that Atari/Nightdive shouldn't miss!

Now about Blood, while the gameplay is very good, there are also a couple things I really don't like about the game's difficulty. The game is brutal at times and I am not a fan of the cultists' high reaction time, as I often get shot just as soon as a cultist sees me. Yes I know about peeking around the corners and I sometimes use the dynamite to get rid of a cultist waiting for me but there are times where it seems the damage is unavoidable. It's just that the game's difficulty curve is weird, with first episode being the hardest and cultists that are common and overpowered enemies. There isn't really a middle ground. The zombies are relatively weak, the cultists are annoying, the Hellhound can burn you to death almost instantly if you get caught too long in the fire, the choking hands can end your game (see below why), etc.

Third, the glitches really drag down the experience. Here is a list of annoying bugs in the DOS version:

1) Saving the game can be buggy at times:
-When you first save on a slot, it's fine. But then when you save on that used slot, then you must REWRITE the save again every time you save. This glitch goes away when you quit and come back on the already used save slots. Then you don't have to type "E1M1" every time you save on the first slot. To get rid of this glitch quickly on the first playthrough, just save on ALL 10 slots, writing whatever you want, then quit the game. When you start it again, all used slots will keep their save name when you just press enter to save.
-No "GAME SAVED" confirmation message upon saving. Then again, the original versions of Duke Nukem 3D (up to v1.3D) and Shadow Warrior (all versions) also lack the "GAME SAVED" message confirmation.
-Saved games lack screenshots and instead just show original BLOOD logo or "BLOOD WITH PLASMA" in case of Plasma Pak and OUWB 1.21. Unlike other Build games, no screenshot of your save position is displayed. This seems to have been a planned feature that never made in, even in the OUWB. Source ports fix this and some of them will even show statistics of the episode/level/skill like other Build games.
-Trying to scroll up to quickly get to Slot 10 doesn't work and you need to actually navigate slowly to last slot. However, the opposite works and if you go past Slot 10, it goes back to Slot 1. My point is, you can quickly go from Slot 10 back to 1 if you want but you can't go from 1 to 10.
-After saving the game, the ENTER button is pressed, automatically activating whatever inventory item is selected. This can have negative consequences, as you will end up using the Medkit (if you save with less than 100 health) or the other items (Beast Vision and Jump Boots) whenever you save and in the latter case, you will probably not even notice that the boots and goggles are activated until you notice they are gone from your inventory. Or if you are lucky, you will notice them draining and have a chance to stop them. The only way to avoid using the items is to save with medkit selected when at 100 or more health or if you have the Diving Suit, it is safe to have it selected on land, as it cannot be activated.

2) Choking Hands cannot be taken off your neck once they grab you. The original DOS versions of Blood have this nasty bug where you CANNOT get the hand off your neck no matter how much you mash the spacebar. This means that you are screwed if one manages to grab you. No matter how much health you have (armor doesn't protect, obviously) and no matter if you are invulnerable or not, the hand will choke you until you die.

3) Enemies can sometimes disappear from the map. Not sure how this happens but I've had situations in past where a few enemies (mostly tiny enemies) weren't found anywhere. In some cases it's a matter of backtracking through the whole map, as you can find enemies, usually zombies, running around. In general in Build games, it's best to kill the enemies as soon as they notice you, so you don't end up with a lost/missing enemy somewhere, as this may cause a glitch with an enemy somehow getting glitched into walls or falling into some unreachable place or whatever.

4) Not fully confirmed but saving and reloading may also cause the enemies' health to reset. I only noticed this with the spider bosses in last E2 map, as you will read at a later time.

However, there can be a few useful bugs. For example, when you begin the next level, most inventory items will be reset to 100. You can see the items will have the same percentage as before until you activate them and they will count from 99 to 0. Obviously, the Medkit is unaffected by this bug, so if you thought the medkit magically refills throughout the levels, you are sadly mistaken.

For a longer list of bugs, please check the following wiki page:
https://www.blood-wi...e=Bugs_in_Blood

Now for the long awaited E1 review (E1M1-E1M8) and the nominations for next month! I'm also going to be listing my level stats and we can discuss why in some levels the maximum amount of kills is not possible.

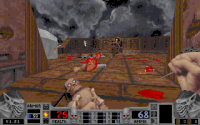
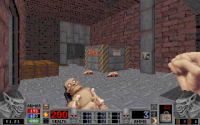
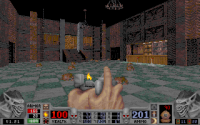
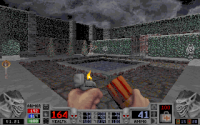
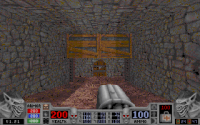
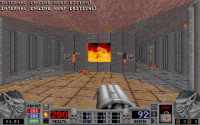
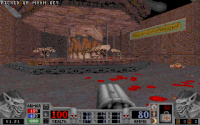
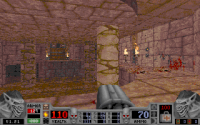
THE WAY OF ALL FLESH

Cradle to the Grave
by James Wilson

Kills: 25/25
Secrets: 11/11 + Super Secret

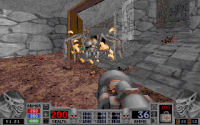
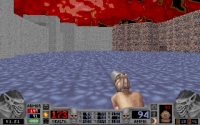
Caleb lives again! This is the first level of the game and it's a pretty good introduction. It is packed with lots of secrets and even a Super Secret, so exploration is highly encouraged. There aren't many enemies and the only enemies you encounter are zombies and cultists! The zombies aren't very threatening and can even be killed with the pitchfork if you are patient enough, works better on higher skills where the zombie doesn't get knocked down constantly. Which I need to point out that they sometimes like playing dead and surprise you later. It seems to be totally random and I know the death sound seems different when the zombie plays dead but doesn't seem to be always the case.

And the cultists can be a pain in the ass, so you have the choice to take the alternate route by jumping on the fence and then the window or going straight into the building. I highly recommend finding the secrets early on, you will have a much better time, as some contain extra ammo, while others contain ARMOR! It's up to you to go the alternate path or go the intended path.

The Guns Akimbo powerup is sometimes seen as a letdown. Don't get me wrong, the ability to dual wield weapons is amazing but it's only useful in certain situations with certain weapons (it doesn't work with a few weapons for obvious reasons). In some cases it just causes you to spend more ammo than usual and ammo is really scarce early in the game if you don't find the secrets (not that much of a problem with completionists). I would have rather preferred a Double Damage powerup or perhaps in best case, the Quad Damage from Quake! Now that would have annihilated hordes of monsters in no time. :D

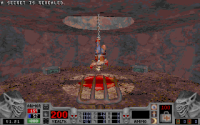
The Super Secret is located right in the place with the exit, located behind a fake wall. You just need to strafe jump from that cracked wall and you should barely make it. It contains an early Napalm Launcher, so it's great stuff!

When you find the super secret in a level, the end of the level stats will not only show kills and secrets but also let you know that YOU FOUND A SUPER SECRET! Oh and no, the level stats don't tell you how long it took you to complete the level (unless you play in some source ports), so it's a bit unusual compared to other games of the era that also showed you the time.

Fine first level. Though the cultists appearing very early may discourage people from playing further if the player can't even make it past the first level. I think there should have been weaker variants introduced early, like some sort of pistol variants that were basically much slower gunners, though understandable since the basic pistol doesn't exist in Blood and I don't know if a Flare Gun cultist would have been better. Either way, I think more Cultist variants with different weapons would have worked pretty well. In meantime, let's see how things continue in this episode.
Attached Image: BLOOD_E1M1_1.pngAttached Image: BLOOD_E1M1_2.pngAttached Image: BLOOD_E1M1_3.png

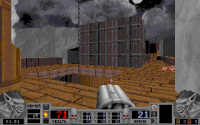
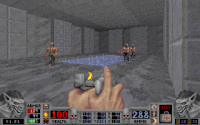
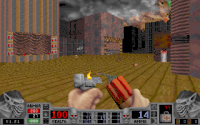
Wrong Side of the Tracks
by Craig Hubbard

Kills: 71/71
Secrets: 8/8

Another memorable level, this one taking place at a train station. It's still quite challenging, as the train station can give you a hard time with the cultist infestation. I forgot to mention earlier but I love how there is level continuity in most Blood maps, just like in good old Duke Nukem 3D.

I died once or twice near the exit, in the train station but that was my bad because I approached the gate and was getting annoyed how my shots get blocked by the gate while the cultists can still hit me. I guess I went the wrong way first, as I was supposed to approach this room at the very end after getting the key and the invisibility secret. Oh yeah, I love how the invisibility actually makes the enemies ignore you. They become active after you hurt them but they have no idea what hit them! In short, the invisibility works similarly to Shadow Warrior and makes enemies entirely ignore you. Just note that the effect doesn't last very long and the flickering effect that the powerup is about to expire seems to happen about 10 seconds before the powerup expires.

Fine second level. Looking forward to the next level!
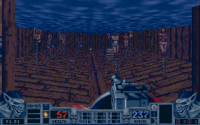
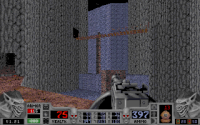
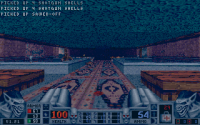
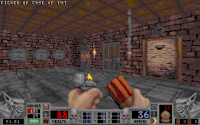
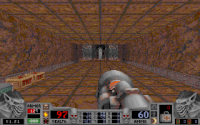
Attached Image: BLOOD_E1M2_1.pngAttached Image: BLOOD_E1M2_4.pngAttached Image: BLOOD_E1M2_5.png

Phantom Express
by James Wilson

Kills: 84/84
Secrets: 6/6 + Super Secret

Ah, the classic train themed level! Another highlight of the game.

The whole action takes place on a train. It's not going to be easy at all, as the place is crawling with cultists that really like to ambush you. Something I didn't realize before is that the cultists have randomized drops, they can either drop the weapon, ammo or nothing. Sometimes the enemies drop health as well but I don't know if that is also randomized or enemies are scripted to drop something, as sometimes enemies may drop keys (such as the cultist in first map) or even powerups (e.g. gargoyles dropping Life Seeds).

With that said, that one Cultist room was a bastard to clear that took me about 10 tries to get done. Sometimes I would do fine but not hit the switch to get the Reflective Shots powerup, then I would get it but get blown up anyway. Ah yes, the Reflective Shot causes certain attacks to bounce off you and hit the attacker back. Doesn't work for explosives but it's okay because this still makes the cultists much easier to handle. It's a semi invulnerability powerup and makes the screen blue tinted for a short while, though it doesn't have any warnings that the powerup is about to expire. ;)

The Beast Vision secret in the chest requires you to pick up the item to register the secret. If you already have a pair of Beast Vision, just activate the current one, stop it, then collect the new item. Apparently, this secret was working differently in previous versions but it was patched in OUWB to prevent re-registering the secret, as the Blood wiki claims. Too bad they didn't fix other glitchy secrets later in the game too. I believe the Fresh Supply remaster didn't bother fixing those broken kills/secrets either.

Super Secret: Near the blown up side of the train, where you can find one of the official secrets, you are supposed to jump out the train and push a nearby wall. I highly recommend saving before doing that, since falling off the train will eat your health/armor quickly (interestingly, it seems to do lots of fire damage, as Blood wiki says), so just mash the jump button to reduce the damage taken. The secret is VERY REWARDING and the level has already 2-3 super health/armor powerups. HOWEVER, keep in mind a nasty bug. If you choose to push the wall to get a shortcut back inside the train, it will spawn 6 enemies (cultists and innocents). For some reason, even after killing them, you will end up with 2 enemies missed somewhere. I remember this from my past playthrough but I knew to avoid this time.

What's interesting is you can push the secret wall as many times as you want to continuously create enemies and in turn end up with more missing enemies. I learned about this glitch since past 1-2 years when playing OUWB 1.21 in DOSBox for first time. The correct solution I did on this playthrough and worked is to go back from where you came from. So after getting the goodies inside super secret, go back to where you came from instead of utilizing the shortcut. You may lose a little health/armor from doing that but if you want to keep 200 health & armor for the next level, then it is strongly recommended to save a Life Seed (the one from the crates room) and Super Armor (the one past the room filled with cultists) for the end of the level to have 200 Health and Armor. Pick up the other ones early on instead because they force you to take damage (e.g. the items inside Super Secret and the Life Seed in the exit room).

Also, I don't know if it's just me but I could have sworn I have played a version of this map that ended a bit differently. Normally, when you activate those switches, the train will start exploding and the level ends (be sure to take cover from the explosions, just leave the room you are in). But in the version I played last time, there was another train that was approaching and you had to jump on it quickly (there was a countdown timer) to end the level before the current train exploded. It might have been the Beta Shareware Version 0.91. Which has only 3 playable maps and has a couple differences compared to the final version. I did it back in January and forgot to check the other earlier shareware versions, considering Blood has a lot of versions released over the years. I will have to recheck at a later time, because this month I'm only focusing on the latest 1.21 release.

Overall, this was another classic level.
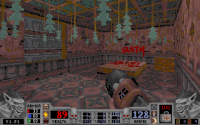
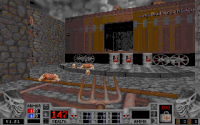
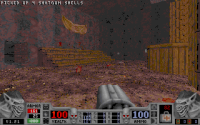
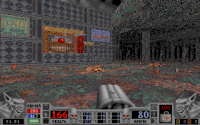
Attached Image: BLOOD_E1M3_1.pngAttached Image: BLOOD_E1M3_2.pngAttached Image: BLOOD_E1M3_5.png

Dark Carnival
by Kevin Kilstrom and James Wilson

Kills: 132/134
Secrets: 12/12

This is one of the best levels in the entire game. It's also packed with enemies, secrets and lots of other cool stuff. This is also where you will find the Duke Nukem Easter Egg, though I will let you discover that on your own. But before that, watch out for the annoying cultists that are everywhere! As an important hint, DO NOT LET THE CULTISTS FALL IN WATER! You are going to have a bad time, as they will be difficult to hit while they can happily hitscan you to death. Yet another thing that is really annoying about Blood, other than the fact certain enemies that fall into water never seem to drown. I'm talking mainly about the cultists and zombies that should be able to drown after spending minutes underwater. But yeah, the cultists underwater are very annoying and if this happens to you, then you will know in the future and to try to prevent this from happening.

As an early precaution, the secret that requires you to kick three zombie heads into the stinky mouth may not register properly sometimes. It is recommended to have a backup save and save on a separate slot after each successful kick. I don't know if it needs to be the first try but keep in mind the zombie head eventually gets destroyed from kicking it too much. It may take minutes depending on how lucky you are but the reward is worth it! Interestingly, in this current playthrough, I managed to eventually get the three heads into the mouth but I wasn't rewarded. Then I found another zombie head nearby, kicked it into the mouth and THEN the secret registered! It may also happen because I'm playing on Well Done, so it may require four heads now and maybe five on Extra Crispy? Not sure but this is how it seemed to me and I'm not surprised if this secret is dependent on the difficulty chosen. It shows that this game's difficulty settings change a lot more other than just enemy placement, though somewhat ruined by the save/load bug.

Anyway, that secret rewards you with an INVULNERABILITY! This powerup should protect you from everything, not sure if it works against crushers, fall damage, etc but it definitely works against every enemy attack in the game (though the hands can still grab you and lead into game over). Make sure to pick up the invulnerability before entering a tough room filled with cultists for the best effect. The item DOESN'T have any on-screen effects and there is no way to tell when the powerup is about to expire. Source ports and the remaster have timers that display on screen while the powerups are active.

This level is also where you can find the secret exit and it is located near the end of the level, after the door locked with the moon key. You just hop on those sticks above water, blow up a crack in the wall and after killing the fishes underwater, you should find yourself in a small room with two very important powerups that will greatly help for the next level! The solution to the puzzle is the order the keys you collected earlier. Just keep in mind the level ends a few seconds after getting the combination, so you may want to backtrack for other stuff. The normal exit is the one with two gargoyle statues that seem to be the cause that prevent you from getting all the kills, even after trying to push them into water, nothing happened. I got 132/134 kills on Well Done and I'm going to assume this is the maximum amount you can achieve on this difficulty.

BTW to keep in mind from now on, the secret levels are ALWAYS found on the fourth level in each episode of the original Blood. This doesn't apply to the Post Mortem (Plasma Pak episode) and Cryptic Passage episode. And also whenever you will see Gargoyle statues that CANNOT be activated, then these will be the cause of the enemies you miss at the end of the level when checking the stats.

Fantastic level overall.
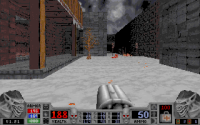
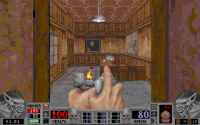
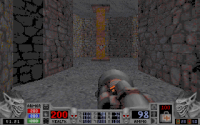
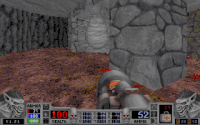
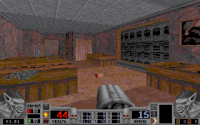
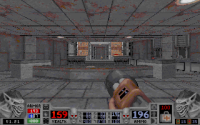
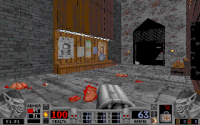
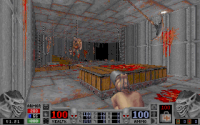
Attached Image: BLOOD_E1M4_1.pngAttached Image: BLOOD_E1M4_2.pngAttached Image: BLOOD_E1M4_3.png
Attached Image: BLOOD_E1M4_4.pngAttached Image: BLOOD_E1M4_5.pngAttached Image: BLOOD_E1M4_6.png

House of Horrors
by James Wilson

Kills: 120/122
Secrets: 5/5

The secret level of the first episode is okay but somewhat frustrating towards end with the never ending corridors filled with groups of cultists! Yeah it's so fun dying over and over because that last cultist survives a dynamite blast or a flare shot doesn't connect. Spent quite a while with low hp towards the end. I guess I was a bit overprotective on the medkit in inventory and only used it much later in the level. Then realized there was another one inside the secret.

Oh yeah and there are a few important notes about this map:
First, despite a seemingly point of no return, you can backtrack towards the end when you can open various shortcuts to the beginning.
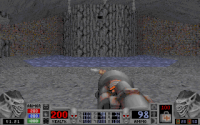
Second, the Diving Suit appears for the first time. It's the Scuba Gear equivalent for Blood, except it has the following behaviors:
-The suit activates a second after entering water and drains very quickly
-The suit can be deactivated underwater but it reactives automatically after a second

An important tip I learned previously is to close it manually while underwater to extend its usage but this is incredibly difficult to do during underwater fights/navigation while playing keyboard only. Even worse with the item getting activated while saving the game, due to pressing enter to confirm saving will activate currently selected inventory item. This requires insane timing to make the best use of it, as a perfect on/off timing will only drain like 1-2% oxygen every few seconds but if poorly timed, it can drain like 3% in a single second.

For best results, if you lack the diving suit and see one for the first time, you may try to save it for later and spend some underwater areas without wasting the suit on some short underwater trips and only use it for long underwater trips. If you are playing the original DOS version (not sure if this bug was fixed in ports/remaster) and still have the Diving Suit at the end of the level in inventory, it will be refilled to 100 in the next level (technically it will display the old number but after activates it goes from 99 to 0, like the Beast Vision and Jump Boots).

Also drowning in Blood seems to be a bit randomized, the screen turns darker until you start drowning and you only lose about 3 hp at every few seconds, sometimes with bigger or smaller pauses. This means that despite Caleb not having a high lung capacity, the drowning isn't as fatal as in other games.

Anyway, the secret map was interesting and recommend visiting it at least once to see what's about.
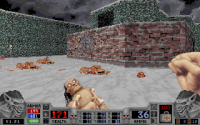
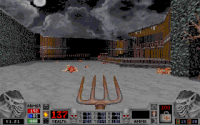
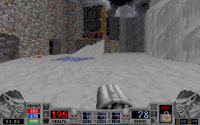
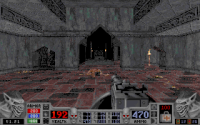
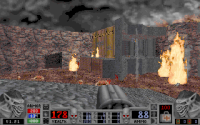
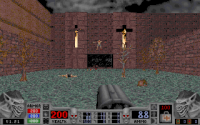
Attached Image: BLOOD_E1M8_1.pngAttached Image: BLOOD_E1M8_3.pngAttached Image: BLOOD_E1M8_6.png

Hallowed Grounds
by Nick Newhard, Craig Hubbard and Terry Hamel

Kills: 130/132
Secrets: 9/9 + Super Secret

An interesting level and the first of the temple levels in E1. It's packed with enemies and feels somewhat frustrating at times but if you get the secrets, you should have a mostly good time.

There is the part where you choose between three doors. One is correct, the rest are traps that will instantly kill you. The correct choice is the LEFT door!

Super Secret: Near the end of the level, drop down the ledge in left side while quickly mashing the jump and use buttons. You will lose health quickly (including health from fall). If done successfully, you should get into the secret room that contains two very important items.

Note about invulnerability secret: If you go back to the secret even after picking up the invulnerability, the secret will keep registering, so it will mess up the amount of secrets found and you can have for example 15/9 secrets found at the end.

130/132 is the maximum amount of kills on Well Done due to two gargoyle statues not coming to life. Same deal as previous two maps.

Fine level overall, although it wasn't as impressive as some earlier maps.
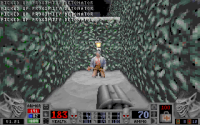
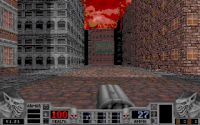
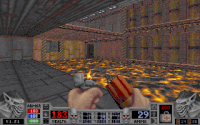
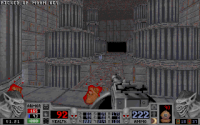
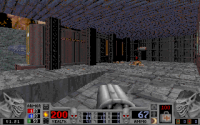
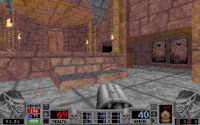
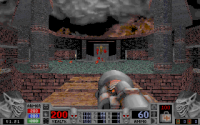
Attached Image: BLOOD_E1M5_1.pngAttached Image: BLOOD_E1M5_3.pngAttached Image: BLOOD_E1M5_5.png

The Great Temple
by Terry Hamel and James Wilson

Kills: 248/251
Secrets: 7/6 + Super Secret

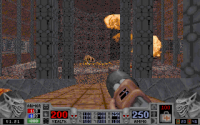
Honestly, I wasn't enjoying this level that much. It has over 250 goddamn enemies on the Hard difficulty! That's way too much for a level into the first episode. I don't remember the original Doom having so many enemies either (Doom 2 did have a few levels with over 200 enemies I think). Granted, it's the penultimate level of the episode and it's supposed to be a bit more difficult. But this seems to be another level filled with cheap traps and annoying enemy placement. I liked the big fights at the end, though. But the parts halfway in the level I didn't like much as I keep getting killed and had to save scum with low hp. The explosion traps were also annoying and sometimes it was irritating to get a direct hit (guaranteed instant death) by a projectile even if you were jumping over the projectiles.

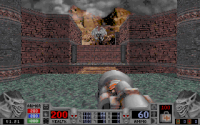
Super Secret (copied from Blood Wiki because I'm too lazy to describe it, it contains lots of goodies):

Quote

At the top of the temple, there is an open air veranda that you can see the clouds from (along with some zombies). Go to the middle opening and look down. There is a patch of clouds at a higher elevation than the others. Walk slowly off the edge and land on the clouds (try dropping near the left side if you have trouble). Follow the ledge to a door. The message "I CAN'T BELIEVE YOU FOUND THIS! HERE, YOU CAN HAVE IT ALL." will display. Later, a teleporter will appear.


Note about the medkit secret: If you go back to the secret even after picking up the medkit, the secret will keep registering, so it will mess up the amount of secrets found. This happened to me and I ended with 7/6 secrets because I needed the Medkit later on and had no idea it would re-register the secret. Oh well.

Not sure where's the rest enemies (the four gargoyle statues came to life and could get killed, I think) but 248/251 seems to be the maximum possible I could get. Just get that fire armor in those rooms with the fireball shooters, as 4 zombies will appear. Still not sure about those 3 enemies left. I will check out a few 100% guides, as I'm sure I missed something. On the bright side, these levels with missing enemies are rare and you should be able to get all kills in most maps, leaving aside the Gargoyle Statues that never come back to life.

Despite the ambitious design and the epic adventure, I didn't like this level too much. Leaving aside its high difficulty, I feel like it would have fit better in later episodes. This is also one of the few maps where enemies randomly disappear for inexplicable reasons. If someone knows a better explanation about where those enemies were, feel free to mention here.

Hopefully the finale will not turn out disappointing.
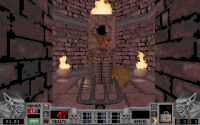
Attached Image: BLOOD_E1M6_2.pngAttached Image: BLOOD_E1M6_5.pngAttached Image: BLOOD_E1M6_7.png

Altar of Stone
by James Wilson

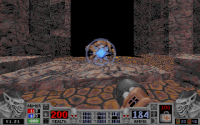
A short boss map. Kill the fanatics, grab 2/3 secrets, approach Ophelia's body, unleash the gargoyles (Cheogh and his minions), grab the third secret, kill the minions and then the boss himself.

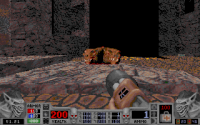
Cheogh is durable but he isn't that bad even with the weapons you have acquired so far (obviously Pitchfork Start is a different story). Crouch and he will not attack you. His attacks do quite a bit of damage but you should have 200 hp and armor, his attacks affecting the Spiritual Armor and in the end you should easily defeat him as long as you crouch/dodge. Dump the Napalm on him, then finish him off with Sawn Off Shotgun. After a couple seconds passing since his defeat, the level will end and credits will play. No level stats or anything, just skips straight to credits.

I forgot to mention I don't have the cutscenes installed, so unfortunately I don't get to see them. You aren't missing much, though. As the CGI cutscenes are really ugly, on par with the Redneck Rampage cutscenes in terms of shittiness. Yes, I watched the cutscenes on YouTube, so I know about them. Should have mentioned there is also an intro cutscene when you start the game but forgot about that.

Oh yeah, I even got a weird crash while fighting Cheogh. Blood suddenly crashed with a granular crash. Not sure if DOSBox issue or whatever. The fight worked fine afterwards and I didn't get any more crashes like this.

Overall, this level was fine on the Well Done skill and if playing continuously.
Attached Image: BLOOD_E1M7_2.pngAttached Image: BLOOD_E1M7_3.pngAttached Image: BLOOD_E1M7_4.png

E1 overall: Pretty good with plenty of solid maps, especially the first half of the episode. But the difficulty is a bit too hard for being the first episode of the game, at least SOME of the levels feel harder than they should. I feel like that's what hurt the game initially, the excessive difficulty and despite having difficulty settings that alter various stats, they were bugged and you still couldn't rely on easier skills to take less damage, as the damage goes way higher upon reloading a save. Couple that with poor timing to release the game after Redneck Rampage was already out for a couple weeks and the game didn't get to truly shine until the 2010s when people started to discover this game.

As a side note, the only maps in E1 I beat without dying were the first and last one.

Nominations for the next month:

One Unit Whole Blood (Part 2)
Shadow Warrior


The first choice is the continuation of the rest official Blood content. This means episode 4, the Plasma Pak episode and the Cryptic Passage episode. The DM episode may also be covered separately if anyone wants. More on that if this gets chosen the next month.
The second choice is the fellow BUILD engine game, Shadow Warrior! Note that only the main game is covered, which means 22 SP maps + 4 DM maps if I remember correctly. The expansion Wanton Destruction will be covered at a later time.

Not voting yet, as I'm not decided and I will leave the public to decide instead. I hope to get the E2 & E3 reviews done before the end of the month. Have a nice day! :)

This post has been edited by FistMarine: 24 July 2023 - 03:55 AM

1

User is offline   Quacken 

#35

Single segment Extra Crispy episode runs are a good place to start, I'd say. It's the happy medium between having something more spicy when Well Done gets too easy and mental sickness (EC Pitchfork runs). Even I can't do maps with a difficulty rating of 3/5 and higher with no saves, I always make at least one (and usually will make two just in case). I don't need arbitrary difficulty in what's already the hardest way to play the game.

To clarify about how buggered the MOUSE2 Voodoo Doll is: In earlier versions of Blood the MOUSE2 Voodoo Doll consumed 25 ammo but did a more powerful attack. Later on, this attack was changed so that the secondary fire now consumes 100 ammo, or the entire Voodoo Doll. However, Monolith forgot to appropriately scale the damage according to its new ammo usage, which means it's broken and does an amount of damage that's not appropriate to its ammo cost (hence why it's useless).

The Life Leech's primary fire also used to give you health when it hit a target, but this was removed in I believe the same update that introduced the secondary fire. Fortunately the secondary fire is pretty good, there's instances in E4 where it will be the best option in a fight. And to clarify about the MOUSE2 Life Leech, because I feel like I have to: It does use ammo while in the turret mode (but the ammo counter is invisible), and it doesn't give you health. When it starts aiming at you and speeds up is when the weapon runs out of ammo. Even while it has run out of ammo though, it can still hurt monsters, so you can still rely on it. When the Life Leech is at 0 ammo, you can't use the secondary fire again until you find more ammo. You can still use the primary fire, but it will start eating at your health if you do use it, which is bad.
1

User is offline   Aleks 

#36

View PostFistMarine, on 24 July 2023 - 03:32 AM, said:

Nominations for the next month:

One Unit Whole Blood (Part 2)
Shadow Warrior


I'd suggest adding some Duke mod to the voting "out of decency" as well, considering this month was a different game anyway :P

I haven't had much time to play this month, but also didn't feel like trying out Blood at all, so not much of a loss for me. Probably won't have much time in August either due to holidays/conference and being out, so either one would be fine with me, with SW I might chime in some comments though as I still remember something from my playthrough 2 years ago.
2

User is offline   Quacken 

#37

I'm here to donate some blood. My own blood, preferably.

The Sick Ward
Hubbard, Wilson

EC Pitchfork
Spoiler


This is a classic map, and a contender for my favourite in the entire game. Something about The Sick Ward is designed so creatively and it stands out extremely well compared to the other maps. It reminds me a lot of E1M3. This map has a unique MIDI and a lot of textures and sound effects that are only used in this map, such as the signs, the medical equipment, the IV drips, the beeping sound on the electrocardiogram and how the texture and sound effect changes to a flatline if you remove the patient, the radiology x-ray, and even the walls. If I had to guess, I'd say Craig Hubbard was responsible for all of the fun parts of this map and James Wilson did everything after the Fire door, which is where the energy sags for me. There's a lot of Phantasms and Gargoyles in the Skull Key fight and I don't know if I really like it. Gargoyles and Phantasms aren't an engaging combination. They're two bullet sponges and they combine together to form a wall of flesh that's not fun to chew through, especially because one of them is immune to fire. I like the morgue section. The tables flying around is a cool effect but the Choking Hand ambush can suck an egg if you're playing on NBlood. The MIDI that plays is one of my favourite ones in the game too. It has more energy than the other MIDIs and has the same curious feel that E1M3's MIDI does, with an added sinister undertone. The Sick Ward sags in its energy and creativity towards the end, but its texturing, music, themes and rich potential for imagination makes it potentially second to none.

9.5/10.
2

User is offline   Quacken 

#38

Before I go to bed, my nomination:

One Unit Whole Blood (Part 2) +
Shadow Warrior

Might as well. I don't think it's time for Shadow Warrior yet, after Blood gets done I think I'd like to get back to Duke for a while until we get to April again (which seems like our Other Build Games month going forward). I played the shareware episode to Shadow Warrior a little while ago on DOS and I honestly didn't really like it. Shadow Warrior plays well on Classic Redux from memory but DOS feels way too sluggish and weird for me. It's mainly just down to the mouse controls, I think.
1

User is offline   Quacken 

#39

So, what's your opinion on janitorial work?

Catacombs
Wilson, Hubbard

EC Pitchfork
Spoiler


Oh good golly gee, would you look at that? It's an unfinished level they tossed into the secret slot. I find it hard to believe that Craig Hubbard was involved in this map, because this level of basicness seems like it's out of character for him. Catacombs is a maze of big gray boxes and tons of Zombies to chew through. It's pretty flatly textured even despite some unique textures like the knight laying in the coffin. This is the grayest map I've seen in a while. And of course CBLOOD7 is playing. There's a lot of Phantasms in this map which makes it hard to ration enough shells to kill them all. I think the best I've done for the kill count on Extra Crispy is 133. I eventually have to Pitchfork the Phantasms and I've got better things to do than that. It's easy to Pitchfork a Phantasm, but they have a lot of health, so it takes a lot of time and it's generally not worth it. It's the same reason for you technically being able to Pitchfork a Gargoyle or a Cheogh. You could, it's easy, and it's technically the best way to save ammo, but you really shouldn't. I don't really have much to say about this map. It feels like it's an afterthought that got rejected from Episode 1 and tossed into E3M8. It's not quite as mind melting as E2M5, but I still don't really like it.

3/10.
1

User is offline   Quacken 

#40

Can I lobby a complaint? Wilson and Hubbard are bullying me.

Spare Parts
Wilson, Hubbard

EC Pitchfork
Spoiler


I always dread playing this map because the game randomly becomes very difficult at this point. Even on a single segment run this map is hard to manage unless you're good with explosives and know how to toss things up to high places. Bringing a Napalm Launcher from E3M4 or E3M8 does make the Invincibility rampage easier though, and a Voodoo Doll helps to clear the opening Hellhounds. This is the first map to really show off the strength of the Hellhounds. They have high health and always have the advantage over you as they can't be damaged by the lava. And on a Pitchfork start, you don't have a Spirit weapon until it's time to fight Cheogh, so you can't neutralise them with the Tesla Cannon. Speaking of Cheogh, this is the first time on Well Done that he's actually a threat. You need to jump up to boxes to get the Tesla Cannon, and thus you won't be crouched, so Cheogh can try and take a bite out of you with his powerful lasers. This map in general is just very hostile. You'll have to take it slowly and use every trick you know of if you want to get by in one piece. The MIDI fits this vicious atmosphere very well. I always like to think that CBLOOD1 is meant to take place inside of a dangerous factory that has plenty of moving parts that hurt. The crushers always seem to find a way to sync up with the beat of the music. Those crushers are one of the complaints I have with this map though, or at least the Fresh Supply version of the map - it seems like player collision was altered in a way that hugging the crusher and then going under it as soon as possible will kill you instantly, as if touching the bottom part of the crusher is set to kill you. On NBlood you can hug the crushers and crawl under them safely, but on Fresh Supply you can't. But I can't play this map on NBlood, because the Choking Hands become hell to deal with. It's quite an unfortunate situation. Spare Parts has a steel jaw and will give you a whipping the first time you play it, but I happen to be fond of its increased challenge.

7.5/10.

This post has been edited by Quacken: 26 July 2023 - 03:23 PM

1

User is offline   Quacken 

#41

I'm ready for more pain. Or I would have been, but I tried out a new route for this map just now and it turned out pretty well. There's a lot of water in this map, so here's a water-related fact: You can shoot the Tesla Cannon while you're in the water. It's not like in Quake where using the Thunderbolt while submerged will kill you.

Monster Bait
Wilson, Hamel

EC Pitchfork
Spoiler


It's Spare Parts... 2! There's a surprising amount to remember about this map. How difficult it is on Well Done and Extra Crispy, its subterranean rock formations, the dam you blow up, the rushing water, and now the EC route I found by using a Dynamite Jump. This feels like another essay map similar to E1M6. There's seven different monster types, every weapon in the game sans the Life Leech (obviously), and it's structured like a linear gauntlet. If you're not good with explosives then this map will give you a glassing. Hamel and Wilson like to place their hitscanners behind doors and around corners in this map, but you also have access to both Spirit weapons and some height advantage in specific sections to even the odds a little. There's a good bit of opening doors, backing away and firing napalm in the latter half of this map. This map features the return of the slumbering E2M2 MIDI, but I think it's better used in this map than it is in E2M2. I think it's just the colour palette in this map more than anything. This map also really likes moving textures. The flowing water is a unique map element that is only really heavily explored in this map, and the twisting turbines sell the power plant aesthetic well. It looks very gray, but Monster Bait is a surprisingly interesting map with a lot to think about. Its unique routing opportunities, the encouragement to use explosives and to try out unconventional strategies and its added difficulty make it one of my personal favourites.

8.5/10.
1

User is offline   FistMarine 

#42

Ah, thanks for the explanation about those two weapons, Quacken. It makes me wonder why they couldn't keep the weapons as they were for Single Player and rebalance them only in multiplayer modes.

But yeah I will try to experiment with the Life Leech more in the future, even though I always felt Life Leech's primary fire is a bit underwhelming, it should have kept the Life Stealing effect it had previously. I haven't used the altfire mode much but I am going to guess it's more useful at throwing into a room without exposing yourself, right? Otherwise, I really can't think of a situation where the Life Leech is more effective than other weapons, unless you are out of ammo or something.

Quote

I'd suggest adding some Duke mod to the voting "out of decency" as well, considering this month was a different game anyway :P


Aleks, I know that I should have added a Duke mod to the mix but forgot entirely about that and with this occasion, I also decided to discard my previous nomination of those two Duke TCs, as they weren't going to win anyway. I think having the two Build Games fighting each other in August seemed cooler to me, IMO. Besides, I have all the suggestions from previous topic kept in mind for the following months. So there's definitely going to be Duke related stuff in those months when the maps by multiple authors will be covered. Too bad you missed out on Blood, I think it's worth playing at least once in your lifetime. The game may be hard to get into initially but once you get used to it, it's incredibly fun. But you will need to learn the game's mechanics first and get used to certain annoying monsters that will kill you over and over. The level design and gameplay is absolutely worth it, if you can put up with the frustration caused by cultists and hell hounds at times!

It's also not a problem for me whatever wins because I'm currently finishing the rest of Blood until the end of the month (Cryptic Passage may be finished in early August, alongside the exploration of the Deathmatch maps) and Shadow Warrior is already finished on No Pain No Gain since last August, so in latter's case I have no desire to revisit the game but I still have my saved games from all levels in a separate folder, so I could just load them up to take the pictures in the topic, as well as have more time to just review the levels. ;)

Quote

Might as well. I don't think it's time for Shadow Warrior yet, after Blood gets done I think I'd like to get back to Duke for a while until we get to April again (which seems like our Other Build Games month going forward). I played the shareware episode to Shadow Warrior a little while ago on DOS and I honestly didn't really like it. Shadow Warrior plays well on Classic Redux from memory but DOS feels way too sluggish and weird for me. It's mainly just down to the mouse controls, I think.

Just a small correction. April is the month for most popular Build engine games, namely Duke Nukem 3D, Redneck Rampage and Blood, as their registered versions were all released in April (Duke3D in 1996, RR and Blood in 1997). Shadow Warrior wasn't released until much later in 1997 (in late August was the registered 1.2 version released) but I can make an exception to nominate it again the next April (Build games that weren't chosen the current year cannot be nominated again until the next year), seeing as Blood was already played now and the second half will be played next month. Although I have plans to nominate another Build engine game around that period in early/mid 2024 but won't spoil more than that. I think I should keep this Build Game special event chosen only like twice per year, considering that RR and Blood were played (and I suppose the Twin Dragon addon for SW that was played last year), I think it's safe to say there won't be any more Build games nominations until next year. I really don't want to turn the topic into Build Map/Mod of the Month Club. :D

As for your experience with Shadow Warrior, sucks to hear you didn't enjoy the DOS version but I won't be surprised if you played some shitty poorly configured digital version, such as the free version on Steam that uses an outdated version of dosbox and is poorly configured. I know the feeling because that was my introduction to SW back in 2013 (the free full version on steam) and that's why I didn't like the game at first, it just grew on me over time when I got a hold of a proper version. For me, the original CD version of Shadow Warrior works perfectly fine out of the box in latest DOSBox 0.74-3, on the default 320x200 resolution. It needs minimal configuring to work (only the Sound Setup, as it has no sounds by default) and runs smoothly, although I didn't have the soundtrack enabled in my past playthroughs, as it needs to be mounted separately. I will see if I ever revisit Shadow Warrior, I will be sure to have the soundtrack enabled.

As for Redux, I always got the impression that Classic Redux wasn't a well liked port/remaster and much like Megaton Edition, it didn't offer any new content (say what you want about the 20th Anniversary World Tour edition but at least it had brand new content, even if the port was half-assed), though it was decent for its time when not many alternatives existed and it had a couple notable features but it doesn't feel like it holds up well nowadays, especially with some good SW source ports around that feel like better alternatives. I have hope that in the following years, we will get better remasters for Duke Nukem 3D and Shadow Warrior.

Anyway, back to talking about Blood. So here is the second episode review, just in time for the weekend:

EVEN DEATH MAY DIE

Shipwrecked
by Craig Hubbard

Kills: 65/65
Secrets: 5/5

The first E2 map isn't very difficult but the cultists may give you some trouble. If you want to conserve the Diving Suit for the later levels, don't grab the secret early on. You don't really need it for the short water trips you will make, unless you are playing each level from a pitchfork start, in which case you want to make use of all the stuff included in the map.

I don't have a lot of things to say about the map. It's tricky early on with the cultists but it gets better after a while. I really like the frozen theme that persists throughout this episode. It makes for a cool setting (pun intended) and another memorable episode with plenty of strong levels, as you will see shortly.

Pretty good starting level.
Attached Image: BLOOD_E2M1_1.pngAttached Image: BLOOD_E2M1_2.pngAttached Image: BLOOD_E2M1_3.png

The Lumber Mill
by Craig Hubbard

Kills: 57/57
Secrets: 2/2

Pretty sure this level is just called The Mill on the loading screen. Anyway, this is probably one of the easiest levels in the entire game. It shouldn't give you too much trouble. Design wise, it's fine. I don't have much of an issue with it and it's on the shorter side.

Something that I don't like at a couple levels in the game is being forced to grab powerups when you don't need them. That Life Seed on top of the Fire Key is best grabbed when you already have 100 hp. Then there's a few more enemies to kill towards the end of the map that you need to be careful to finish the map with 200 hp intact.

Not much else to say. It's fine.
Attached Image: BLOOD_E2M2_1.pngAttached Image: BLOOD_E2M2_3.pngAttached Image: BLOOD_E2M2_5.png

No Rest For The Wicked
by Kevin Kilstrom and Craig Hubbard

Kills: 90/90
Secrets: 5/5

Pretty cool level. Can you believe that three levels in a row share the same theme (secret level not included). :P

I almost beat the level without dying but died once near the end at the Cultist ambush when I went the wrong way. I wanted to save the invulnerability for that moment but instead of going the one safer path to clear first, I ended up running into the area that had the cultists firing at me and died quickly. :(

I don't have much else to say, sadly. The level is very solid and looking forward to the next one!
Attached Image: BLOOD_E2M3_1.pngAttached Image: BLOOD_E2M3_2.pngAttached Image: BLOOD_E2M3_3.png

The Overlooked Hotel
by Kevin Kilstrom and Craig Hubbard

Kills: 168/170
Secrets: 19/17

Another highlight of the entire game (one of the best levels), this level is huge and contains plenty of secrets! Not to mention the secret exit is found here and involves an interesting side quest to collect FIVE tomes to open the portal in the living room! It's a neat idea and it even lets you backtrack from the secret exit room in case you missed something earlier.

Note that this level contains 19 secrets and not 17! This means if you find everything, you will have 19/17 secrets found! It's also the level containing most secrets in the entire game. Shame about the two enemies that you can't kill, those being the gargoyle statues. Maybe the two extra secrets will help offset those two missed enemies? :P

I won't spoil too much about this map, as it has to be seen to be believed. The only annoying thing is how easy is to get lost and run in circles finding certain keys/doors. Combat is nice for the most part, rarely there being some annoying things that kill you quickly. To compensate for the difficulty and for the lack of Super Armor pickups, you are given at least FIVE Body Armor pickups! Use them wisely! Also I really like the spooky atmosphere that this level offers. Great stuff! Looking forward for the secret level!
Attached Image: BLOOD_E2M4_1.pngAttached Image: BLOOD_E2M4_2.png
Attached Image: BLOOD_E2M4_7.pngAttached Image: BLOOD_E2M4_8.png

Thin Ice
by James Wilson

Kills: 90/90
Secrets: 2/2

Despite a short population of enemies, there's mostly the annoying cultists ready to fill you with bullets! And the level doesn't seem to be very generous with health as I thought, at least if you don't mind going back to collect some hearts. I died plenty of times that I was getting sick of the cultists, especially when stuck with low hp left (no, I didn't want to use too many shots from my Napalm Launcher). The Cheogh at the end can be defeated with just using the Voodoo Doll and you are even given another one, so just crouch and Voodoo him to death.

Seriously, most of the bosses aren't that bad if you know how to fight them (though it's kinda boring to get so many bosses as regular enemies in later levels, even though some of the weapons make short work for them), yet the common cultists manage to give you more trouble than usual. It almost seems like there wasn't as much thought put into balancing certain enemies/weapons and the sad thing is the game had a couple patches released, yet OUWB 1.21 can be still buggy and unbalanced at times. I feel like Fresh Supply's Made To Order difficulty is much needed in order to fully enjoy the game.

Interestingly, I got the gillbeast bug too on this playthrough, as I noticed some of them randomly died as soon as I approached them. I'm happy they counted normally as kills.

Overall, the secret level is okay, I guess.
Attached Image: BLOOD_E2M9_1.pngAttached Image: BLOOD_E2M9_3.pngAttached Image: BLOOD_E2M9_5.png

The Haunting
by James Wilson and Kevin Kilstrom

Kills: 140/144
Secrets: 8/8 + Super Secret

I was surprised by Quacken's reaction. I thought this was a pretty solid level.

Note about the secret that rotates the sector you are in. If you keep pressing on the shelf, the secret keeps getting registered and you can end up with more than 8 secrets found.

Note that two monsters will drop the Life Seed (the first gargoyle at beginning and a phantasm much later in the map), so health is more than enough in this level.

Note there are NO cultists in this map, one of the few levels in the game where they aren't present at all! This makes the level much easier, except for those damn choking hands. Oh yeah, speaking of them, as mentioned before, if they grab your neck, you will die, as there is no way to get them off you. It's a bug in all the DOS versions and Blood Wiki claims that this is caused on faster PCs and playing on the default 320x200 resolution. I didn't bother changing the resolution, as I kinda prefer the default 320x200 for most Build engine games (only applies to their original DOS version, exception from this rule is Redneck Rampage that runs at 640x480 by default).

Super Secret (the ONLY one in this episode, guide copied from Blood Wiki):

Quote

Before the zombie-filled maze, there is a pool with a doctor's bag in the courtyard. Walk through the northern archway and follow the path to the right. Turn at a corner and continue until you hear humming (you may have to increase your speaker volume, and walk very slowly). Near the next corner, the humming becomes louder. Before the pathway turns to the left, crouch a few steps away, face left towards the fence, and press the invisible trigger. If you succeed, you will be teleported to another room (what seems to be the house's attic) with a teleporter that will bring you back.


It seems 140/144 kills is the maximum possible. I don't know what was with the other four enemies that never showed up. Oh well, not gonna lose sleep over that but if someone knows the explanation about those enemies, please let me know.

Overall, despite what Quacken said, this was quite a solid level. Except for the fucking choking hands and running in circles for minutes trying to find the right door or key or backtracking, mostly because all the 6 keys are used. BTW funny that the Fire key is duplicated, as one of the zombies drops it but you can't grab it if you already got one. Speaking of backtracking, one part is blocked off at some point but shouldn't affect completion if you clear that room. Just make sure to grab the Skull key before dropping down to the corridor with zombies. So leaving these annoyances, I thought this was a good level.
Attached Image: BLOOD_E2M5_1.pngAttached Image: BLOOD_E2M5_6.png
Attached Image: BLOOD_E2M5_7.pngAttached Image: BLOOD_E2M5_10.png

The Cold Rush
by James Wilson

Kills: 63/63
Secrets: 5/5

This level is fine and is not very challenging. I actually completed it without dying initially but then when backtracking, I fell into pits trying to see if those two last enemies somehow survived the falls. Turns out, I was wrong and there were two Butchers behind a door that were just waiting for me. So much for searching in the pits. :P

On another note, there's two enemies that you may miss if you don't look carefully. Two choking hands should show up after a flame trap when you grab a Voodoo Doll. This window closes after a while, so make sure they notice you or quickly throw a dynamite in the window revealed. It is very easy to miss these two enemies and lock you out of 100% kills.

Not much else to say. I liked this level and find the ice theme in this episode pretty cool.
Attached Image: BLOOD_E2M6_1.pngAttached Image: BLOOD_E2M6_2.pngAttached Image: BLOOD_E2M6_3.png

Bowels of the Earth
by James Wilson

Kills: 133/135
Secrets: 2/2

The only criticisms about this map is I feel it is a bit out of place of the otherwise ice themed episode and doesn't let you get all the kills for some reason. I was still missing two by the time I got to the exit. Technically, I initially had at least one more but backtracking revealed an inactive Gargoyle that I was able to take out with a single napalm shot. Other than that, I really don't have much to say, as the level is fine but somewhat forgettable.

Looking forward to the boss level and the E2 conclusion!
Attached Image: BLOOD_E2M7_2.pngAttached Image: BLOOD_E2M7_4.pngAttached Image: BLOOD_E2M7_6.png

The Lair of Shial
by James Wilson

A short simple level with a couple tiny spiders and the Shial spider boss! No wait, on higher skills you get to fight TWO of them! I don't really understand why there's TWO of them, especially since only one is required to kill to finish the episode. I forgot to mention that in the first episode, there's also TWO bosses but only when playing on Extra Crispy! Here, you get two Shials even on Well Done! Plus, it's a pain in the ass to kill both of them before the credits start rolling. After you kill one of them, you get like 10-15 seconds until the credits roll. And due to lack of level stats (in-game stats and the results screen in the last level of each episode) and the Shial's spider spawning ability, this map will be nearly impossible to max out. I think I was able to do that in the end but it must have taken me at least 30-40 minutes of trying.

You see, the problem is there seemed to be a bug that I didn't caught at first until later on. Reloading the save seems to reset the boss' health. I'm sure I was going crazy when I was savescumming to keep my 200 health for my perfect saves and reload if a spider bites me (or accidentally hurting myself with explosives) but then notice the Shials are never dying, even after emptying all the NAPALM SHOTS! Something weird was going on but I've had other attempts ruined when one of them was falling into water and I saved like this. I had almost all save slots used in this episode and only had the last two used for this level. As I like to keep my saves clean, one per each level, with boss level having 2-3 saves and in this case the episode is longer and used only last two saves, one save before boss fight and another during/after boss fight.

But then I realized later on that reloading a save resets the enemies' health to full. It's also a good idea to not save and reload while enemies are burning (only when they fall to the ground, then you can save) or else they will extinguish, as if they fell into water. Yes, Blood is buggy as hell, as you can tell. But yeah, just shoot the momma spider until she dies. And don't save/reload during fighting, especially if you are playing the original DOS version. I don't know if this bug was fixed in source ports but all I know is this is a bug I haven't seen mentioned anywhere. Oh yeah and there are NO secrets to find in this map!
Attached Image: BLOOD_E2M8_1.pngAttached Image: BLOOD_E2M8_2.pngAttached Image: BLOOD_E2M8_3.png

The only levels I beat without dying in the second episode are: E2M2, E2M6 (before backtracking for remaining stuff) and E2M8.

E2 Overall: Pretty good. The quality of the first two episodes is pretty consistent with only a few weaker maps and for that, the game deserves big points on having the registered episodes keep the quality as the shareware episode did. It's only a shame there's plenty of dickish traps (talking in general about the Blood maps) that will almost always get you and some weird balance with how overpowered some enemies feel, while others feel like a joke. That's why I feel the game is hard to get used at first and even if you have mastered it, some parts will still give you plenty of trouble. But more on that later on as we reach the later episodes. In the meantime, here is my vote for August:

One Unit Whole Blood (Part 2) ++
Shadow Warrior

I guess I'm voting for more Blood, so it can have a proper conclusion next month. Of course, there are also plans in the future to nominate mapsets for Blood but that won't happen until next year! And until then, I have enough time to check the custom content for Blood and get a general feeling of what the Blood community is capable of creating. And once Fresh Supply gets another patch, it will give me an excuse to check out some community content, even if I don't have Fresh Supply but some official news would give me a bit more motivation, I guess.

I will post about E3 next week. Have a nice weekend! :)

This post has been edited by FistMarine: 28 July 2023 - 07:45 AM

2

User is offline   Quacken 

#43

I don't think we're in Kansas anymore, Cujo.

The Pit of Cerberus
Wilson, Hubbard

EC Pitchfork
Spoiler


Well, here's the end of Part 1! The Pit of Cerberus tasks you with killing a big maroon-coloured Clifford that can shoot fireballs. Also his children are trying to attack you. Cerberus is a dangerous opponent who thankfully is only on two maps in Well Done (E3M7 and E4M8). He's basically a Cyberdemon but he's not as tall and doesn't have an easily exploitable attack pattern. The only weapon you should really be using against Cerberus is the Tesla Cannon, the Voodoo Doll or the Pitchfork (only use the latter two if you can afford losing a ton of health trying to approach him). None of the other weapons are that useful against Cerberus because he does way too much damage, he's immune to fire and his fireballs can crumble you to pieces. He's very useful for infighting, though. Using Cerberus and Tchernobog to kill eachother on E4M8 is another well known trick, but on E4M7 in Extra Crispy you can use a Cheogh to kill Cerberus for you. I'm sure he'd be useful for infighting in like... Death Wish? Cerberus is very underutilised in the commercial maps. After E4M8 you only fight two of them in CP09, and there isn't a single Cerberus in Post Mortem. Instead they introduced the Fire Pod, which is essentially a Cerberus with less health and it can't move. The cutscene for the end of this map is very gory, but it's a little unpolished and Caleb's model is nowhere near good enough to do an extreme close-up. If the shot was of Cerberus' body blowing up instead of cutting to Caleb's face, that would have made it a lot more memorable. It was probably too difficult to animate in such a short time though. The Pit of Cerberus is the bossiest boss map to have ever bossed.

5/10.
1

User is offline   FistMarine 

#44

Alright. Time for the third episode review and wrapping up the first half of ONE UNIT WHOLE BLOOD for this month!

FAREWELL TO ARMS

Ghost Town
by James Wilson

Kills: 71/71
Secrets: 10/9 + Super Secret

Good news. The opening map of the third episode is pretty solid. It is also quite action packed that you will get yourself killed a couple times thanks to the cultists that await you in some of the rooms. Also the newly introduced Hellhounds that are one of the deadliest enemies because of their flame breath that really like to stick for many seconds until you die! Rarely you will get flamed for only a few seconds and it is recommended to avoid their attacks as much as possible. Finding secrets will greatly help here against the nuisance enemies (the hands are here too but they only appear in a few spots). In fact, this is the last map of the regular game (the four main episodes) that contains a Super Secret. Two more Super Secrets follow in the Post Mortem episode and that's it. No more super secrets until the custom levels!

Speaking of the secrets, this is another one of those maps where one secret (the painting with the bullets inside) keeps registering even after you found it. It's fine if it happens because even if you didn't get that same secret twice, you will still end up with one extra secret found at end of level stats (10 out of 9 secrets found). Not sure why it happens but I suspect it's the Super Secret registering twice (as a regular and super secret) or something along the lines. I'm no expert in the Blood's mechanics and the maps' quirks but this is my guess.

Super Secret (Life Seed and Super Armor) guide from Blood Wiki:

Quote

At the top of the elevator shaft is a spider nest. You can get to it by using small metal ledges around the shaft walls.

Be careful as there are a bunch of spiders and you have to do a bit of platforming to reach the secret but finding it is absolutely worth the effort!

Fun fact: Fresh Supply has an achievement where you must make sure no innocent dies in this level. Kinda hard to do when they spread around and the cultists attack them. But if you are not playing Fresh Supply, then there is no reason to try to keep them alive, as you sometimes even get goodies if you kill them. See below for a rather interesting example in one of the later levels.

Overall, this is a great starting level. If you can get past its rough beginning with the cultists and limited resources, you are in for a fun ride.
Attached Image: BLOOD_E3M1_1.pngAttached Image: BLOOD_E3M1_3.pngAttached Image: BLOOD_E3M1_5.png

The Siege
by Craig Hubbard and Terry Hamel

Kills: 112/112
Secrets: 3/3

Ah yes, the infamous level with the annoying siren! It's also shown in the intro demos, at least in the version 1.21 of the game. Don't let that siren distract you because this is a pretty good level! It is quite action packed and it's not very difficult early on until the later parts where the hands will show up and give the DOS players a bad time. Also the explosions at the beginning are pretty cool.

I won't talk about the whole map but I will say the third secret that you get at the end can be gotten in a few different ways. The easy way involves using Jump Boots and I suppose the hard way is by jumping on top of an enemy's head. But the intended way that I discovered on this playthrough requires you to jump from the broken lockers (this may take a few attempts) to the nearest locker in the right side. Then there is a fake wall you can go through, which will lead to the switch that opens the bank vault secret with the Voodoo Doll. Had no idea about the fake wall and the walkthrough I followed on YouTube just used Jump Boots directly, as I probably did in the past playthrough. There were also comments that mention entering the correct code to unlock the rooms but the switches didn't seem to affect how to get the secret to my knowledge. All I know is the switches became unusable after a while, so I assumed the "puzzle" got solved and was able to reach the exit. I could be wrong about that and there may be a certain correct order to do the puzzle. I just followed the order from the YouTube video.

If you can ignore the alarm in the background (it's less audible the further you get into the level), this is a fine level. Bonus points for including backtracking, which is true for almost (if not all) every level in the game.
Attached Image: BLOOD_E3M2_1.pngAttached Image: BLOOD_E3M2_8.pngAttached Image: BLOOD_E3M2_9.png

Raw Sewage
by James Wilson

Kills: 85/85
Secrets: 5/5

And now time for the obligatory sewer level! It's pretty bland but at least it's mostly on the easier side. Just make sure that you get the Life Seed secret underwater, as this secret can become inaccessible after messing with the valves too much and this happened to me on my initial playthrough, so it was the only secret in the game I didn't get back then (leaving aside the glitchy non-registering secrets in Cryptic Passage). Luckily, this time I got it at the end of the level, as the underwater valve was still working once.

I really don't have much to say about this level. It's not as bad as other people say and it's not too difficult but it's definitely one of the weaker levels of the original game. I will give it that this level is nowhere near as bad as a certain level much later in the game, in the Post Mortem episode. You probably know which one I'm talking about and it's also very water themed, to give you a hint. More on that next month.

Also, if you have Jump Boots, I'm sure you can just skip most of this level but if you plan to get 100% completion, I recommend going through it anyway. And be careful with the Life Seed secret mentioned earlier. And also the Spider Boss that appears at some point in the level, as it spawns tiny spiders and inflates the kill count. If you don't kill the big spider quickly, there is a chance the tiny spiders may disappear somewhere in the water. Not helped by that room containing a bunch of eels that can also get glitched if not killed quickly (not very sure but tiny enemies seem to be the culprits sometimes in why you can end up with missed enemies at the end of the level). But hey, at least this time I was able to get all kills and secrets. Whereas in the past playthrough, I had both an enemy and secret missed.

Maybe the next level will get back to quality level design?
Attached Image: BLOOD_E3M3_1.pngAttached Image: BLOOD_E3M3_2.pngAttached Image: BLOOD_E3M3_3.png

The Sick Ward
by Craig Hubbard and James Wilson

Kills: 84/86
Secrets: 5/5

Well, this is probably one of the best levels in the game. I really enjoyed my time with this hospital themed map and it's one of the most memorable maps in the game. The map isn't very difficult but there are a few things to keep in mind:
-There are a bunch of innocents inside one of the secret places. You MUST kill them in order to claim your rewards. And besides ammo and health, they even drop POWERUPS! Yes, this includes a Life Seed and a Super Armor!
-Related to the secret above, I clearly remember getting a weird glitch in the previous playthrough where the cultists and innocents respawned in the secret and could claim their rewards once more! No idea how this was possible but my current guess is saving while they were burning and later when I reloaded the save, they came back again.
-Two gargoyle statues don't come to life, so maximum possible kills is 84/86 on Well Done.
-The choking hands at the end can be annoying and can lead to a painful death. Be sure to save often!
-The secret exit is found in this map, as you may have expected.

Great map! Hopefully the secret level is worth it.
Attached Image: BLOOD_E3M4_2.pngAttached Image: BLOOD_E3M4_3.pngAttached Image: BLOOD_E3M4_6.png

Catacombs
by James Wilson and Craig Hubbard

Kills: 134/134
Secrets: 6/6

This map is okay, I guess. It's not as memorable as most maps in the episode but it's somewhat decent. Also at the end, I expected a Stone Gargoyle to show up but there wasn't any, as far as I remember.

Not much else to say about this map other than I noticed a possible game breaking bug with a locked door that opens only once, though it won't affect the progression if you go through the door before it closes. Also if you are missing a few enemies, go back to the catacombs. You may notice a few zombies running around. Outside of that, I don't have much to say. What about the next map? Is it going to be better or worse?
Attached Image: BLOOD_E3M8_1.pngAttached Image: BLOOD_E3M8_3.pngAttached Image: BLOOD_E3M8_5.png

Spare Parts
by James Wilson and Craig Hubbard

Kills: 74/74
Secrets: 4/4

I didn't have much fun in this map. Design wise, it's interesting. But the gameplay is miserable with lots of dickish traps, mostly involving dropping enemies silently behind you and having plenty of environmental hazards, most notably lava and crushers (one crusher didn't even hurt/kill me for some reason). There is no safe place in this map and it's just annoying from beginning to the end. Even on my past playthrough, I wasn't impressed with this map too much. But I don't recall being this damn annoying at that time! Oh yeah and another annoying thing is being forced to grab the Super Armor TWICE but this time I found a way to bypass one of the pickups, so I can keep one SA for the end of the level.

I'm not going to say more, as just thinking about this map gives me a headache. I didn't like it at all. Hopefully the next map is better!
Attached Image: BLOOD_E3M5_1.pngAttached Image: BLOOD_E3M5_3.pngAttached Image: BLOOD_E3M5_5.png

Monster Bait
by James Wilson and Terry Hamel

Kills: 77/77
Secrets: 5/5

Well, this was a much better level. But still frustrating at times with the cultists everywhere, ready to slaughter you. Like the part you take an elevator, only to get blasted by two cultists waiting. Bullshit.

Highlights include a weird puzzle towards the end that I couldn't figure out on my own and had to look up YouTube or read the Blood Wiki's answer to solve it. Oh and the dam at end is quite impressive, so impressive that I had to look up YouTube again just to see where the exit was. :P

I wish I had more to say about this map but even if gameplay was so-so, it was far better than the previous map.
Attached Image: BLOOD_E3M6_1.pngAttached Image: BLOOD_E3M6_2.pngAttached Image: BLOOD_E3M6_5.png

The Pit of Cerberus
by James Wilson and Craig Hubbard

I had no idea who Cujo was until I looked on the Blood Wiki. I simply did not get the reference at that time and assumed it was Caleb's dog or the nickname he gave for the boss or whatever.

Anyway, final level time! You get to fight a couple Hellhounds, press a couple switches and fight Cerberus, who might as well be the father of the Hellhounds! Interestingly, his fire doesn't do as much damage as the Hellhounds if you get near him (coding mistake, I guess?) but don't worry, as he has an attack that will surely terminate you almost instantly! Yep, he fires Napalm shots at you, two in fact that will vaporize you even if you have plenty of health and Fire Armor! Not much different from Doom's Cyberdemon and Duke's Cycloid and if you survive, you will surely get blinded from how much damage you take at once! Because Blood's red screen of death (heh) is closer to Doom and Shadow Warrior rather than Duke Nukem 3D, in terms of the hurt intensity. As in 2-3 seconds of red screen at instant death or just taking lots of damage at once (like 100 or more hp lost).

Luckily, this time I was able to "cheese" this fight a bit by standing far away and firing Tesla. He was just chasing his tail or something and almost ignored me until one of his heads died and then he finally became aggressive. Remember how saving and loading will reset the enemy's health? Well, this time, if you save with one of his heads destroyed, he will still have less health instead of a full recovery, so you don't have to worry about wasting your ammo. Just shoot him with the Tesla Cannon and he will eventually die. Oh yeah, not going to imagine how is pitchfork start but I know I have seen someone on YouTube who managed to get near him and pitchfork him to death. Oh nevermind, I learned this trick and did this too later on in the fourth episode by abusing crouch glitch against the Cerberus while pitchforking him to death. More on that much later.

Oh and as is the case with most boss maps, there are NO secrets to find!
Attached Image: BLOOD_E3M7_1.pngAttached Image: BLOOD_E3M7_2.pngAttached Image: BLOOD_E3M7_3.png

E3 Overall: Once again, the level design is pretty good in general. Except for the fact this episode had a few weaker maps than usual but the good maps are still good and very fun to play. There is a tiny decline when compared to E1 & E2 but nothing too serious. And the good news is the later episodes are also pretty consistent in terms of quality, yes even the Plasma Pak episode which is generally seen as a mixed bag. But more on that next month when comes the time to play the remaining episodes!

As bonus trivia, you can get all the kills in every level in the third episode. With the exception of E3M1's glitchy secrets and E3M4 that had two Gargoyle Statues, every level can be cleanly 100%'ed. There are no more disappearing enemies unless you get unlucky.

The only E3 level I completed without dying was E3M3. I don't think I managed to do any other E3 map without dying.

Blood (E1-E3) Overall: Very Good. The game has plenty of well designed levels and only a few really weak ones. But I will also admit that there are some balance issues and weird mechanics that I don't enjoy much at Blood. More on that next month when I give the final conclusions to Blood.

Speaking of which, BLOOD WINS...AGAIN! Thanks everyone for participation and see you on the August 2023 edition of the club!

This post has been edited by FistMarine: 31 July 2023 - 08:16 AM

1

Share this topic:


  • 2 Pages +
  • 1
  • 2
  • You cannot start a new topic
  • You cannot reply to this topic


All copyrights and trademarks not owned by Voidpoint, LLC are the sole property of their respective owners. Play Ion Fury! ;) © Voidpoint, LLC

Enter your sign in name and password


Sign in options