Duke4.net Forums: Creating Landscape Terrain - Duke4.net Forums

Jump to content

Page 1 of 1
  • You cannot start a new topic
  • You cannot reply to this topic

Creating Landscape Terrain  "How to create landscape terrain."

User is offline   Graphics 

#1

I'm about to explain a basic lesson on landscape terrain mapping. This lesson doesn't explain how to made all the parts you'll work with. That takes little geometry and math. It's a lot of work and I'll explain that later. But for now, please enjoy this how to.

1 : First thing you'll need are these maps to use with Mapster32. They come with an example and the landscape parts you'll need to build terrain with. Here's a link to the maps.
Attached File  Creating Landscapes v0.1.zip (140.26K)
Number of downloads: 260

2 : Then you'll need to do expand the grid map in Mapster32. There is more then one way to do this. I prefer opening the Mapster32 configuration file. Open this file with Notepad.
Posted Image

3 : Once you've open the file. Look for editorgridextent and change the number to 524288. This will expand the mapping grid to it's max. Allowing you to work with the landscape parts.
Posted Image

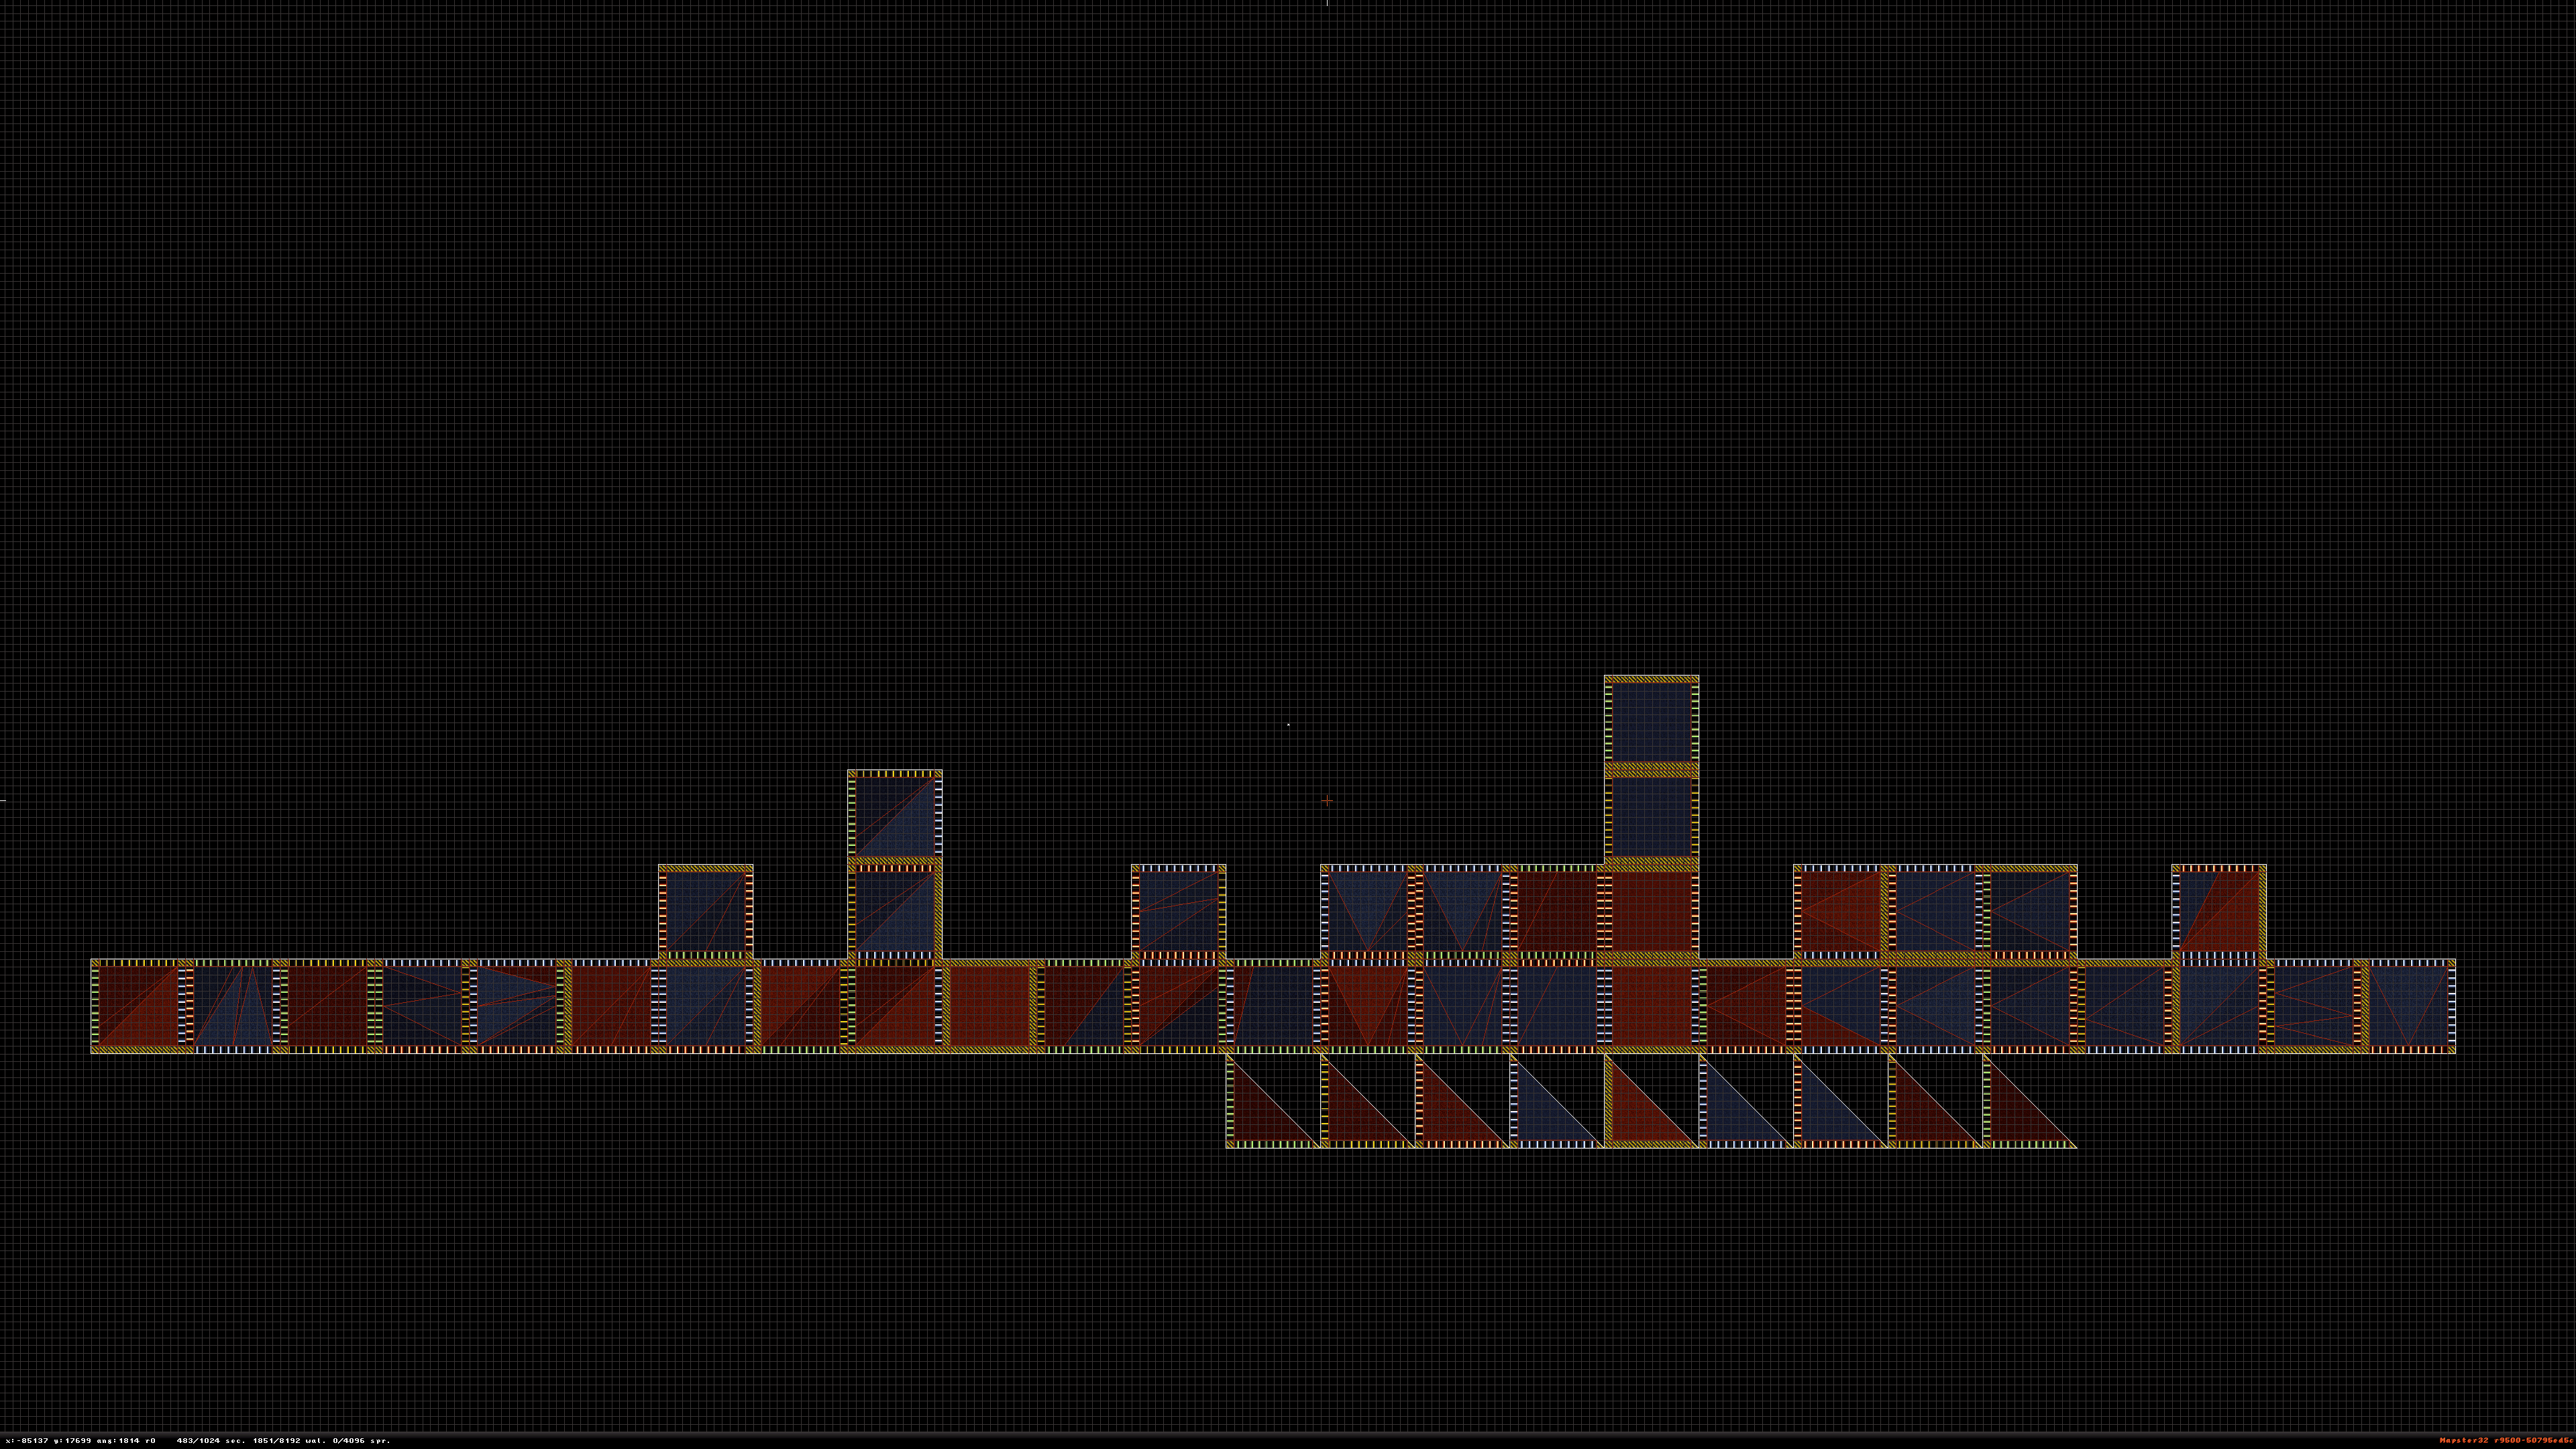
4 : Now go to mapster32 and open the map file Landscape-Lago.v0.01 You'll then see all the BETA landscape parts I've created. This is unfinished work. But it's already capable of making terrain.
Posted Image

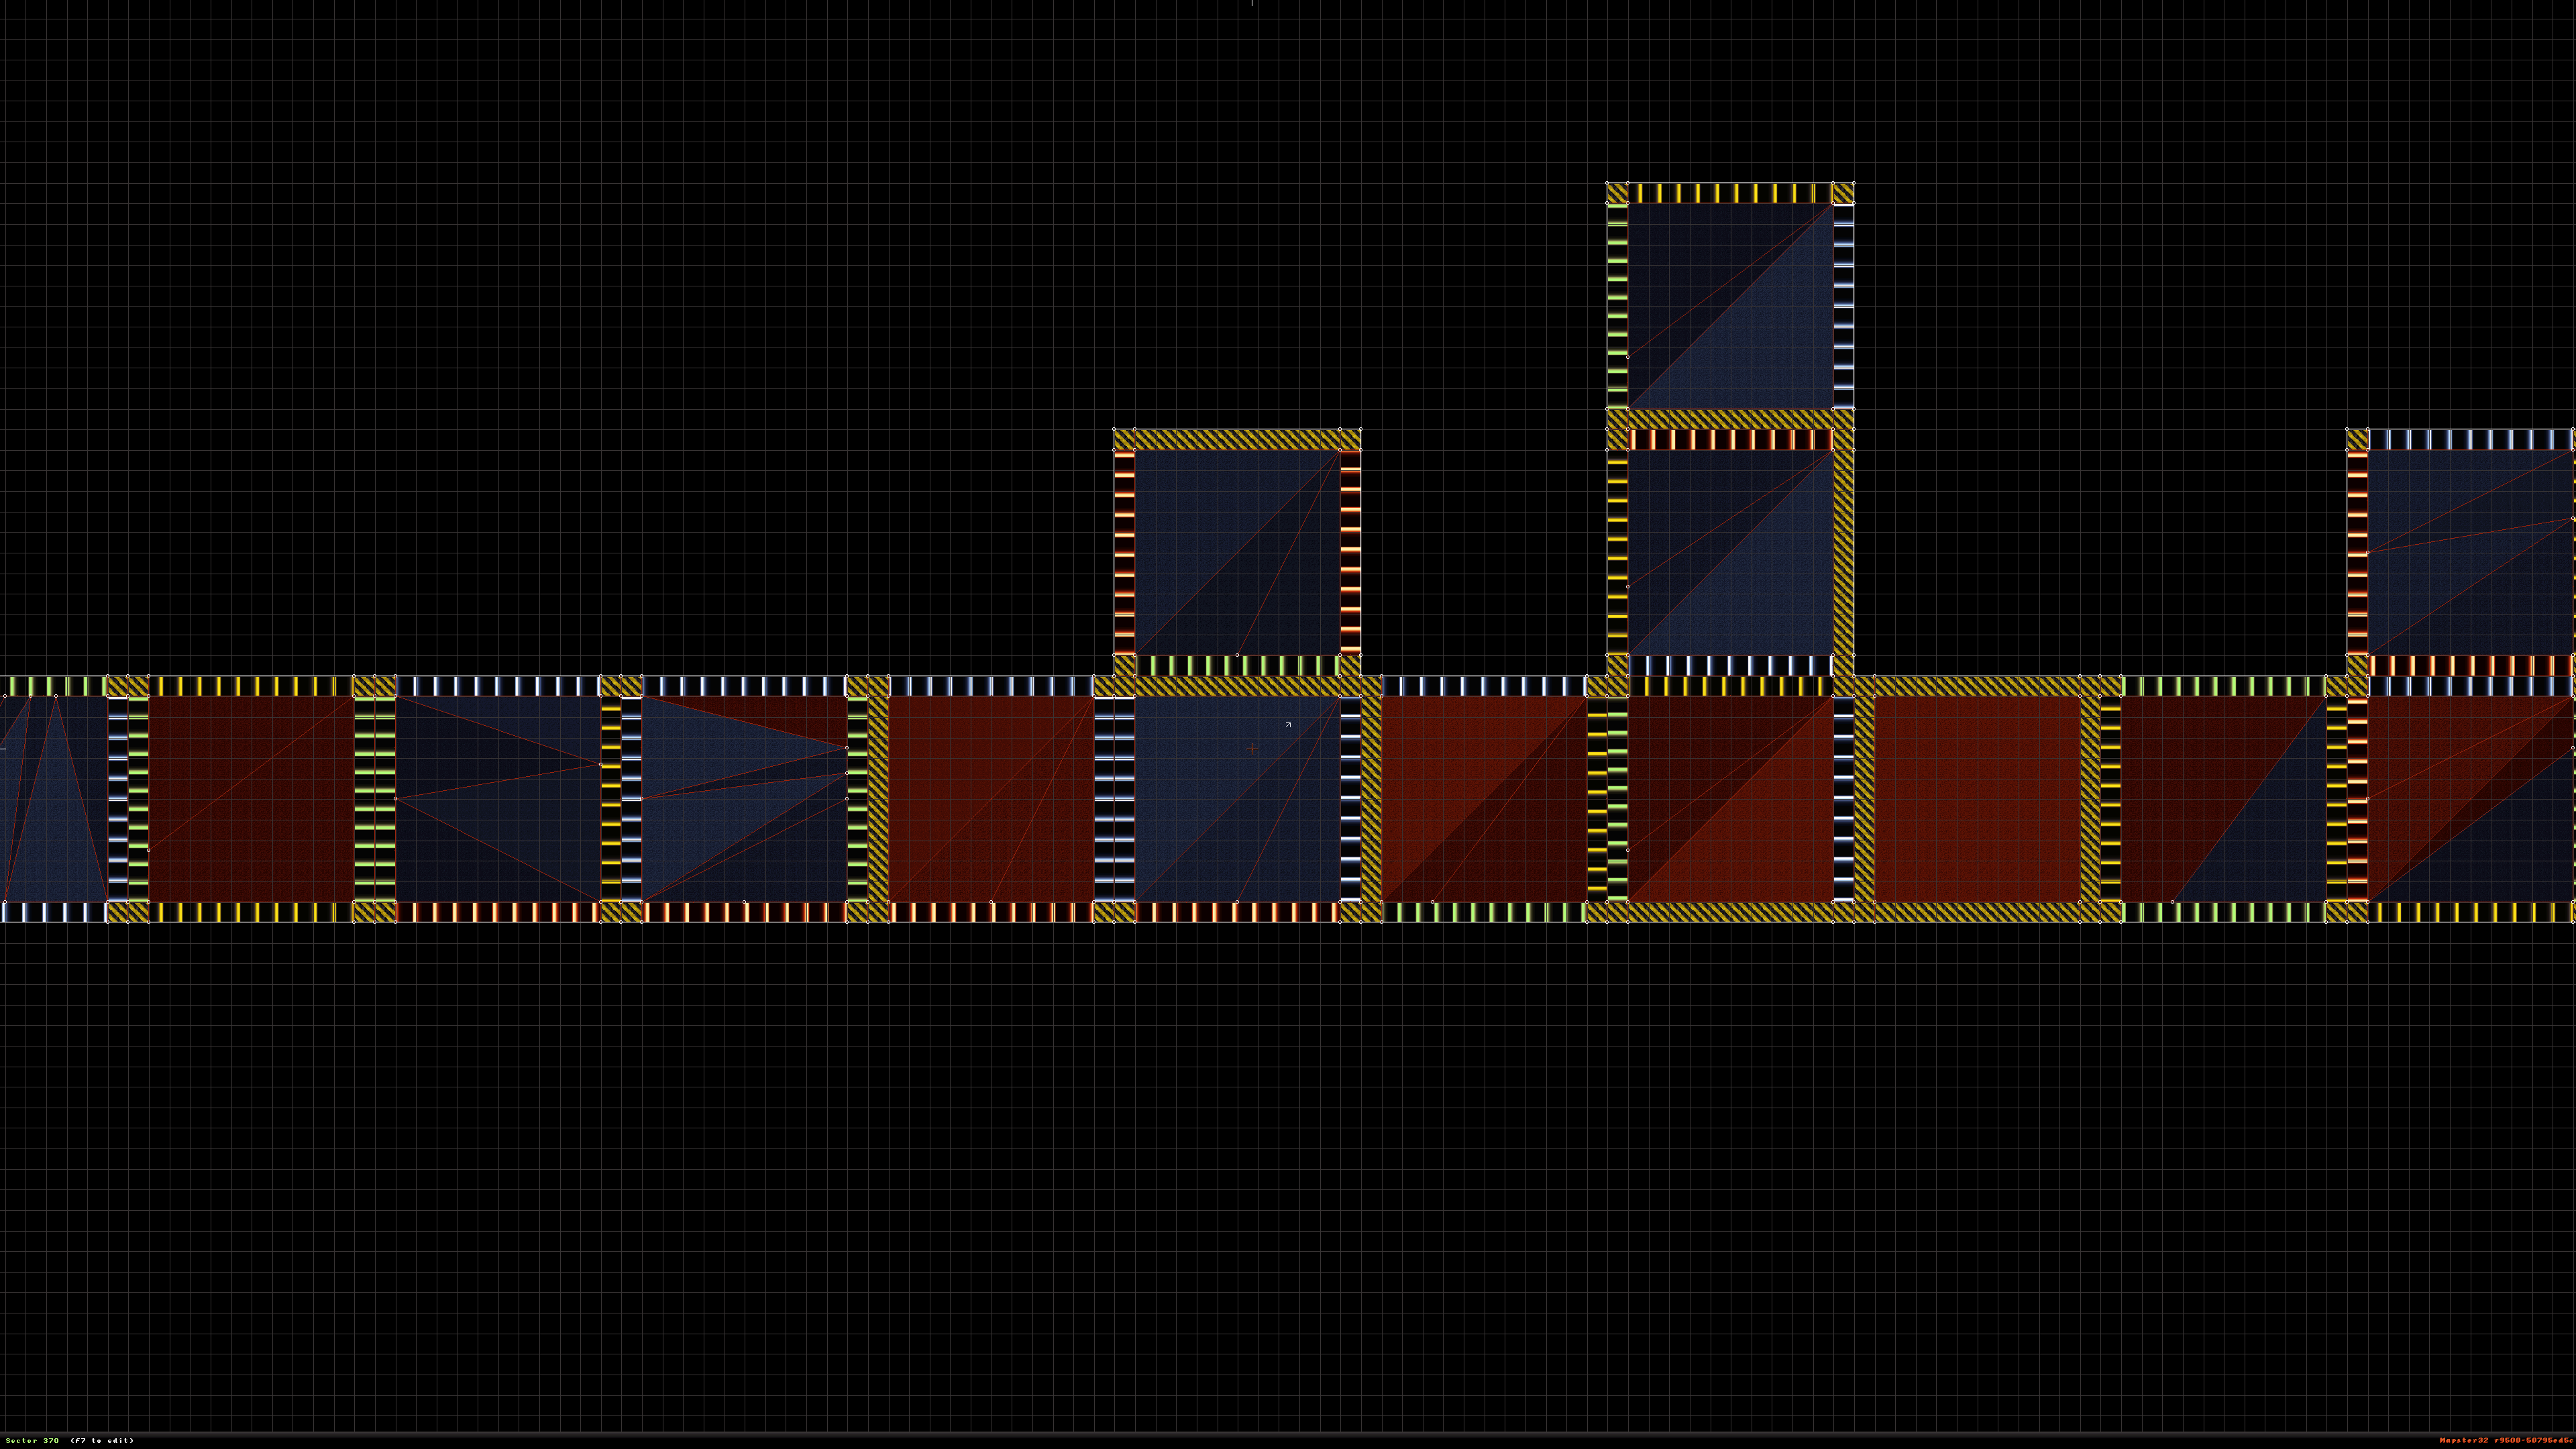
5 : You'll notice each landscape part has a moving color. This let's you know how high the slope is well also telling you what direction it's going in. This will be important in construction.
Posted Image

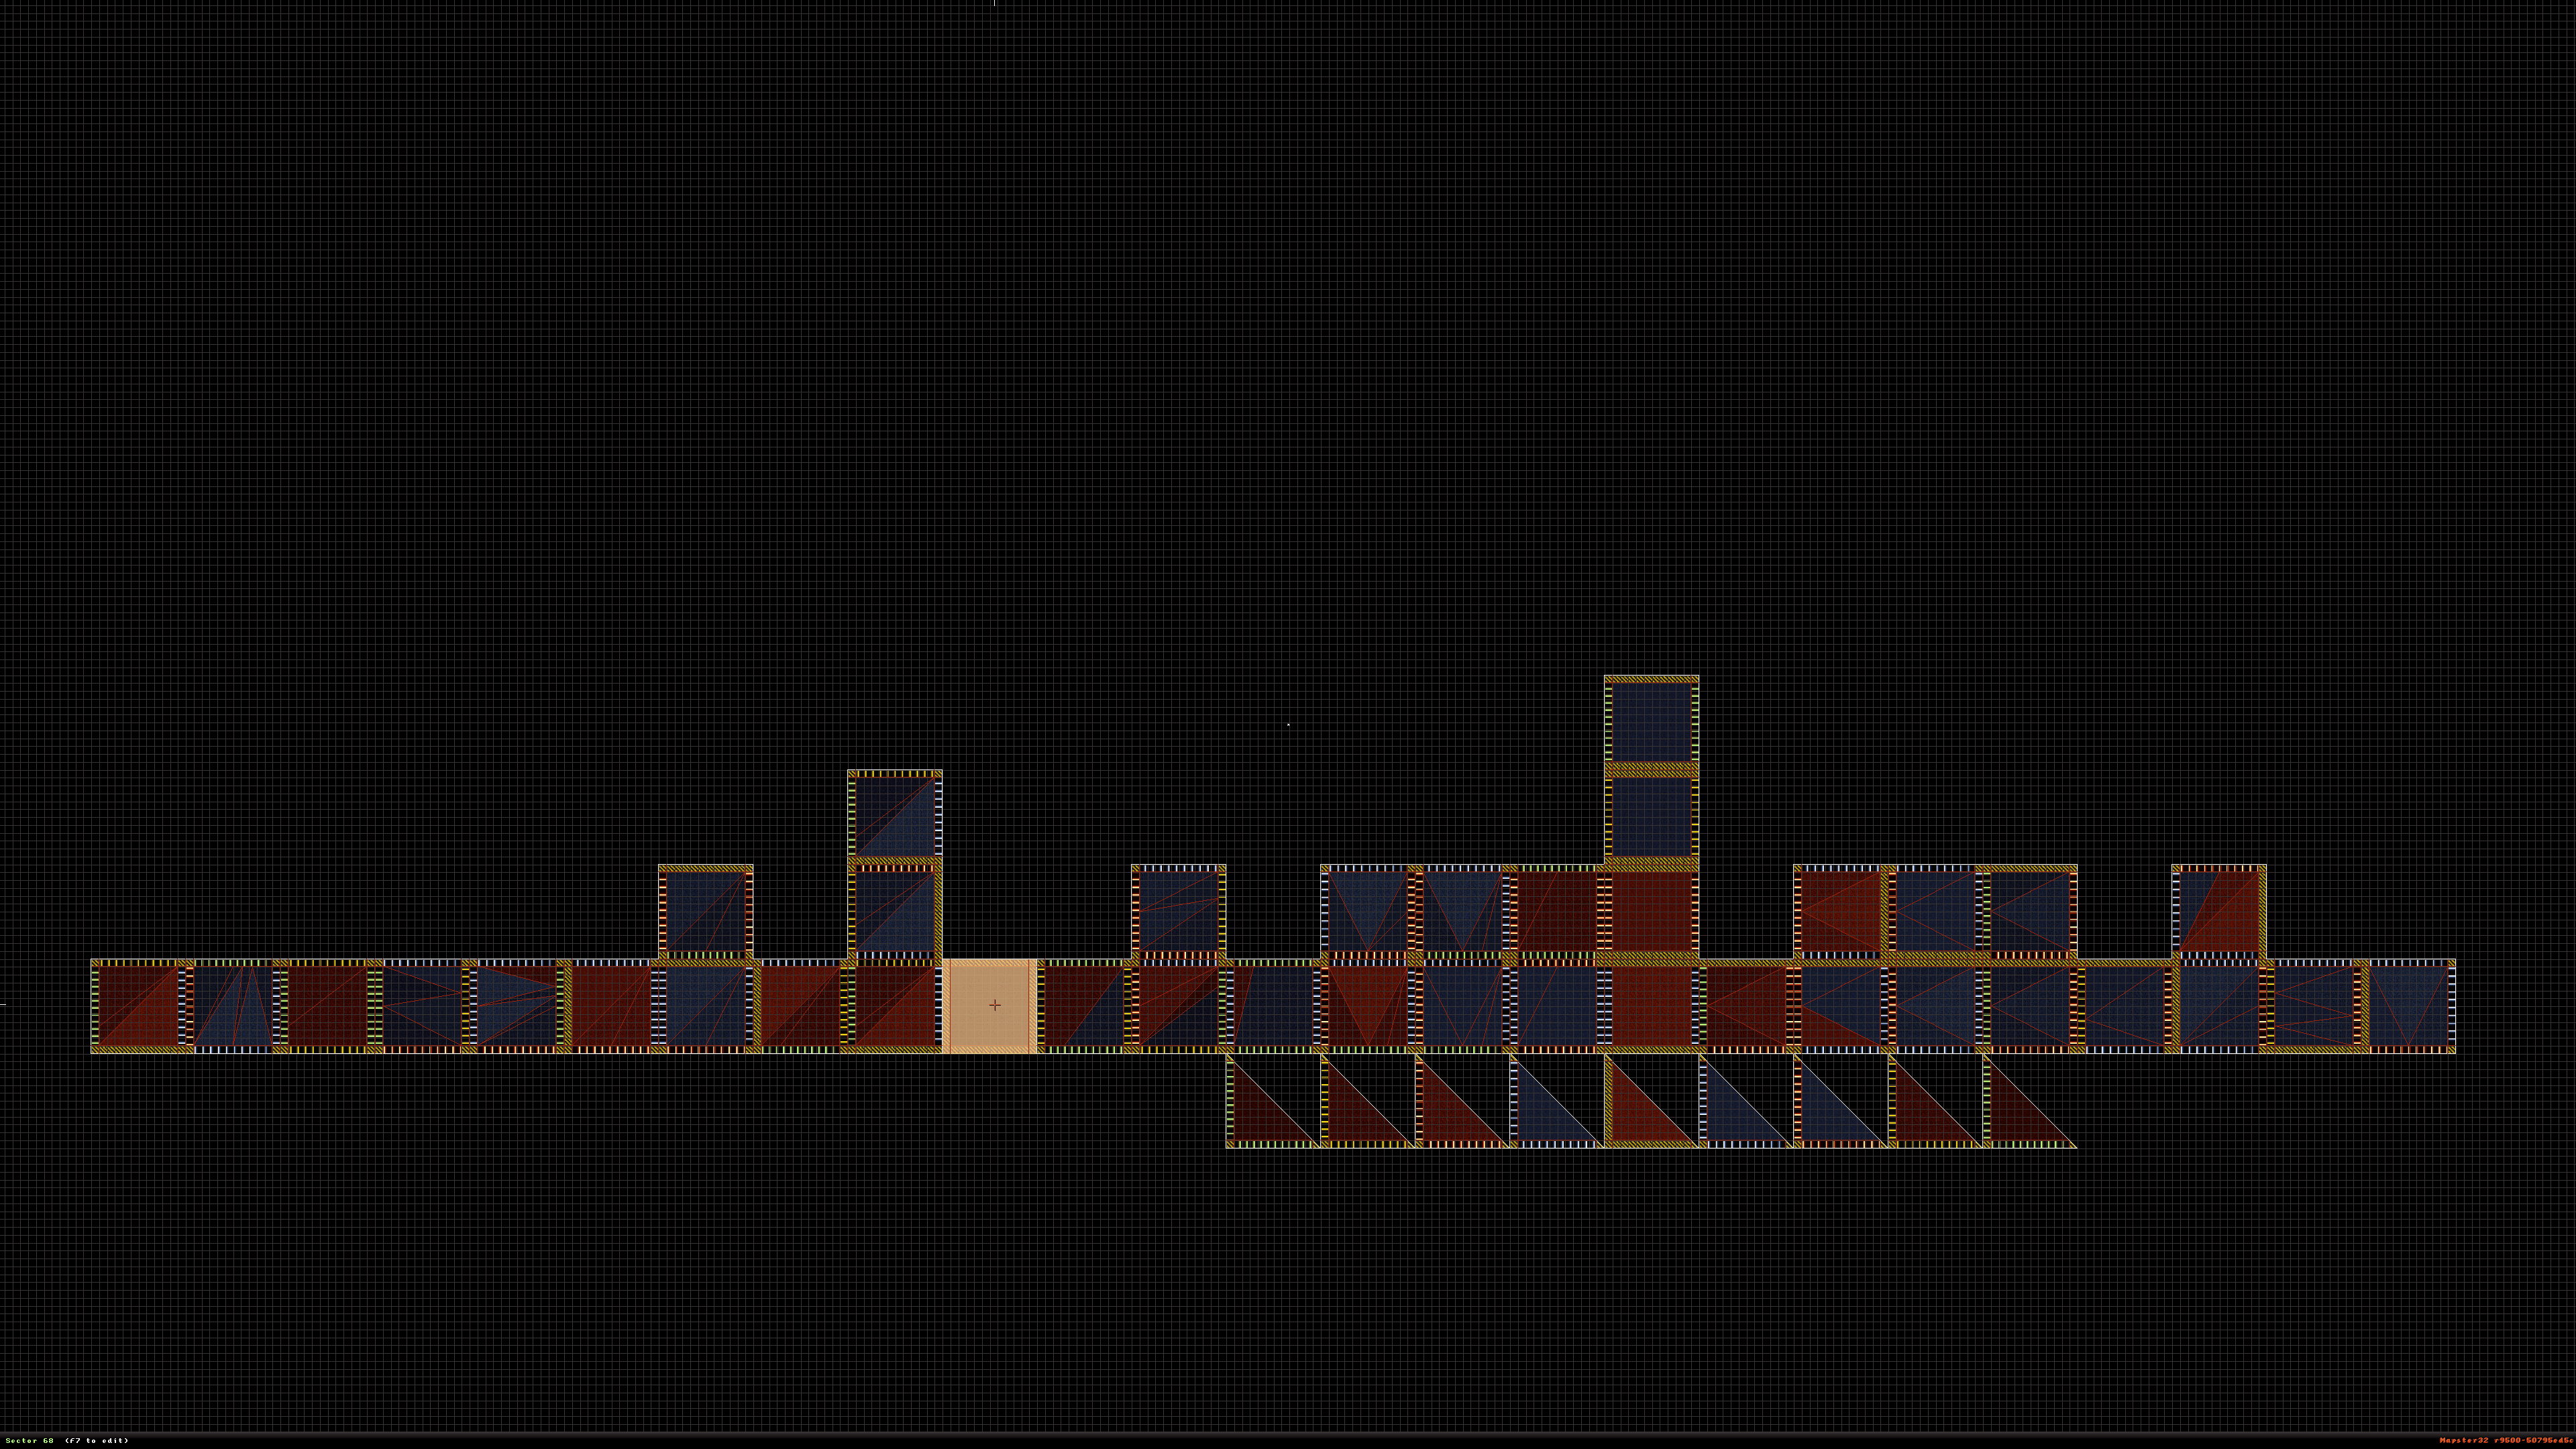
6 : You can choose from any part to start with. Because this is a tutorial we'll going to start with a flat landscape piece. Press and hold Right-ALT to highlight the selected landscape part.
Posted Image

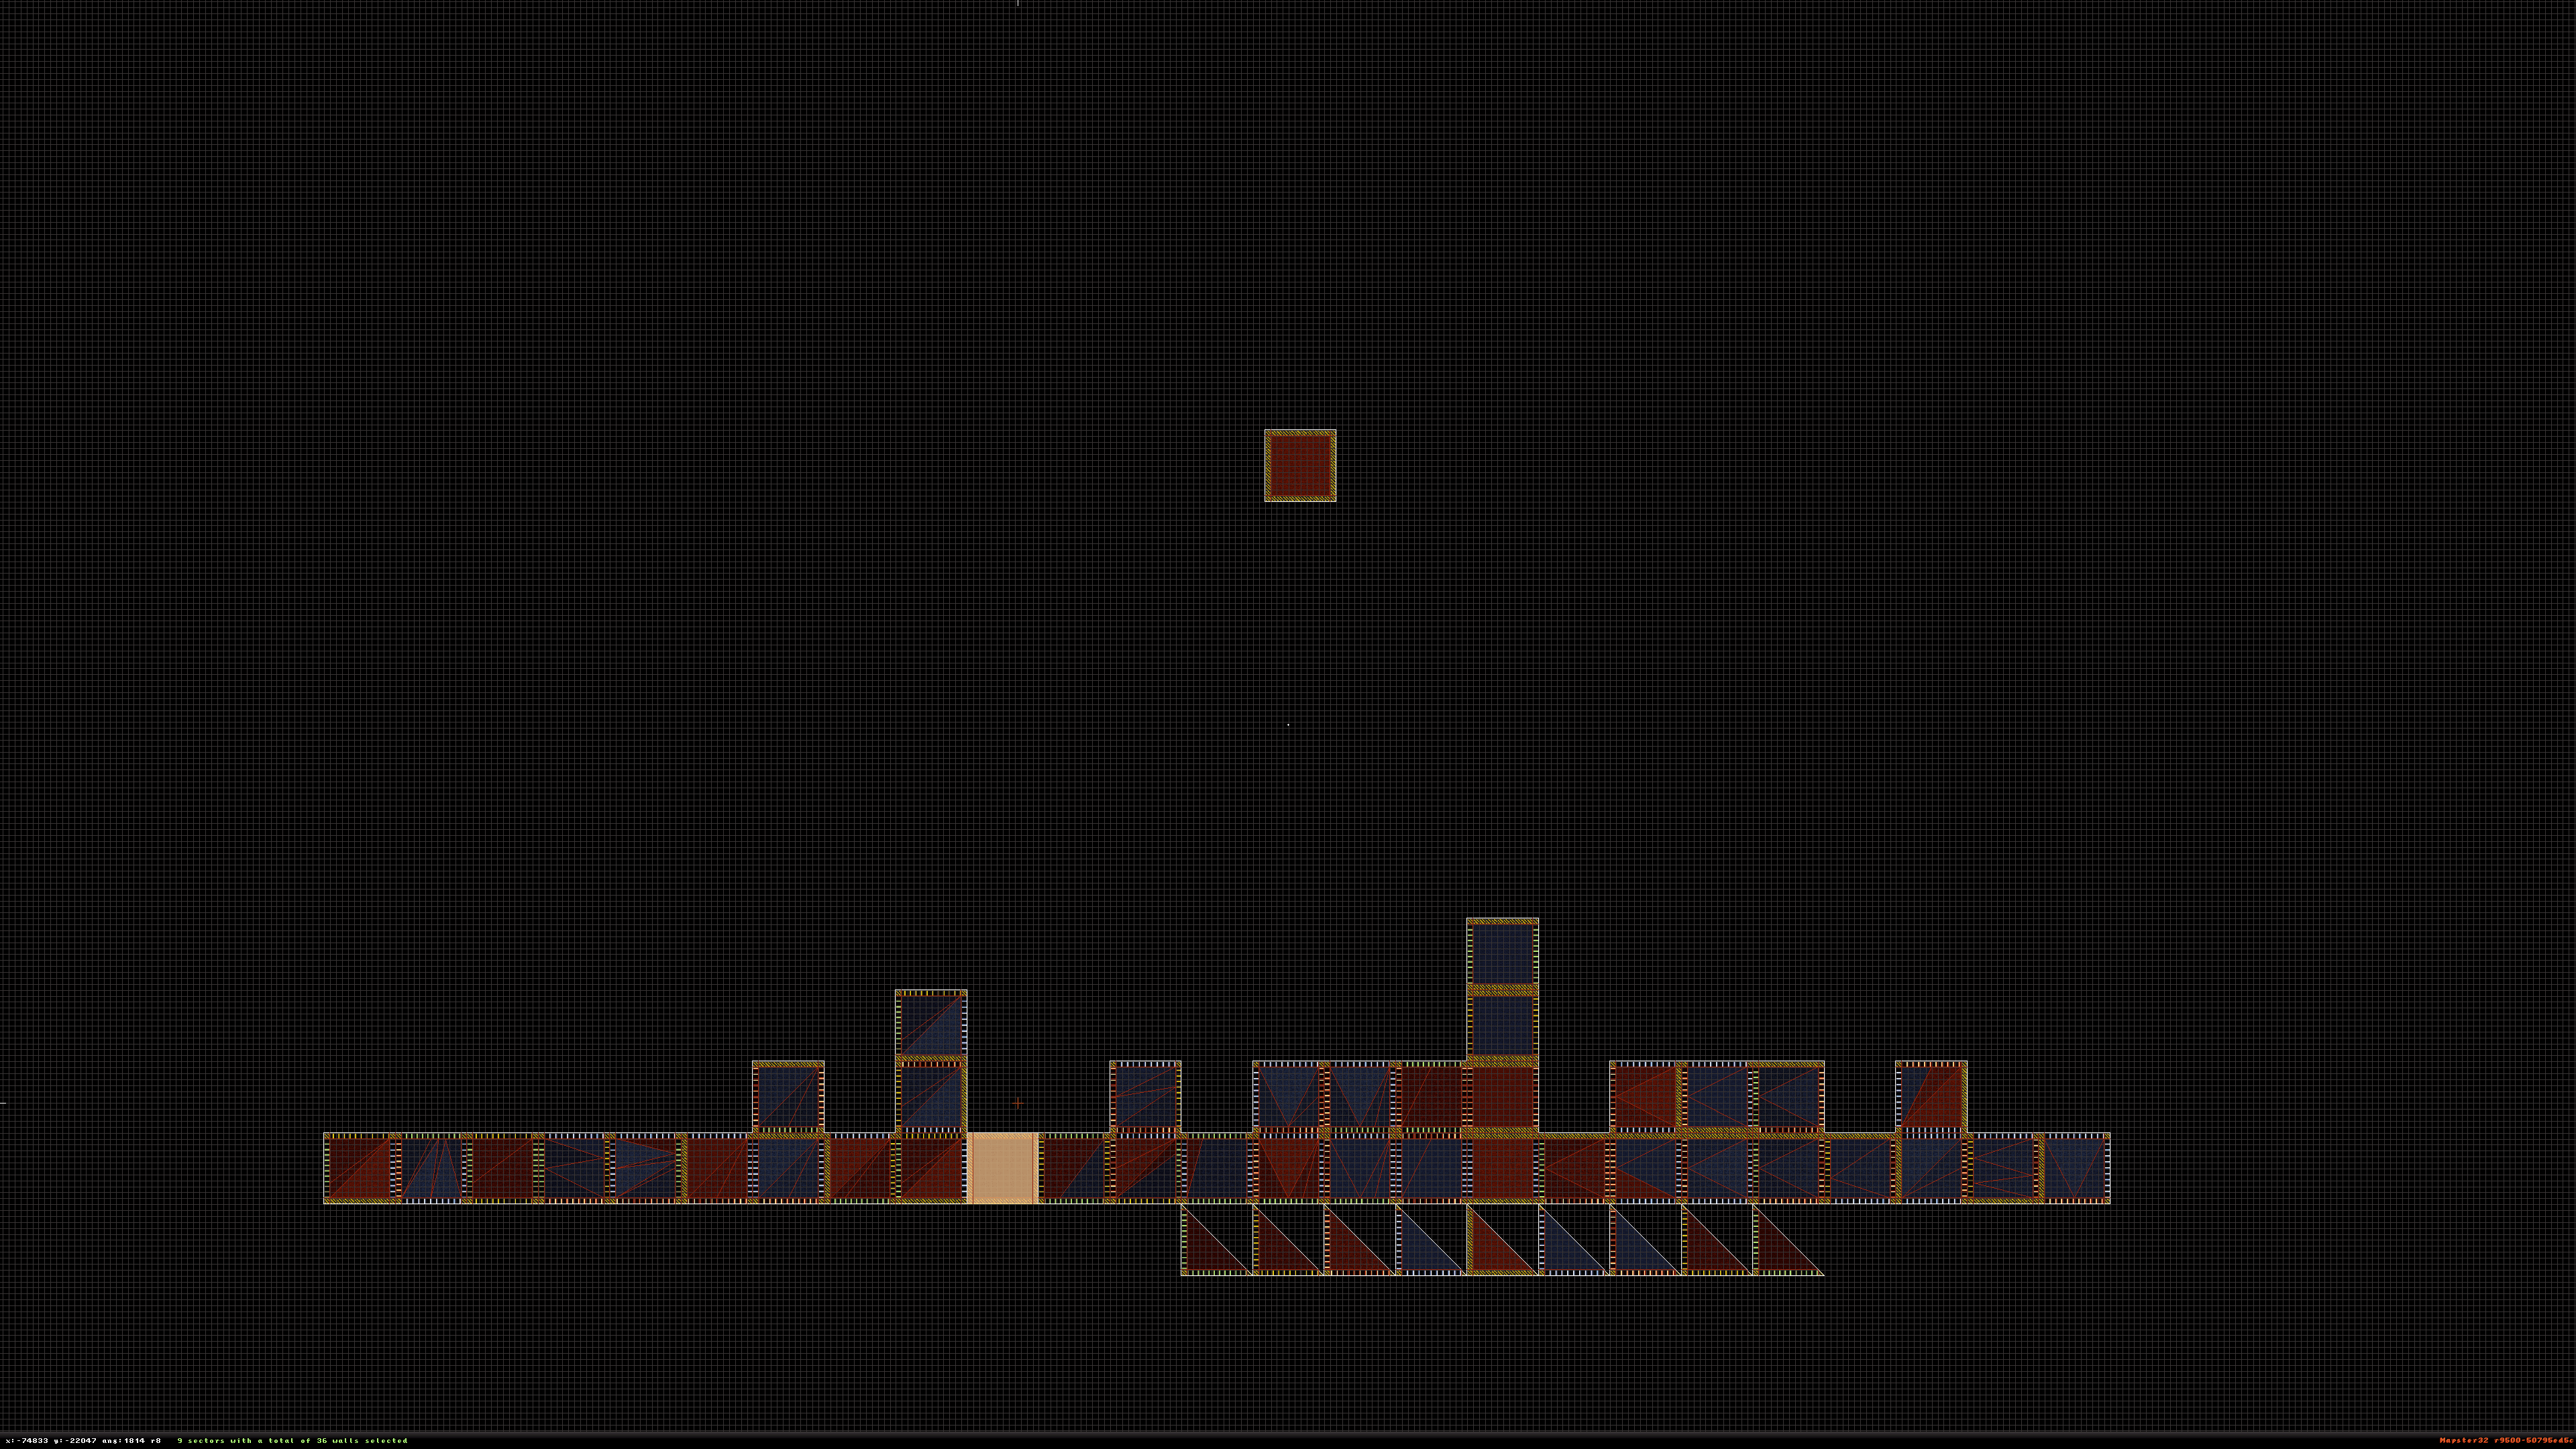
7 : Next you're going to need to place the part down in the area you want to work in. Well highlighted copy the landscape part by pressing the Insert key. Then put it back with the other pieces.
Posted Image

8 : Remember those colored moving sides? Look for a landscape part with a matching side and connected to your first piece. Remember to keep it highlighted at first. You'll need to level it.
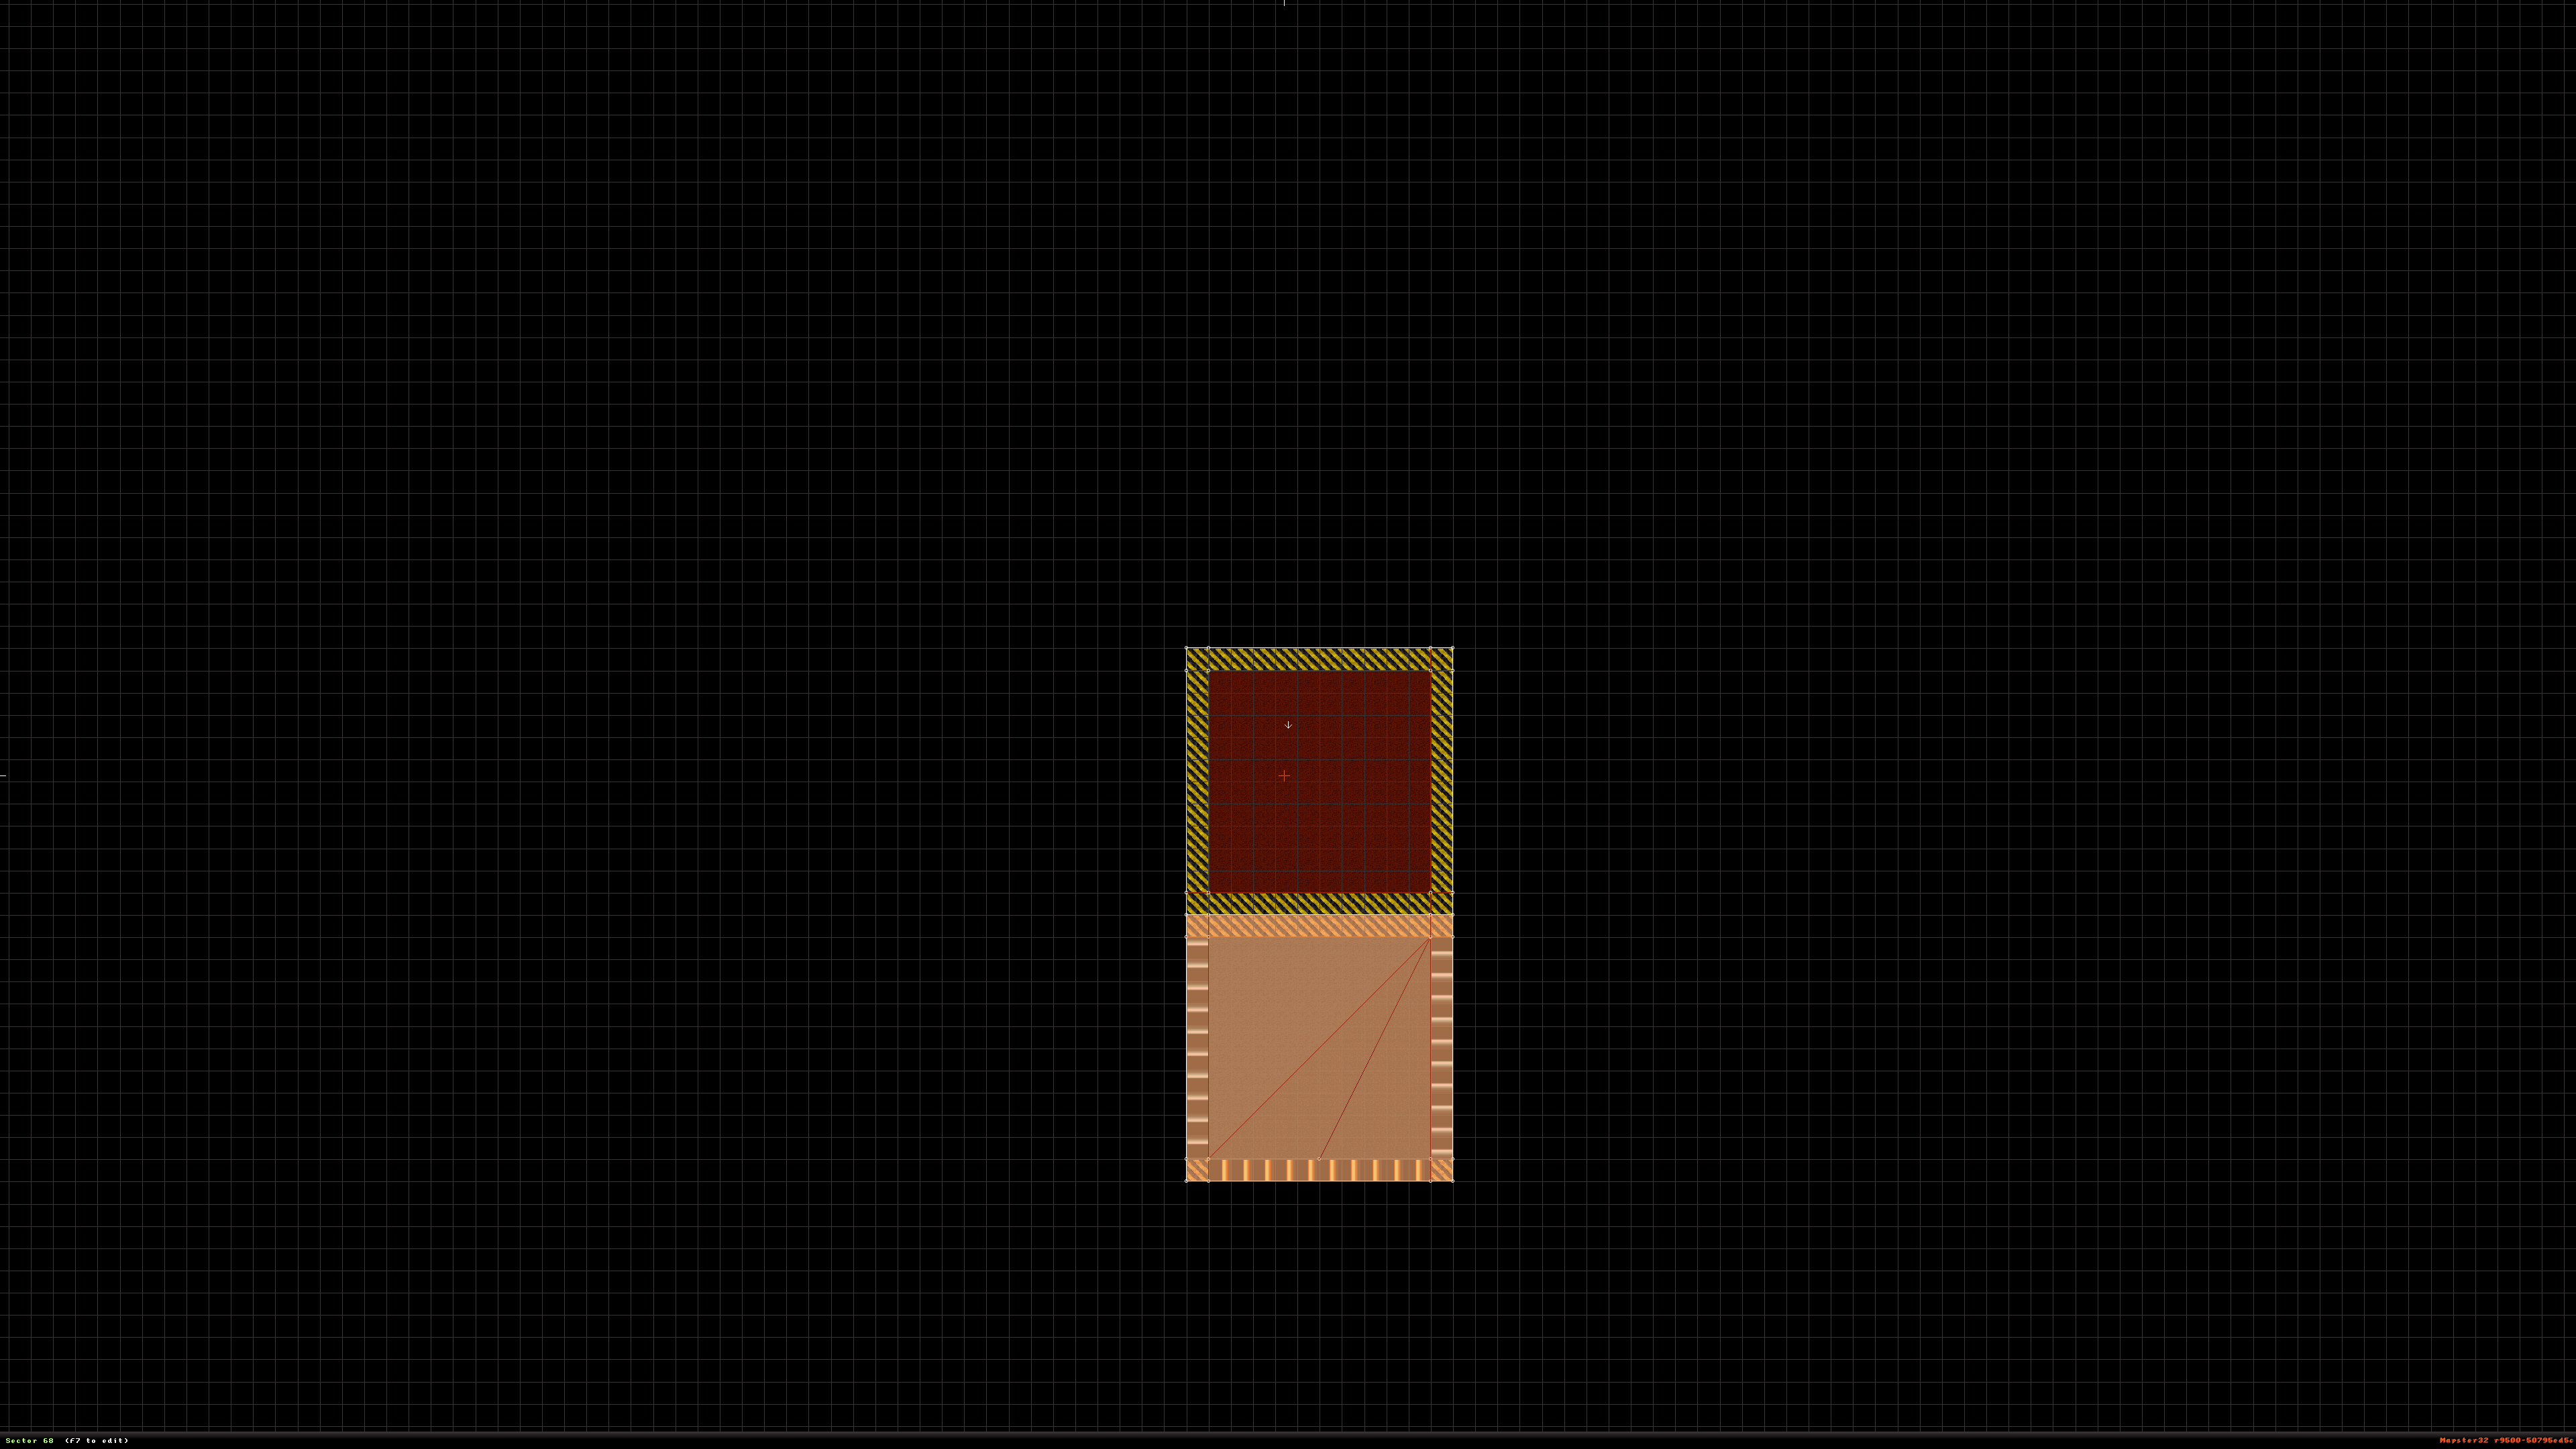
Posted Image

9 : The reason we keep this highlighted is because we're going to need to level it with the attached sector in 3D mode. Highlighting it allows you to raise or lower all sectors at the same time.
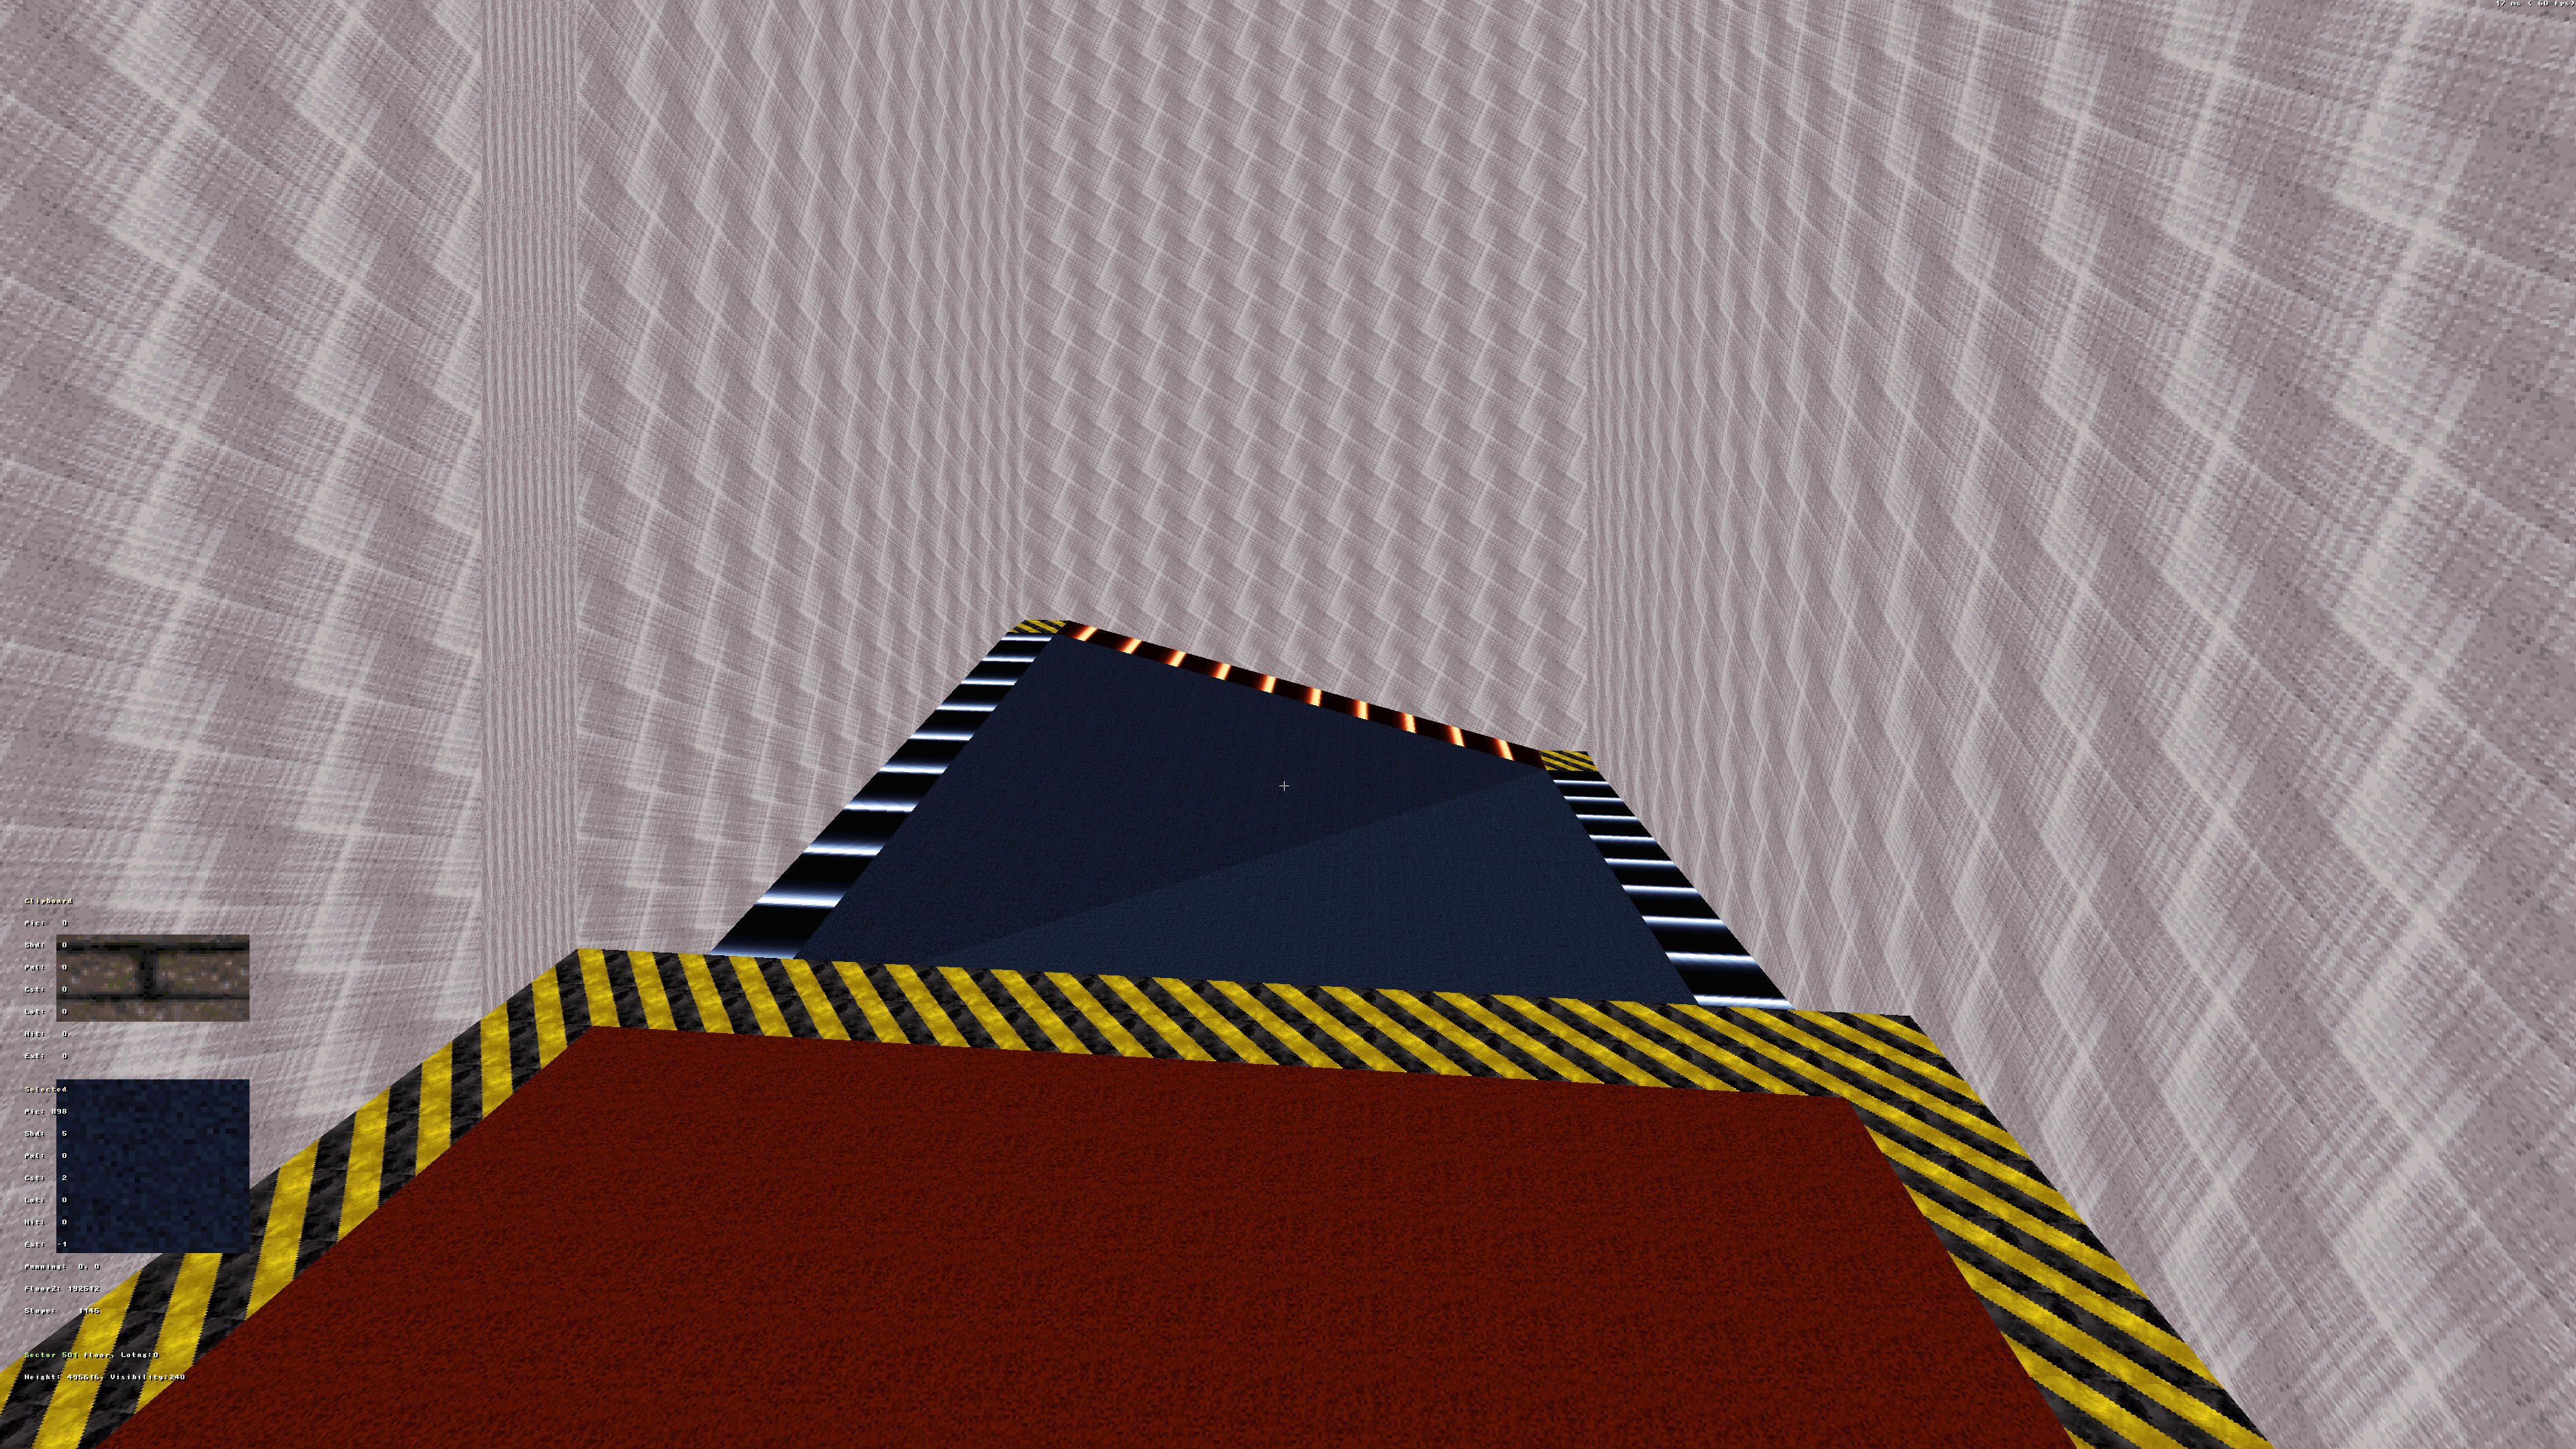
Posted Image

10 : Once your heightened sectors are leveled into place. It should look like this next picture. Now you've complete your first link and you're on your way to creating landscape terrain.
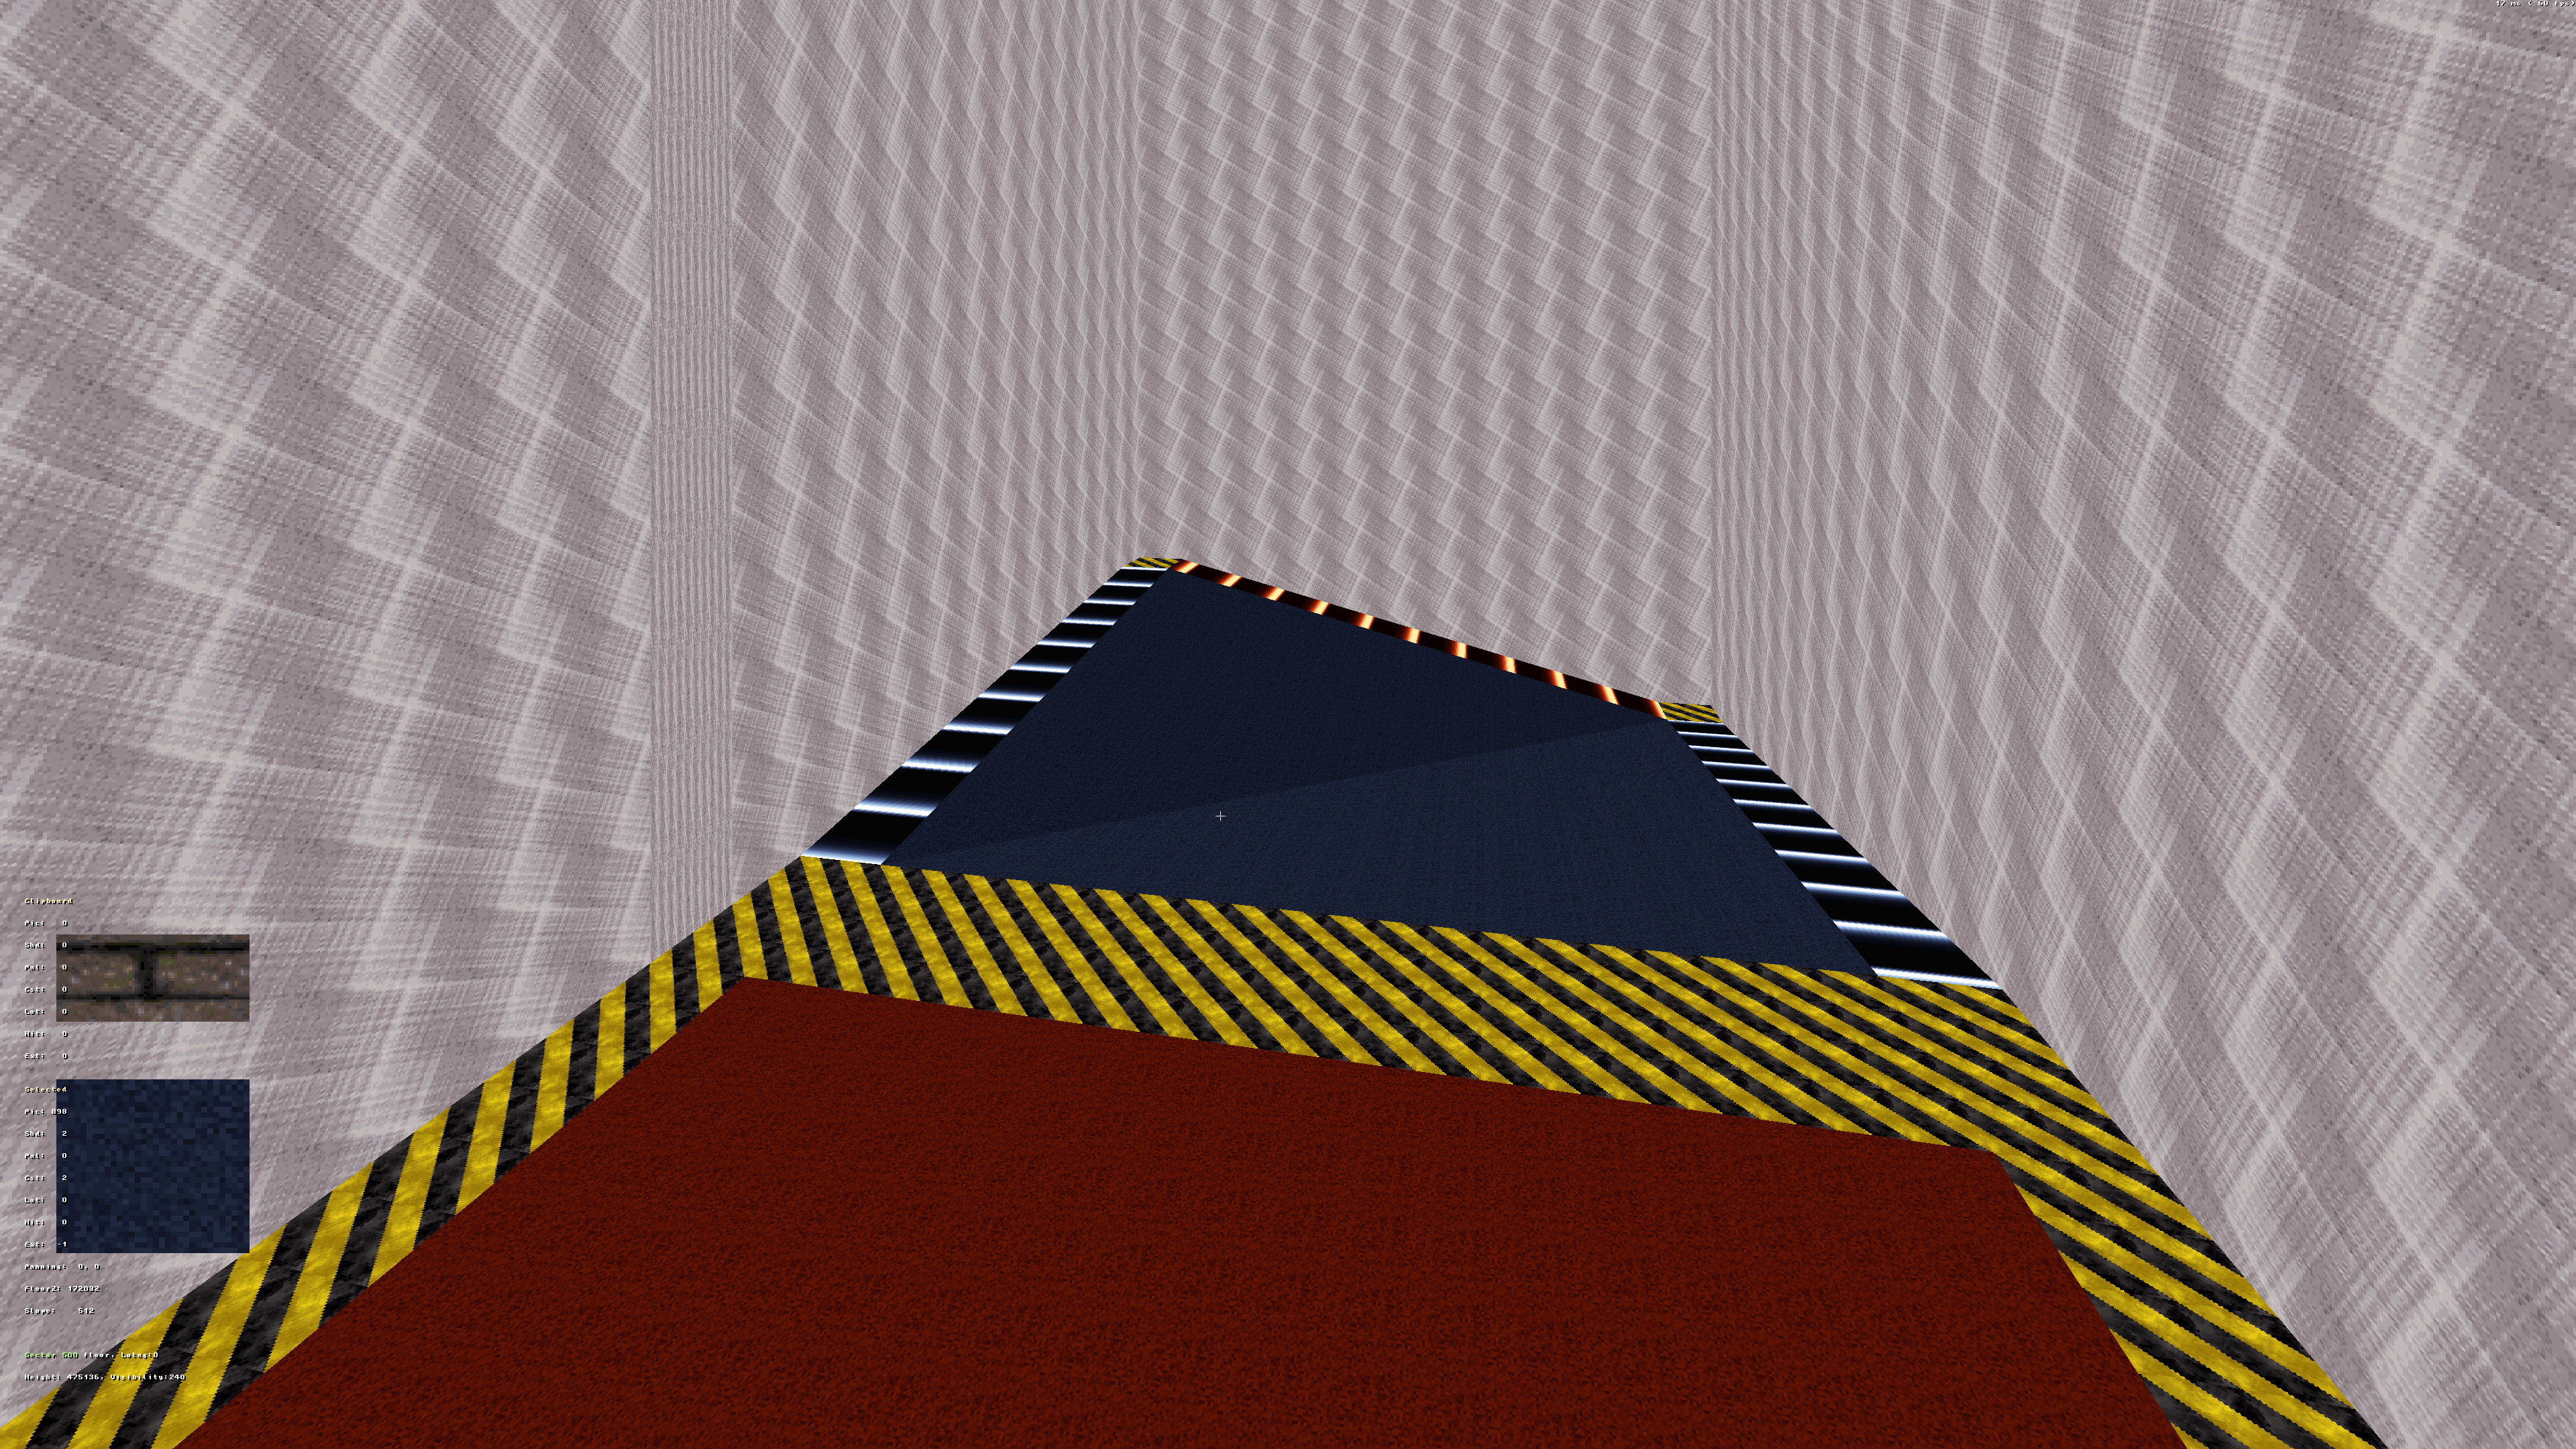
Posted Image

11 : Keep connecting pieces until you've created a landscape. After some time your map will look something like this. Though presentable it's not completely done yet.
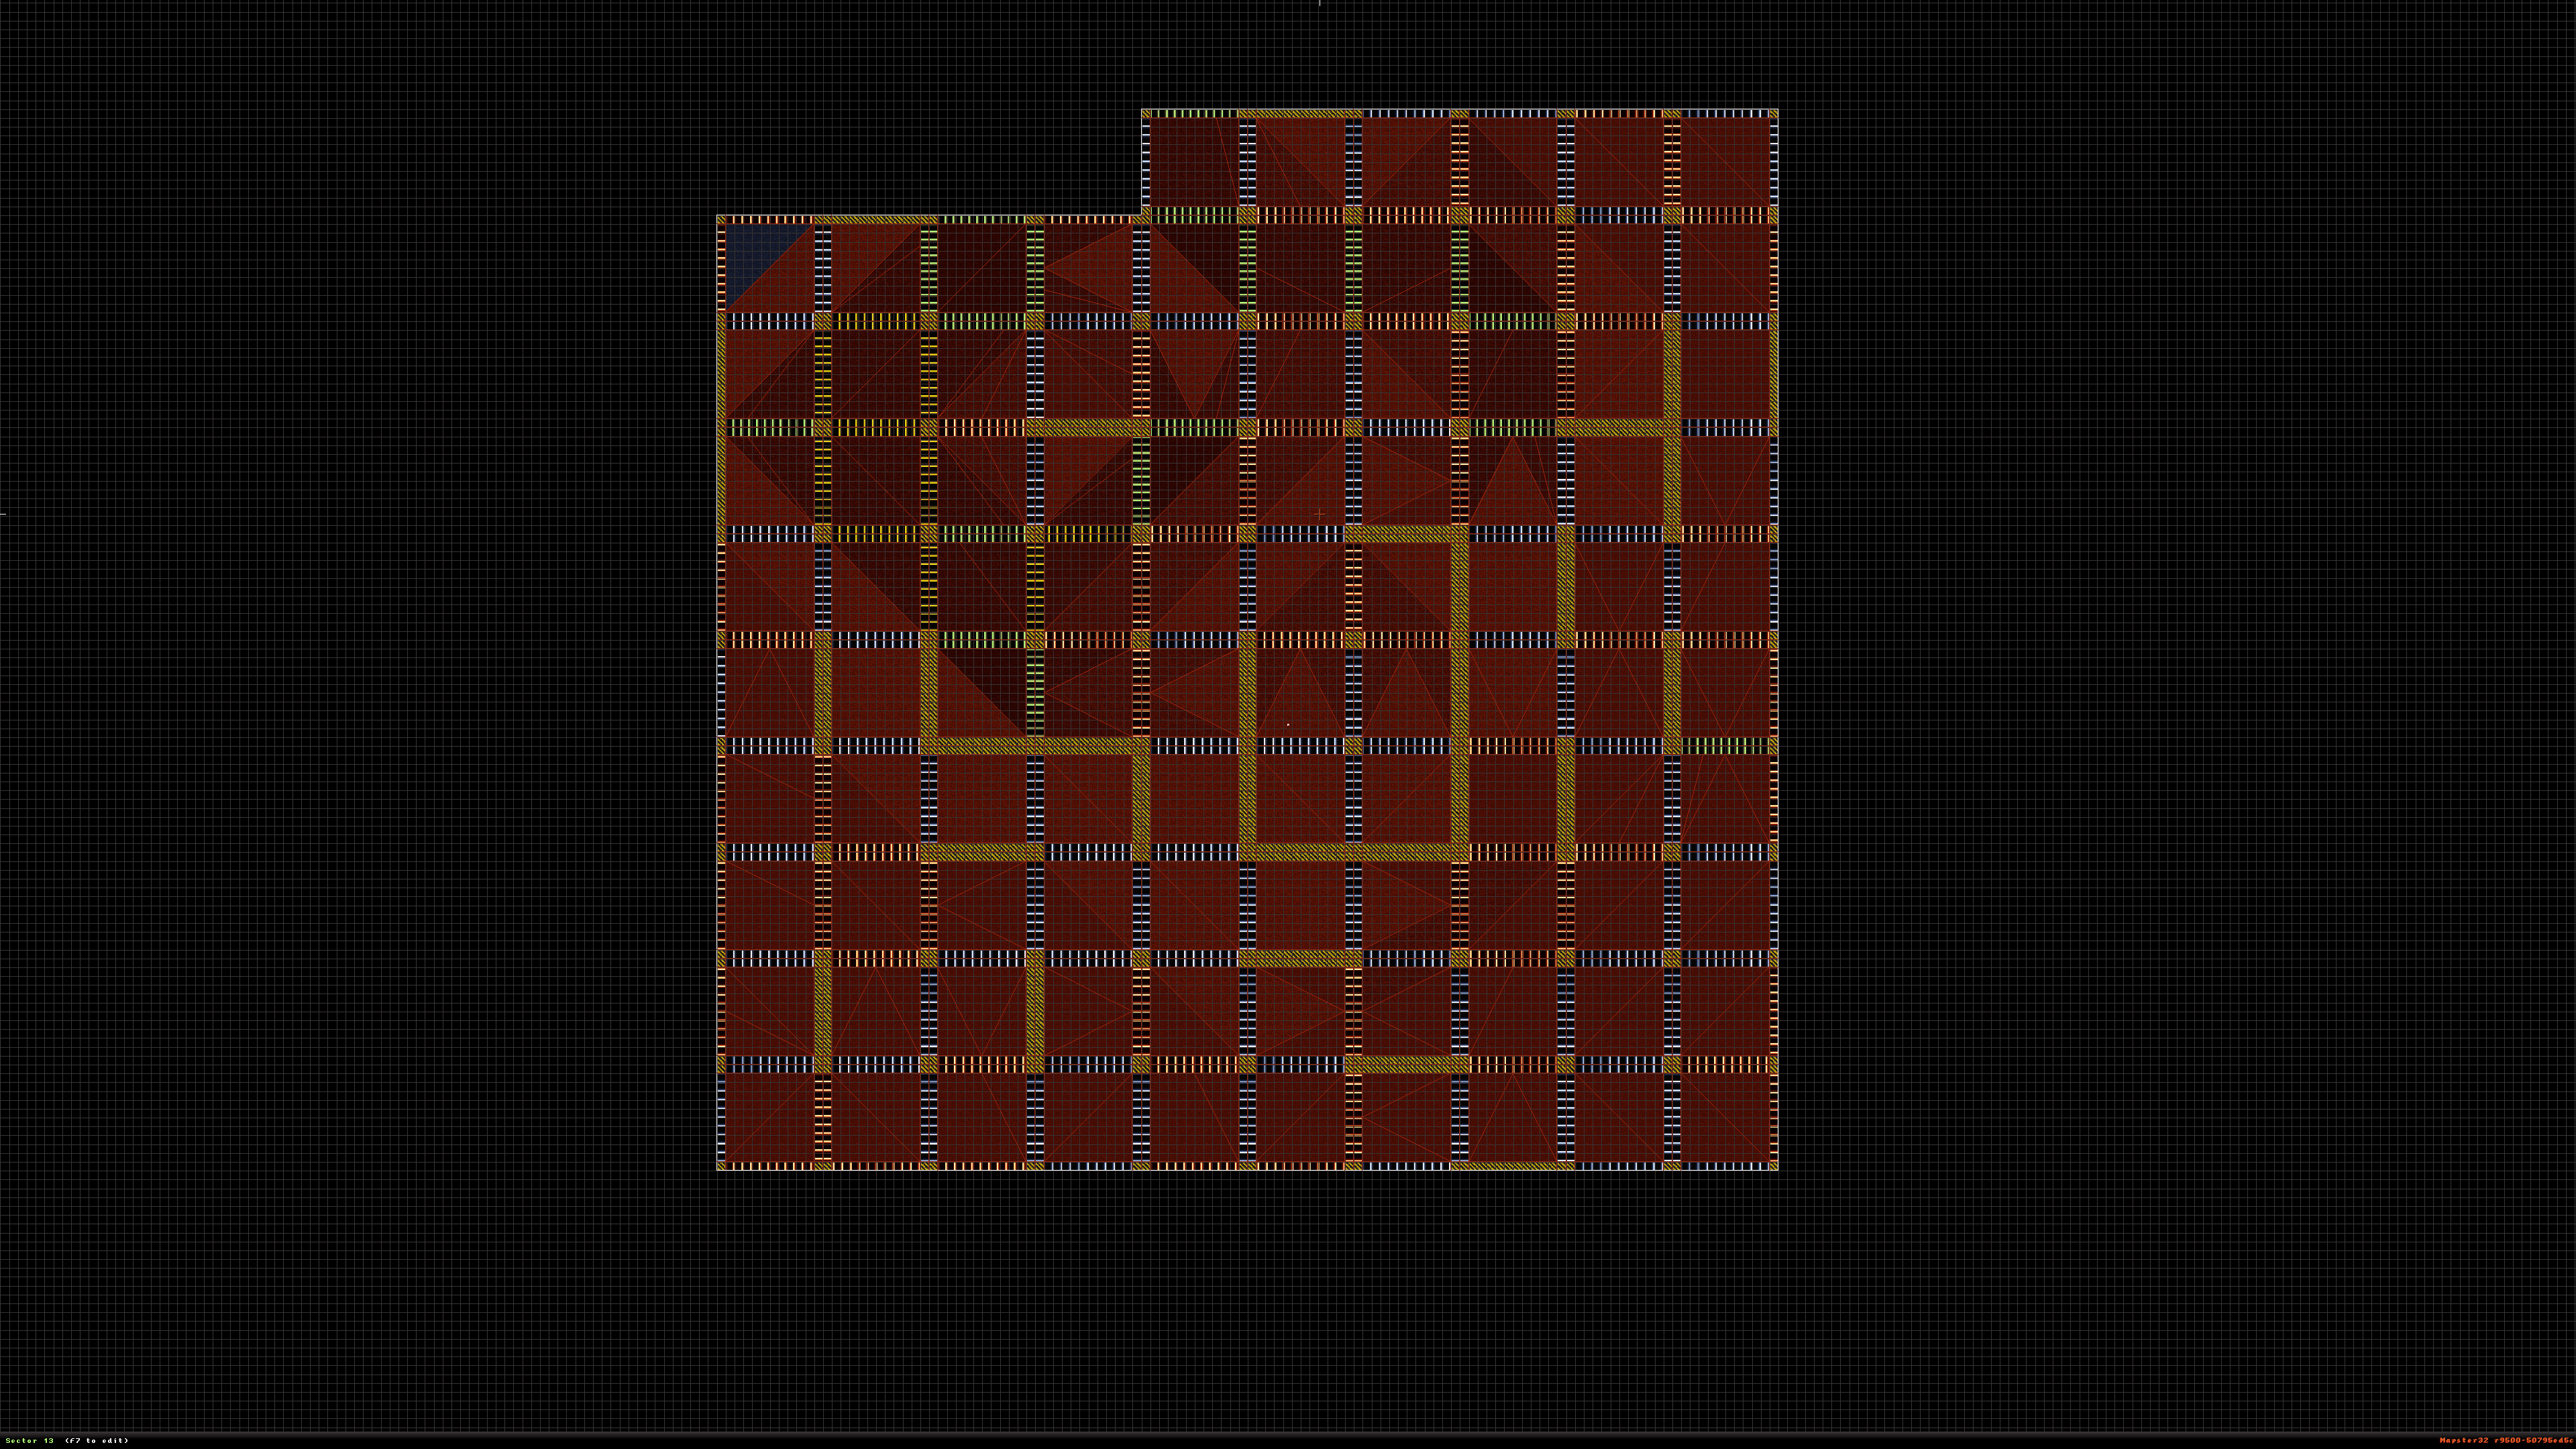
Posted Image

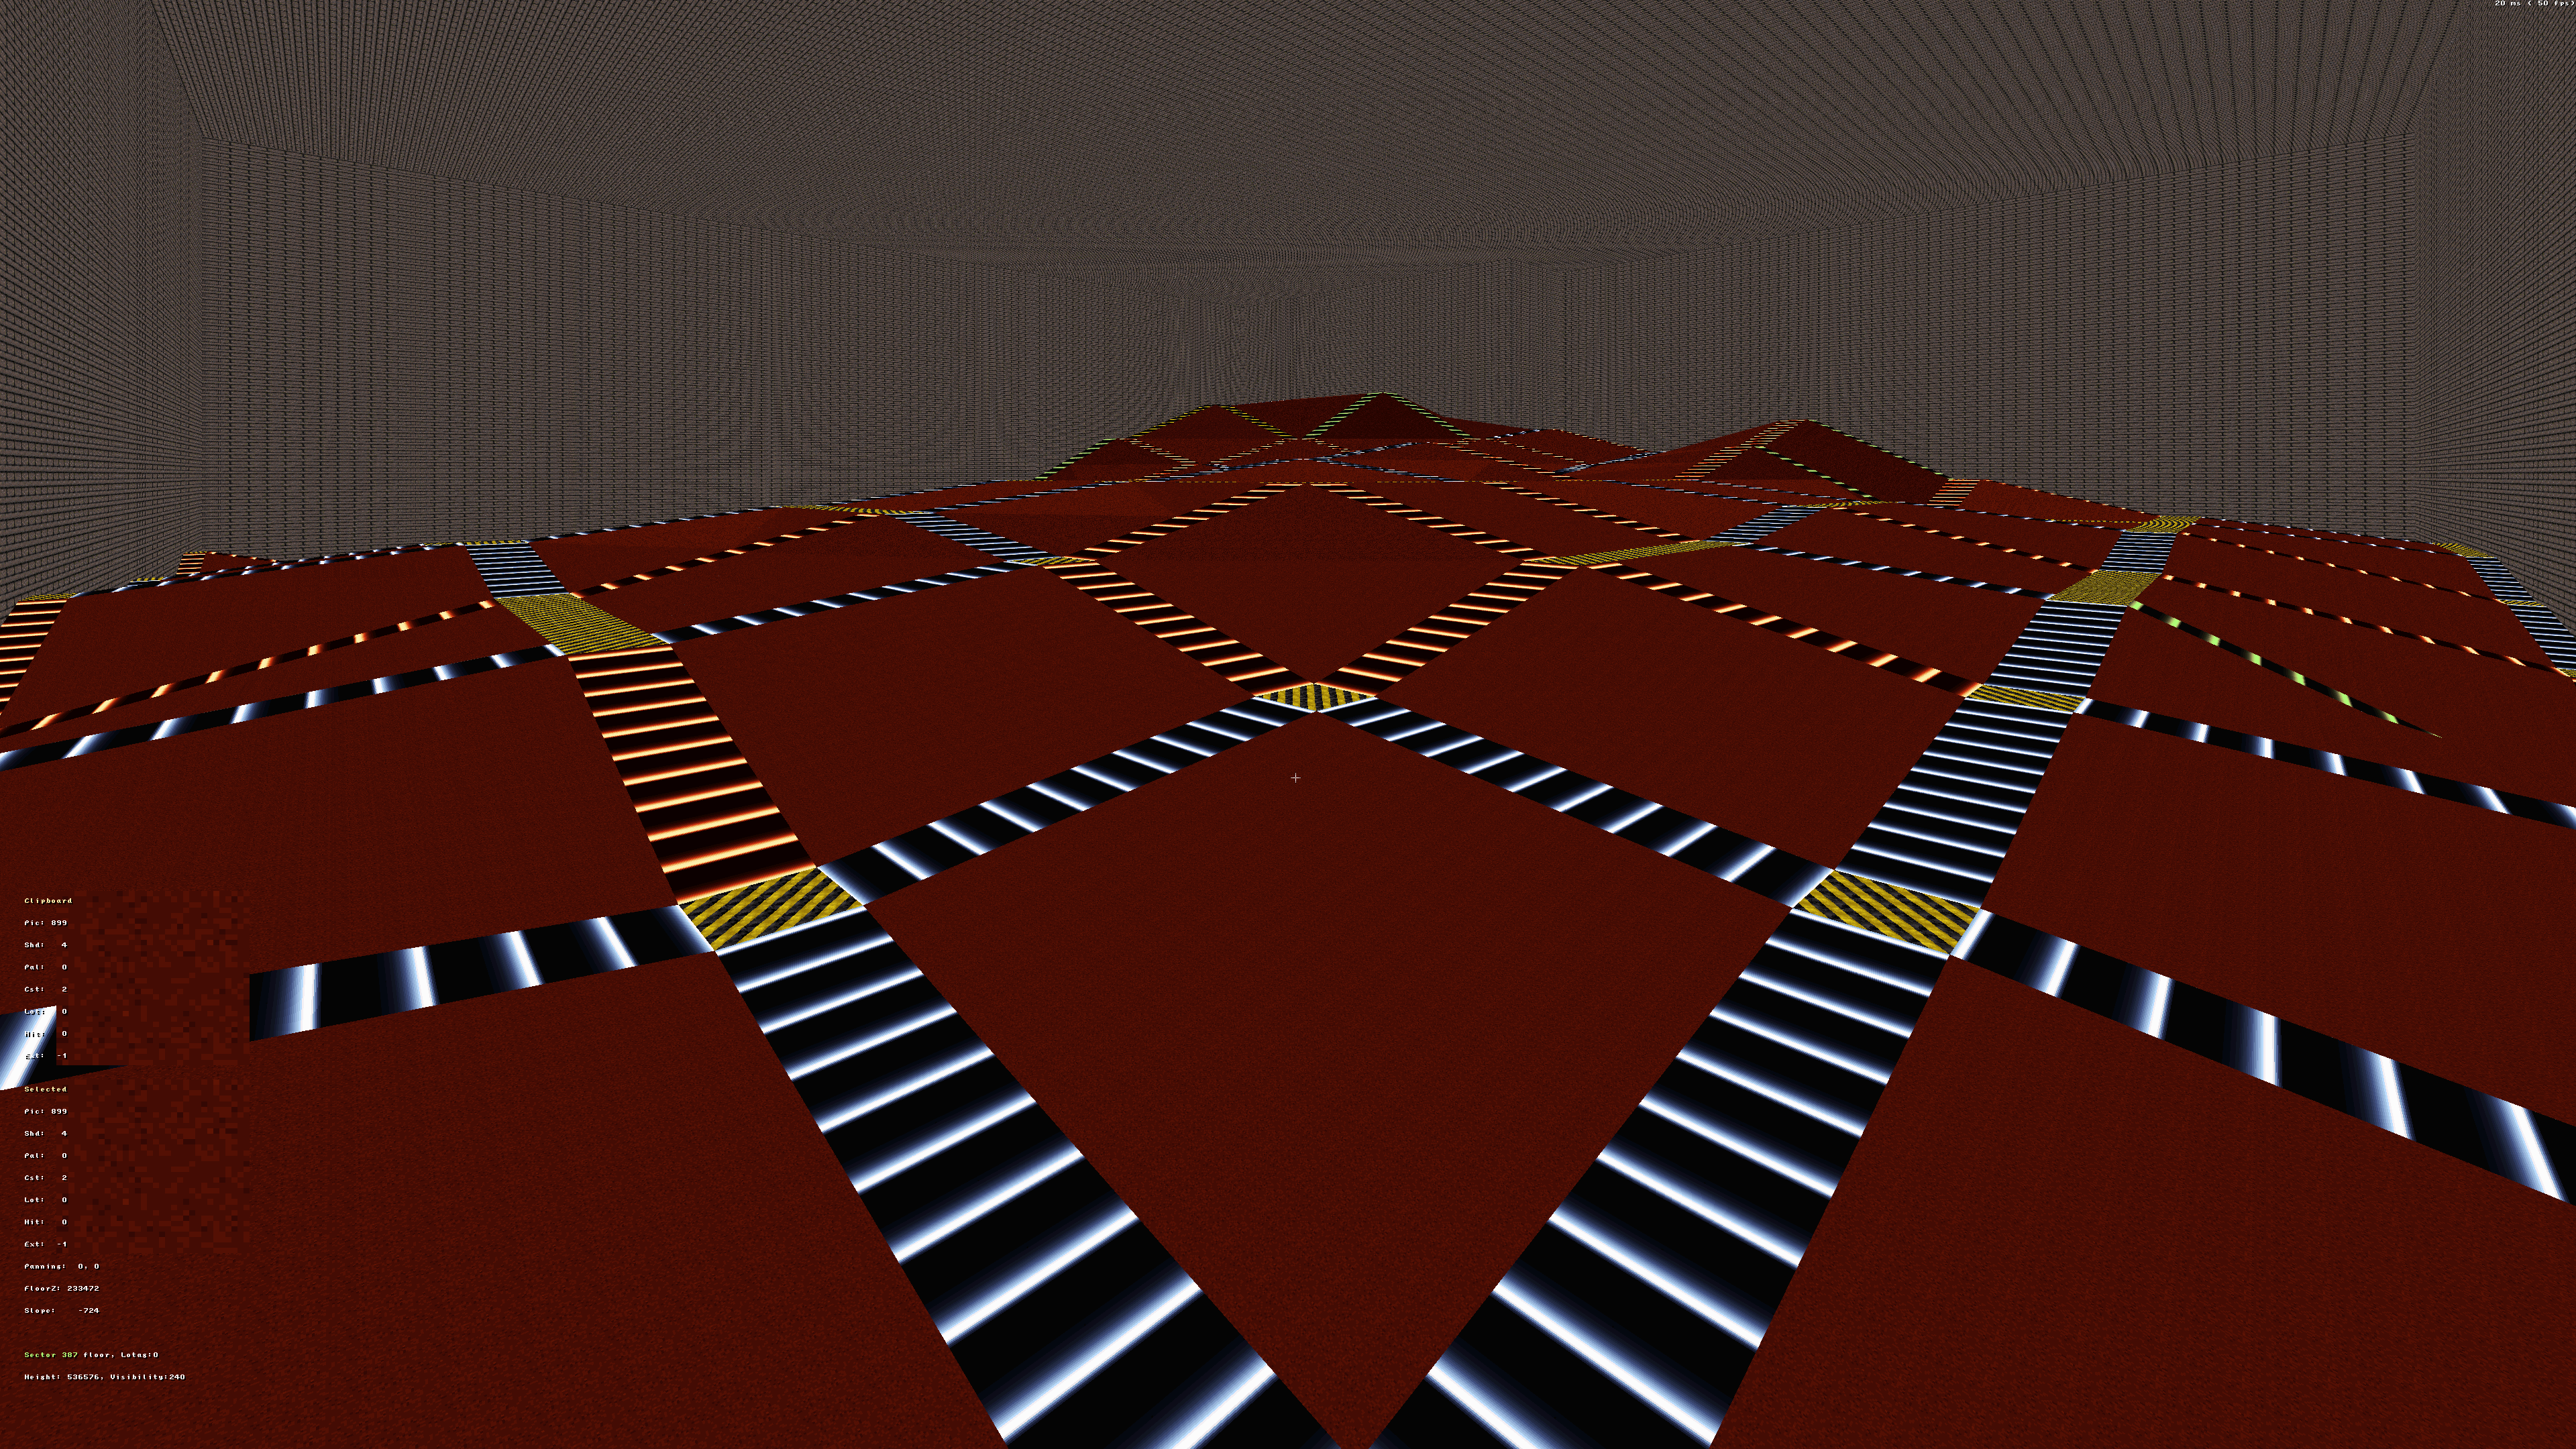
12 : As you can see in this next picture. In 3D mode there are flat strips of color all over the map. You're going to need to remove these colored strips and connect the sectors together.
Posted Image

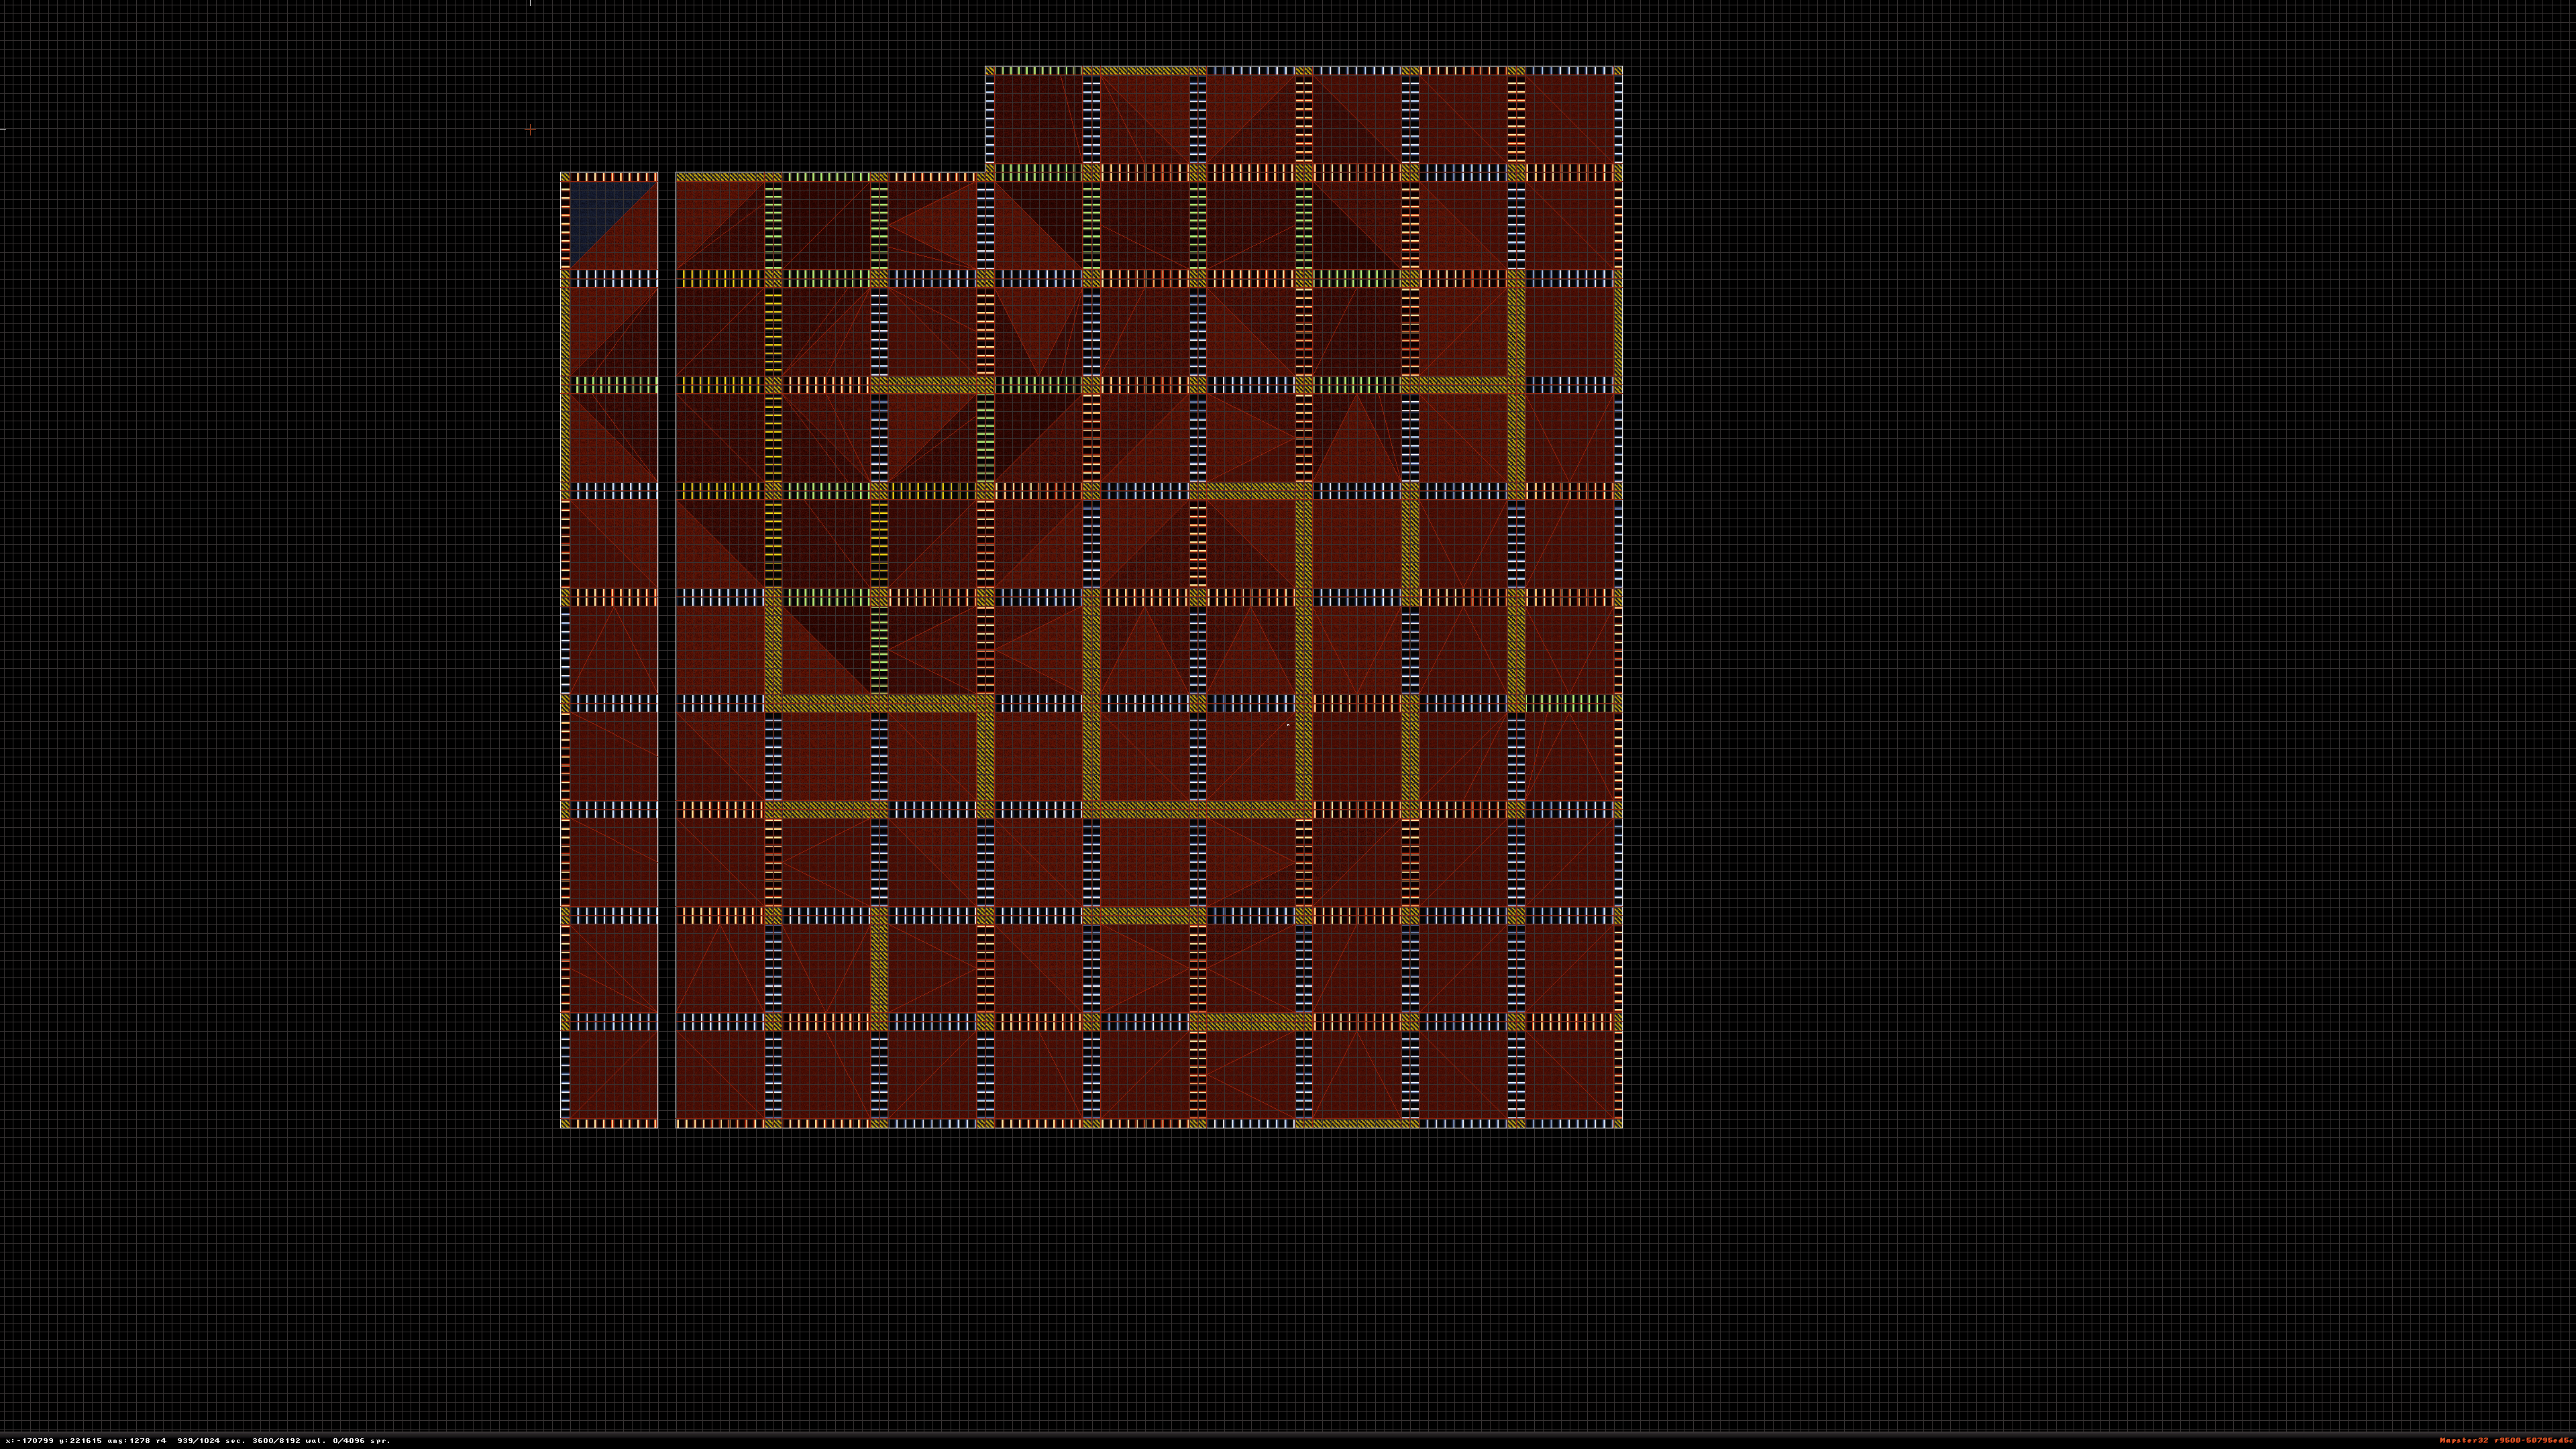
13 : Using the Right-Alt key, highlight these colored strips and delete them by pressing Right-Ctrl & Delete. It should look something like this after you're done deleting those sectors.
Posted Image

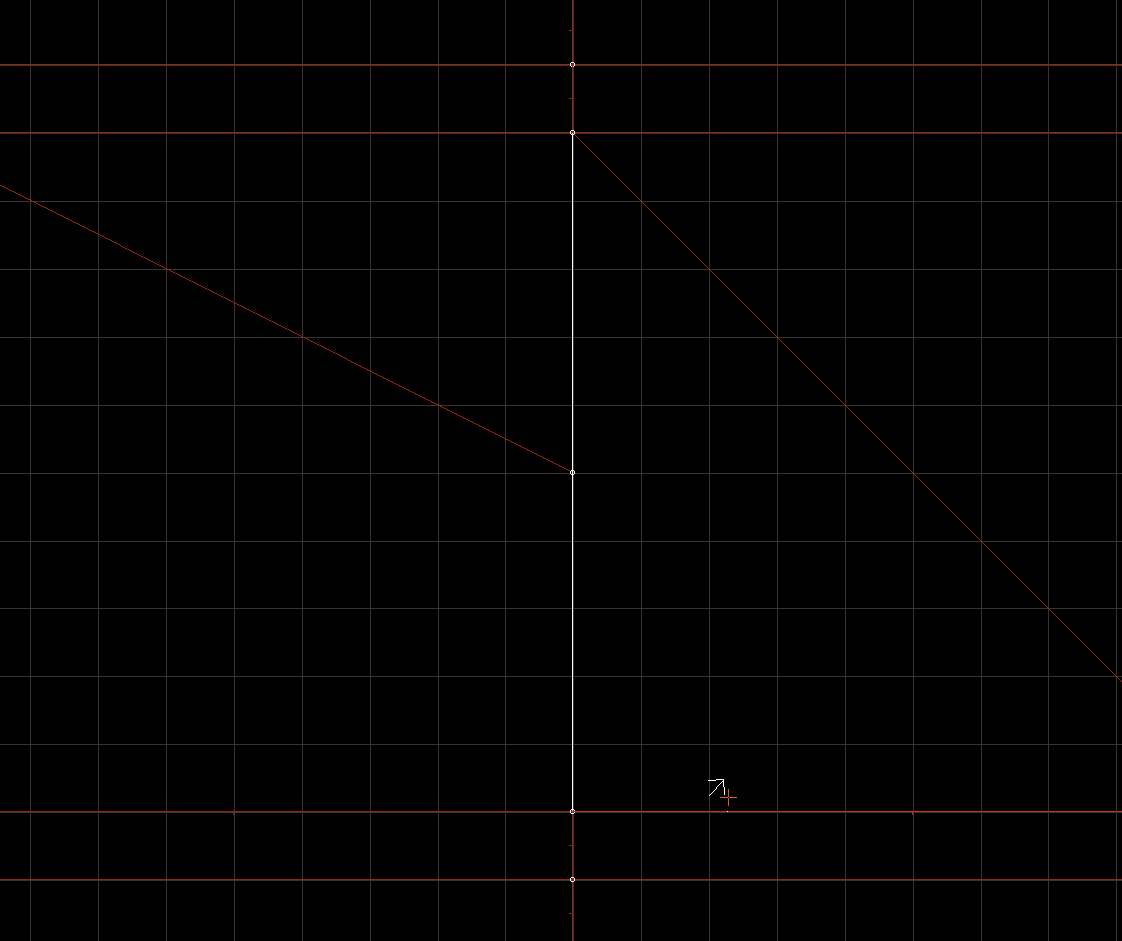
14 : Then you're going to need to bring those sectors together. Ones done you might come across walls that didn't connect right. Fixing this is easy. But just encase I'm also going to explain how.
Posted Image

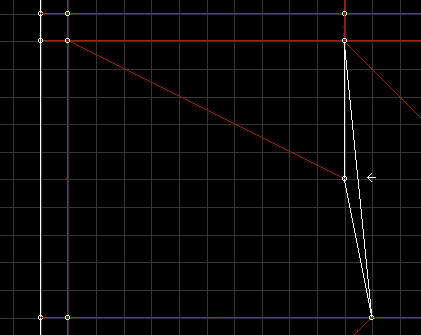
15 : You move the wall to the size from the top of bottom points. Making it possible to see the missing split in the wall. Add a split by pressing Insert near the wall and connect it to the other one.
Posted Image

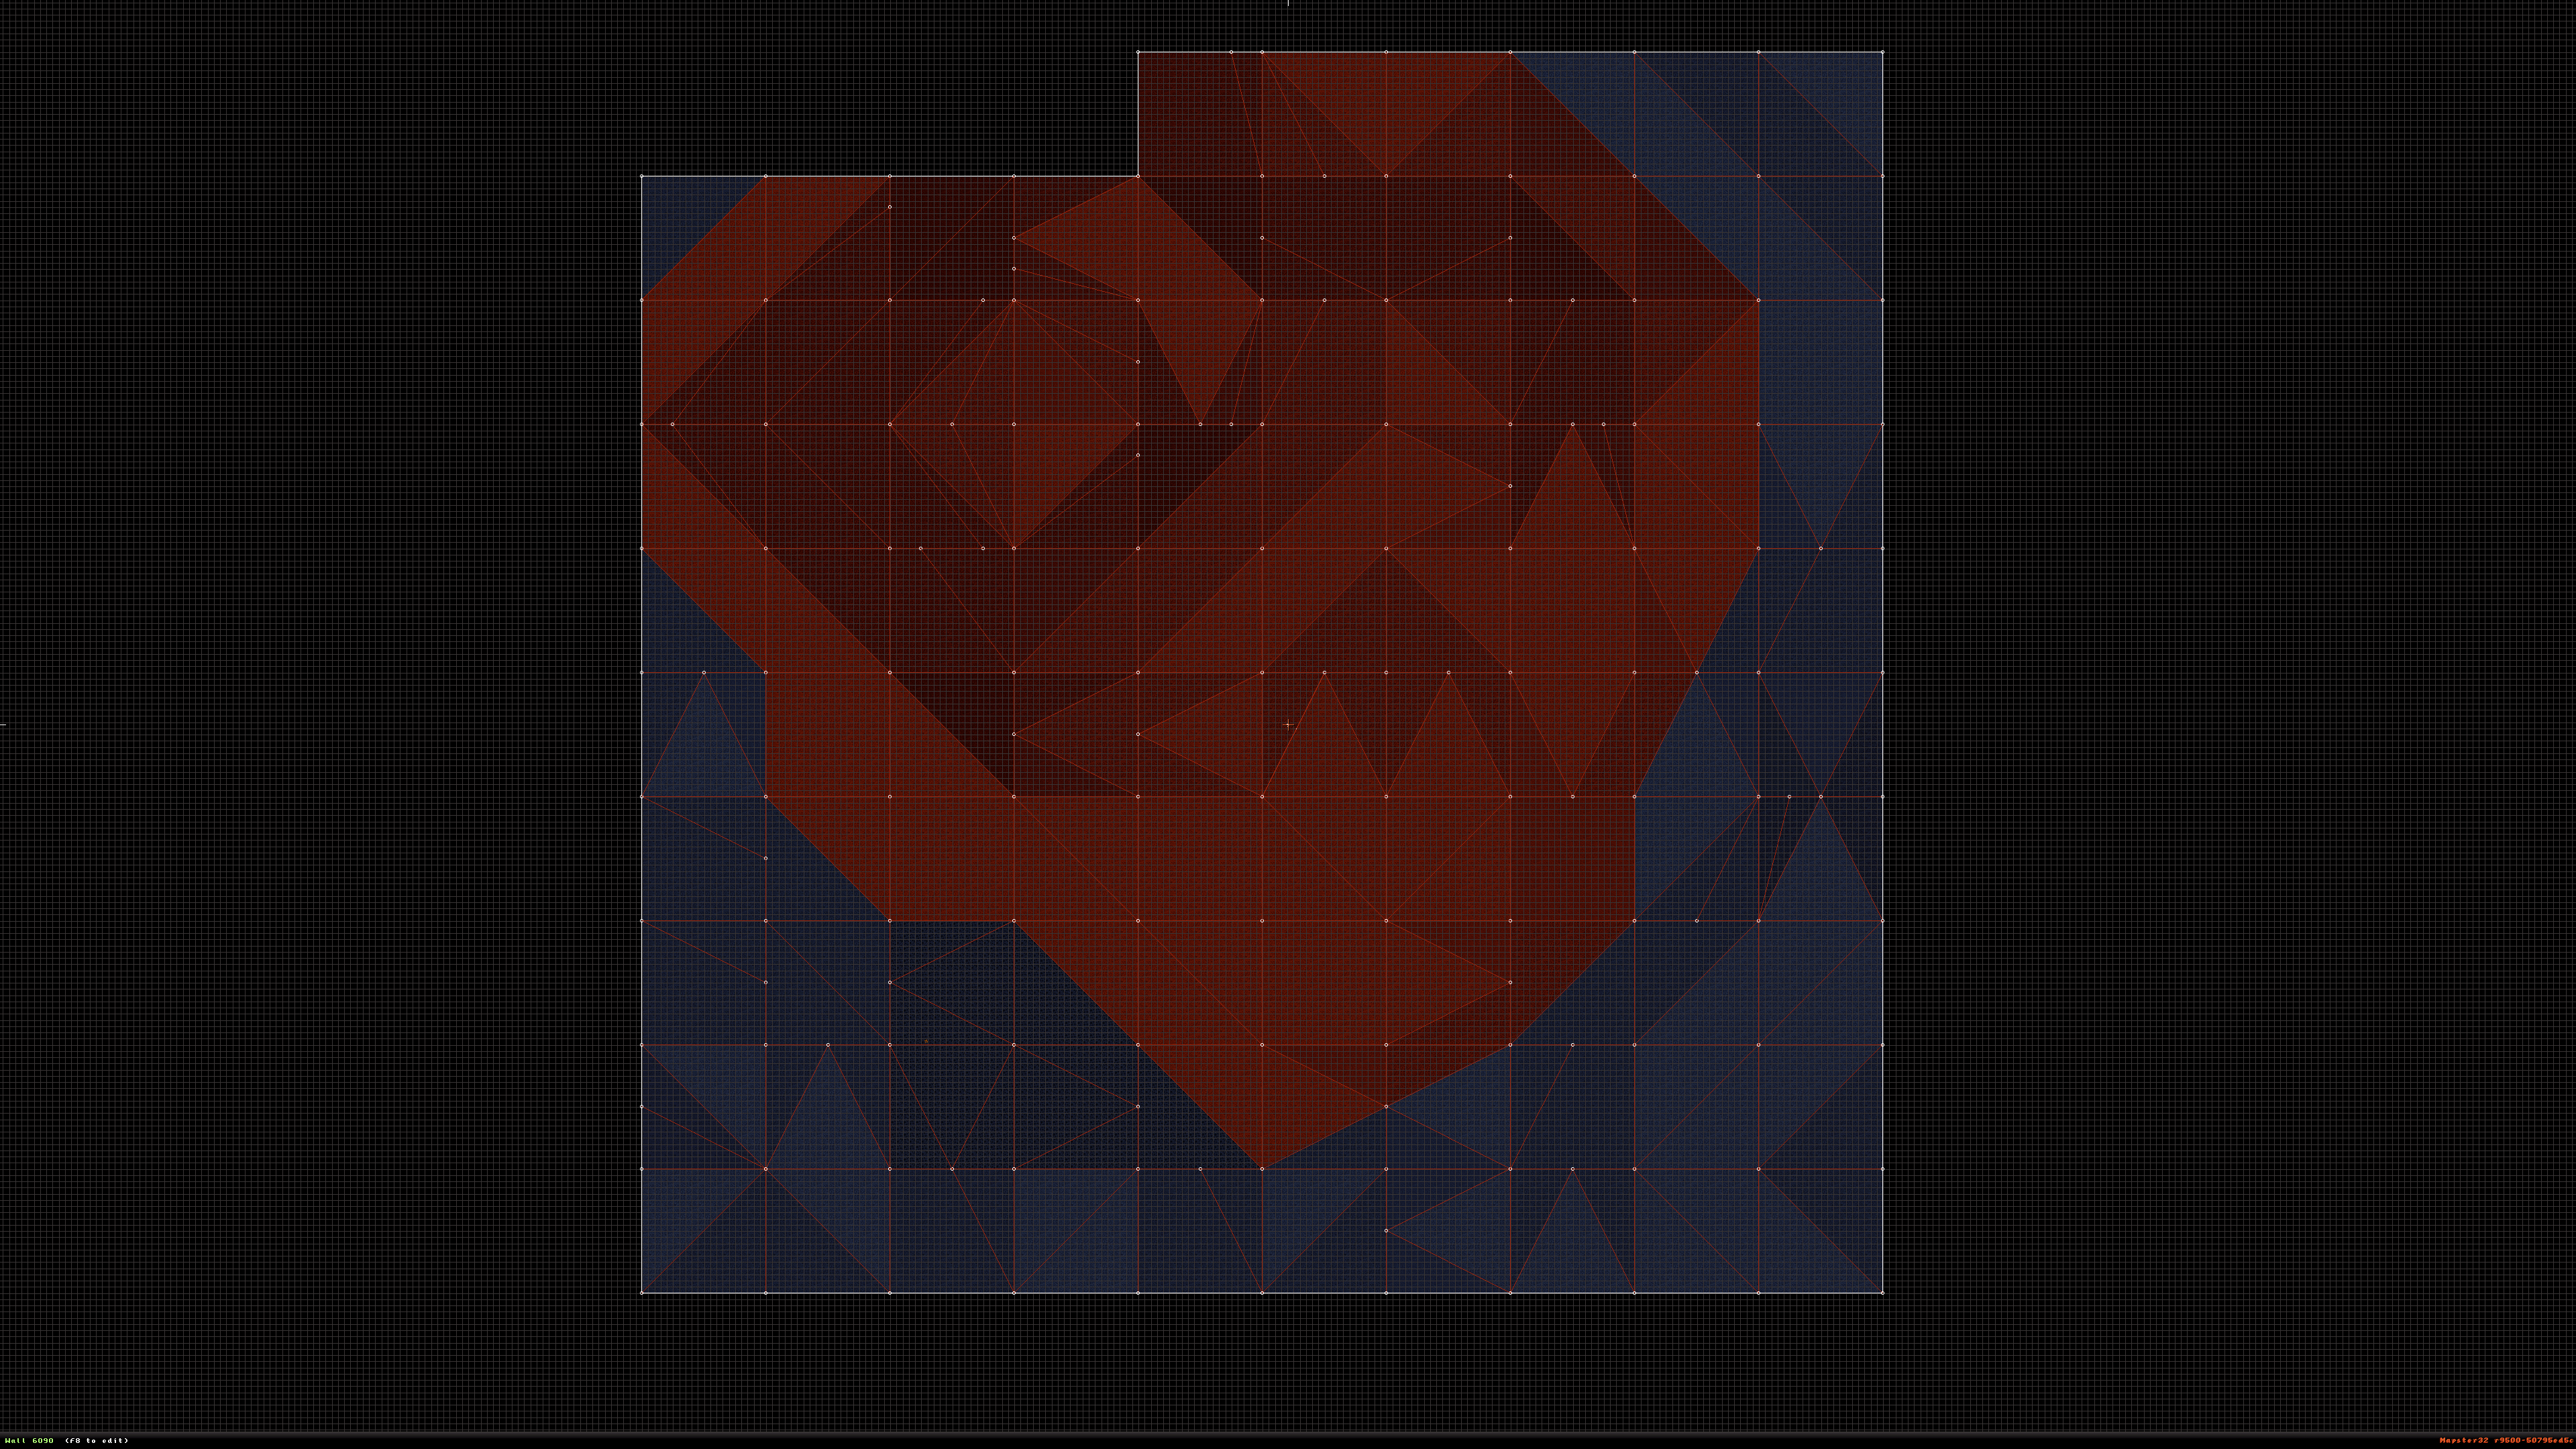
16 : Once you've deleted all the colored strips and fixed all the conflicting walls. The map should look something like this next picture. With no white walls in the middle of the map.
Posted Image

17 : Continue the mapping process until you've gotten to a point you feel comfortable at. Press TAB on a ground texture and Alt+C on the untextured ground. It should look something like this.
Posted Image

18 : You've now completed a basic lesson on landscape terrain mapping. I will be updating this in the future.

This post has been edited by Graphics: 02 September 2021 - 05:29 PM

6

User is offline   MC84 

#2

Great write up - I was able to follow along pretty easily. Thanks for taking the time to put it together!
0

User is offline   Graphics 

#3

"Thanks for taking the time to put it together!"
Thank you for checking it out. If you plan on working with it. Let me know of any parts you need made and I'll create them for you. In my next update I'll be including higher elevations. Plus landscape parts like roads and buildings.
1

User is online   ck3D 

#4

Nice tutorial and thanks for contributing with directly exploitable assets, myself I probably won't use them but I'm sure some others might and that's always generous. I would like to emphasize on how important it is what you're demonstrating with point 15 in particular, the joining of white walls by inserting vertices like that and just the flexibility of sector work in general. I feel like a lot of people just assume corruption and reload whenever they see an odd white wall popping up in their map (sometimes that may persist even once the vertices are technically overlapping, too; but then usually just clicking the problematic one without moving it auto fixes it), or when they mess up some sector drawing in general because back in the old Build days that was thought of as a bad omen for some reason, as in the first sign of imminent corruption of the map. I think the old tutorials from the 90's might have contributed to demonize that practice and deter people from sector and vertex manipulation, too. But in reality, at least current Mapster32's do not care and will let you mess around with 'imprinting' walls/sectors/vertices etc. with versatility, and getting into such habits of workflow saves tons of time. For example when needing to expand a sector with complex boundaries (lots of walls) by drawing another sector attached to it, one doesn't need to directly draw a line over and meticulously connect every dot on the border, they can just sketch out a square sector, insert as many vertices as required in random places and then drag those over the first sector's for the walls to connect. Paired up with all the bulk manipulation tools Mapster32 also offers now for sectors, walls and sprites, this kind of approach to technique I find really does wonders when it comes to efficiency.

This post has been edited by ck3D: 03 September 2021 - 02:23 AM

2

User is offline   Graphics 

#5

I'm just trying to explain things as if they've never mapped before. I wanted to make it easy to understand. But I'm glad you know of a faster method to dealing with the problems of number 15. That should save time for more advanced mappers.

This post has been edited by Graphics: 03 September 2021 - 08:49 AM

0

User is offline   Sanek 

#6

I like the way the terrain-making is explained here, the final result looks very cool! However, it comes at a great cost if you want to make highly-detailed map...

@Graphics I remember seeing your landscaping posts on vk group, glad to see you finally here on duke4! B)
0

User is offline   Graphics 

#7

Thanks it's good to be here. Cost too detail? Do you have framerate drops?
0

User is offline   Sanek 

#8

I mean that you use a lot of walls and sectors to make terrain, so it comes at a cost of other parts of the level.
0

User is offline   Graphics 

#9

Only the sectors are limited. But I haven't gotten into creating buildings or sector hunting. When you create a building, you have to remove sectors and there are a lot of walls left over to play with. As for sector hunting, some slopes connect together without the need of an vector in between. That's just left over in the design phase. The results leaves you with a lot of sectors left over. I'll have to explain that technique later in an update.

This post has been edited by Graphics: 03 September 2021 - 09:31 AM

0

User is offline   Aleks 

#10

Cool tutorial, glad you made it and published here! Hopefully people will find it useful.

View PostGraphics, on 03 September 2021 - 09:27 AM, said:

Only the sectors are limited. But I haven't gotten into creating buildings or sector hunting. When you create a building, you have to remove sectors and there are a lot of walls left over to play with. As for sector hunting, some slopes connect together without the need of an vector in between. That's just left over in the design phase. The results leaves you with a lot of sectors left over. I'll have to explain that technique later in an update.

It's usually the walls limit that hits first, whatever theme the map is - since it only got "doubled" from the original limits, while sectors and sprites got basically quadrupled. But I assume not everyone will be using it on such a large scale either, even smaller levels could benefit from this being used for natural/terrain parts.
0

User is online   ck3D 

#11

View PostGraphics, on 03 September 2021 - 08:47 AM, said:

I'm just trying to explain things as if they've never mapped before. I wanted to make it easy to understand. But I'm glad you know of a faster method to dealing with the problems of number 15. That should save time for more advanced mappers.


Explaining things as if someone has never mapped before is important indeed I think so that's wise, and no I didn't mean to say I knew better than you on number 15, just to highlight that what you happen to be describing there (insert matching vertices on white walls so that they join and turn red) is important in general. Basically I suspect that many mappers are wary of and stay away from doing such manipulations in fear of corrupting their map, but if they have the right basic logic down then it won't and that will in fact unlock many shortcuts in their mapping.
0

User is offline   Graphics 

#12

"insert matching vertices on white walls so that they join and turn red"
Oh your right. Something like that would explain it better. I can't change the first post here. But my ModDB page can be updated. Look for the update later. After all this whole tutorial was created from your advise. So think you for advising me to do this.
A link to my article on ModDB.

"Cool tutorial, glad you made it and published here! Hopefully people will find it useful."
Well, I did think up a new method to making those landscape terrain parts. Should use about half as many sectors. By not cutting the sectors in half to angle them. But rather by using a thin bend in the wall of the sector that angles it. But right now, it's untested and I need to create all the missing pieces.

This post has been edited by Graphics: 03 September 2021 - 01:15 PM

0

User is offline   Mark 

#13

Part 2 should be how to do it on a much smaller scale. Or do your techniques work exactly the same no matter what scale used?
0

User is offline   Graphics 

#14

Yes, this works on almost any scale. You can resize the landscape pieces. If you can hold Right-Shift or the Left Mouse Button to highlight each vector point, then hold Left-Shift and you'll have to option to edit the size of those vectors. But this won't change the highest of each sector. So that would have to be done manually. I hope this answers your question and thank you for checking it out.

This post has been edited by Graphics: 04 September 2021 - 03:49 PM

0

User is offline   Graphics 

#15

I'm taking a break from mapping levels to work on my Landscape Terrain and Infrastructure pieces. Here's a picture of the newly organized terrain parts. Infrastructure parts are next.
Posted Image
Look for the update in my on my ModDB page in a few days. As I can't change the original eDuke post here. But if anyone has any questions. Feel free to reply here or send me a PM.

Thank you for reading this.
0

#16

This is really cool!
When i started mapping i played a lot of final fantasy, so i wanted to make some terrain maps too.
I even went as far as creating a floor slope calculator with con coding to make the sectors meet each other, but it is of course nowhere near what you have made.


The things i made were pretty bad because i had no idea what i was doing, gameplaywise.
So something like this might be useful for some people.

The thing about the wall limit is true.
The real good mappers always fight to keep within the wall limit, and making sectors by hand, which could be made with triangles in this case, would save a lot of walls.

But, if you start with a landscape like this, then you can build the map out of that framework you have, so that could actually make it a lot easier!

just an idea, this game doesn't have grass textures. But some textures can look like grass if they are placed under the ground.
Maybe you could make an option to add grass randomly on the selected sectors.

This post has been edited by bullerbullerseven: 23 September 2021 - 05:29 PM

0

User is offline   Graphics 

#17

Grass that looks more natural is a good idea. I could do something with sprites. As I was planning on adding trees to my island. But I need to finish the update to the landscape terrain mapping first. I kind of put a date on it's completion. Not realizing the work will take longer.

Thank you reading my post.

PS: Here's the link to where you'll find the updated versions of the Landscape Terrain Mapping maps.
https://www.moddb.co...phics/downloads

This post has been edited by Graphics: 23 September 2021 - 11:50 PM

2

User is offline   Graphics 

#18

The links to this post are out of date and the tutorial is also dated. If anyone is still interested in this. Please check out this updated link to the tutorial.

New Landscape Terrain Mapping Link
https://www.moddb.co...ding-landscapes

This link contains all the updated information to this tutorial. As well as mapping tools related to it.

This post has been edited by Graphics: 10 December 2022 - 03:54 PM

1

User is offline   Graphics 

#19

Does anyone know how to delete this and start over? I'm kind of new to the making forums and it shows. I also couldn't come up with a name for this until recently. So, the links are all broken.

Exp for this one: https://www.moddb.co...tor-landscaping
0

Share this topic:


Page 1 of 1
  • You cannot start a new topic
  • You cannot reply to this topic


All copyrights and trademarks not owned by Voidpoint, LLC are the sole property of their respective owners. Play Ion Fury! ;) © Voidpoint, LLC

Enter your sign in name and password


Sign in options