Duke4.net Forums: Importing models into eduke32? - Duke4.net Forums

Jump to content

  • 8 Pages +
  • « First
  • 6
  • 7
  • 8
  • You cannot start a new topic
  • You cannot reply to this topic

Importing models into eduke32?

User is offline   Nukester10 

#211

View PostTea Monster, on 12 September 2012 - 02:08 AM, said:

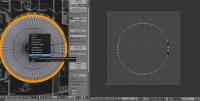
First off though, try going to the 3D viewport header, select Object > Apply> Scale & Rotation


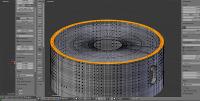
Even before doing this,I noticed practically every time I'd go from objectmode to editmode,I'd immediately notice that one of the tablelegwheels would be highlighted in an orange color.

I didn't think much of it really.All I would do is just press the "A-Key" to select all then press the same key again to deselect all,problem solved.

But I never gave much thought to this happening until I read the Blender Forums article you supplied in your last post in this thread.One of the replyees stated that you need to remove doubles first.

Right away I thought about that orange highlighted tablelegwheel and sure enough when I clicked the "remove doubles" tab,there actually where doubles there,161 doubles removed Blender stated in the upper right hand corner message box.

After that,when I went from objectmode to editmode the tablelegwheel did not turn an orange color from then on.
So I'm guessing this going from objectmode to editmode and seeing part of the mod in an orange color,in this
case it was one of the tablelegwheels,was Blender's way of letting you know you had doubles that you
needed to remove.I don't really know I'm just speculating on this but like I just said,once I performed
the removal of doubles command,I could now go back and forth from objectmode to editmode and
not one area of the model would be highlighted in an orange color any longer.


Now getting back to what you said above,

"3D viewport header, select Object > Apply> Scale & Rotation"

Yes, I did this and you could see that immediately what appeared to be Blender Placing the mod in the center of the grid.

The "Transform"tab read as such,

Location Rotation: Scale:

<0.00> <0> <1.00>
<0.00> <0> <1.00>
<1.35> <0> <1.00>

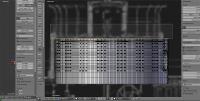
Well the good thing is that there where no error messages but the bad thing is that even after I waited for 5 minutes,I thought maybe Blender might need an extra few minutes to unwrap a more complex object.In the end it made no difference.The mod refused to show up unwrapped on the UV Map screen to the right.TeaMonster,from what info I've supplied in this post perhaps you or someone else really good with Blender might be able to figure out what the problem is here?

TeaMonster,in final to this post I'd like to ask you more about this tab command of applying scale and rotation
in Blender 2.62?

First of all,I don't understand how there are 2 modes of scaling within this version of Blender and yet this tab
was not at all available in say 2.49b?

Take for example,if you where to ask me,

"Nukester10,I'd like you to show me how you would scale your mod to this particular size I have written down for you?"

My response on how I'd accomplish this task would be by you simply pressing the "S Key" and this is all I know about scaling within the Blender environment.

So what I'm trying to say is that when you say to scale the mod but it has nothing to do with using the "S Key" then I'm kinda lost in understanding as to what kind of scaling you are talking about here.

Basically,What kind of scaling is this and how is it different then say scaling by performing the "S Key" command type of scaling?

This post has been edited by Nukester10: 15 September 2012 - 08:36 PM

0

User is offline   Tea Monster 

  • Polymancer

#212

By using 'S' you are usually doing it by eyeball. You can though do 'S' then '.8' to shrink it by 80%.

When they overhauled the interface for 2.x, they decided to put all this stuff up on the screen so people new to the app could see it. It does the same thing, it's just in 'button' format that is easier to use for people who don't know the command keys.

You can also go 'S' and follow it with Y, X or Z to shrink it along one axis.

In Blender 2.x , one 'Blender unit' is the same as one cubic yard.
0

User is offline   Nukester10 

#213

View PostTea Monster, on 16 September 2012 - 02:25 AM, said:

By using 'S' you are usually doing it by eyeball. You can though do 'S' then '.8' to shrink it by 80%.
You can also go 'S' and follow it with Y, X or Z to shrink it along one axis.
In Blender 2.x , one 'Blender unit' is the same as one cubic yard.


Ok,Thanks for the info on that but getting back to unwrapping the mod.

Like I said in the last post and as you can see from these settings,

Location Rotation: Scale:

<0.00> <0> <1.00>
<0.00> <0> <1.00>
<1.35> <0> <1.00>

that the needed settings that at least Blender 2.62 requires for you to unwrap a mod have to be set at <1.00>
for which they are and yet as I explained in my last post even though after pressing the "unwrap" tab

Blender DID NOT show any "error" message of any kind but still refused for some
reason not to unwrap the mod!?

As far as Location <1.35> goes you'd think that it would read <0.00> like the two settings above it but it doesn't
and I don't know if that's correct or not.What do you think about how that setting reads? and is it correct or not?

I don't know if this is important either but earlier on when I was running the seam along one of the tablelegs of the
mod,you know how you can hold the Shift Key and place each seam one at a time? Well at one point when I got
to around the elbow of the tableleg I had to do this.Normally what I'd do would be to Press both the,

"Shift-Key and the Alt-Key while Rightclicking"

As you know this would allow me to do is to save a lot of time by running the seam the entire length of the
tableleg for example instead of doing it by just pressing and holding the Shift-Key and highlighting the seam
one section at a time which obviously takes much longer.

Usually when you do the Shift-Key and Alt-Key while Rightclicking Command there isn't any problems and
the seam WILL run the entire length of the mod.

But in this instance for example,it would run all the way up the tableleg but stop at around the elbow then
I'd have to manually click each seam until I got around the elbow and try the second way again then
the entire seam would be finished for this area!?

Now in modding I don't know if this is important or not but there are other areas of this same mod where
the same thing will happen and I also don't know that if this would effect Blender trying to create a
UV Map from this.I'm not so sure myself and I just threw that in there to get your thoughts on that?

I'm starting to believe that this mod is practically impossible to UV map in it's current state.

So what I may do is to "un-pin" the mod and try to UV Map it into smaller files
which earlier on you called overkill.Even so though,just to see if basically any part of this
mod is able to be "unwrapped" at all would be a relief.

If you can think of any better way of doing this then let me know?

Thanks!

This post has been edited by Nukester10: 16 September 2012 - 07:20 AM

0

User is offline   Tea Monster 

  • Polymancer

#214

The other reason you should leave triangulation till last is that if the mesh is triangulated, Blender won't 'automatically' run seams along edges. It will stop where a face is triangulated. You have to manually click on edges to select them. One tip is to use 'edge' select mode rather than vertex for this step. Sometimes you just can't do that, especially if you are merging several different objects. It just gets messy.

Another way of doing it is to view it lengthways. In vertex selection mode, use the B key to select only the top vertices.
Attached Image: unwrap1_select.jpg

Here is a pic of the object on a 3/4s view to show you how I've selected only the top vertices.
Attached Image: unwrap2_ortho.jpg

Swap to top view and all the front faces will be selected. You can then 'project from view' to map out those faces.
Attached Image: unwrap3_project.jpg

On a simple object, you can either go to select and choose 'invert' to select the other faces, or you can repeat the top steps on the bottom of the mesh (viewing from the bottom this time).

To select the sides, go to the same side-on view, choose 'face select' and do the same 'B' key select, but this time run through the middle of the mesh. Because it's in face select mode, it will catch the little square 'face select' icons and not touch the top and bottom surfaces of the mesh

This post has been edited by Tea Monster: 16 September 2012 - 02:50 PM

0

User is offline   Nukester10 

#215

TeaMonster I did manage to do a UV Map of the mod but it wasn't until I decided to "unpin" the tabletop from the base
of the table that I was able to manage this task.

The interesting thing about this was after running a seam from the top and bottom of the tabletop,I also ran one through the middle of the side and finally from the top edge to the center.

Anyhow,I "marked the seam" then went into "face mode" "select-all" and waited for a minute but even with no
"error" messages,once again it did not show in the right UV Map screen............well temporarily anyhow.

It wasn't until I clicked on the viewtab within the UV Map screen and started to look at different settings
then once I closed the settings,right away,there it was,a UV Map of the tabletop!

Now I don't know if this was just a coincidence but I do believe that if I didn't look at these settings the
UV Map of the tabletop would not have shown up.What I mean is if I didn't do anything but watch
the screen for 20 minutes for example without clicking on these tabs I don't believe it would
have shown up.To me it seems possible that Blender 2.62 may has some unknown bug issues
related to this that are not listed yet or more then likely it tends to get a bit sticky now and then
depending on how complex of a mod you working on.I tend to believe more the last idea,
what do you think?

This post has been edited by Nukester10: 16 September 2012 - 07:43 PM

0

User is offline   Tea Monster 

  • Polymancer

#216

Without being there, I don't know what happened, but one thing I can see is that if you've rendered something, the render result, even if it isn't loaded, can 'block' the pane. You have to click on the X near to 'render result' and then it works. Probably something like that.

Yes, you will have to run seams through the sides, even if it is only one or two. If you give it one, continuous loop to unwrap, it can get confused, or it can unwrap it in a way that you will get severe stretching of the texture. Best to have several small sections.
0

User is offline   Nukester10 

#217

View PostTea Monster, on 17 September 2012 - 02:18 AM, said:

The render result, even if it isn't loaded, can 'block' the pane. You have to click on the X near to 'render result' and then it works. Probably something like that.

Yes, you will have to run seams through the sides, even if it is only one or two. If you give it one, continuous loop to unwrap, it can get confused, or it can unwrap it in a way that you will get severe stretching of the texture. Best to have several small sections.


Yes,TeaMonster,you where absolutely correct!

It was by clicking the "X" near to "render result" that did the trick!

Have you heard about this being a current bug in this version of Blender btw?

Yes,also based on how I ended up running the seams on the tabletop,not to forget what you told me above,I was able
to come up with a decent UV Map of this mod,

Posted Image

Now of course I'll have to try to come up with a somewhat believably realistic sort of looking Texture.
I was kinda thinking of using a dark "cherrytop" wood texture but trying to find a texture like that can be
as much of a hunt as trying to find a good texture site that provides the needed oversized textures.

"Remember the oversized texture you provided that I used for the "Coffeetable" mod a while back"?

Now if there was a good texture site out there,then they would provide a huge amount of oversized
textures for one's needs.

Are there any good texture sites that you would recommend?

This post has been edited by Nukester10: 17 September 2012 - 05:31 PM

0

User is offline   Tea Monster 

  • Polymancer

#218

There are a few sources in the Tutorials and Resources thread.
0

User is offline   Nukester10 

#219

Posted Image

TeaMonster, could you explain what's going on in the pic above and how to fix this?

As soon as I saw this immediately I thought of the "Mirror Modifier" that was applied earlier.

If you where to move the table from left to right on the Z-axis, what you see on one side from this angle
the centerleg for example disappears as soon as you look at from the left side,it mirrors itself so to speak,
except for the round decoration which was created with the "Boolean Modifier" earlier as well,for some reason
this does not change at all.

The commands I used in order to create this from the UV Map where in this order,

1. Added a Material,I chose a red color which immediately was noticeable in the left panel beneath the orange selection.

2. Then I added a Texture,New,"Image or Movie" tab.Then I scrolled down to the bottom and chose,"Open" and picked the texture.

3. Next,I went to the "Image" tab on the bottom of the UV Map to the right and chose the same texture,then it showed up right away on the left underneath the orange selection on the mod.

4. After this,I clicked "N" in the left panel,scrolled down to "Shading".It was set to "Multitexture".Just as soon as I checked off the "Textured Solid" Box underneath this,you could see the chosen texture show up right away underneath of the orange selection or "A" for "Select All".

Then once I clicked the "Object" Tab you could see now that the mod was textured but upon closer observation I noticed what you're seeing in the pic above and then I kinda wished I never used the "Mirror Modifier" at this point.I remember thinking back for a second when I applied this Modifier wondering whether or not it would become an issue later on when UV Mapping and I was correct,an issue obviously did come about.

Now from what you can tell,is there an easy fix for this or am I going to have to backtrack and try to fix the legs without having the "Mirror Modifier" applied later on so this doesn't happen again?

This post has been edited by Nukester10: 23 September 2012 - 07:21 PM

0

User is offline   Tea Monster 

  • Polymancer

#220

Once you applied the mirror modifier it should have had everything just follow along. It's more likely that the boolean modifier wasn't applied before moving the table legs. That would leave the shapes that you booleaned hanging in space somewhere.

Does it look normal in Edit mode? If so, it could be a normals problem. If some of the faces's normals are facing in the wrong direction, you can flip them back to face outwards. You can try 'A' and then 'Cntrl' + 'N' to get them to point outwards. But if there is any weirdness with your mesh, and Blender has got confusled about which way things can be pointing, you can get half your faces suddenly pointing the wrong way.

Best way to check is to go to normal face selection mode. Each outward facing normal will have a blue line attached to it. Spot the faces without blue lines or with really short lines and you have your culprits.
I've highlighted how to turn this on.
Attached Image: normals.jpg
0

User is offline   Nukester10 

#221

TeaMonster,many of the blue lines where short like you mentioned.
Here is the pic after I reset them,

Posted Image

This next pic pretty much proves you where correct about the normals.As you can tell
in this pic,the table actually looks good with the texture applied as well,

Posted Image

Now here's where things get screwy.In this final pic I viewed the same tablemod
within Nphero's and this is how it came out,

Posted Image

Ah!!! WTF !!??!!??

Once again,as you can plainly see from the pics above,as a ".blend" file there was absolutely nothing wrong
with this mod but once this was exported as an "md3" file,parts of this tablemod became missing as you can
easily tell from the last pic in this post.

Could you please explain what's the deal here? You mentioned fixing the "Normals" in your last post for which
I did,So now what do you think the problem is?

This post has been edited by Nukester10: 24 September 2012 - 06:15 PM

0

User is offline   Mark 

#222

It may be a dumb question but... if your model has more than one "group" or part did you make sure that you highlighted and chose all parts in Npherno when prompted?

Attached thumbnail(s)

  • Attached Image: example.jpg

0

User is offline   Tea Monster 

  • Polymancer

#223

You can also try the 'rebuild normals' button (second from the bottom).
0

User is offline   Nukester10 

#224

View PostMarked, on 24 September 2012 - 06:15 PM, said:

It may be a dumb question but... if your model has more than one "group" or part did you make sure that you highlighted and chose all parts in Npherno when prompted?


No,this mod has NOT been Grouped it is all 1 Object.

View PostTea Monster, on 25 September 2012 - 01:02 AM, said:

You can also try the 'rebuild normals' button (second from the bottom).


I tried that way before you asked this question and it didn't work then either.

I'd like to ask you a few things about Blender 2.62 so that maybe this might clear some things up.

First of all when everyone was using version 2.49b if you recall,when you wanted to export a UV Map so that it could be painted in Gimp,Blender would export it as a "tga" file aka "Targa" file then once you where finished with the map in Gimp you would import it back into Blender as a "png" file then somehow when you went to export your mod if I recall correctly your png file would end up in the same folder along with the md3.

Now when you go to export your mod in Blender 2.62 as an md3 file you actually have to remove .blend at the end and type in md3 at the end of the line in the second box then press the export tab. Does this sound about right to you? I may recall having to do this in 2.49b as well.

How come when applying a texture you have to do this not once but two times,in this case by pressing the "Image" tab on the bottom where it says ( View Select Image UVs) then do it all over again on the right where it says you know,"image or movie" tab. Now is having to do this twice really necessary? I do not recall having to do it twice in 2.49b?

Again with 2.62 when you go to export the mod unlike 2.49b there is no png file exported along with the md3
so then in that case,where is the texture located at then!?

This post has been edited by Nukester10: 25 September 2012 - 07:26 PM

0

Share this topic:


  • 8 Pages +
  • « First
  • 6
  • 7
  • 8
  • You cannot start a new topic
  • You cannot reply to this topic


All copyrights and trademarks not owned by Voidpoint, LLC are the sole property of their respective owners. Play Ion Fury! ;) © Voidpoint, LLC

Enter your sign in name and password


Sign in options